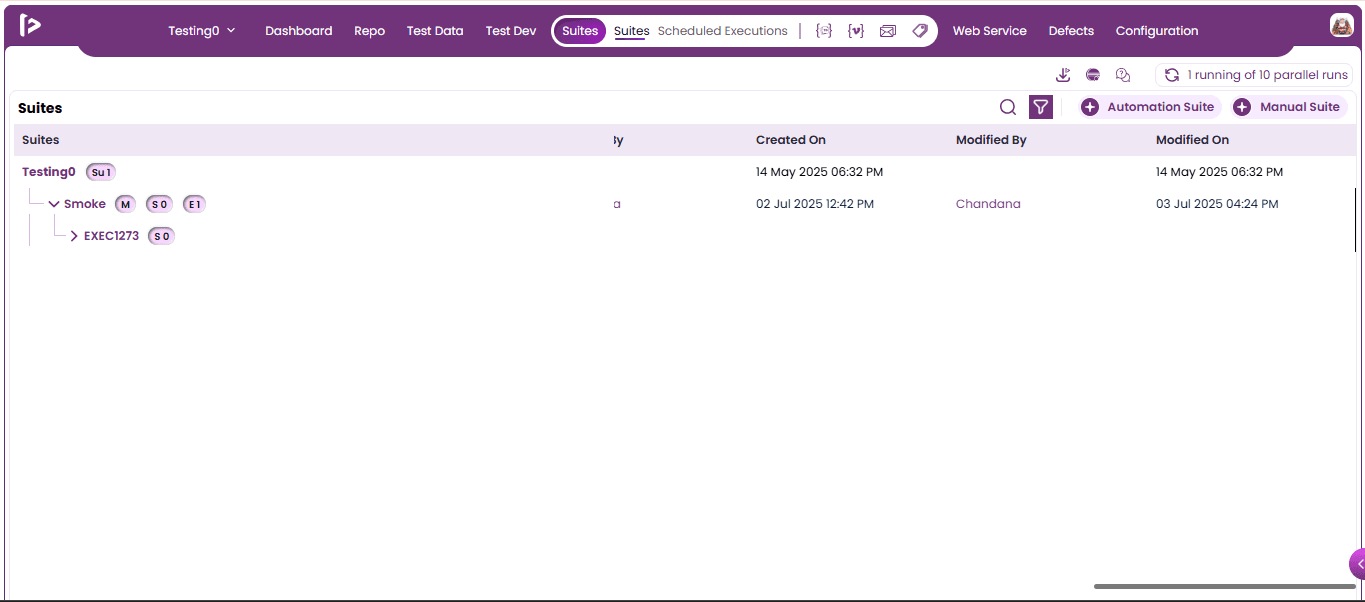
Manual Suite
Manual Suite
A manual suite refers to a collection of manual test cases that are organized to validate specific functionalities or behaviors of an application without automation. These test cases are executed manually by test engineers rather than through automated scripts. They ensure quality coverage where automation cannot reach.
Navigation
Individual Project > Top navigation bar > Suites
Steps to Navigate
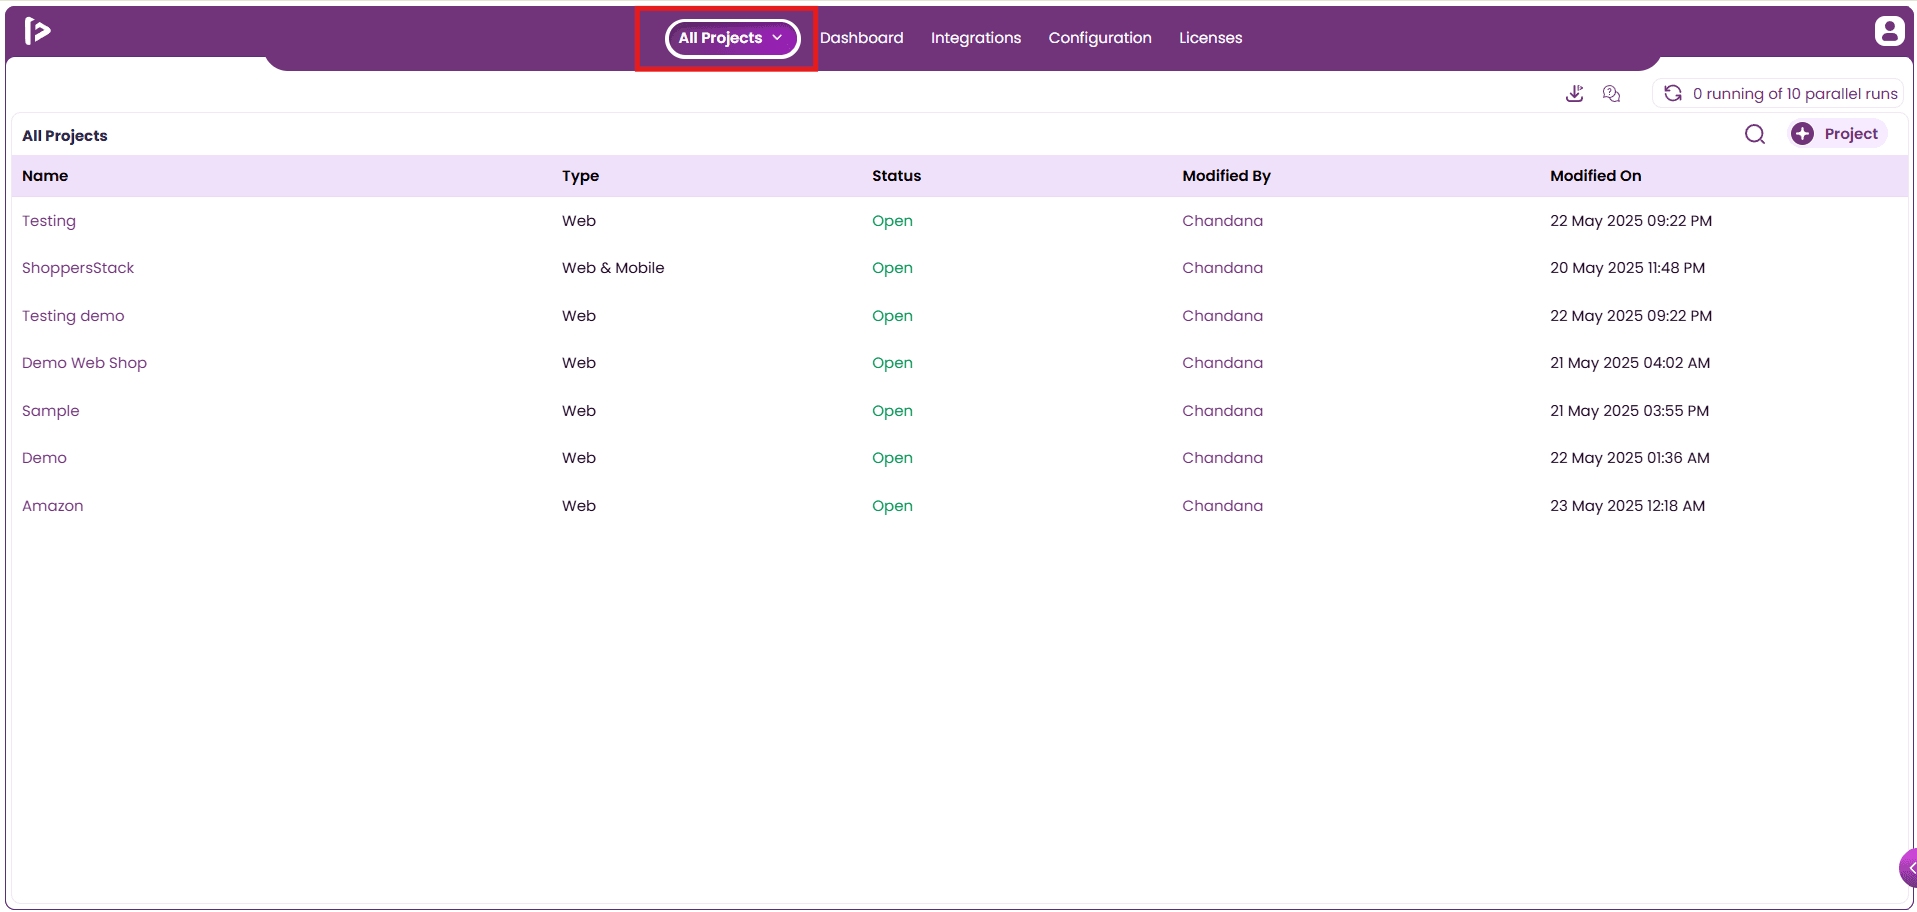
- User can navigate to Individual Project by clicking on the All Project button as shown below
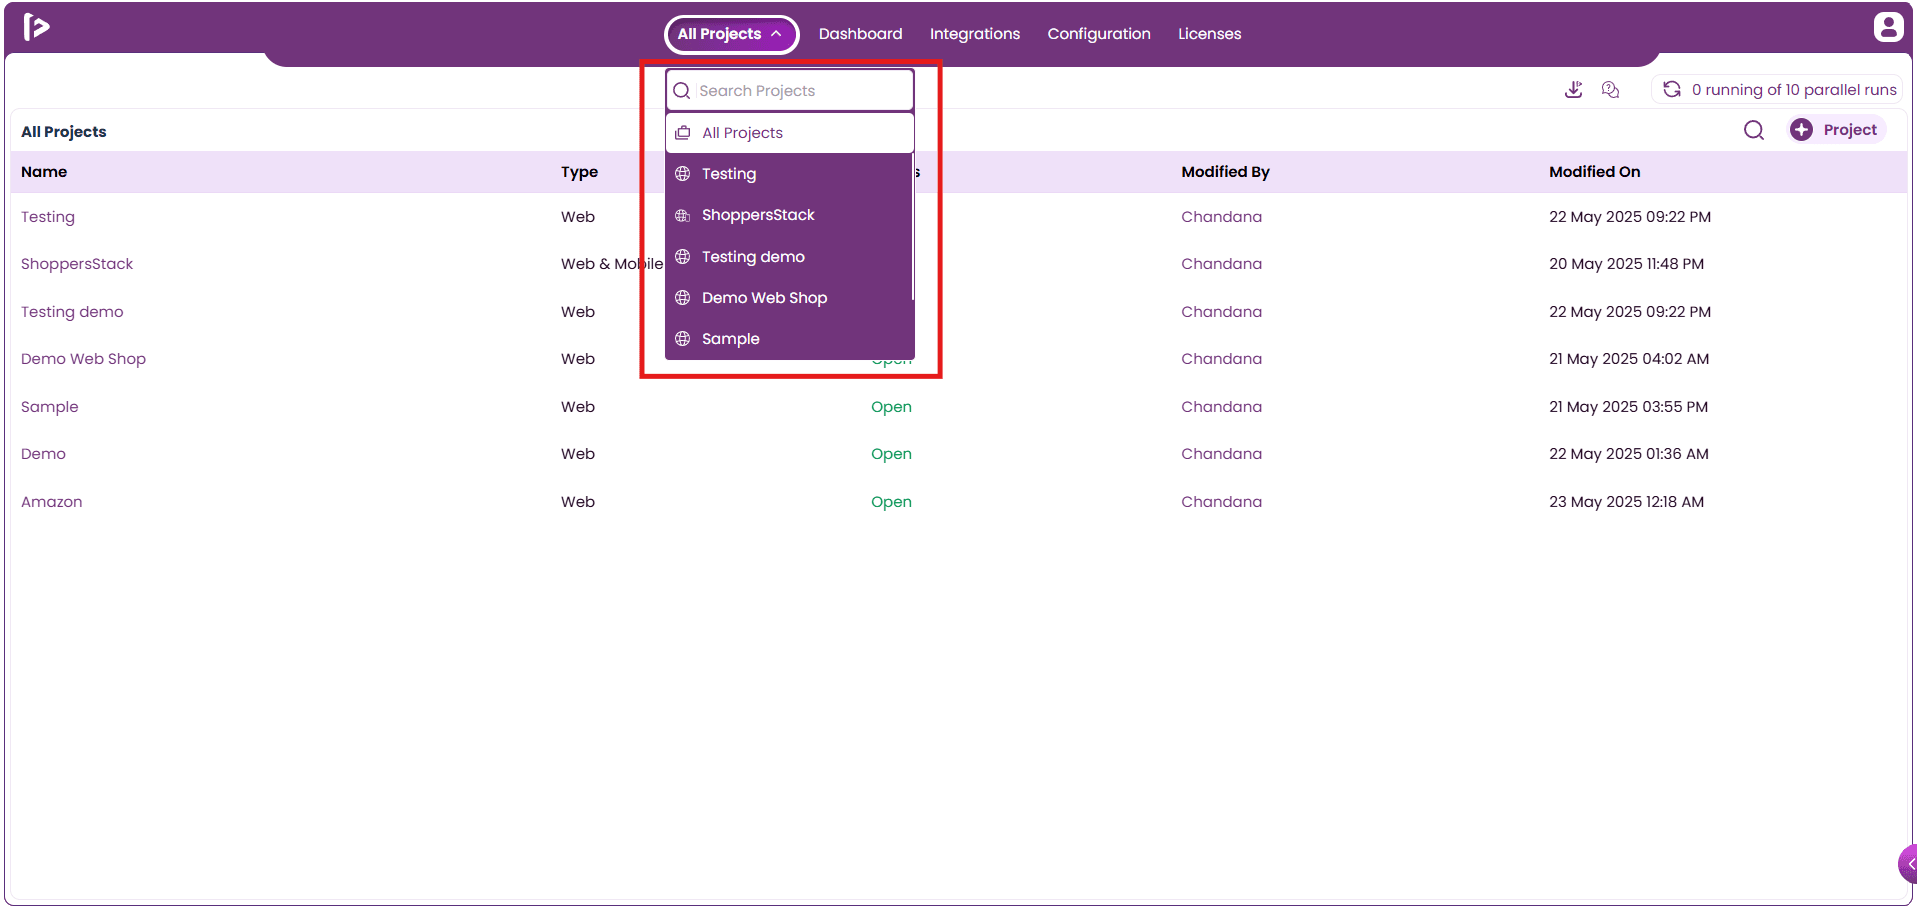
- Upon hovering on it ,users will be able to get options to select the project as shown below.
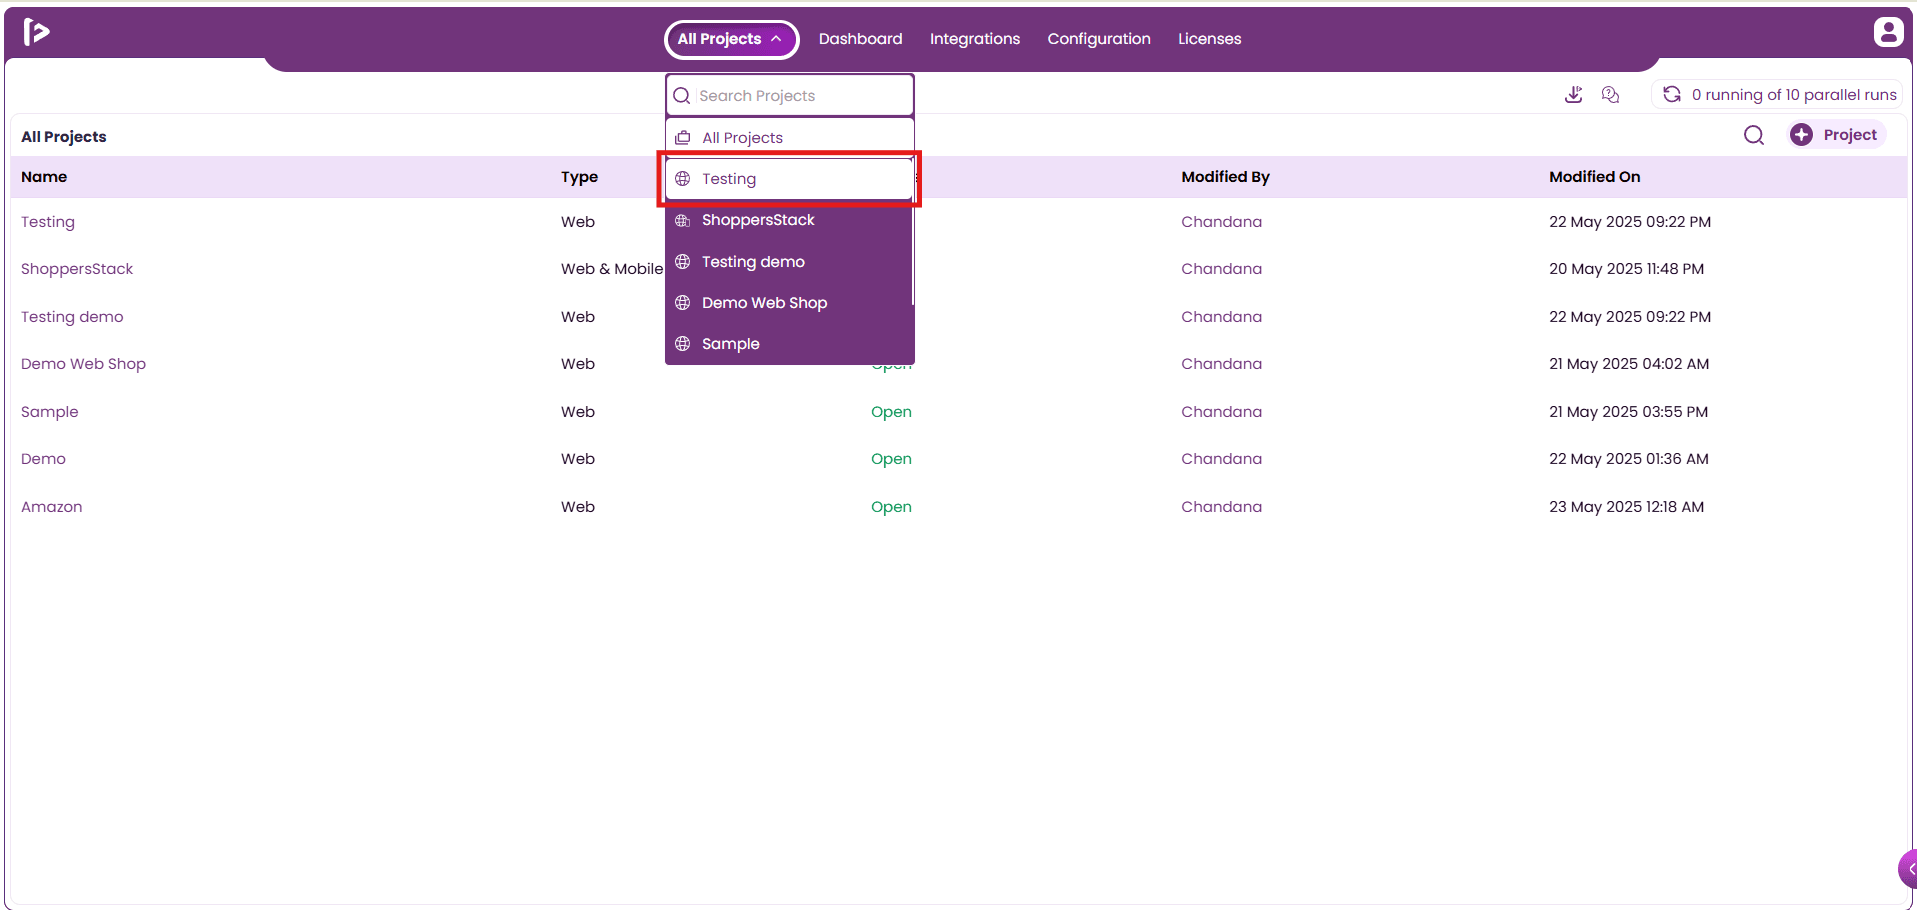
- Select the project you wish to access, as shown in the image below.
- When the user clicks on a project, they are redirected to the Individual Project level, where the top navigation bar becomes visible. By default, the user is taken to the Test Development section.
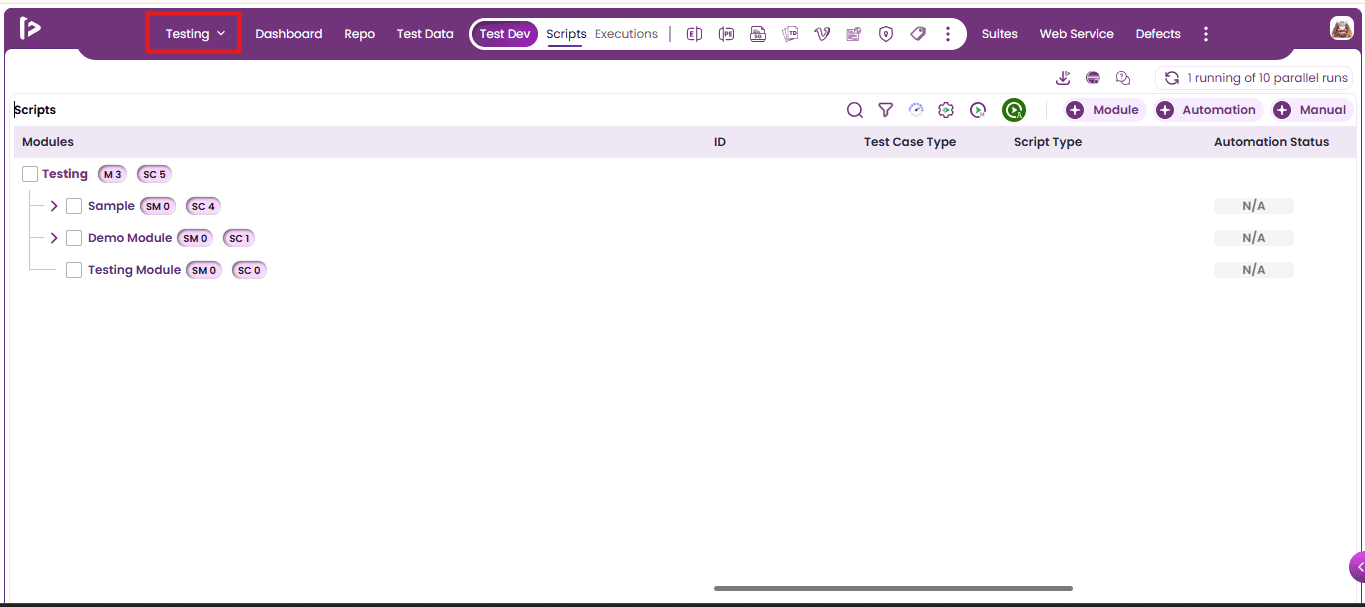
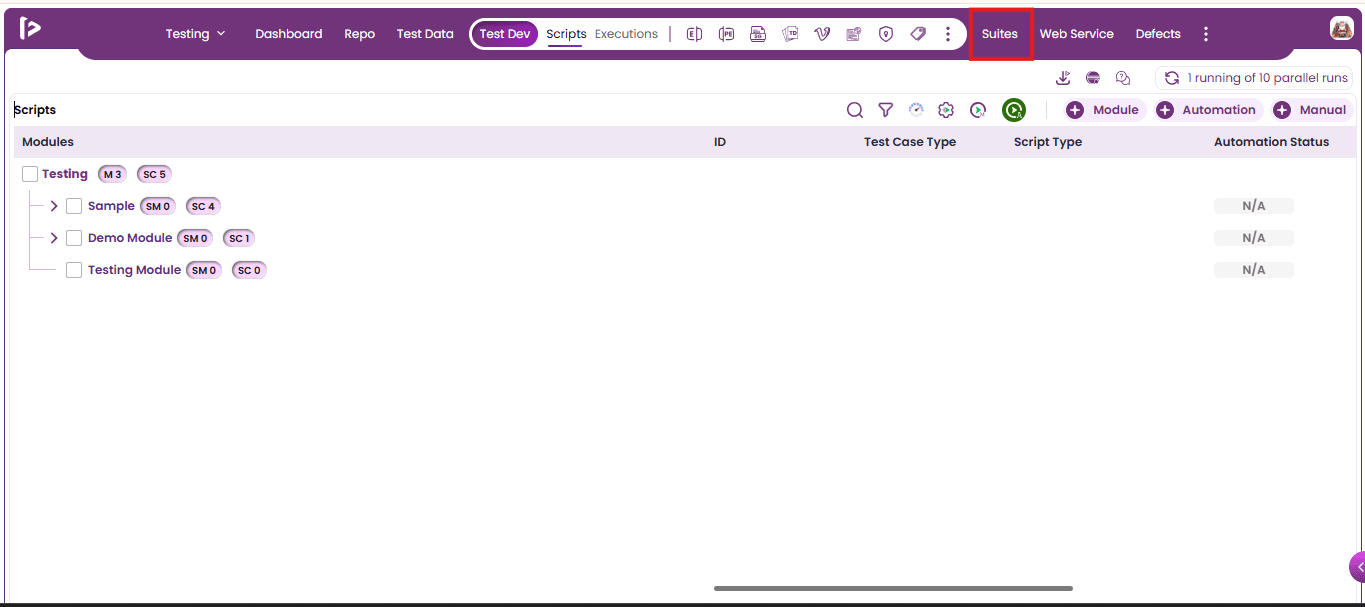
- Users can locate the Suites tab in the top-right corner of the interface.
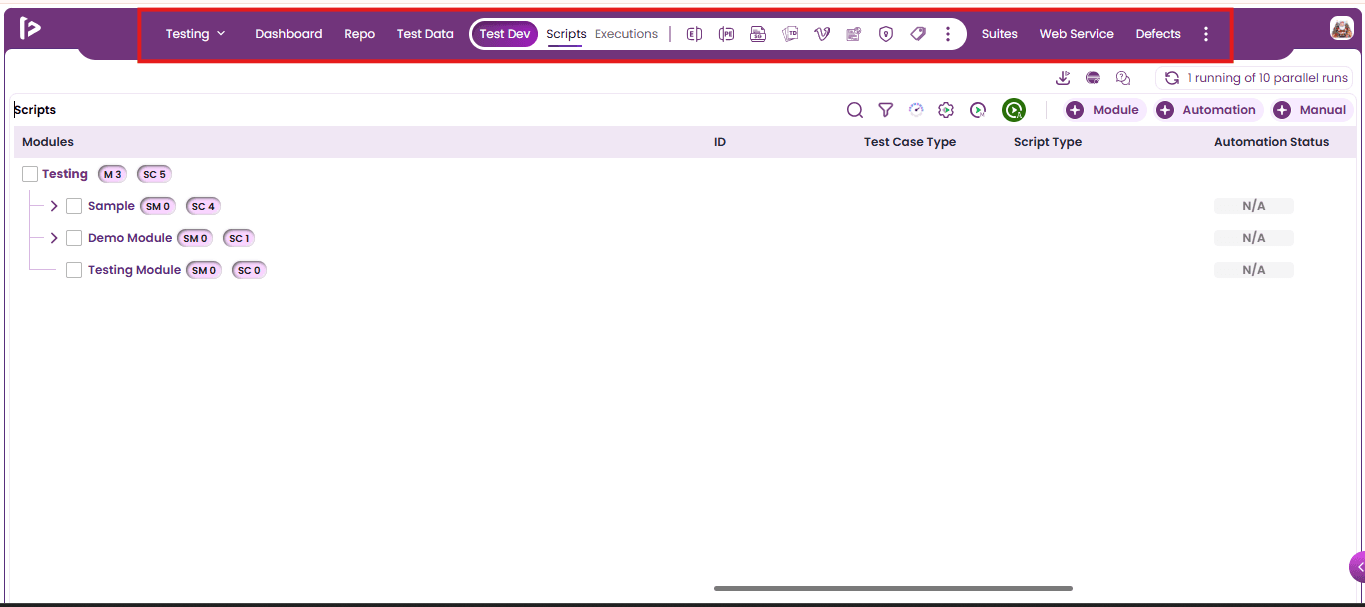
- Click on Suites tab to proceed
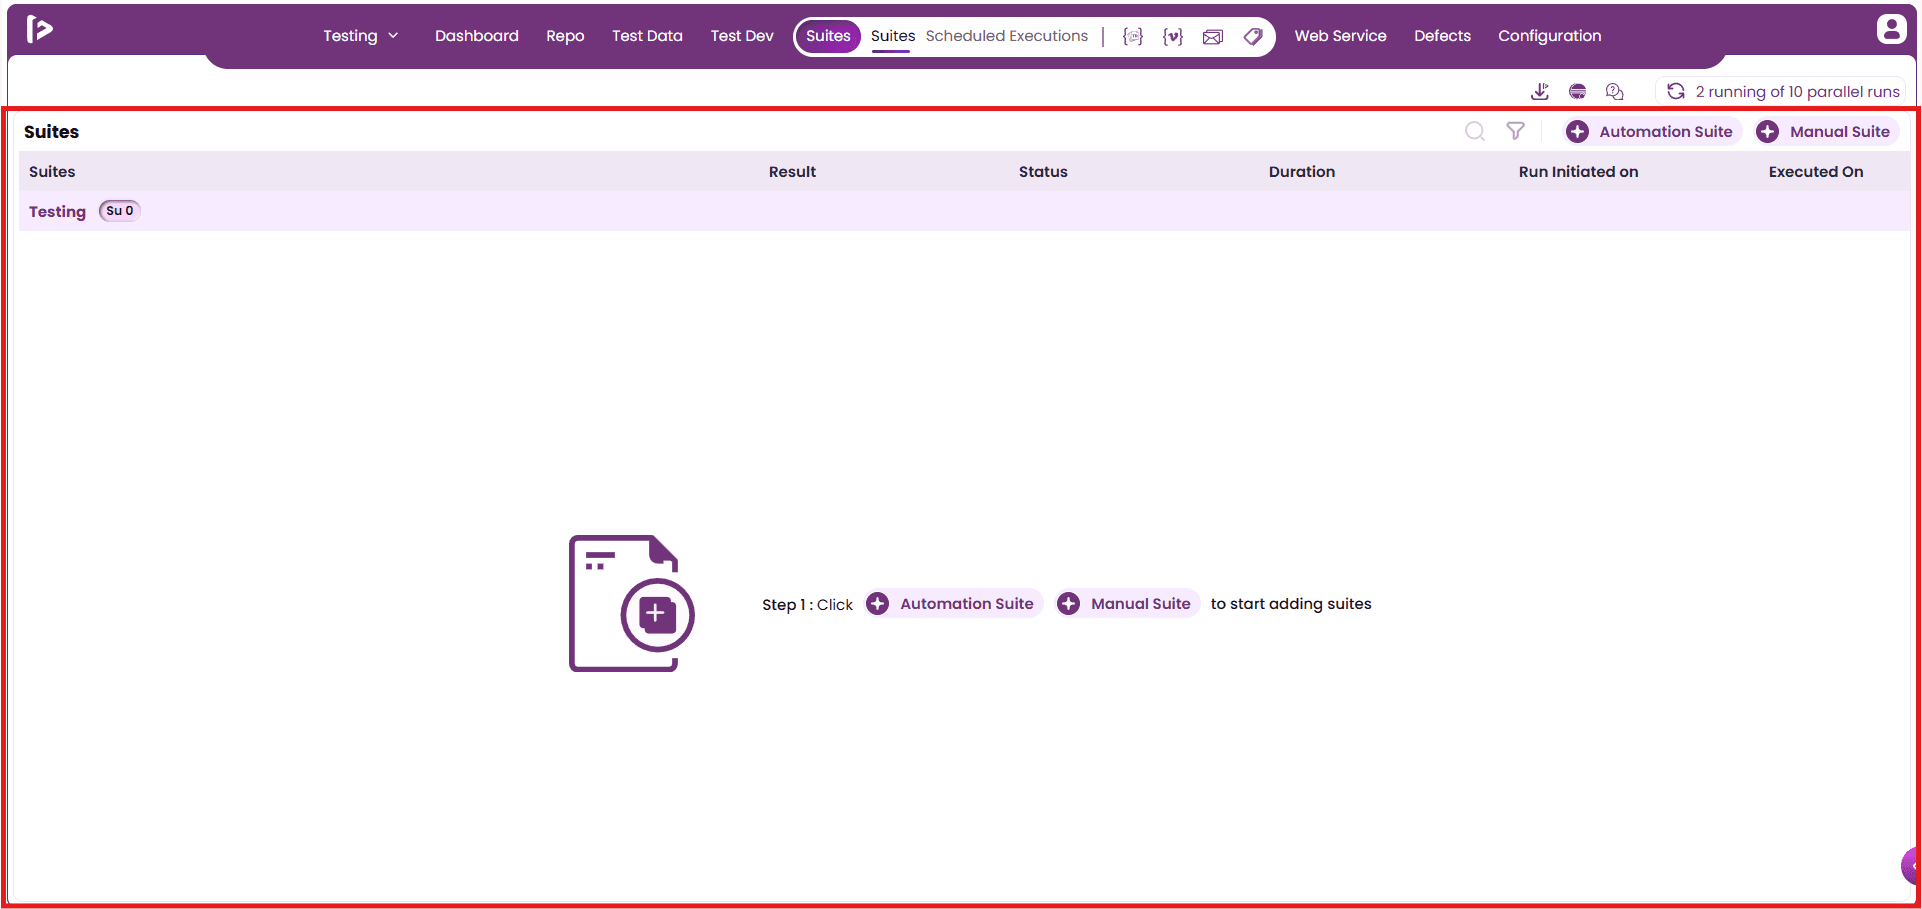
- This action will redirect the user to the Suites page, where all test suites associated with the selected project are displayed.
Steps to create manual suite
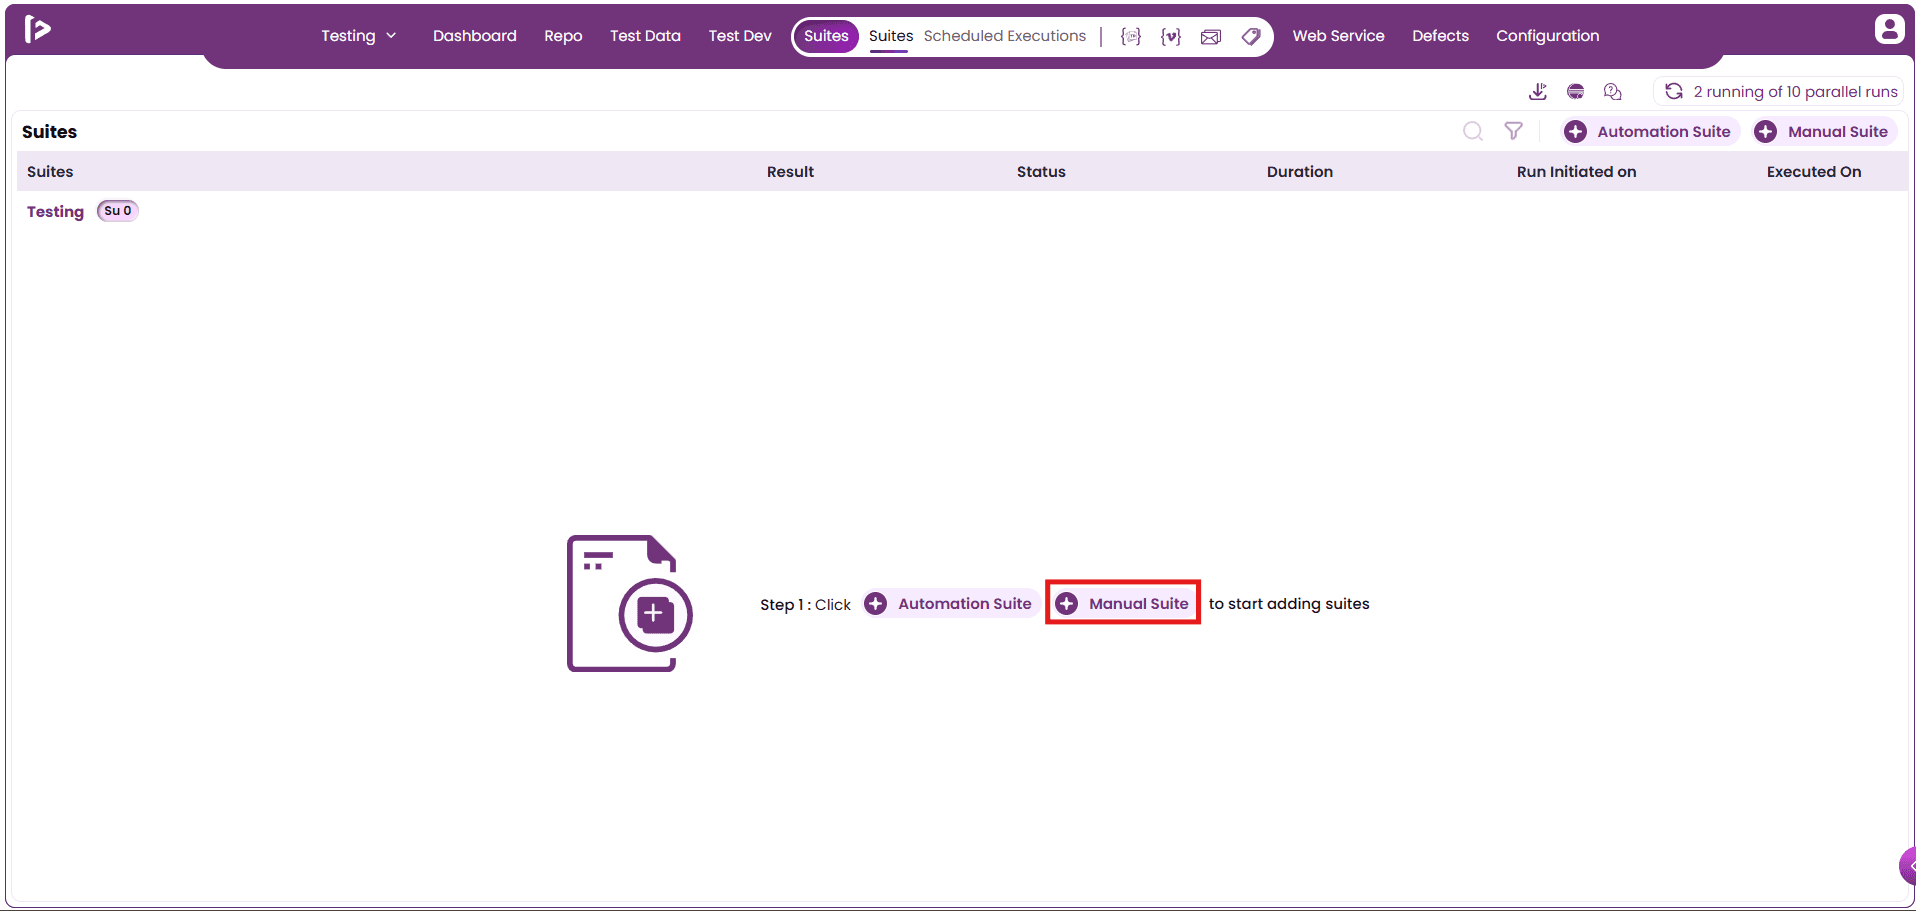
- After navigating to the Suites section, click on the “+ Manual Suite” button. If you are creating a test suite for the first time, the interface will be displayed as shown below.
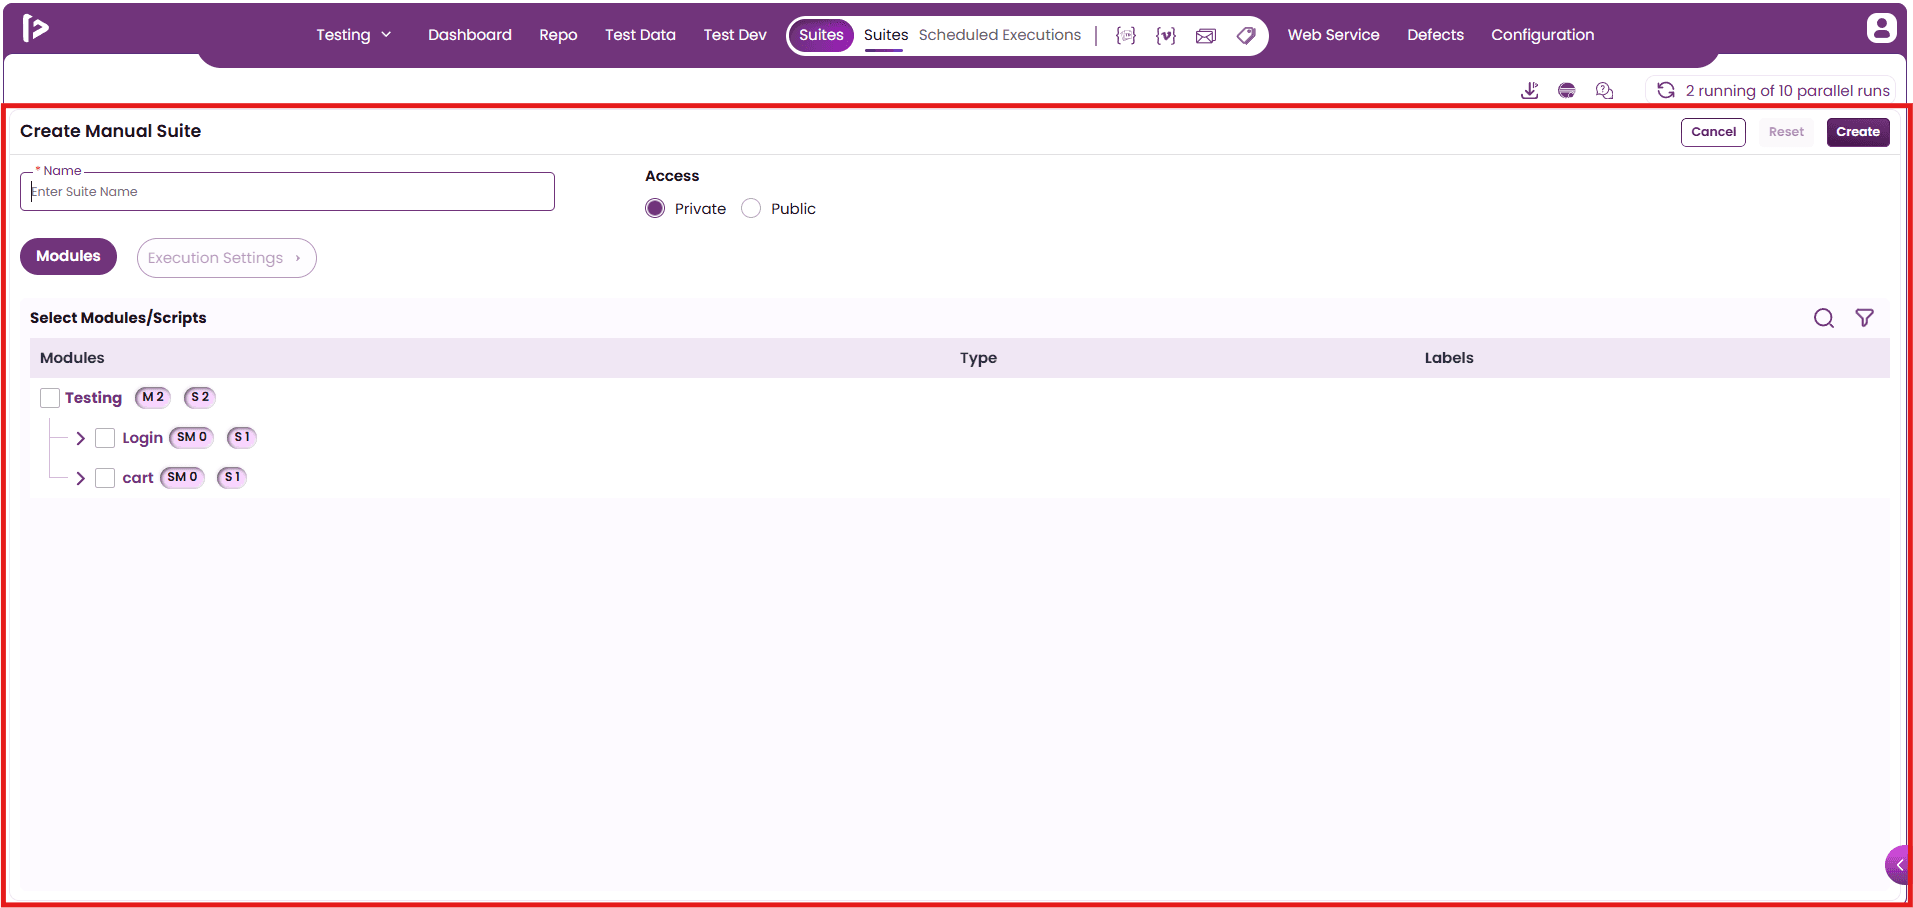
- Once the user clicks on the “+ Manual Suite” button, user will be redirected to the Create Manual Suite page.
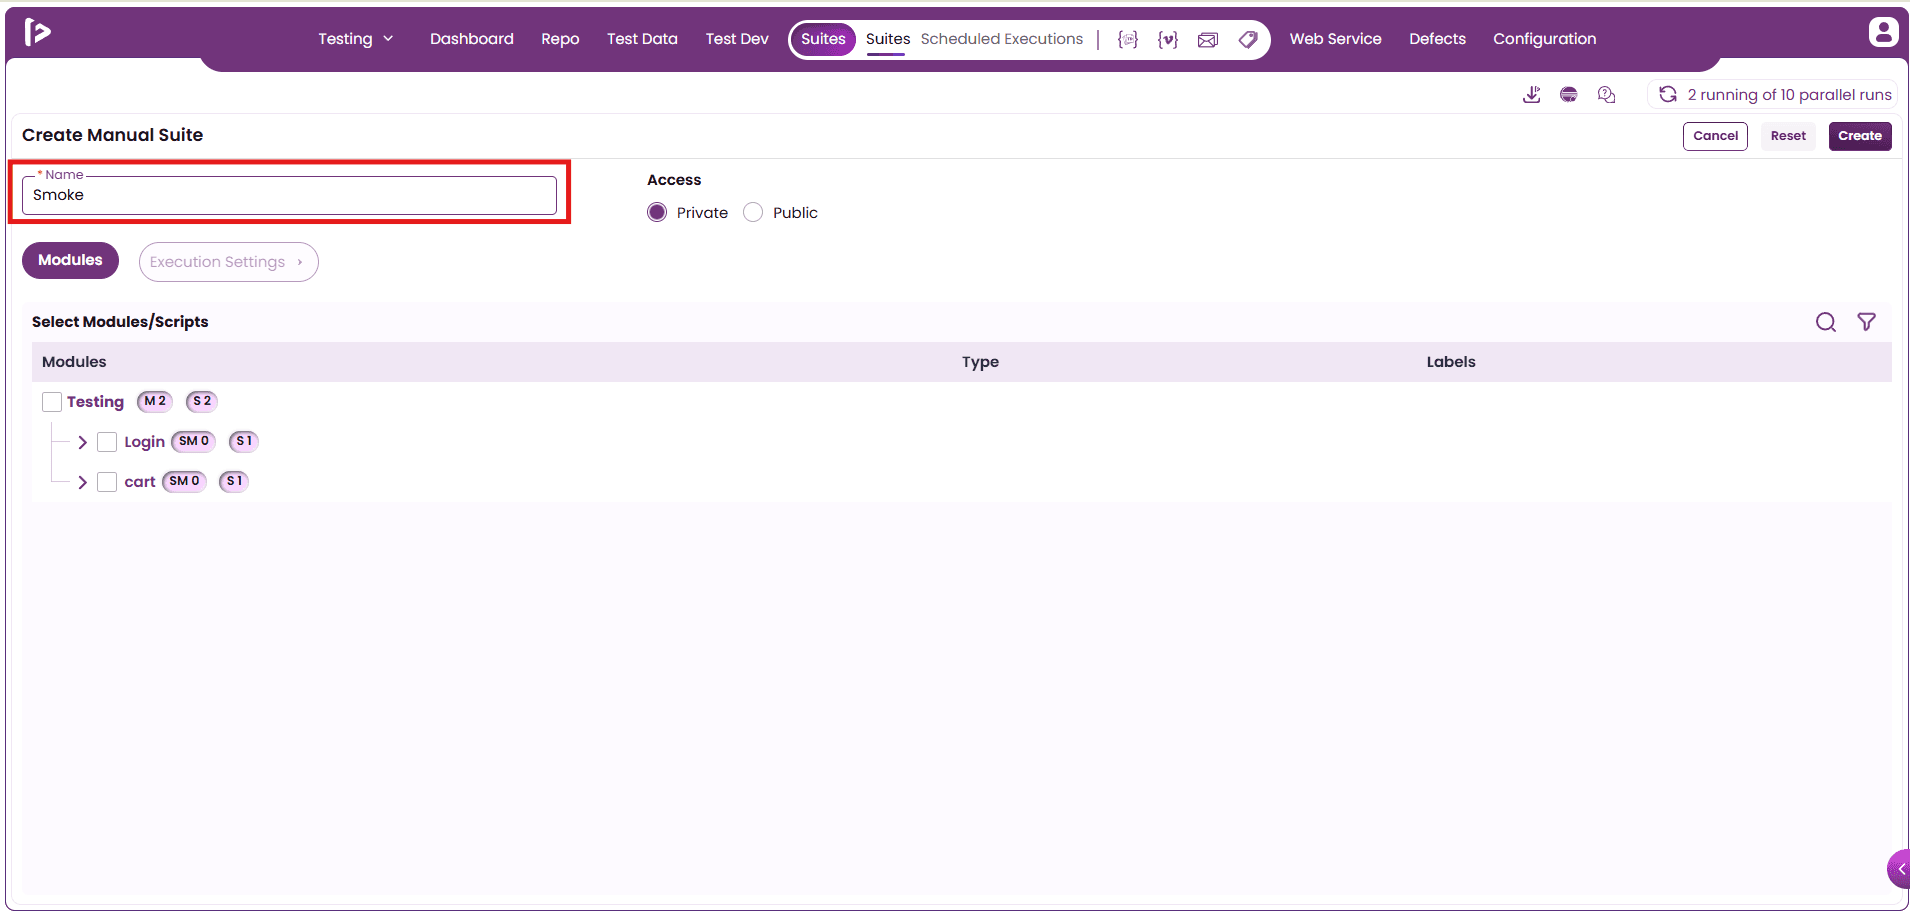
- To create a manual suite, it is mandatory for the user to enter a name in the designated ‘Name’ input field.
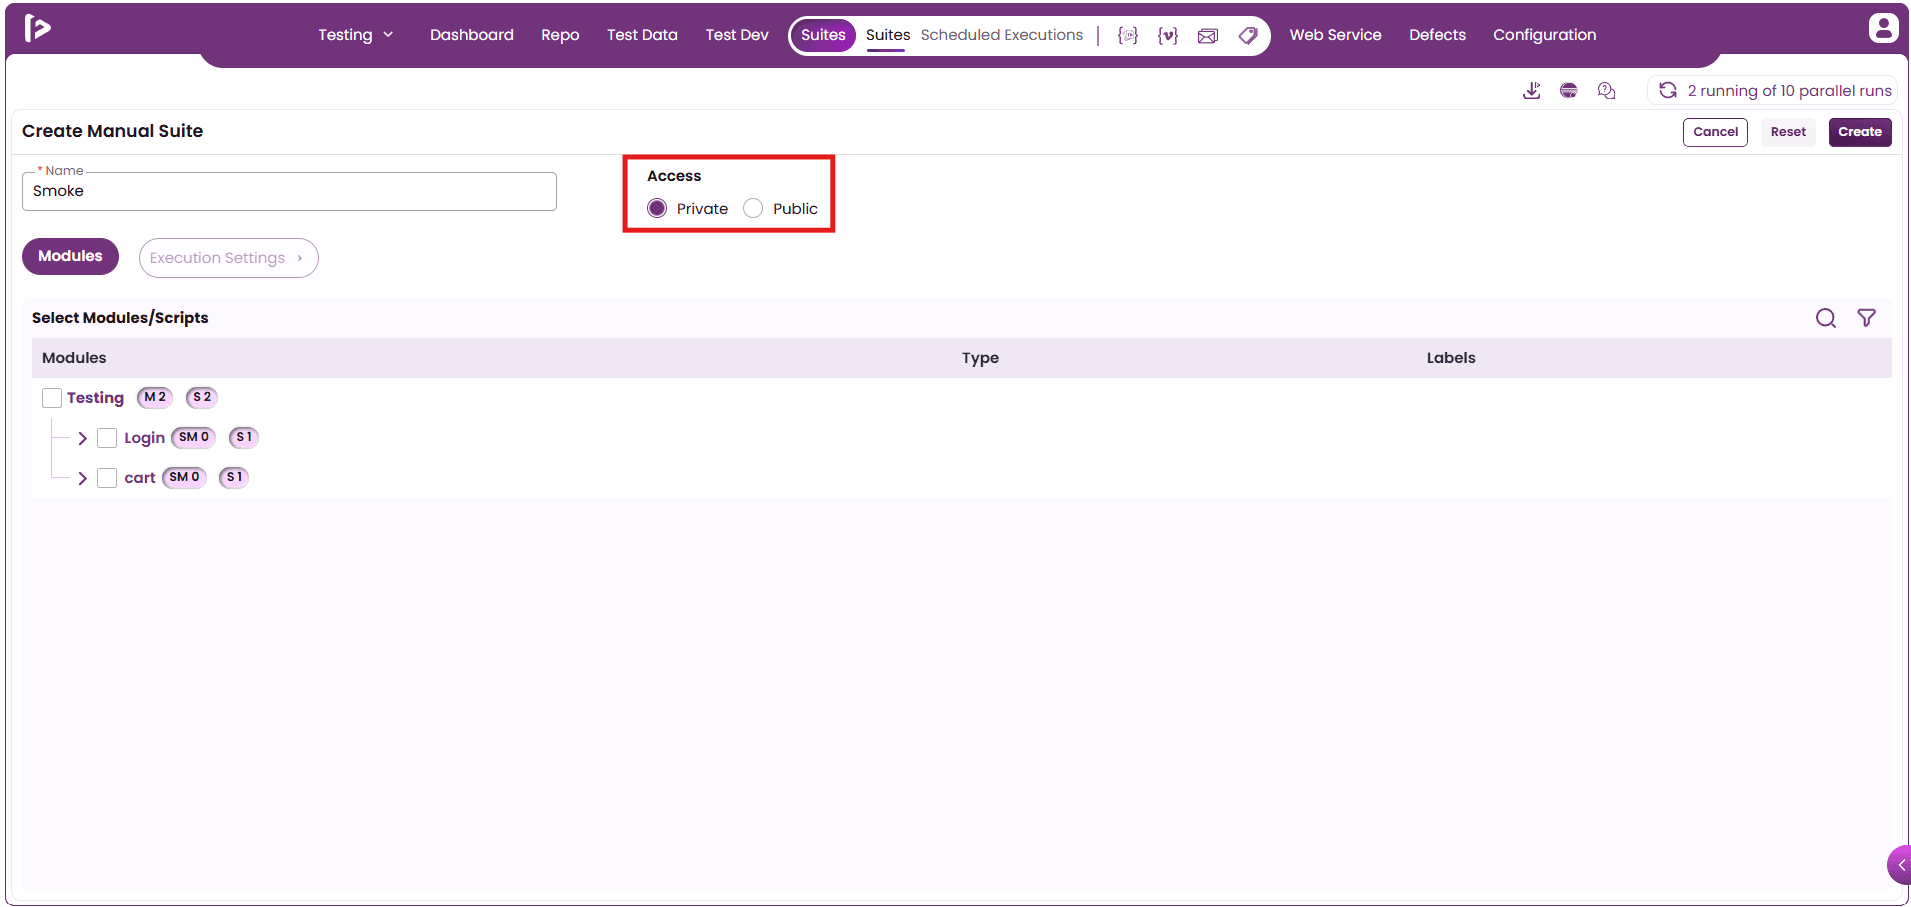
- Under the Access section, the user must specify the access level for the suite by selecting either 'Private' accessible only to the user or 'Public' visible to all users.
- Within the Modules section, the user can select the desired test modules or test cases to be included in the suite. If no test cases are available, a message stating 'No Test Cases Found' will be displayed.
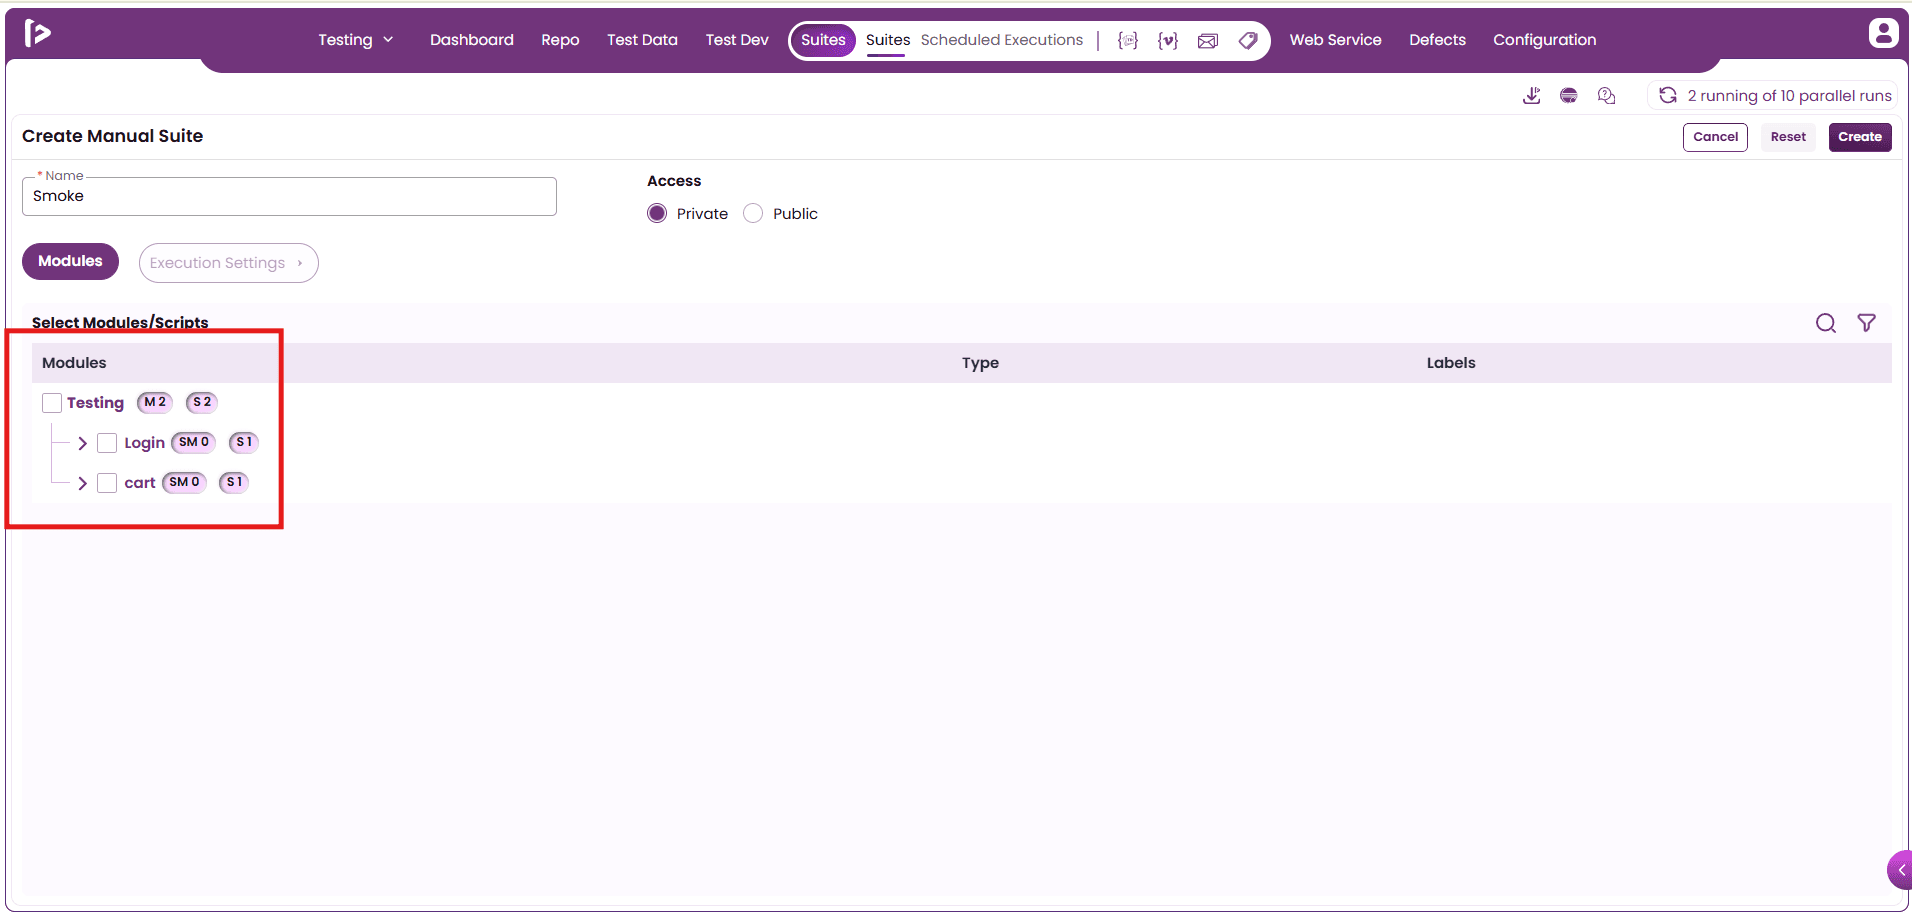
- The columns displayed under the 'Select Modules Scripts' section are as follows:
- Module : Displays the hierarchical module structure, including all modules, sub-modules, and associated test cases.
- Type : Indicates the type of test case linked to each item. This column remains blank for root modules, modules, and sub modules.
- Label : Represents a custom tag that can be assigned to test cases or suites to enhance organization and categorization.
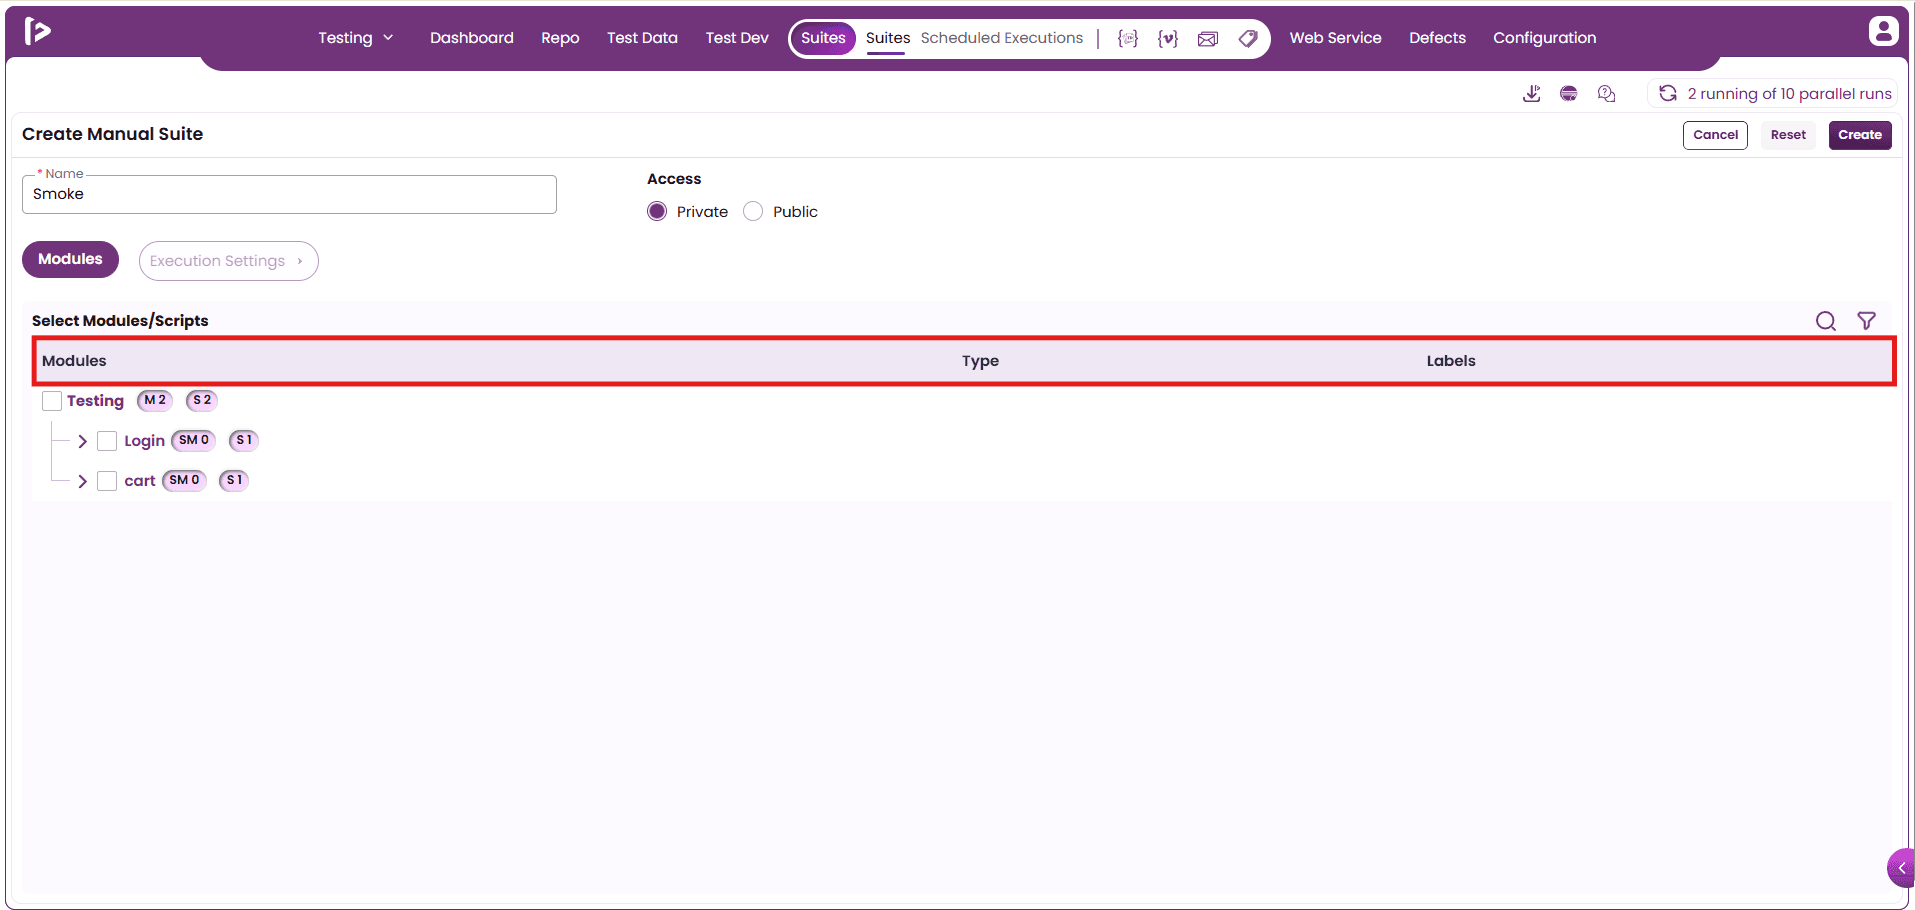
- The user should then select the "Execution Settings" option.
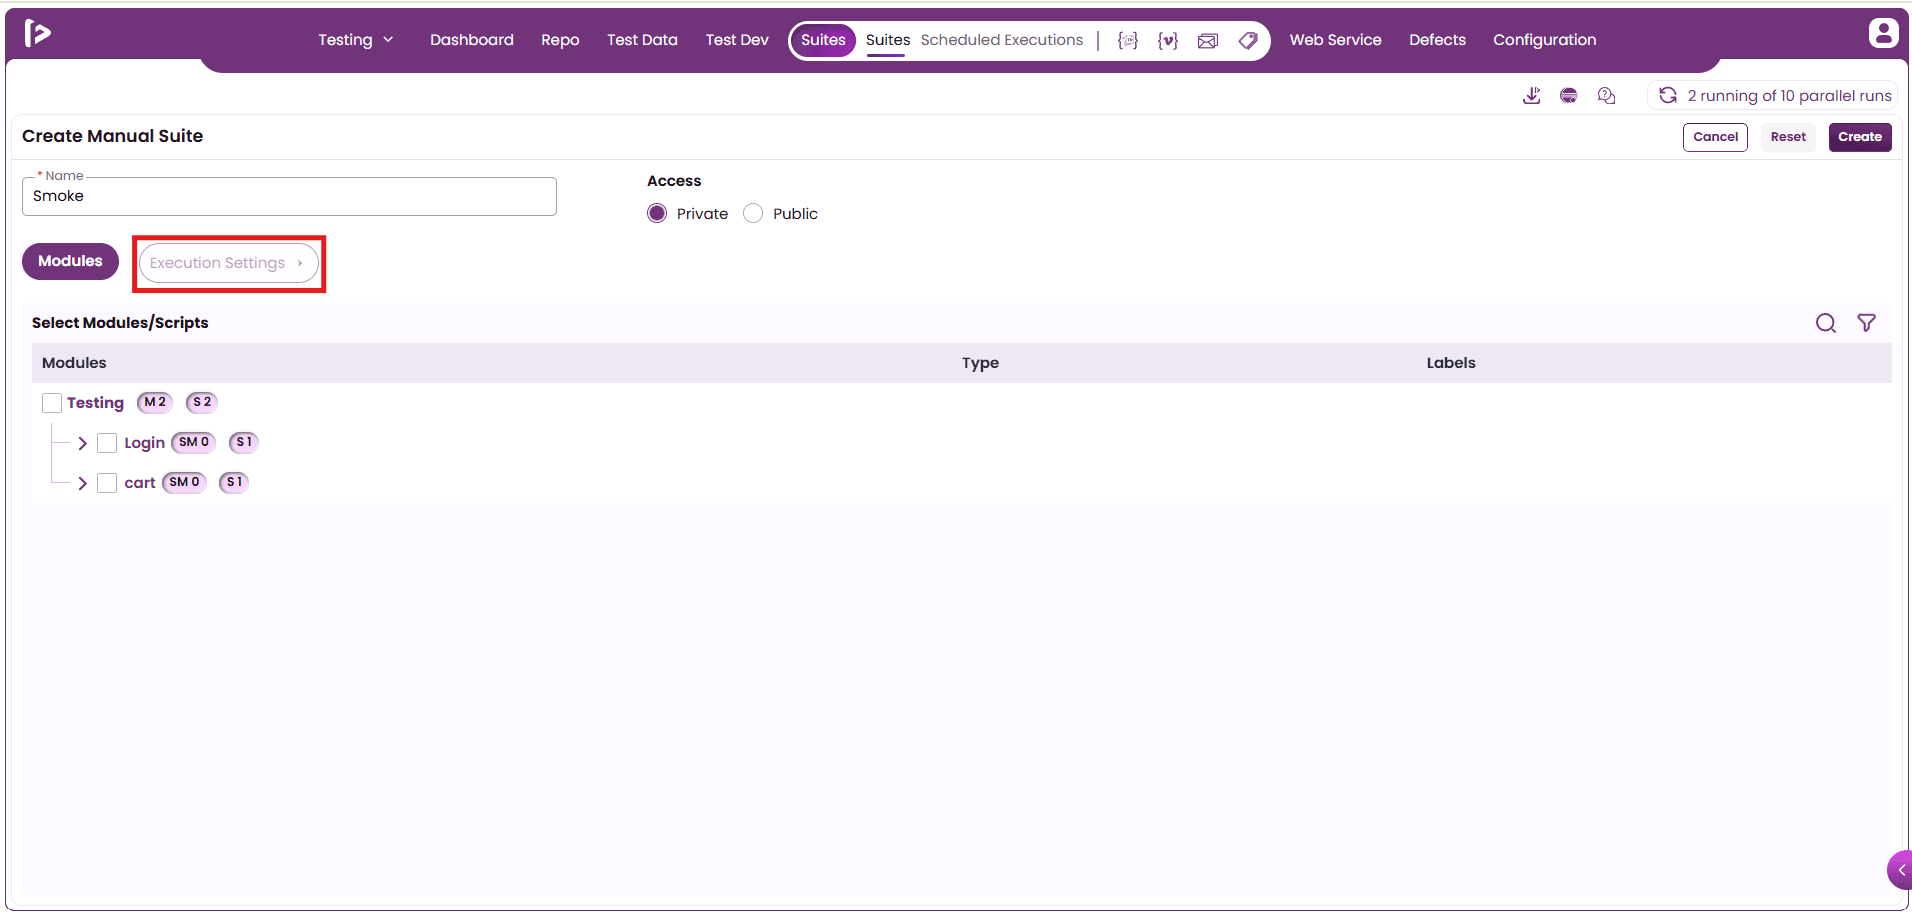
- Upon clicking "User Settings," the Execution Type section will be displayed.
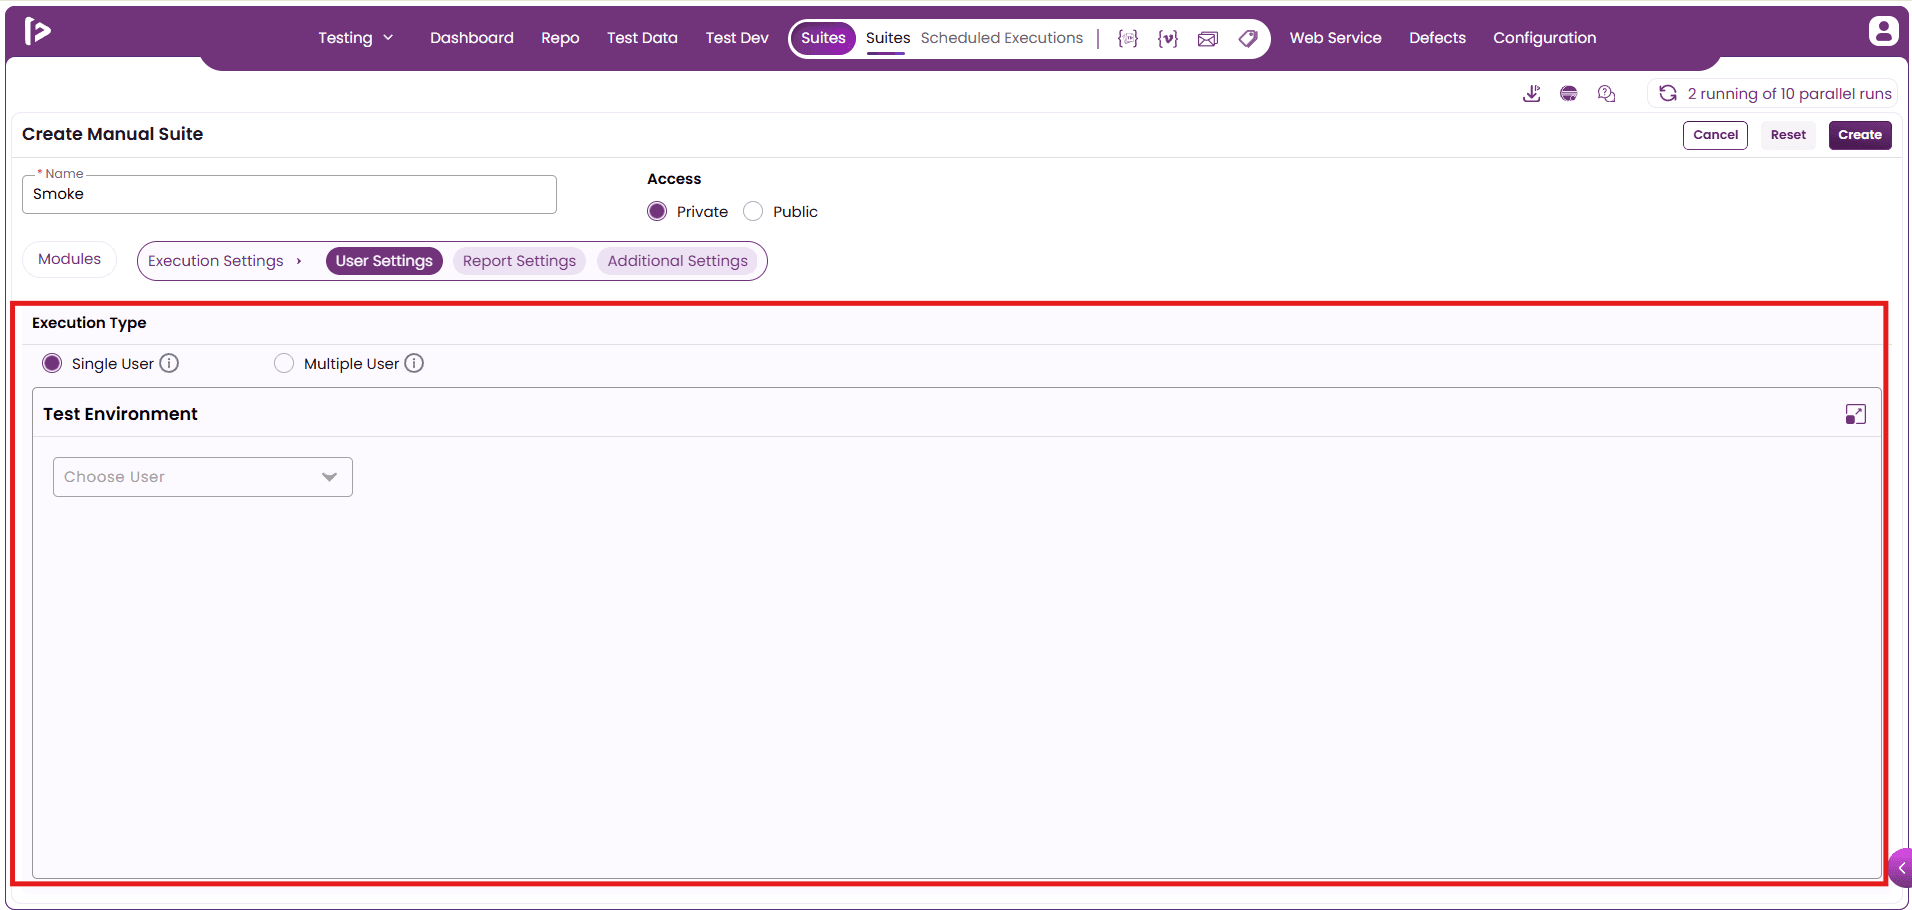
- Within the User Settings, the user can select either the Single User or Multiple Users option.
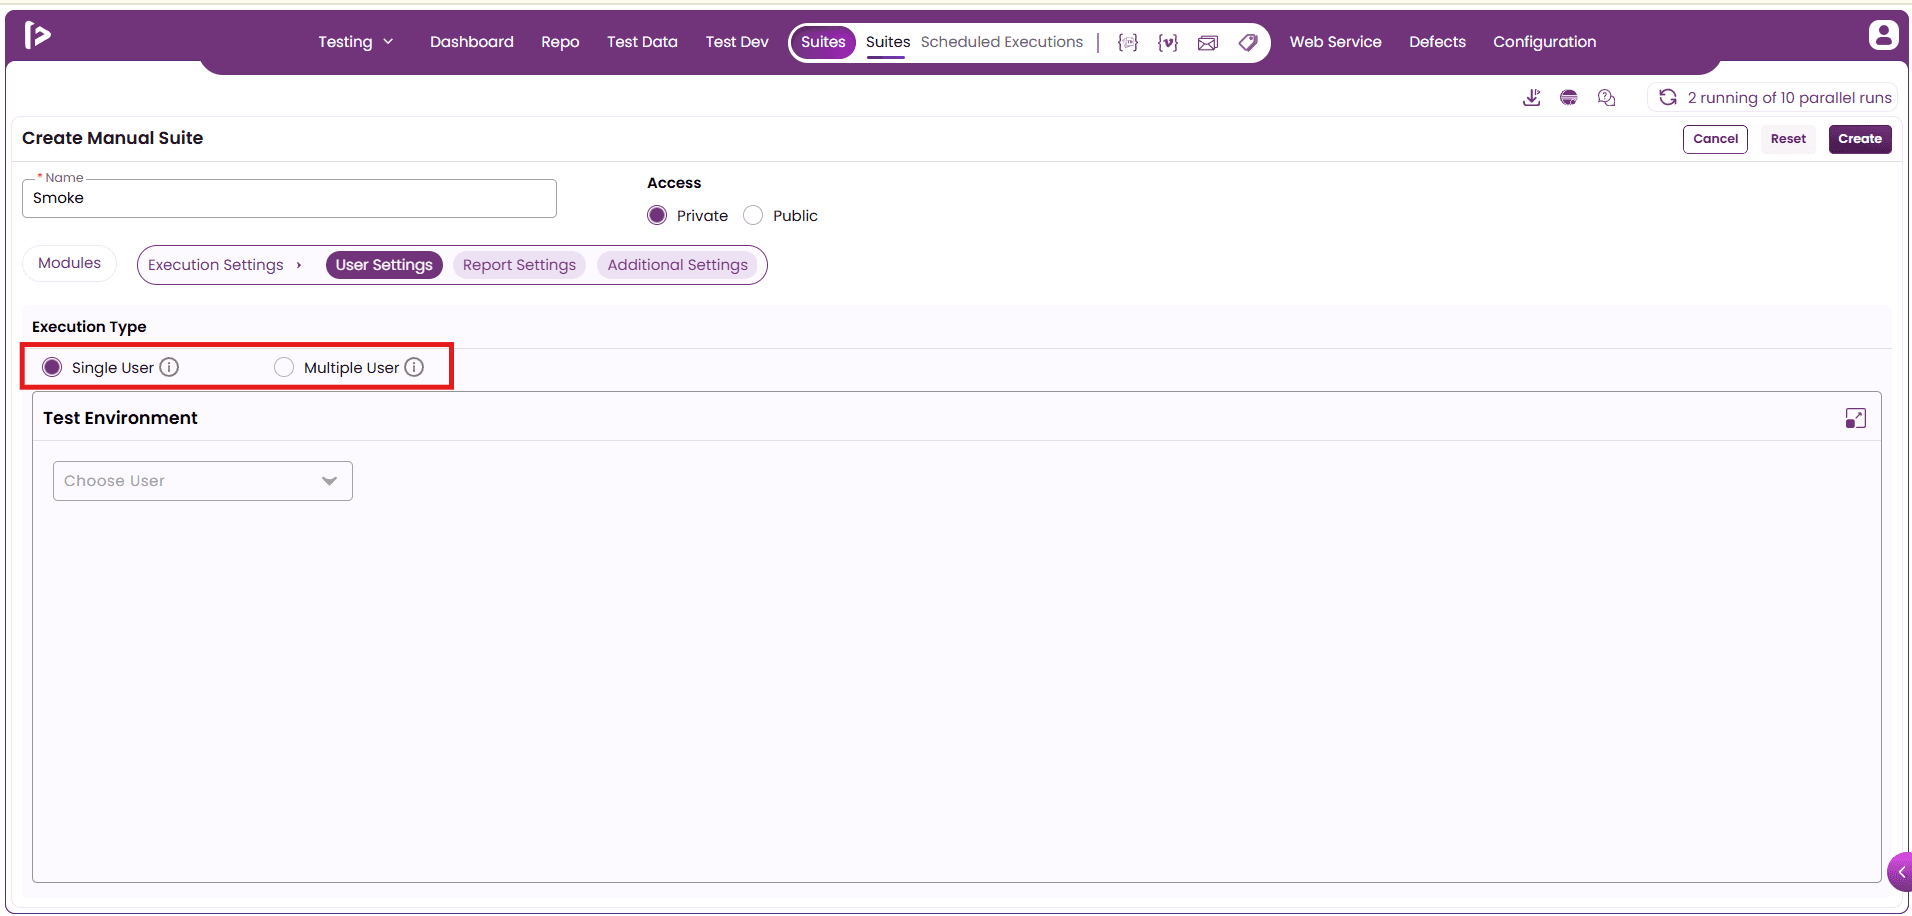
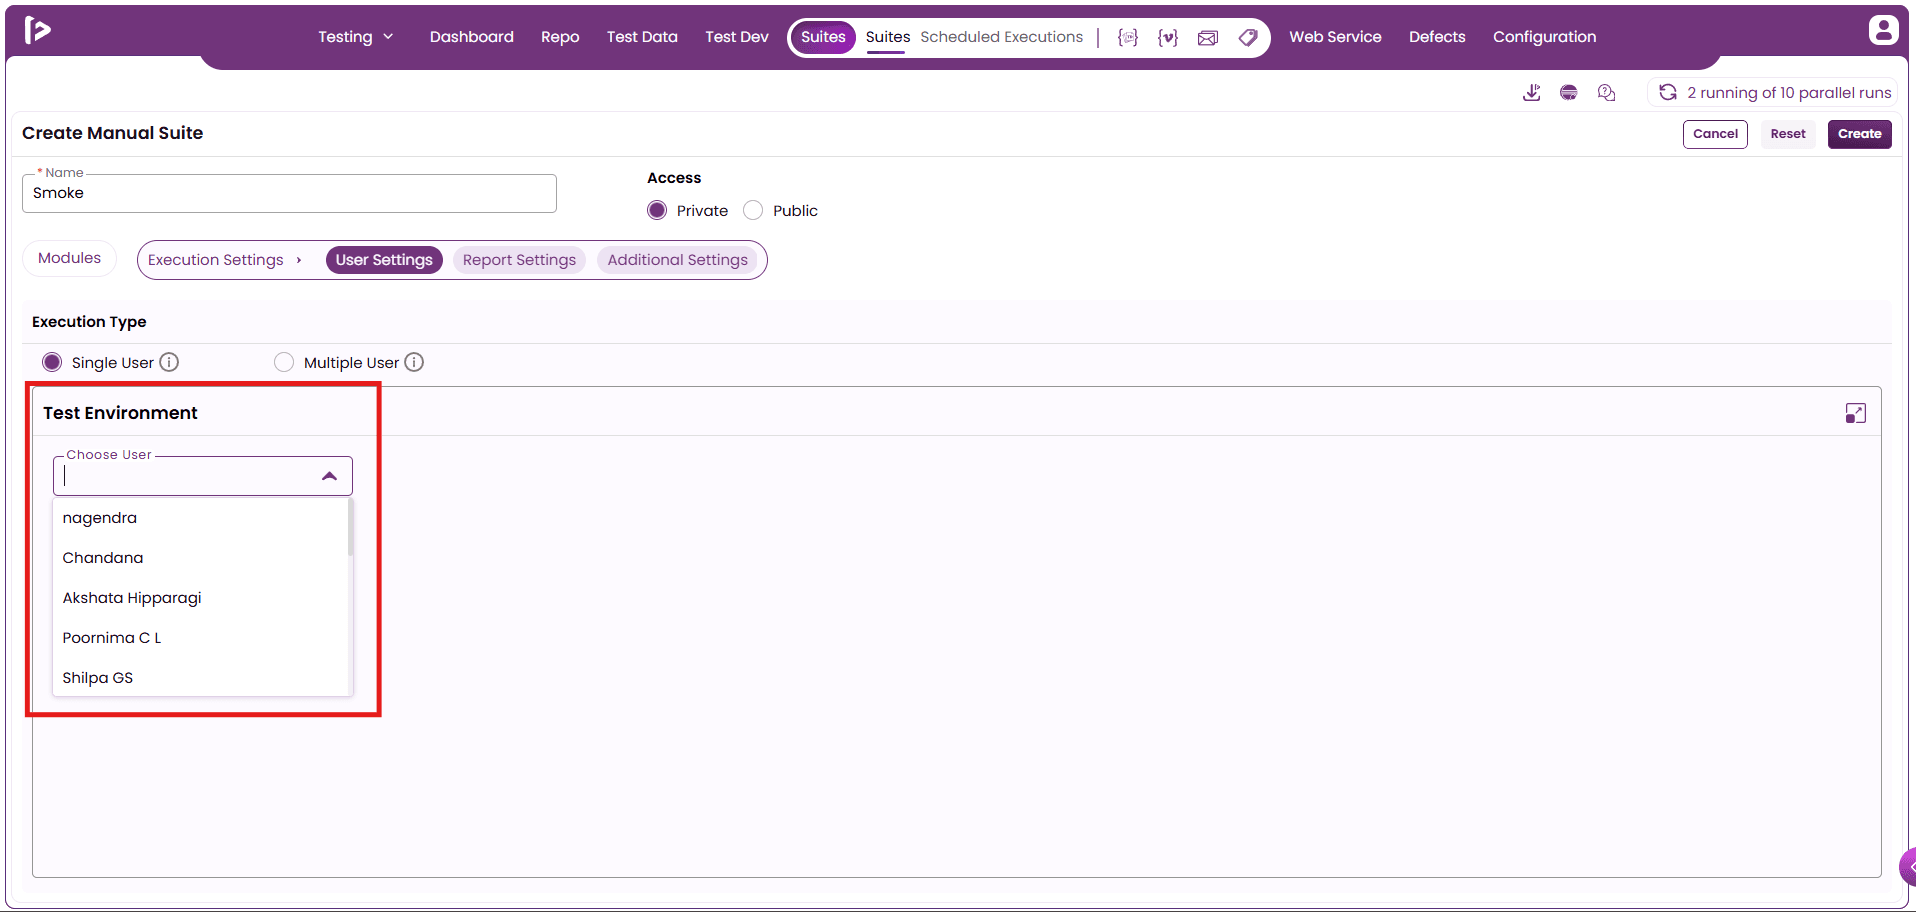
- Single User : This enables the user to select a single user from the dropdown list, as illustrated below.
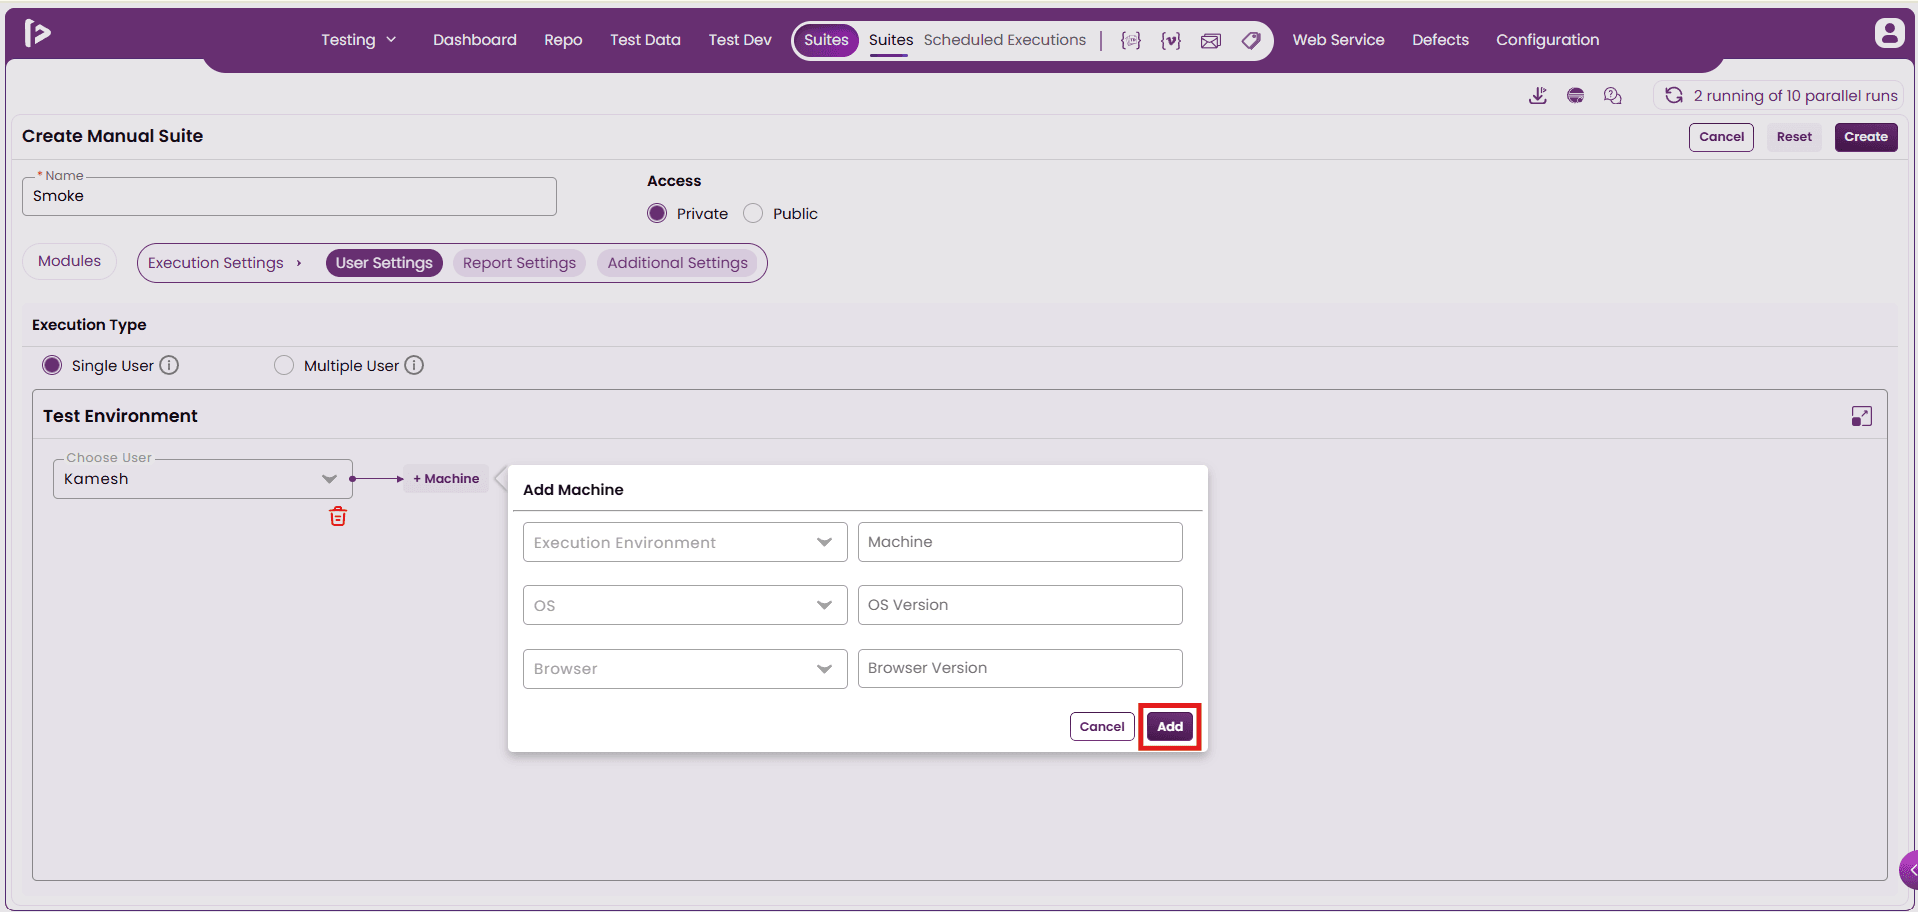
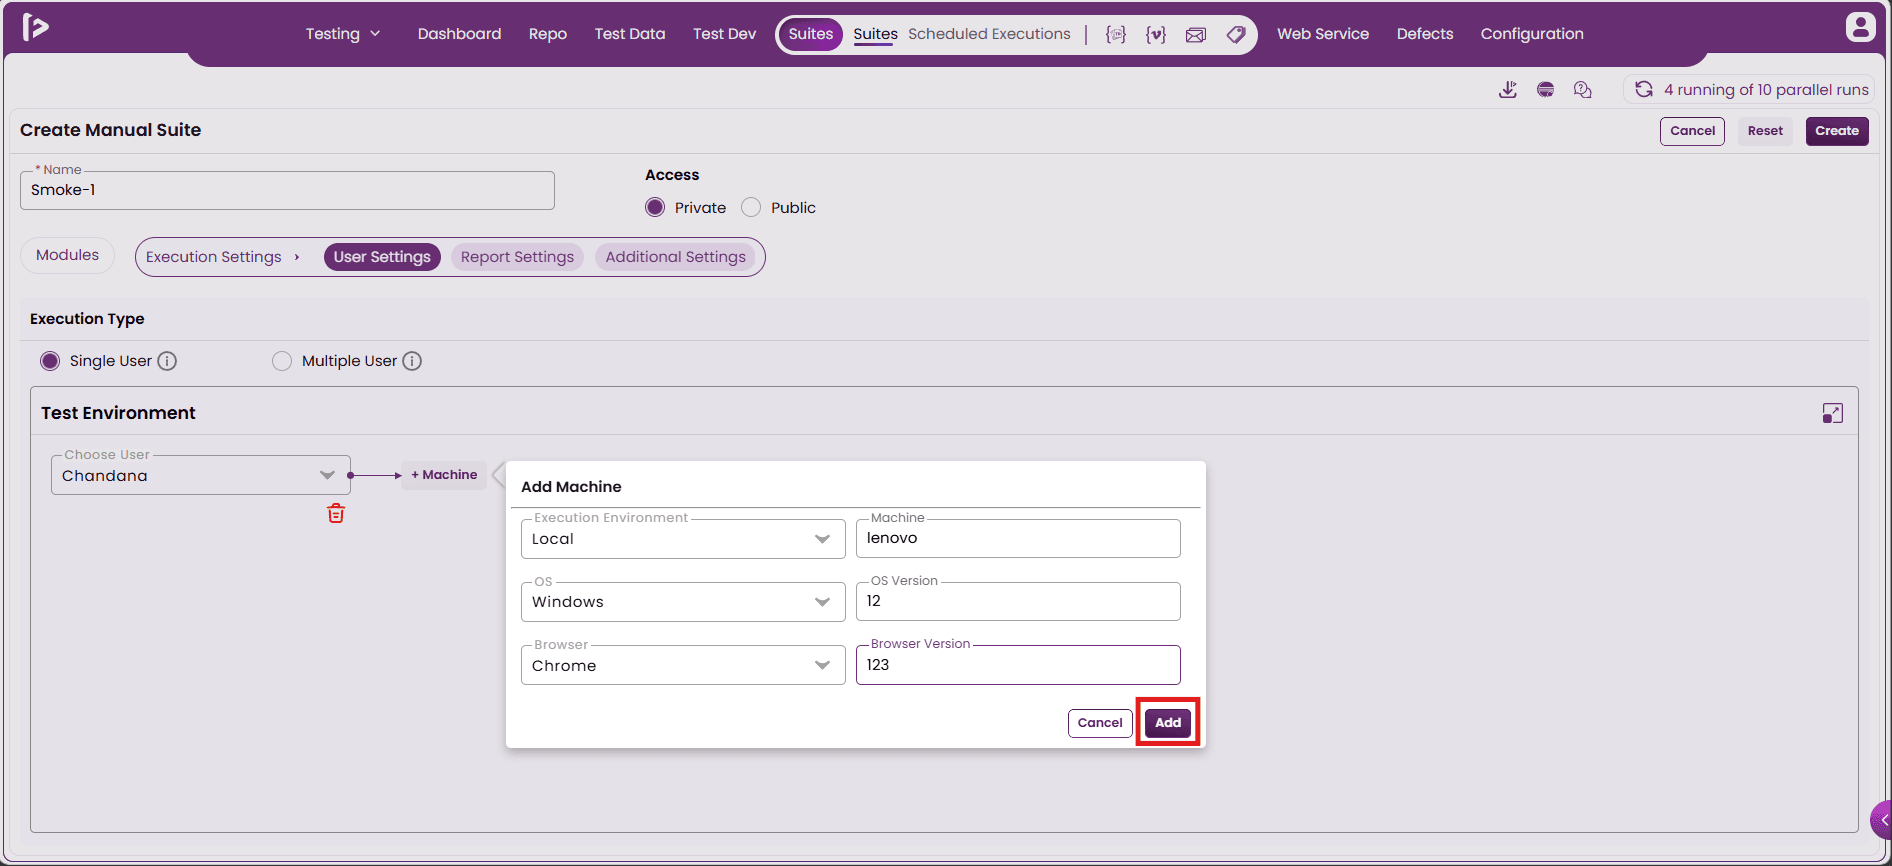
- Once the user is selected, the system allows the addition of a machine. Enter the required details and click the "Add" button.
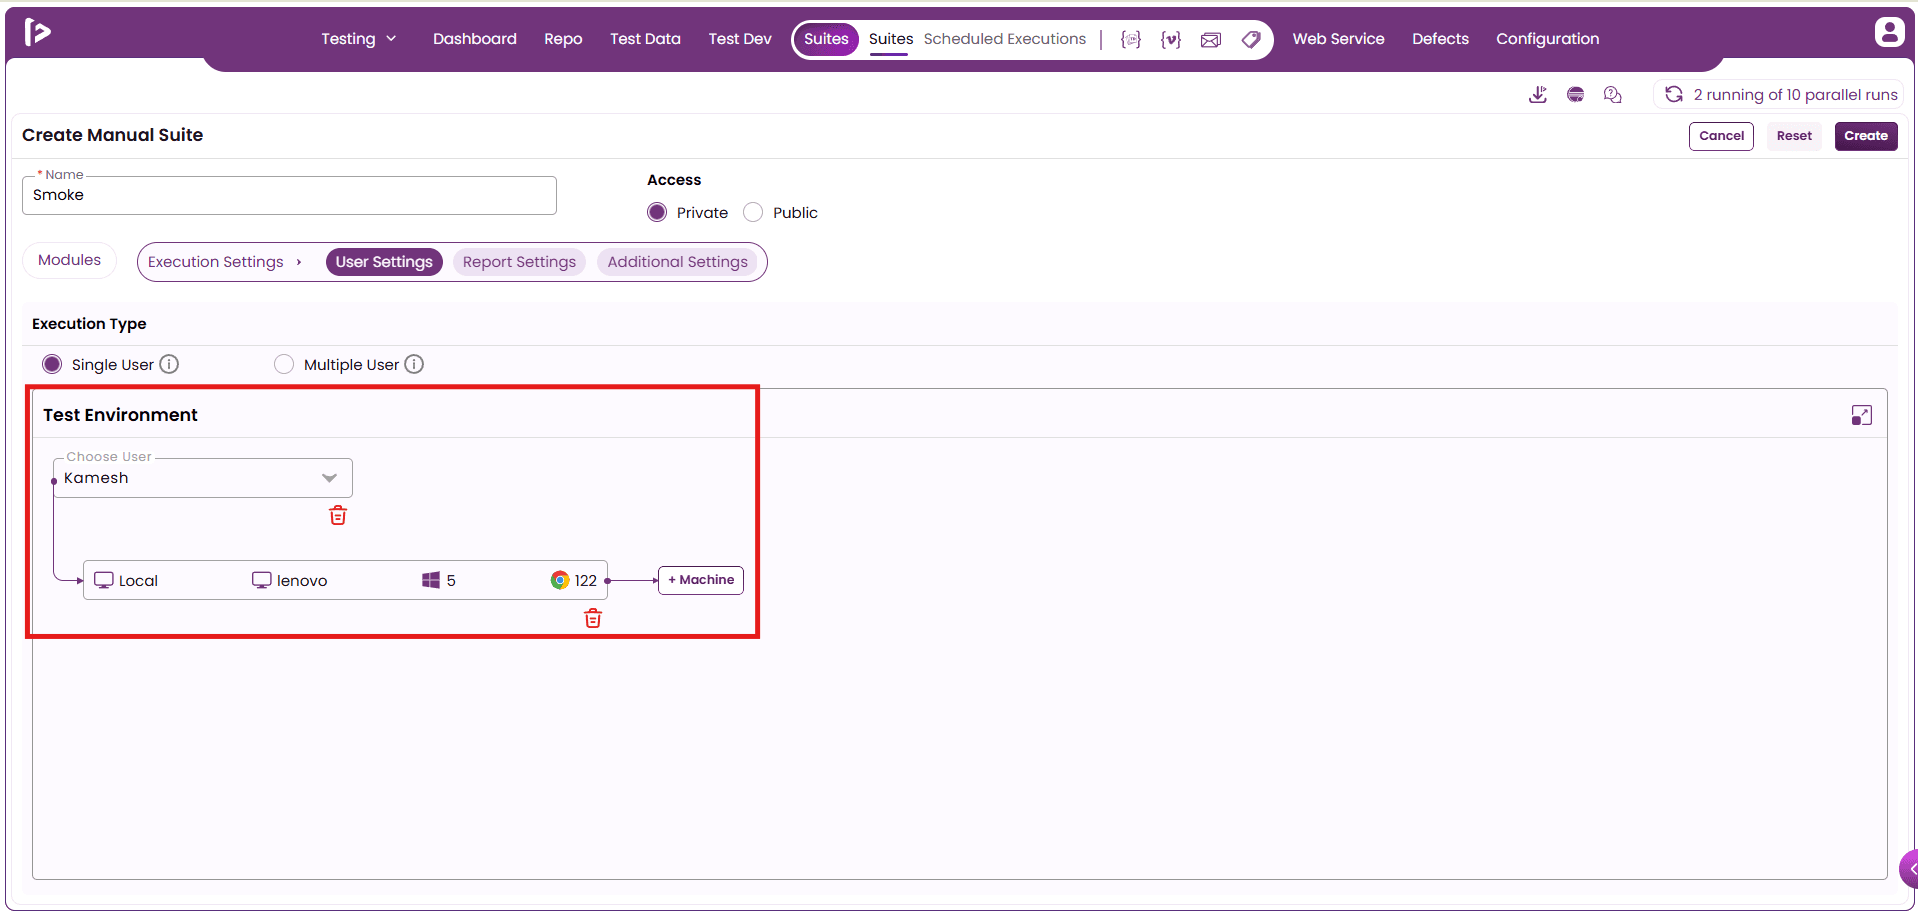
- Upon clicking, the selected user and machine will be added to the suite. Users can add multiple machines as needed.
- Multiple Users : This allows users to select multiple machines for execution from the dropdown list, as shown below.
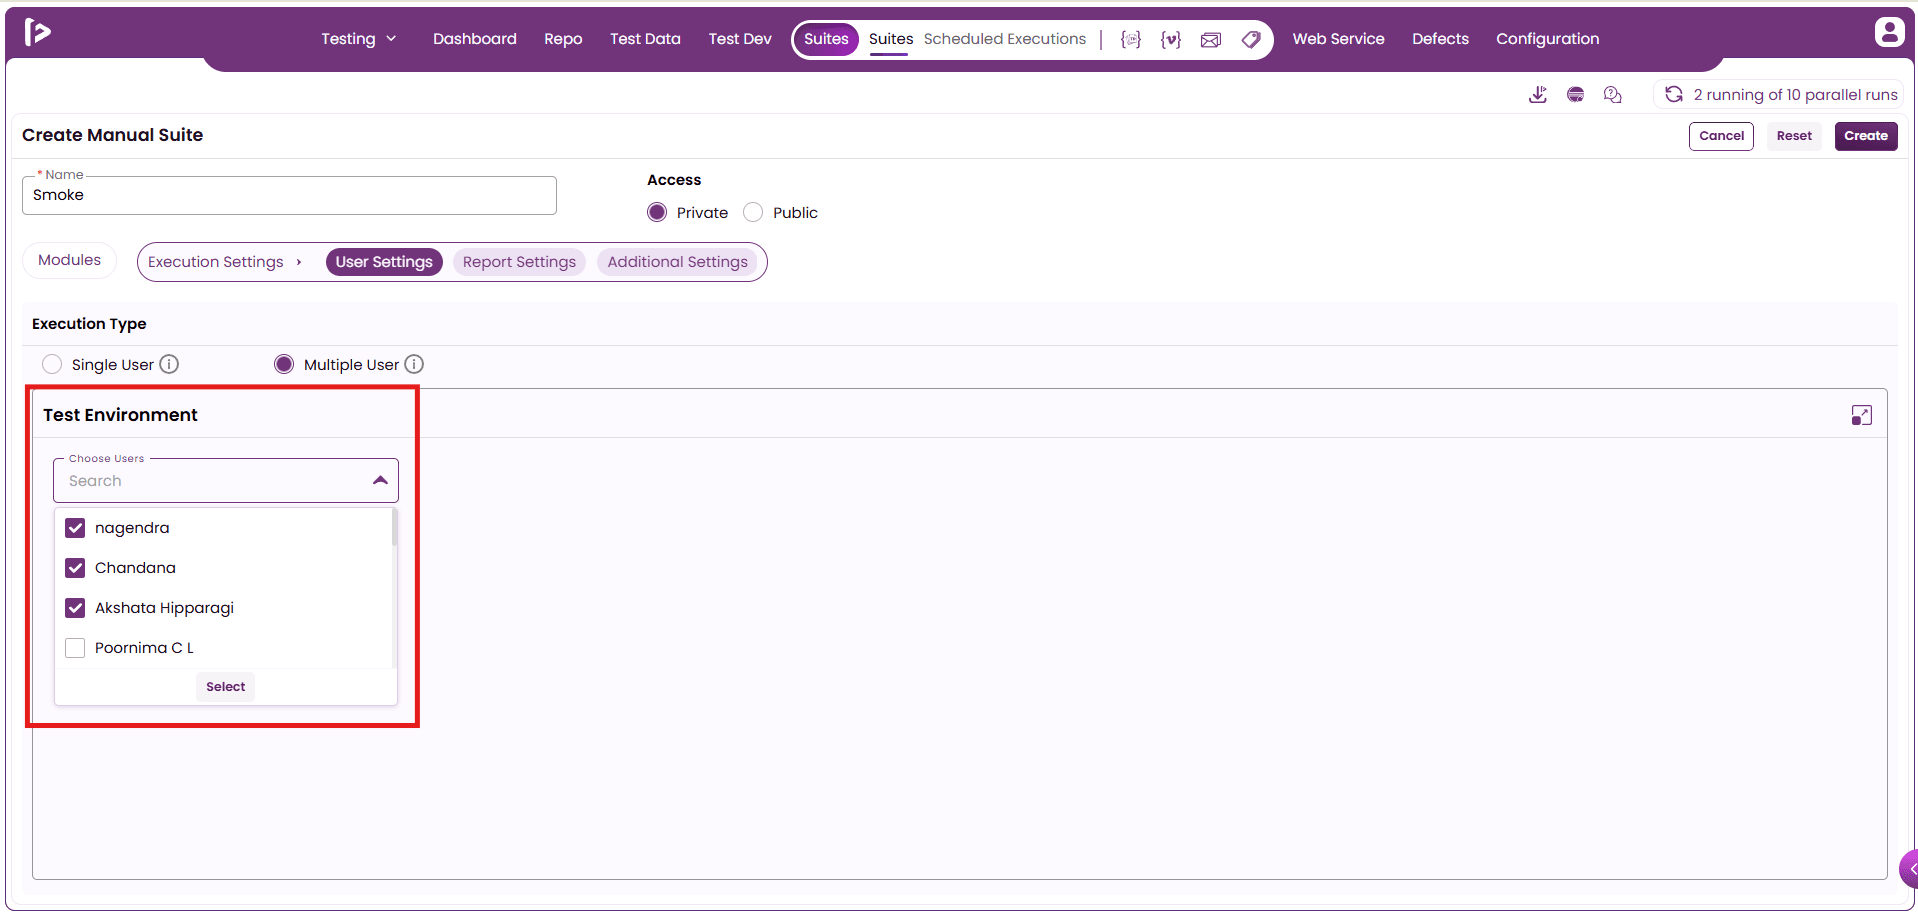
- After selecting the user, the system provides the option to add a machine. Enter the necessary details and click the "Add" button to continue.
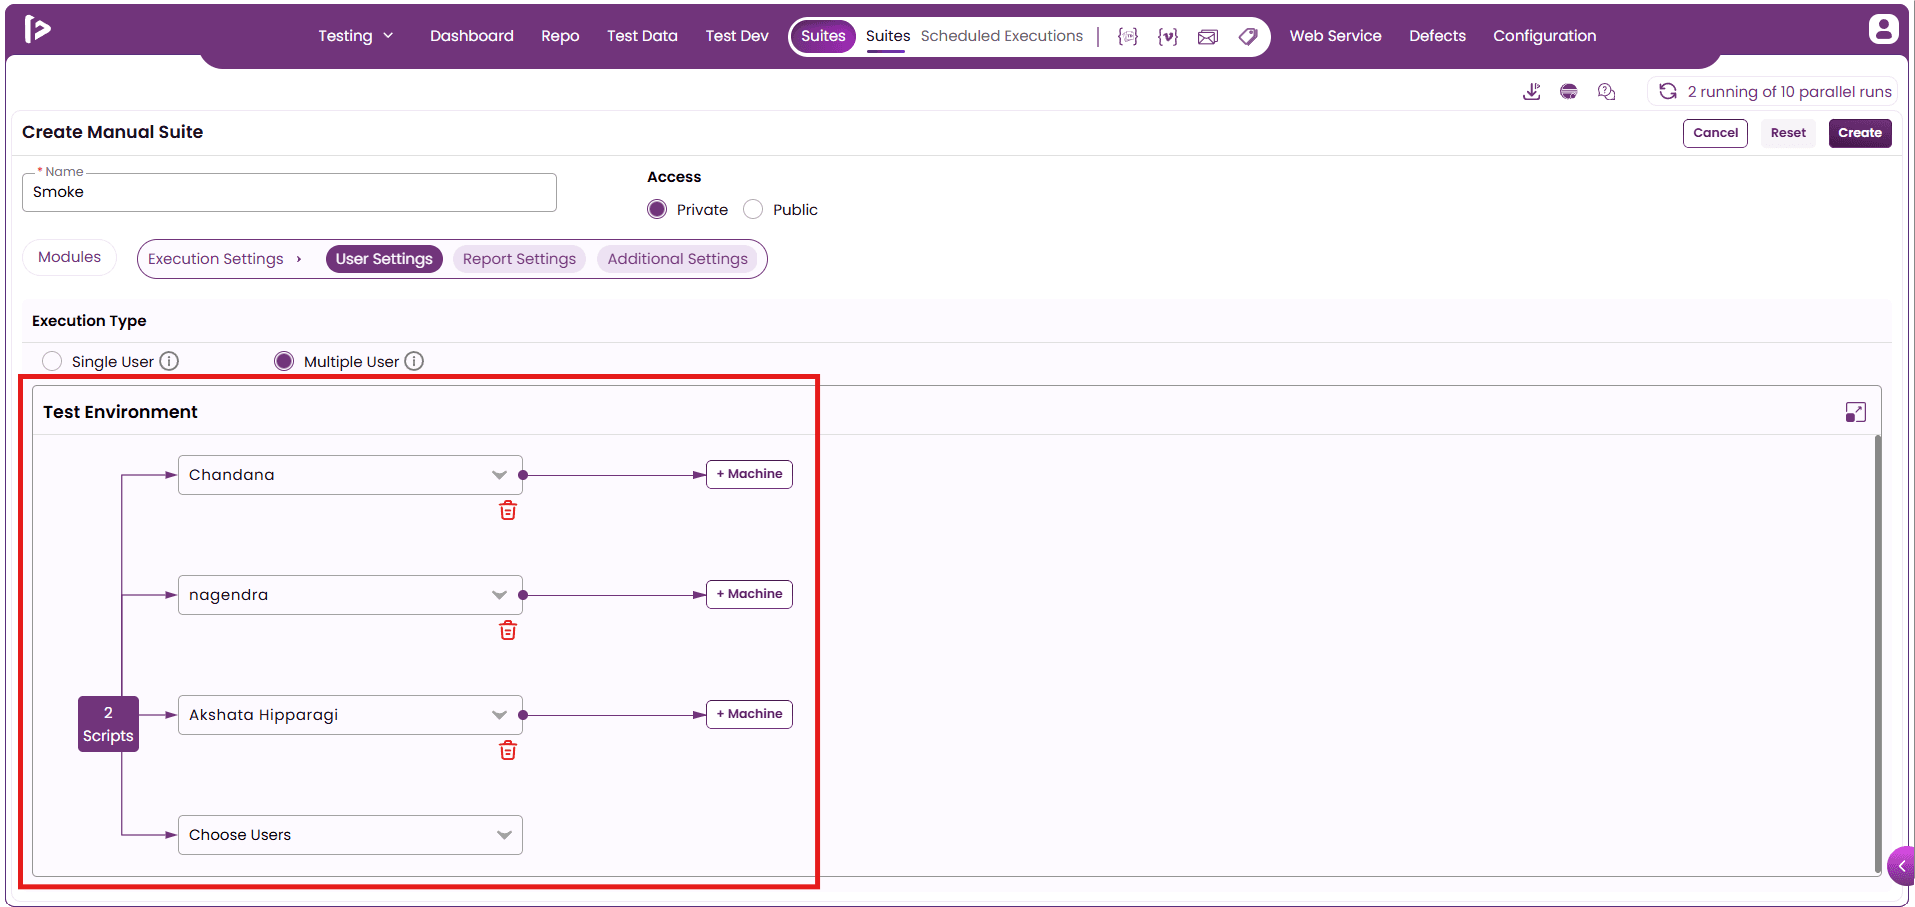
- Upon clicking, the selected user and machine will be added to the suite. Multiple users and machines can be added as needed.
- After selecting a specific User Setting, click on the "Report Setting" option to proceed.
Report Configuration : FireFlink allows report generation to be configured and customized based on specific user requirements. This feature facilitates automated report delivery through multiple channels and provides options to manage notifications and report storage, including server-side deletion.
- Reports can be triggered post execution via two primary methods: Email and Slack
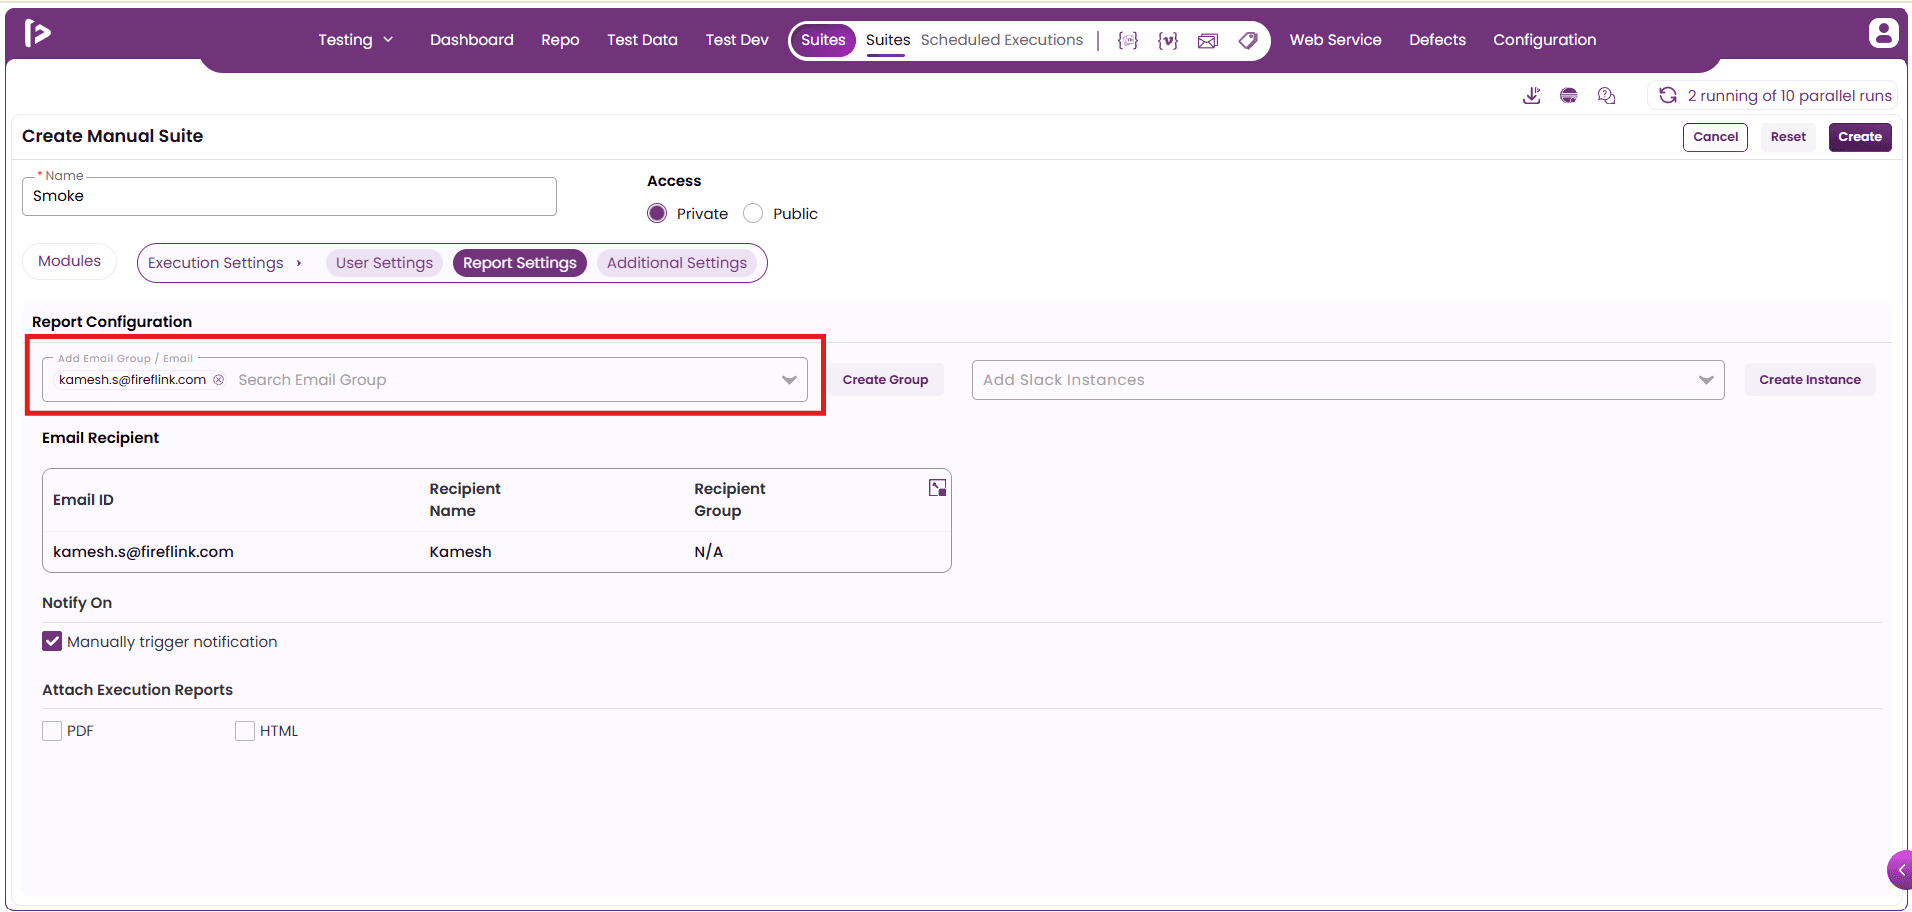
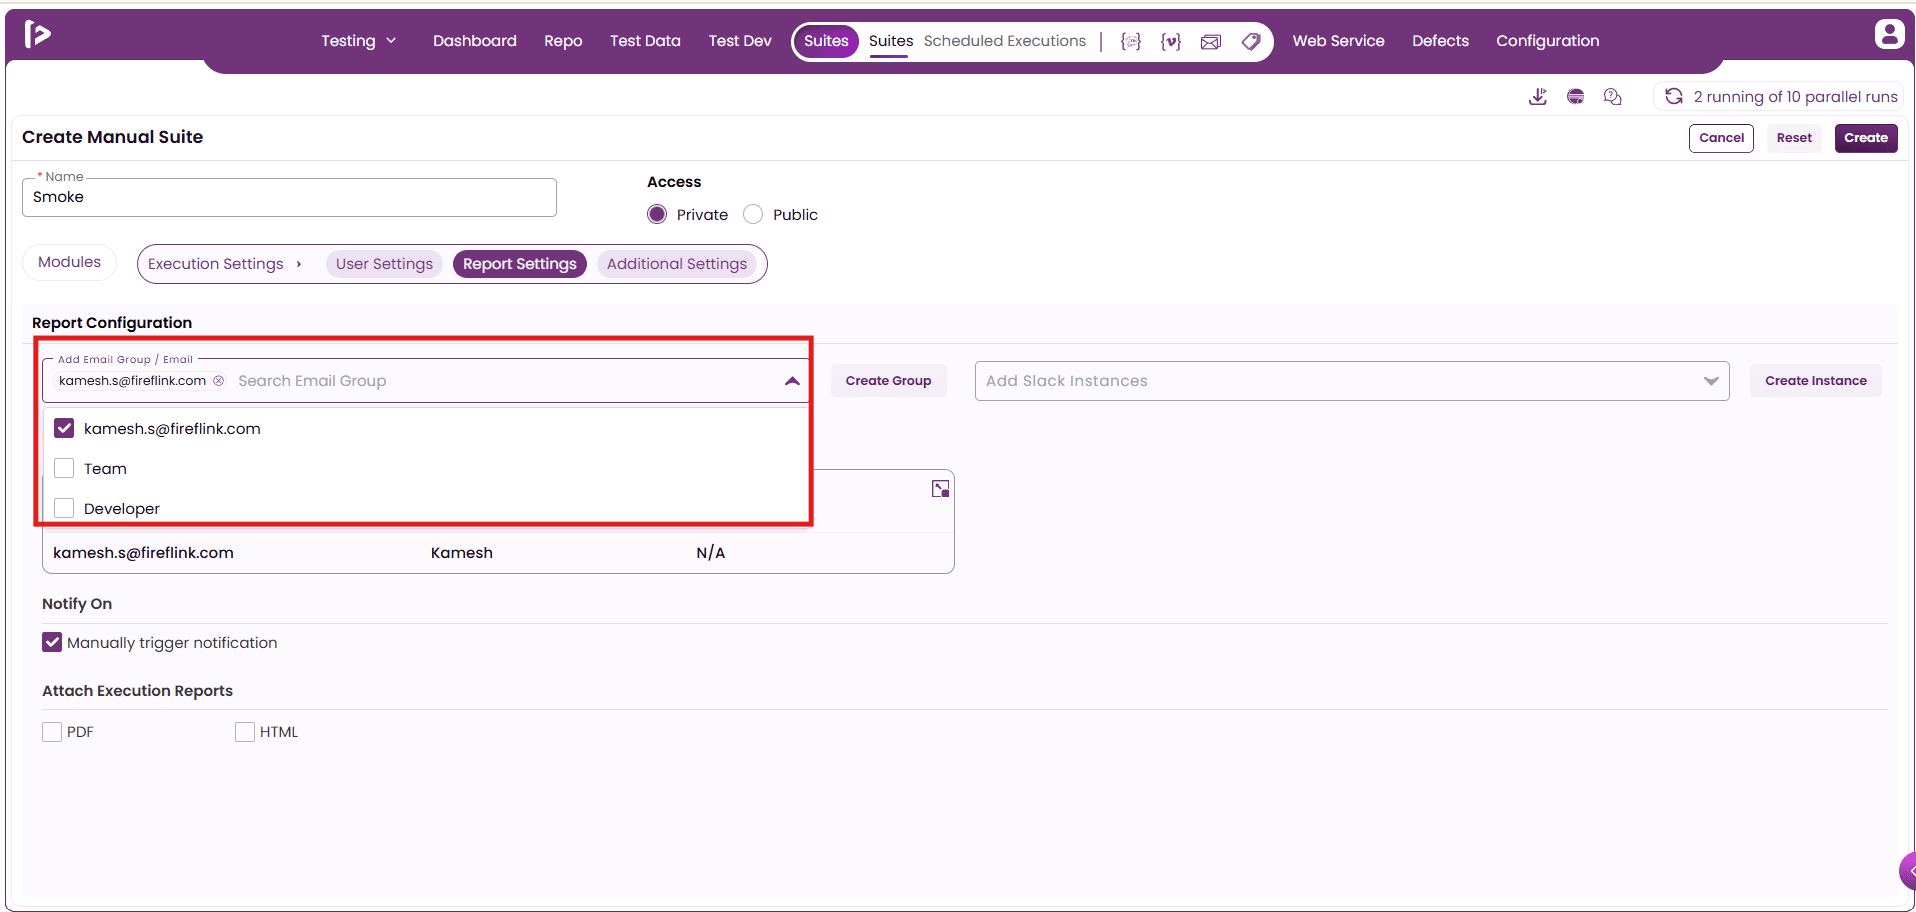
1. Email : Users can configure execution reports to be sent to specific email addresses or predefined email groups. Email IDs may be added individually, or users can create a group to streamline distribution. For detailed steps on creating an email group, refer to the Groups or Report Configuration documentation.
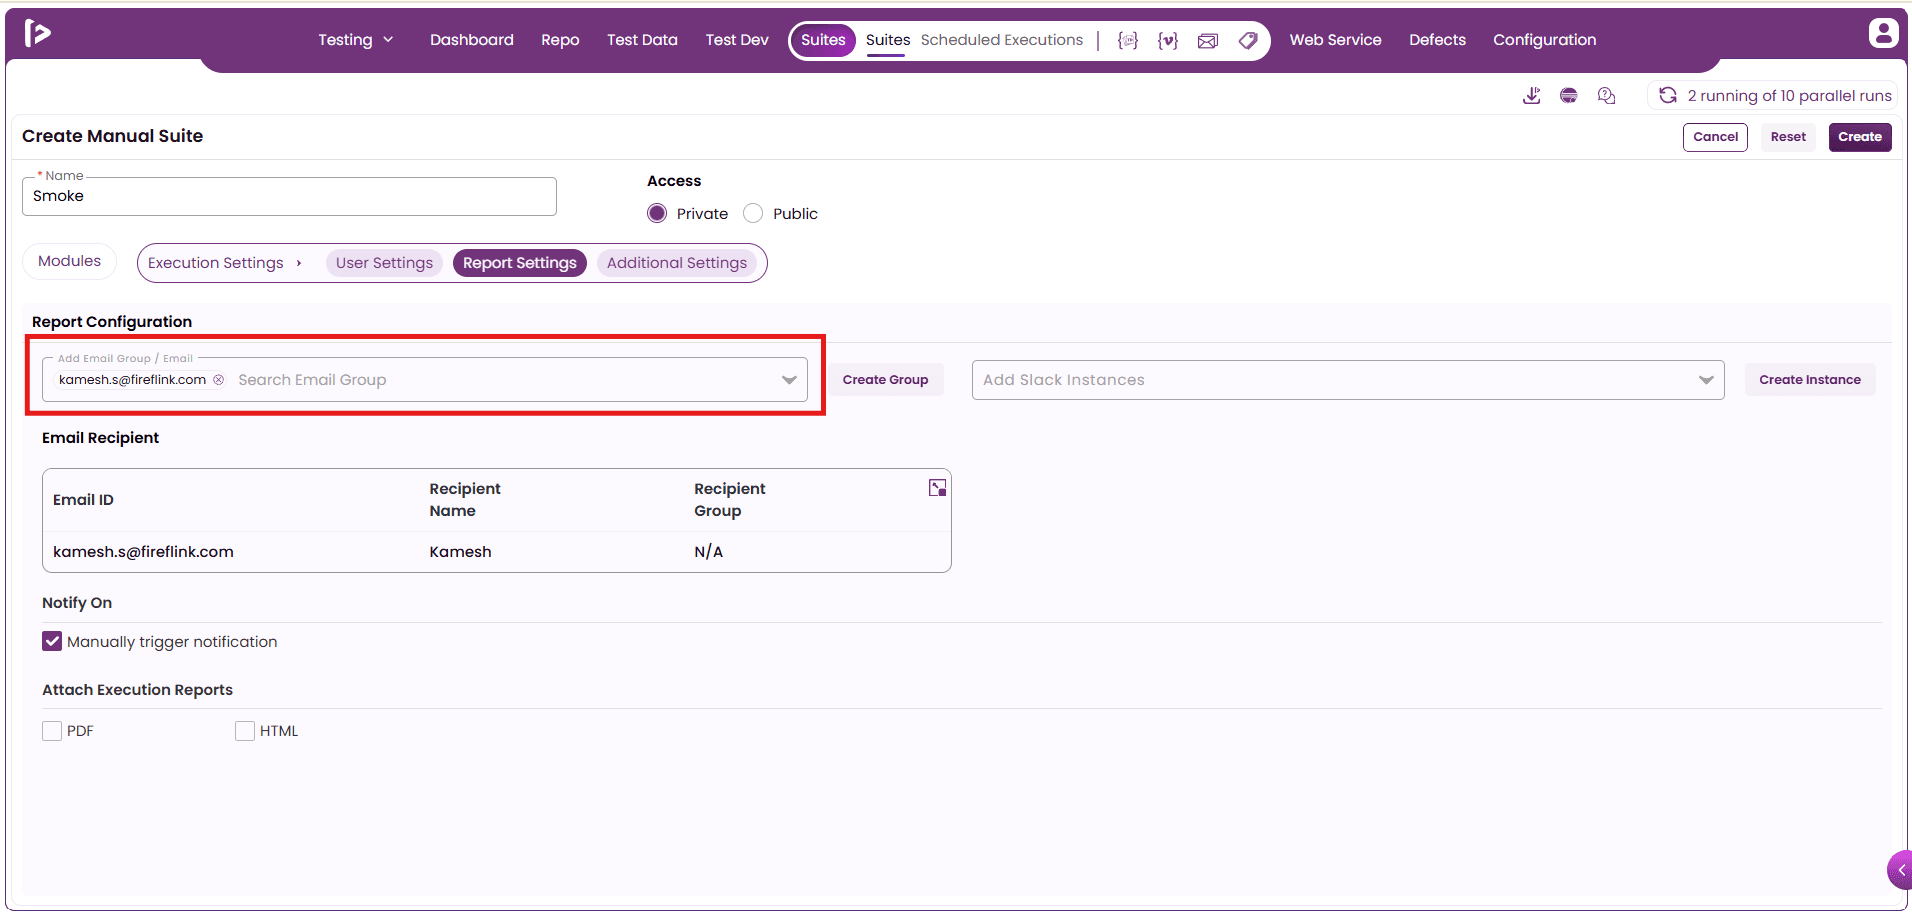
- Once a group is selected, the details of the email recipients will be displayed, and the execution reports will be sent to all email addresses within the selected group.
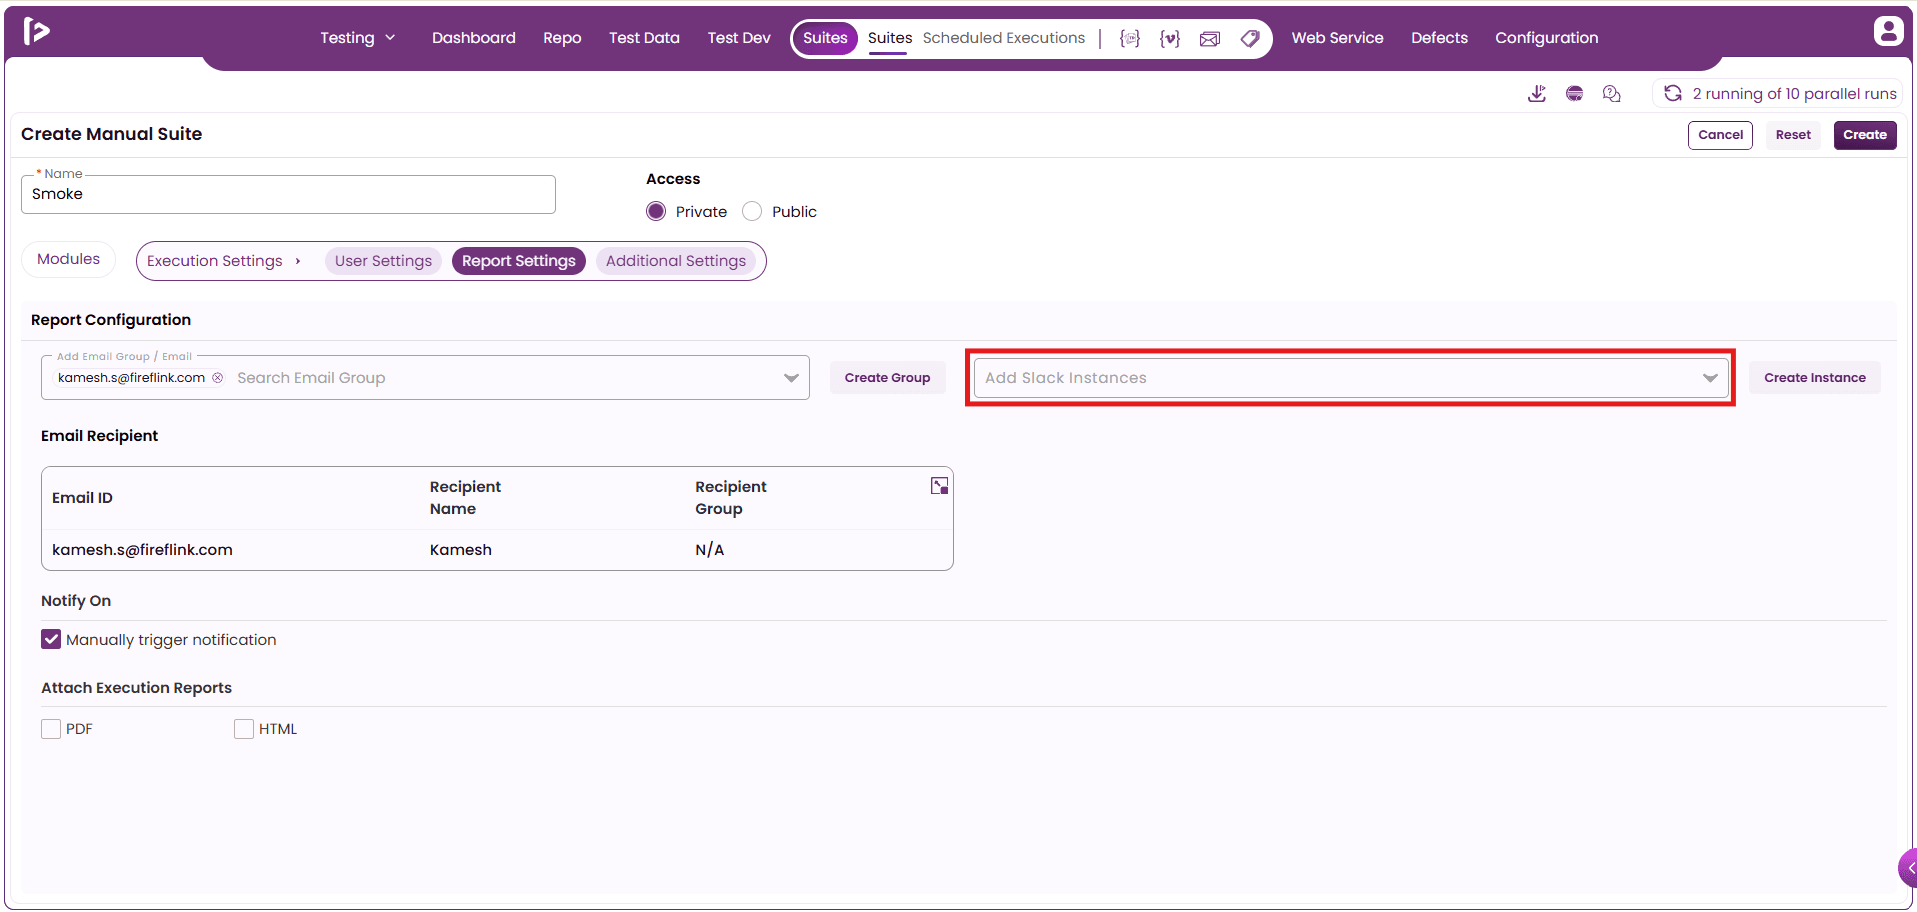
2. Slack Notifications : Users can also distribute reports to designated Slack channels. To enable this functionality, a Slack instance must be configured. If an instance has not yet been set up, click on "Create Instance" to begin the integration process. For detailed instructions, refer to the Slack Integration documentation.
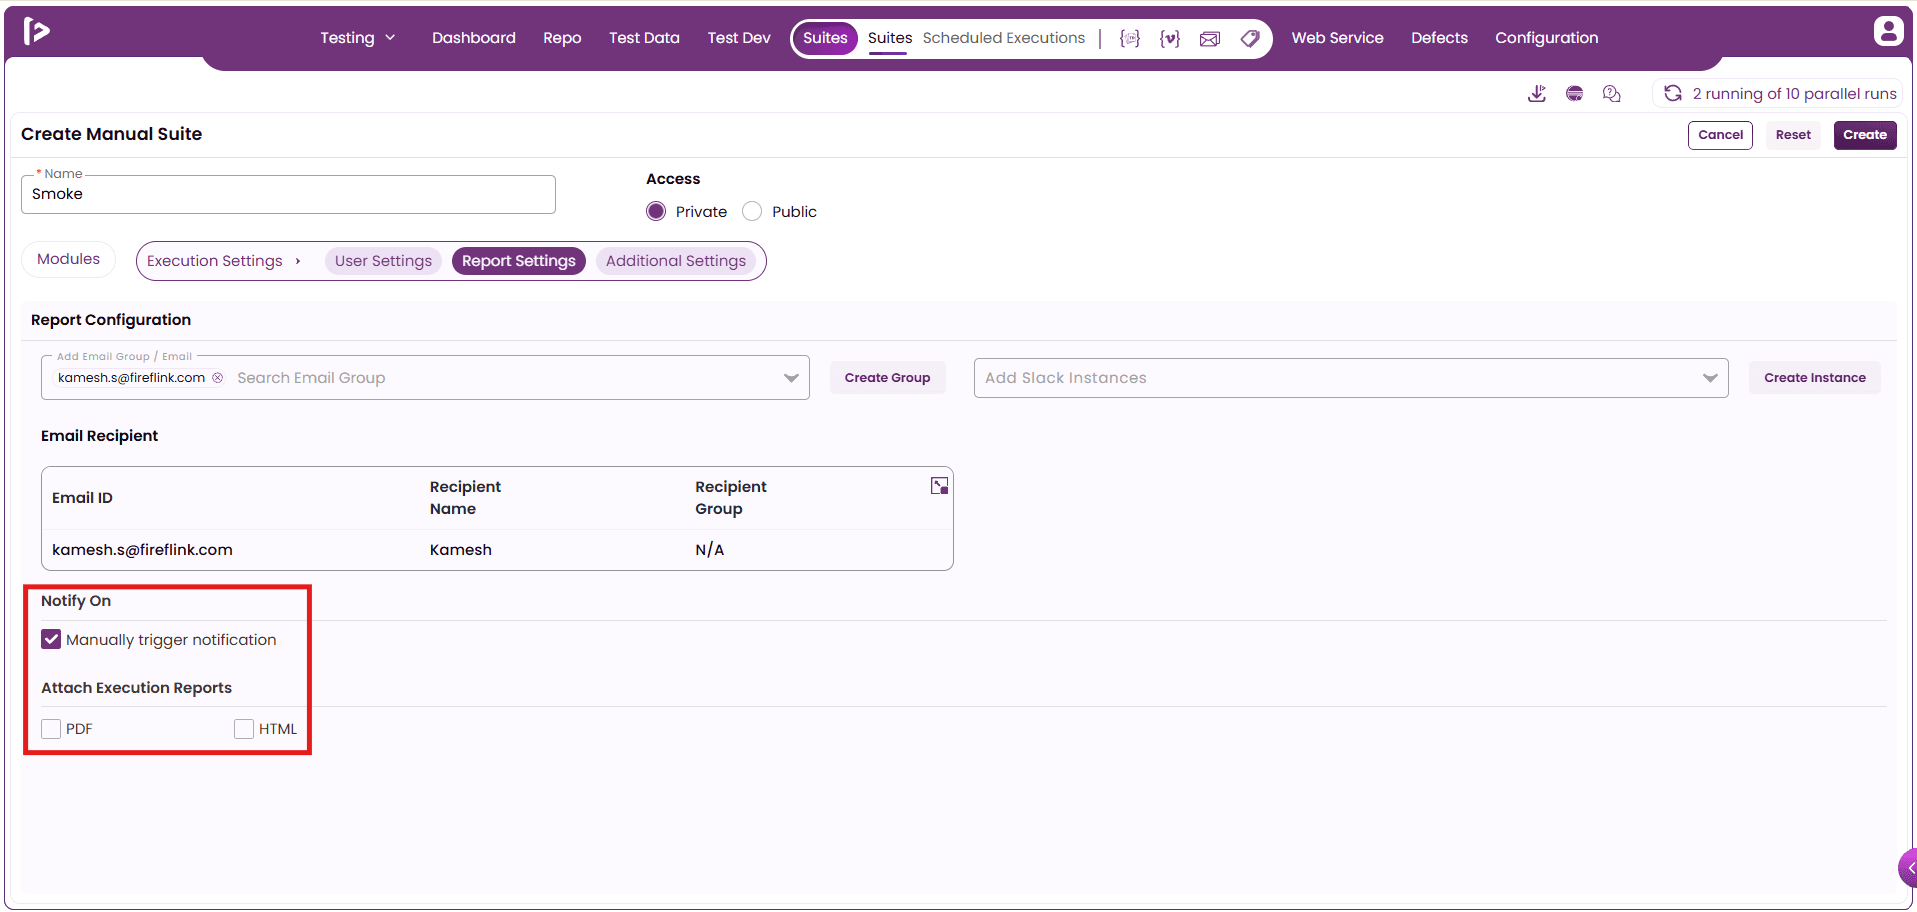
Notify On: Within the "Notify On" section, a checkbox labeled "Manually Trigger Notification" is available. When selected, an additional option "Attach Execution Reports" is displayed.
- Under this option, users can choose the desired report format by selecting one or both of the available checkboxes: PDF and HTML.
- Once the user has completed the report settings, proceed by clicking on "Additional Settings."
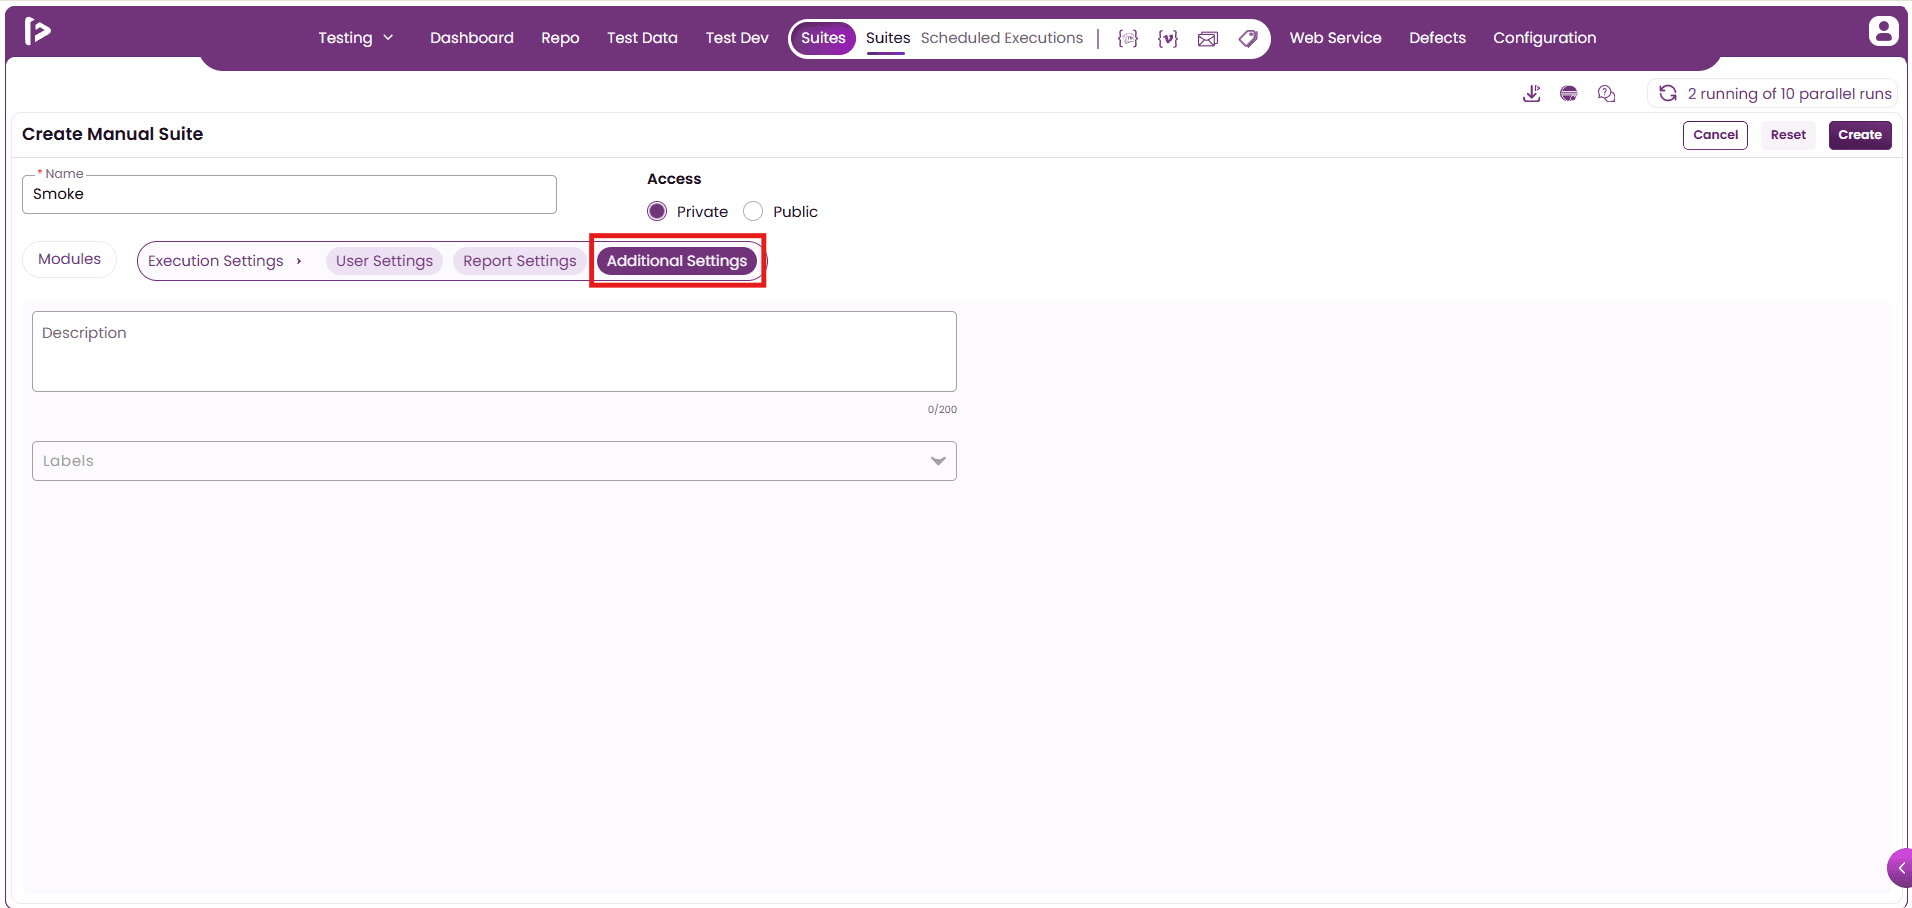
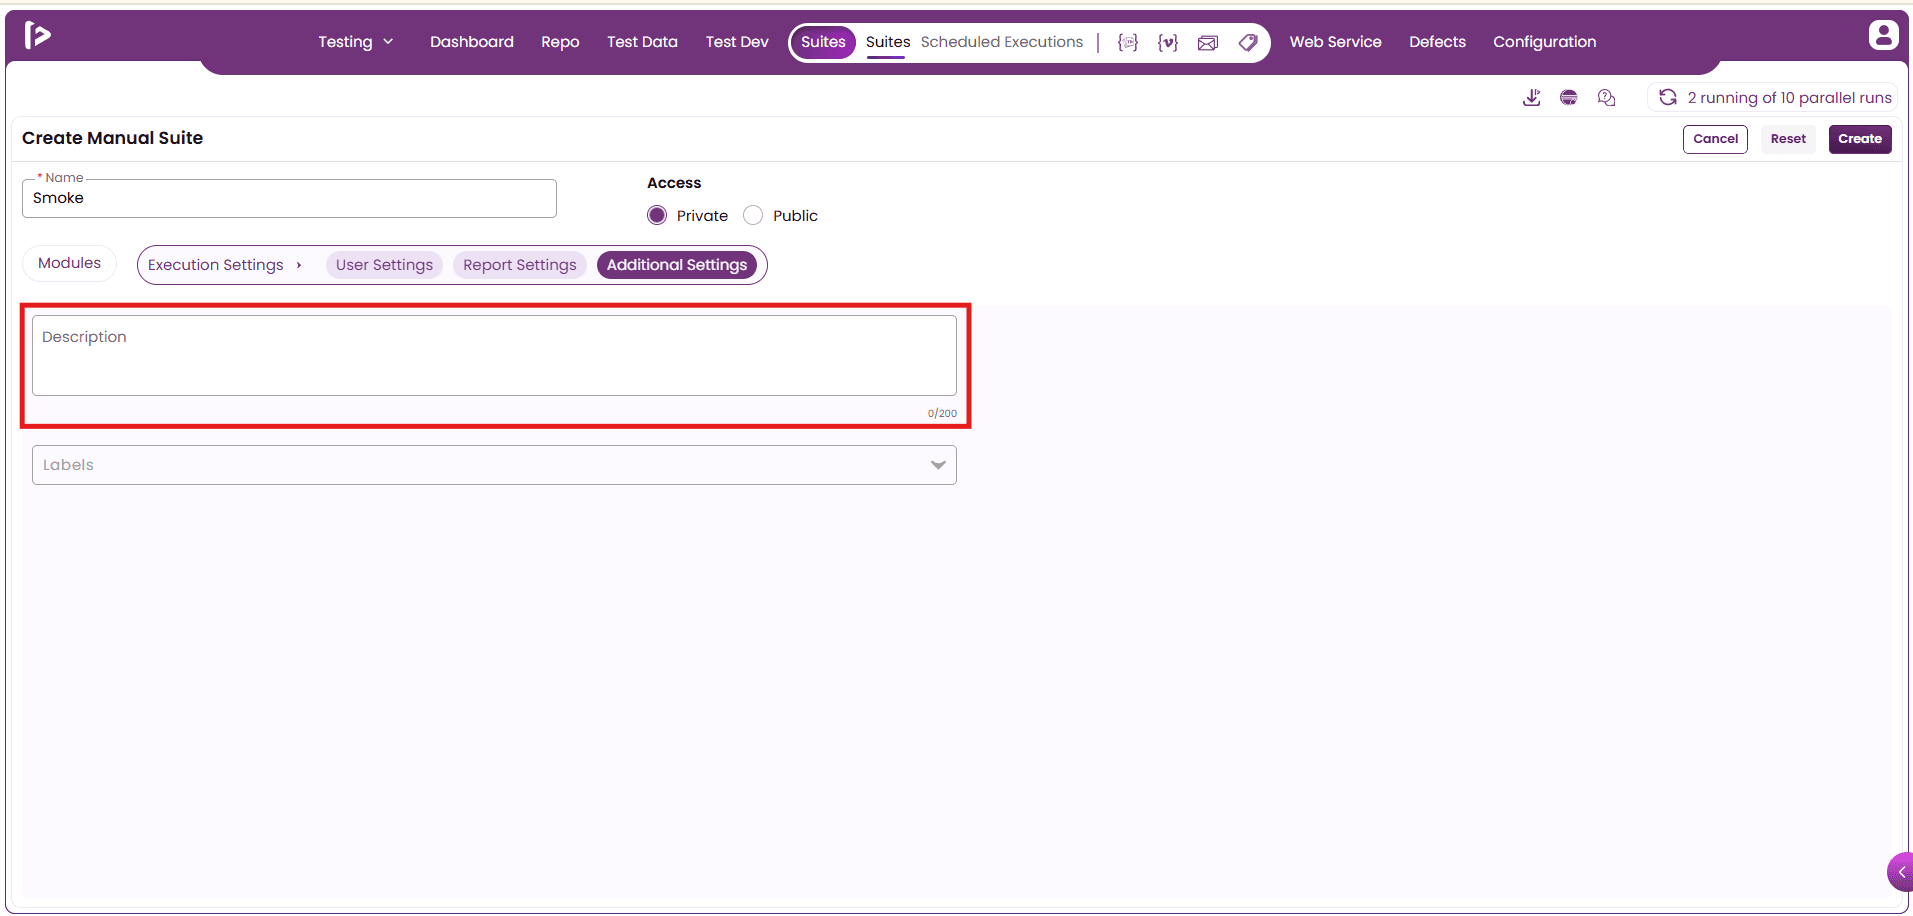
- Description: In the Additional Settings section, users have the option to enter a description. This field can be used to provide any relevant information or context about the suite.
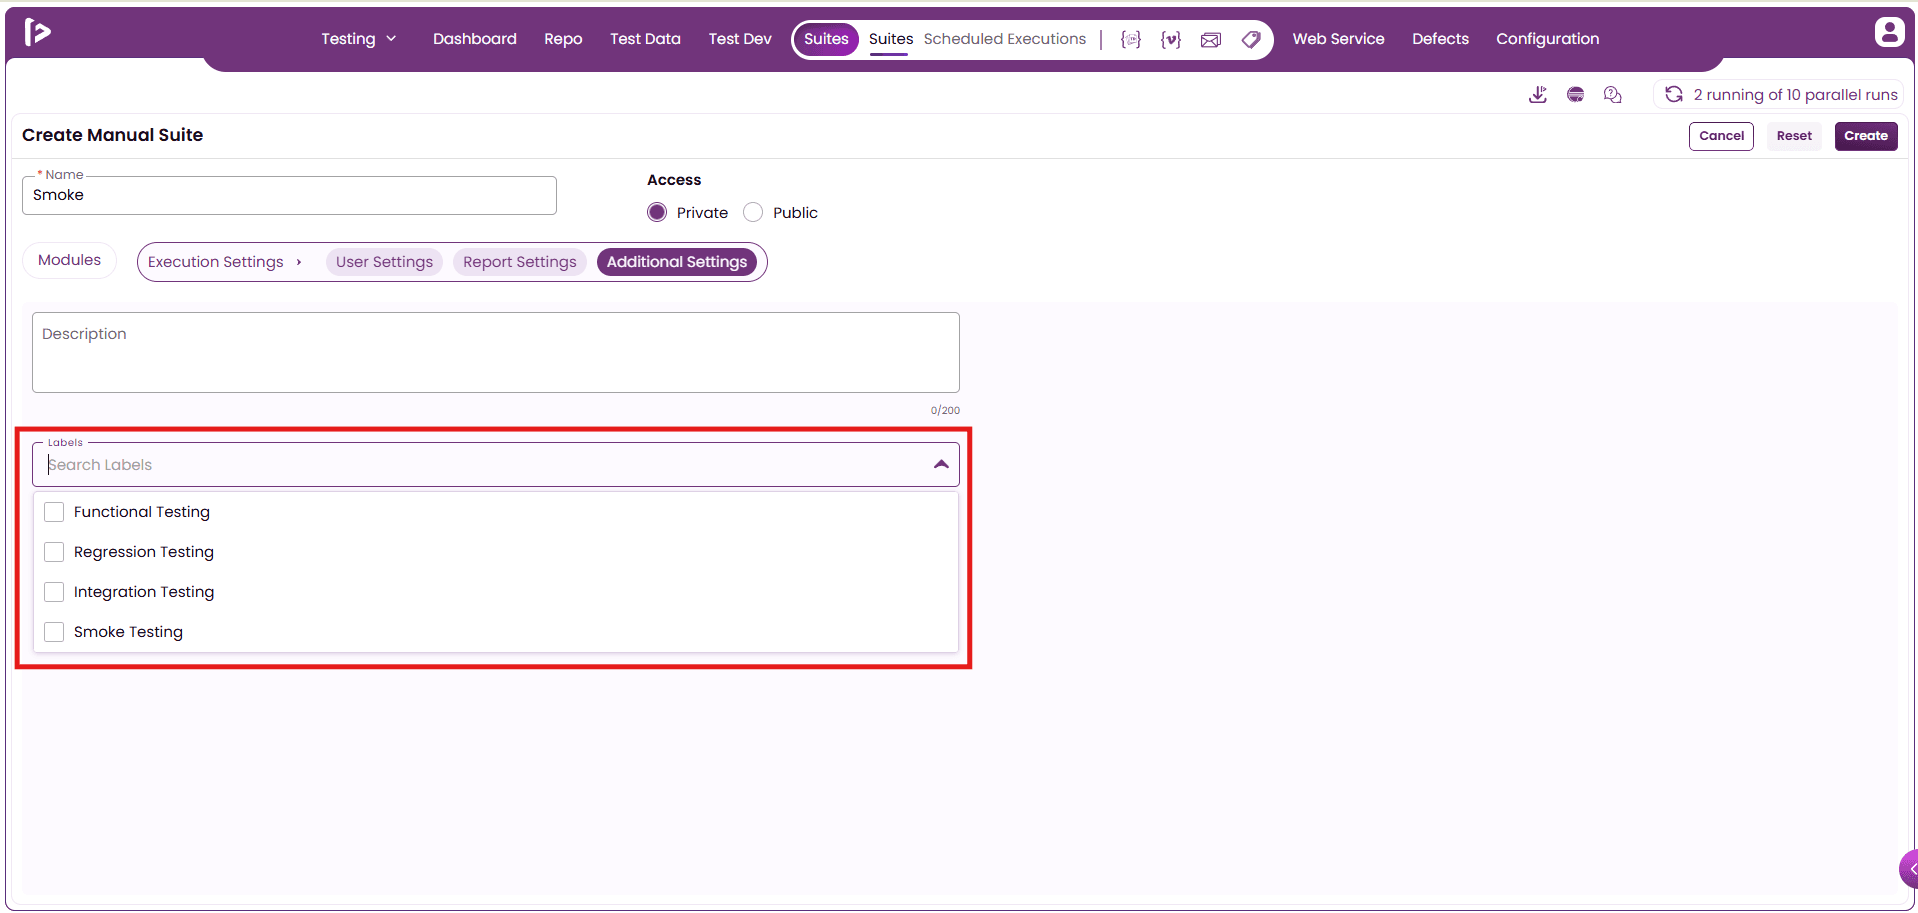
- Below that, the user will find the Labels section, which includes default options such as Smoke Testing, Integration Testing, Functional Testing, and Regression Testing each provided with a corresponding checkbox for selection.
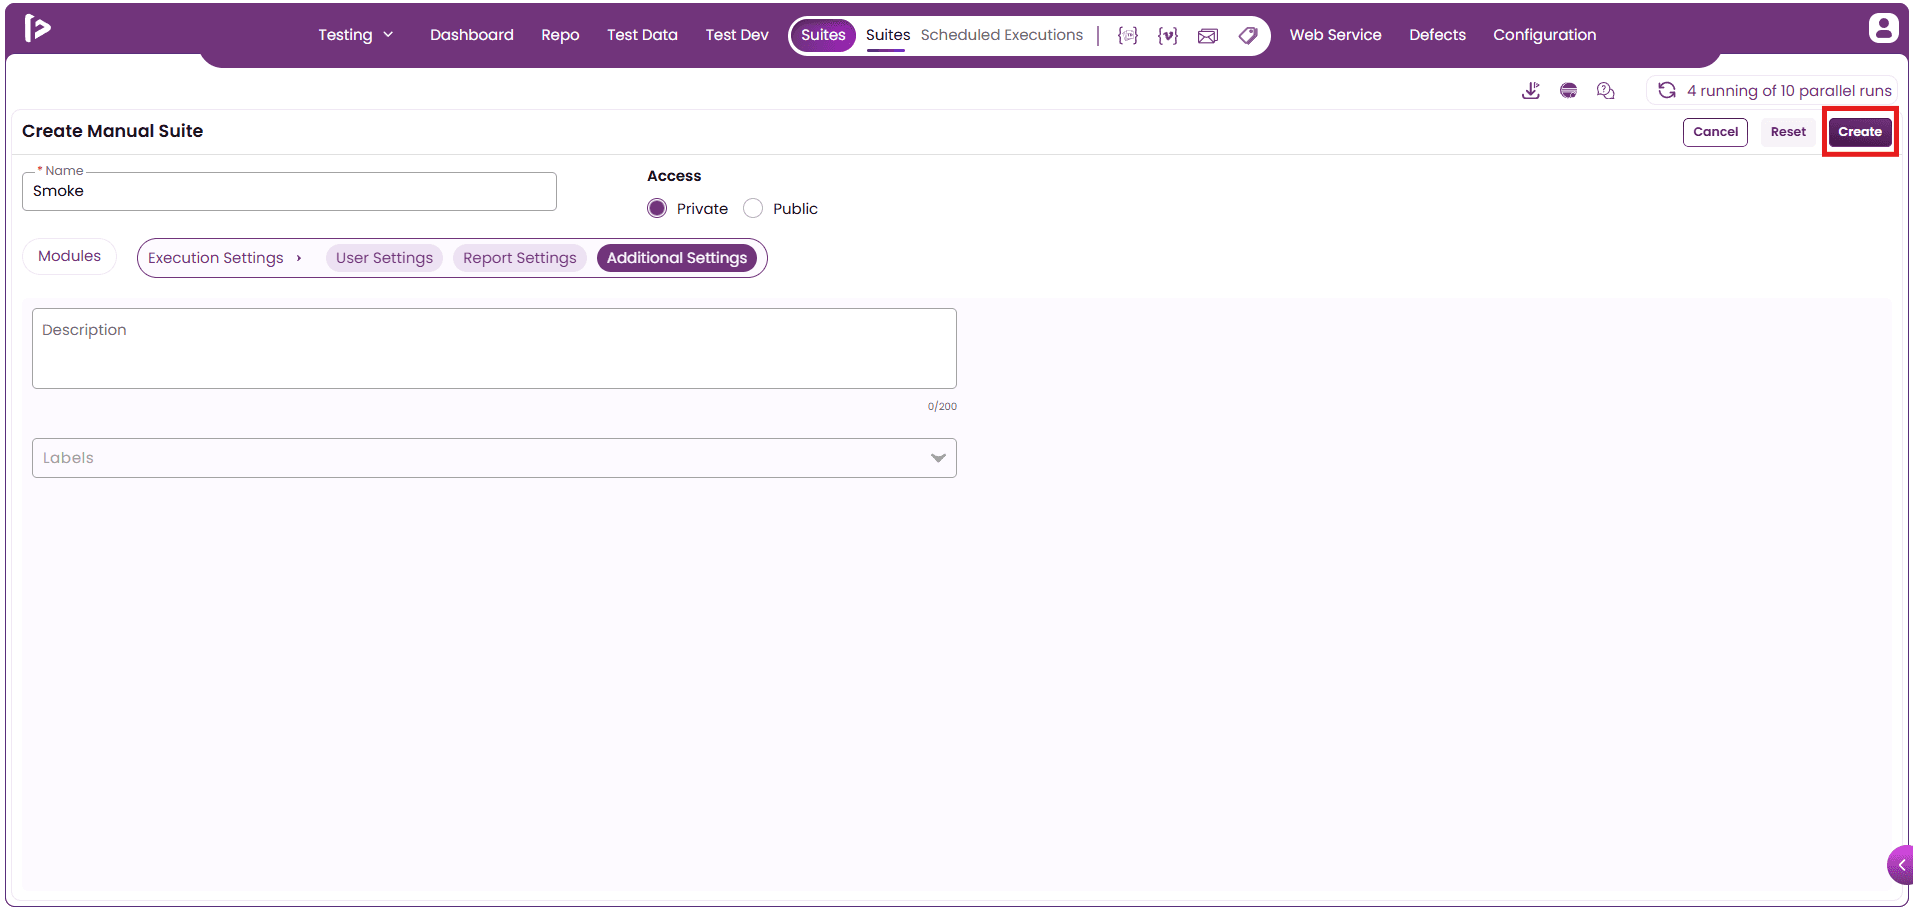
- Once all mandatory information for the suite has been entered, click on the "Create" button to complete the process.
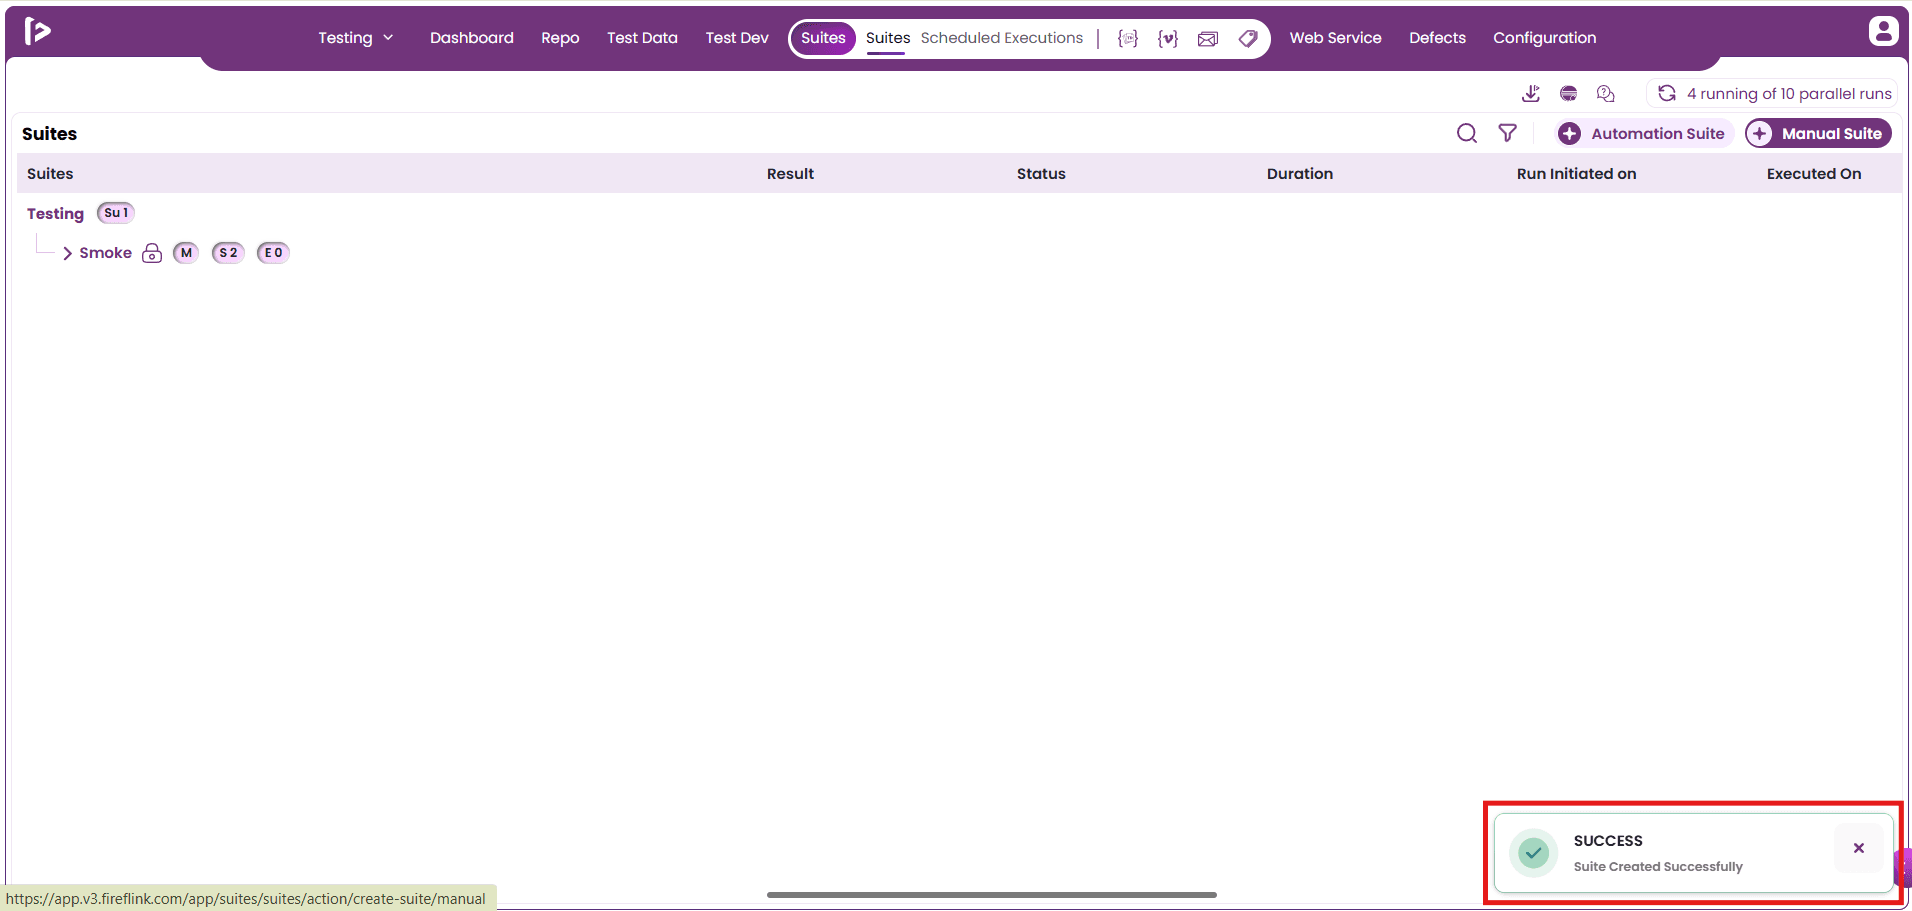
- The “suite created successfully” popup will be displayed as shown below:
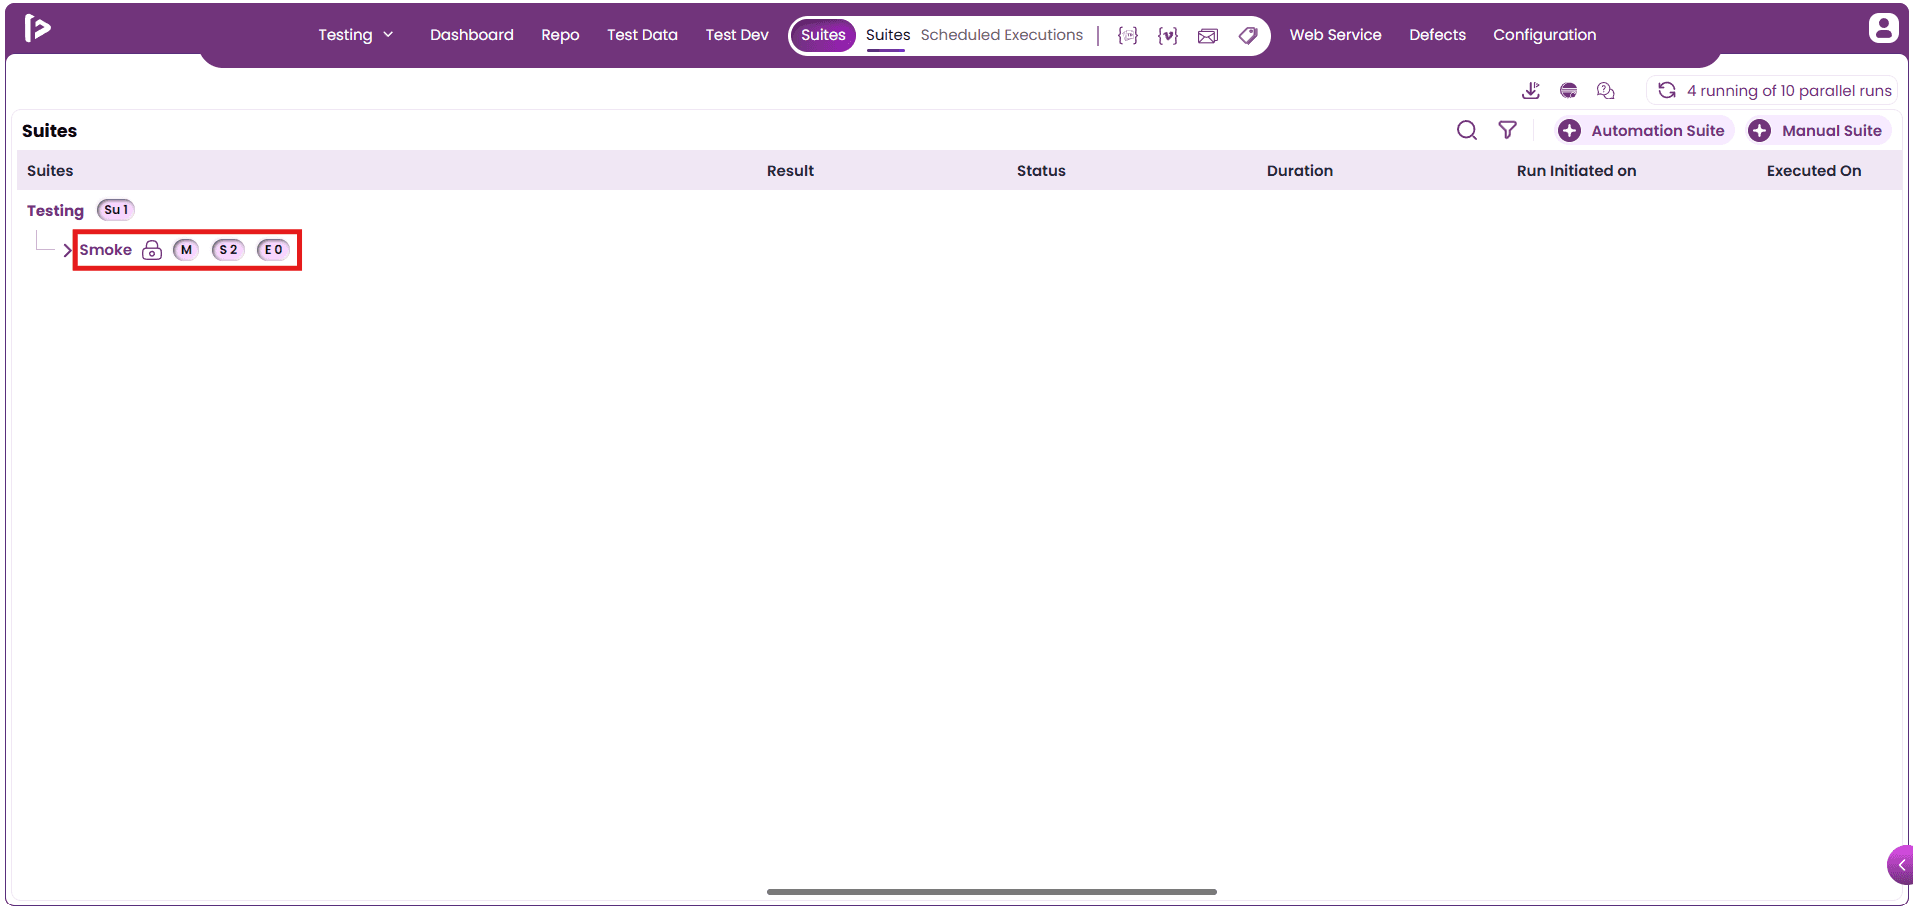
- Upon creation, the Manual Suite will appear on the Suites page, as shown in the example below.
Columns under suite
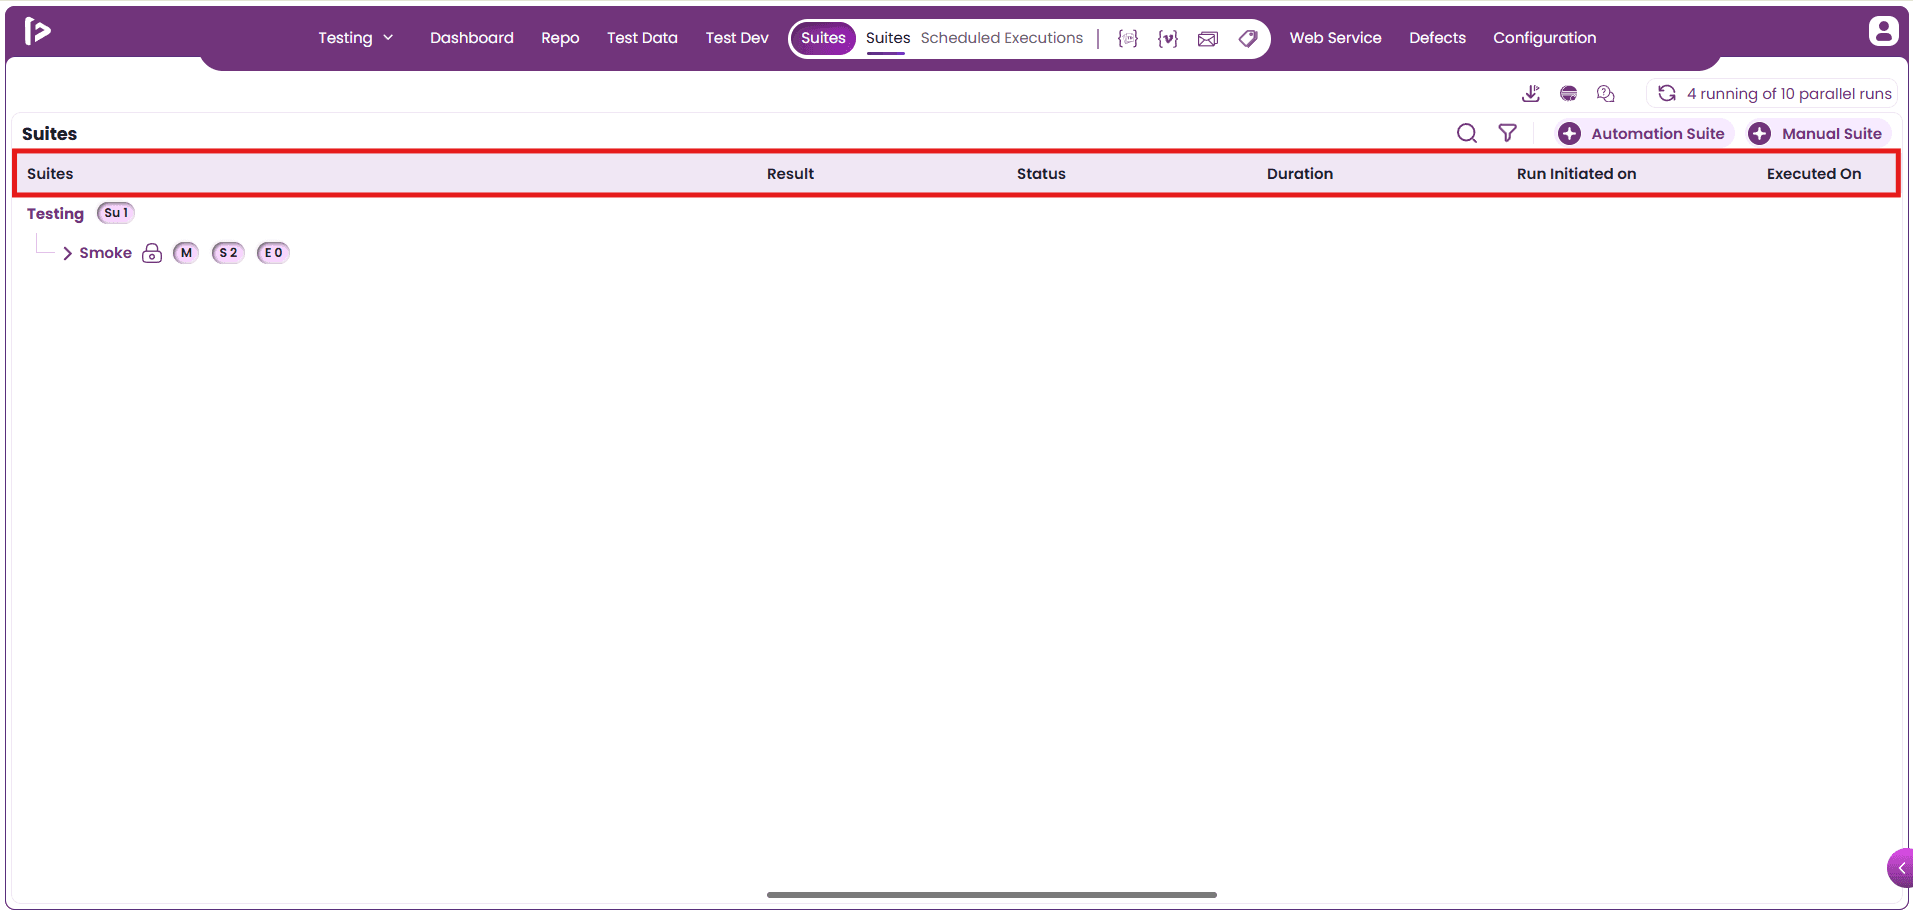
- Suites: Displays the name of the suite that has been created.
- Result: Shows the overall script execution outcome in the form of a statistical visualization.
- Status: Indicates the final execution status of the suite e.g, Passed or Failed upon completion.
- Duration: Reflects the total time taken for the execution of the suite.
- Run Initiated On: Displays the exact time when the suite execution began.
- Executed On: Shows the timestamp indicating when the execution was completed.
To view the hidden columns, move the page using the horizontal scroll bar.
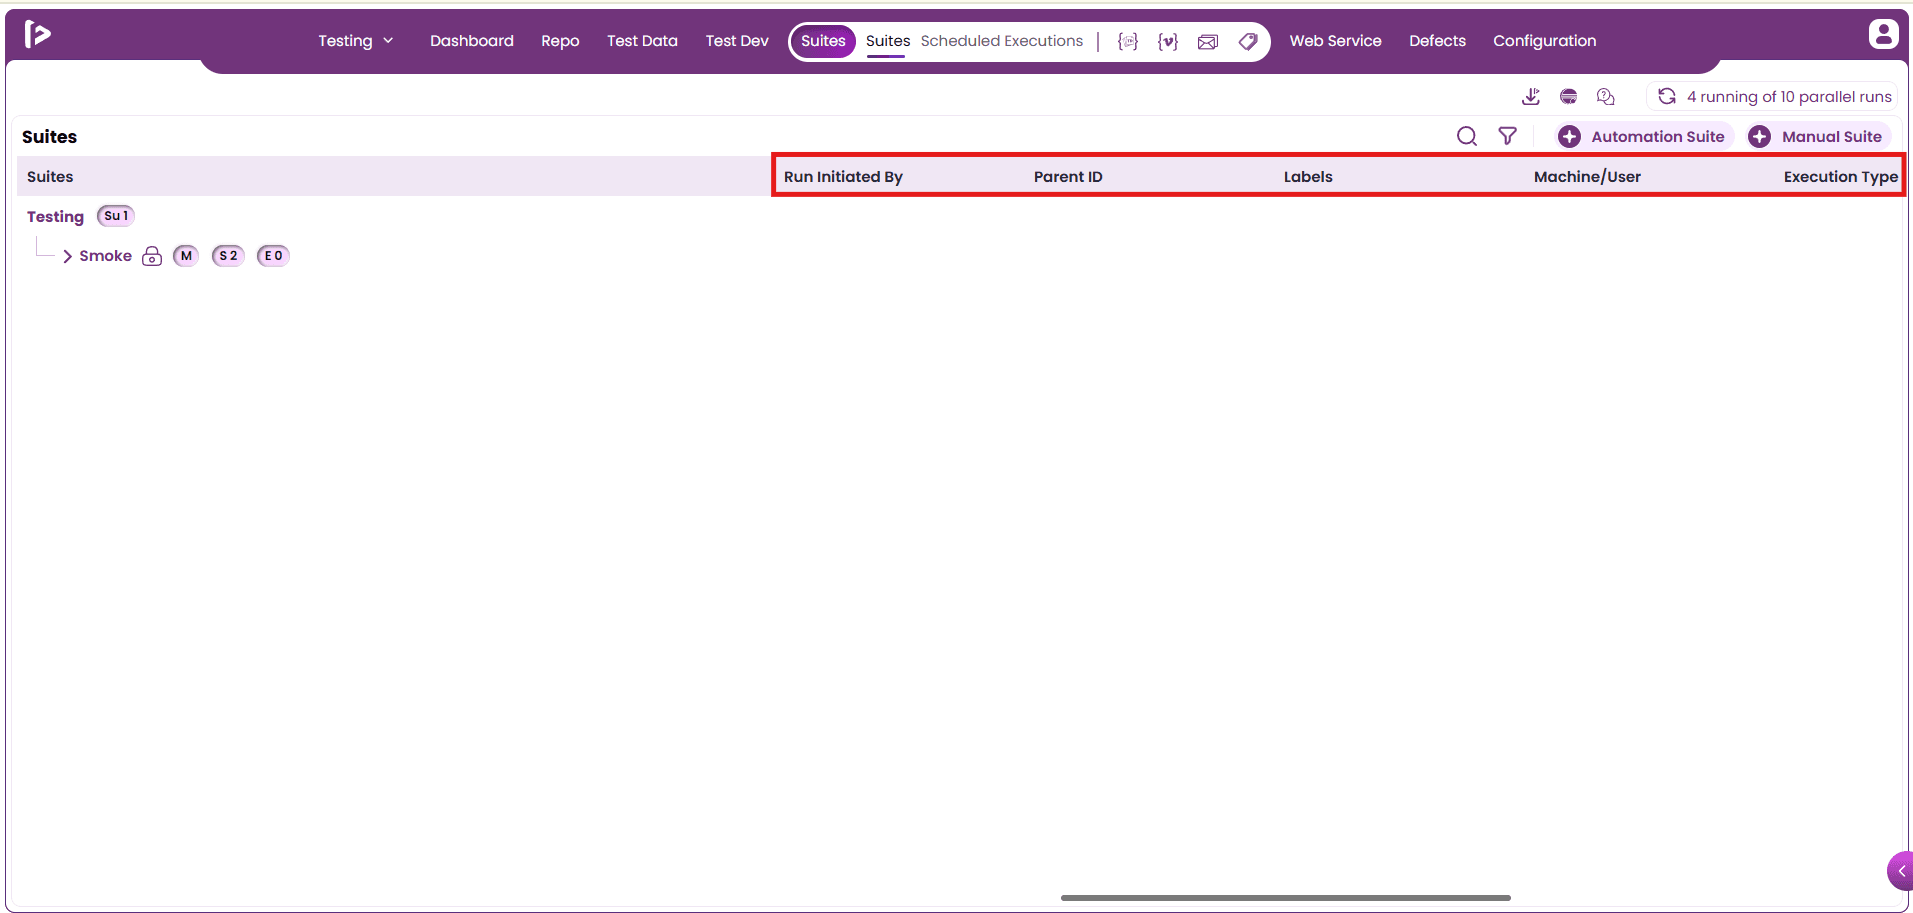
- Run Initiated By : It displays the user who has initiated the suite execution.
- Parent ID: When a suite is executed multiple times, the Parent ID represents the identifier of the initial execution instance.
- Labels: Displays the label assigned to the suite during its creation.
- Machine User: Shows the details of the machine and user involved in executing the suite.
- Execution Type: Indicates the type of execution selected at the time the suite was initiated.
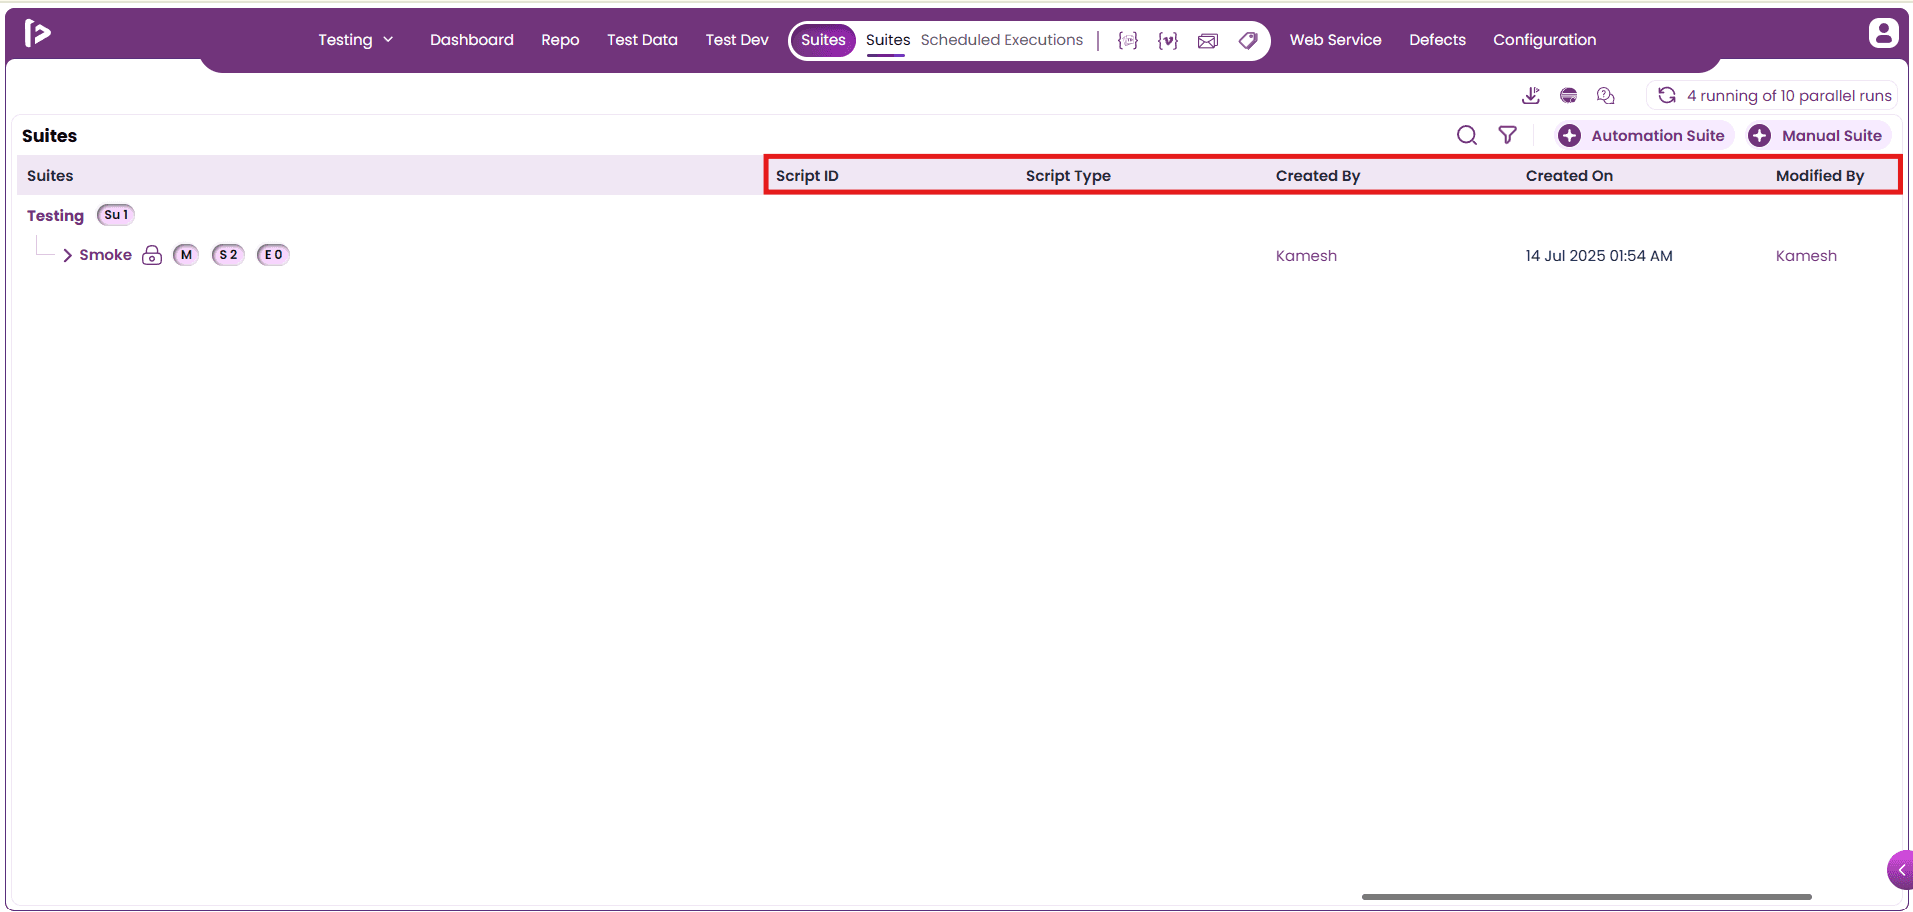
- Script ID : This section displays the script IDs belonging to the suite.
- Script Type : This displays the type of each script in the suite.
- Created by : It displays the user who has created the suite.
- Created on : It displays the creation time of the suite by user.
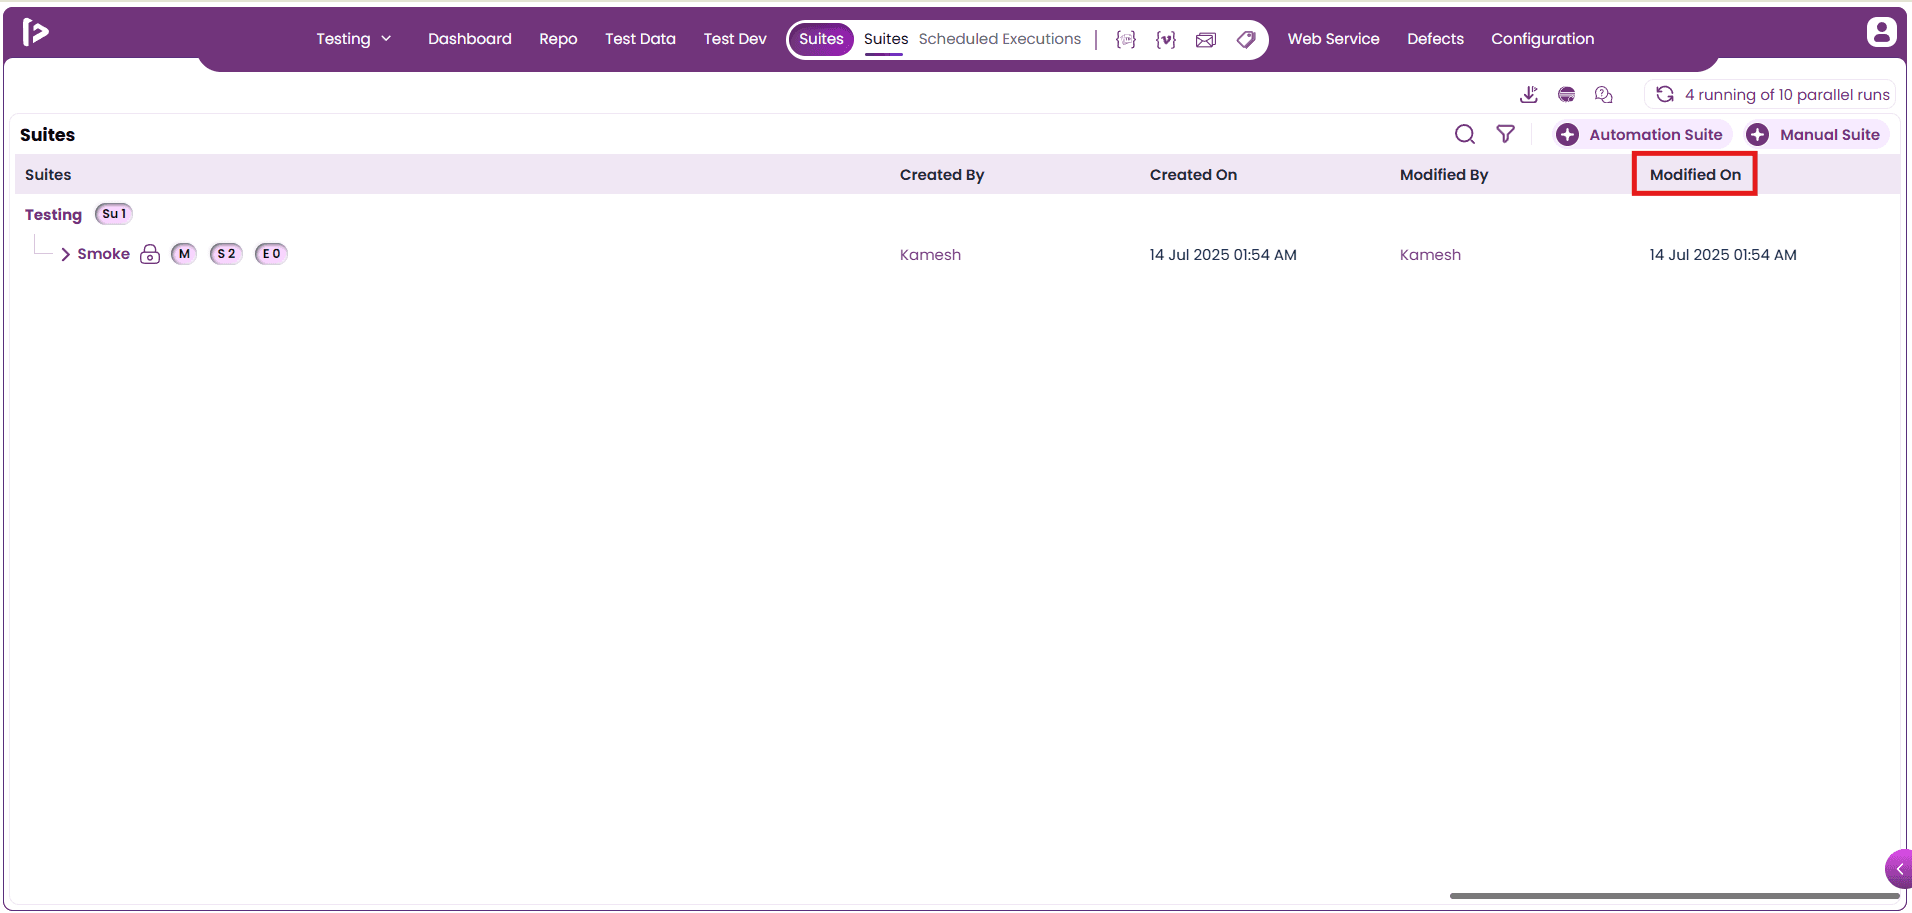
- Modified By : It displays the user who has modified the suite.
- Modified On : It displays the time when the modification of the suite is done.
Suite Action Features
Upon hovering the mouse cursor on the created suite, actions will be displayed. They are as follows:
- Edit
- Run
- More
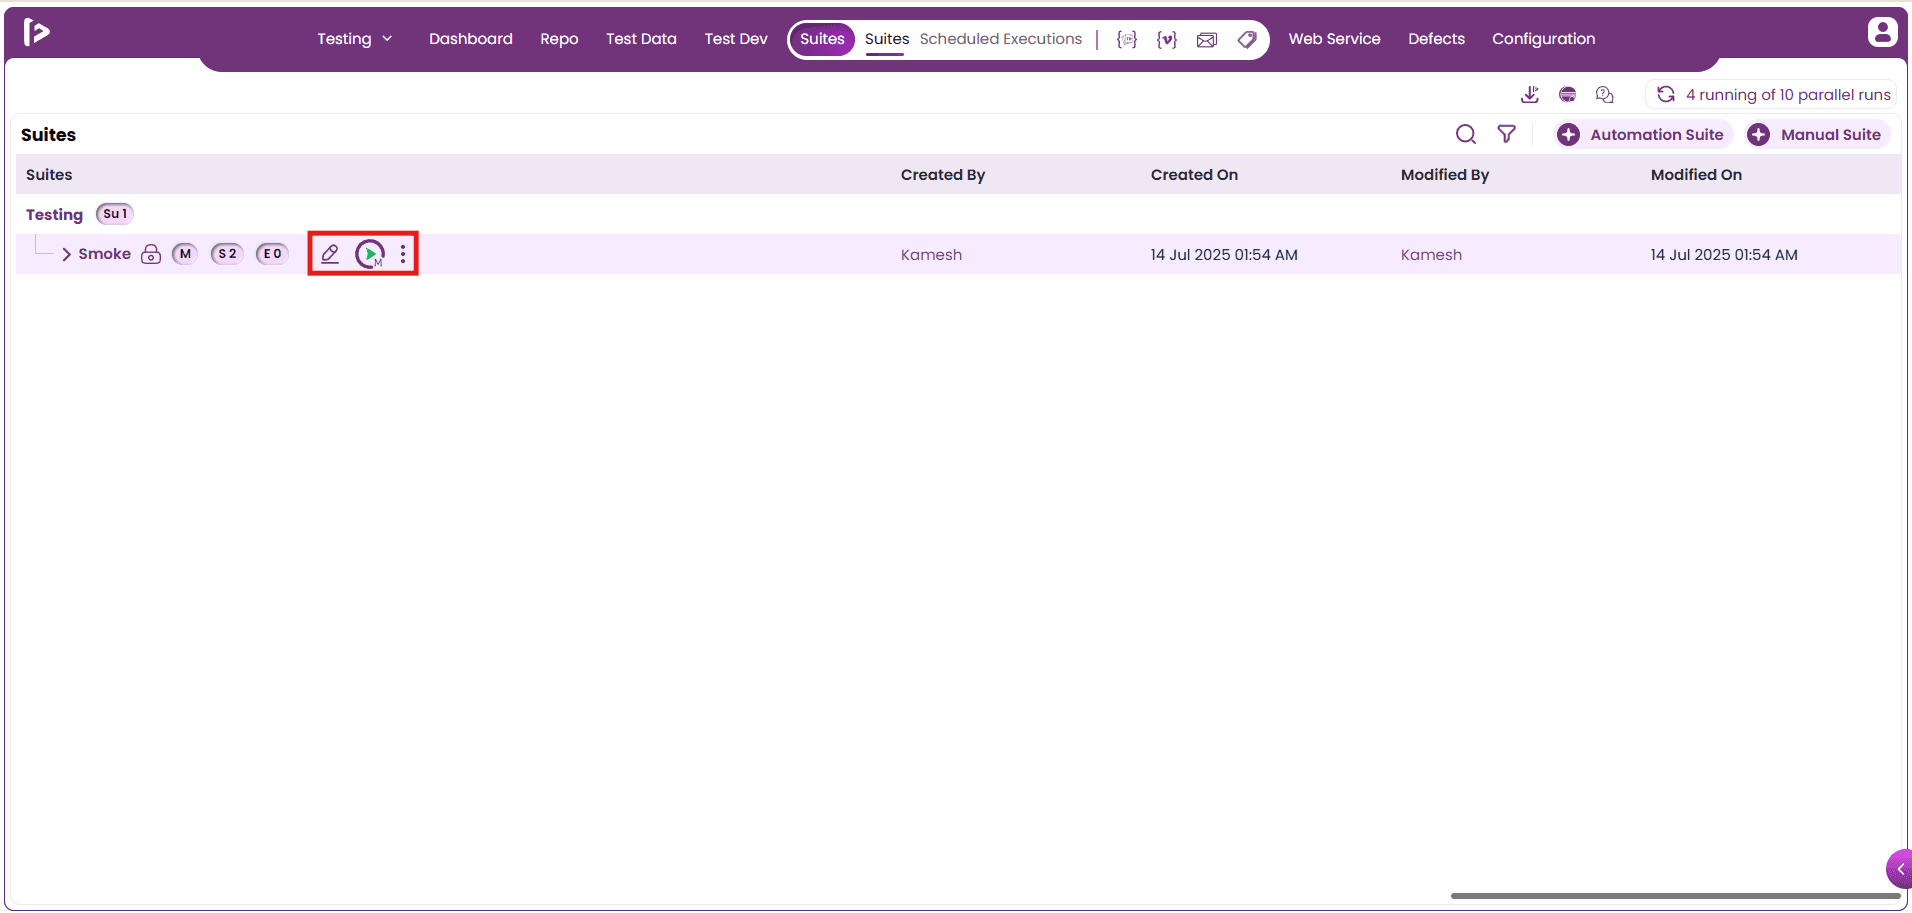
Edit: To modify an existing suite, please follow the steps outlined below.
- Click the edit icon corresponding to the suite that you wish to modify.
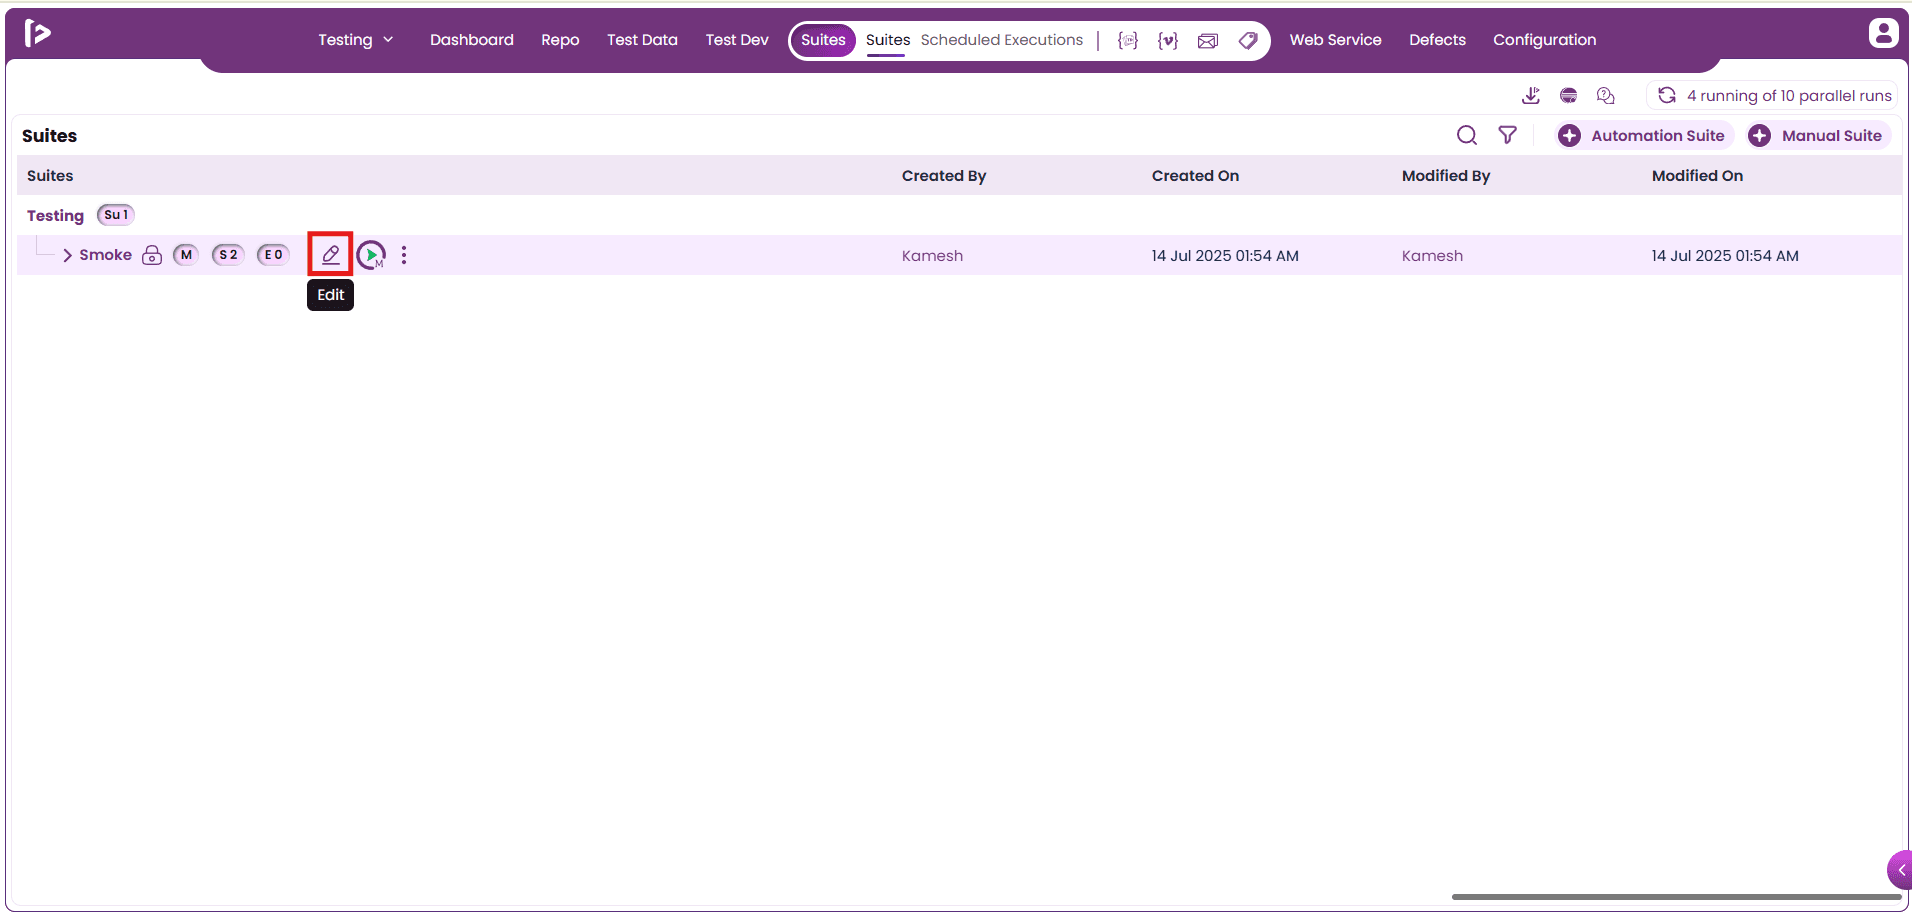
- Upon clicking the edit icon, the Edit Manual Suite page will be displayed. This page provides the user with a comprehensive set of options to modify various attributes of the suite.
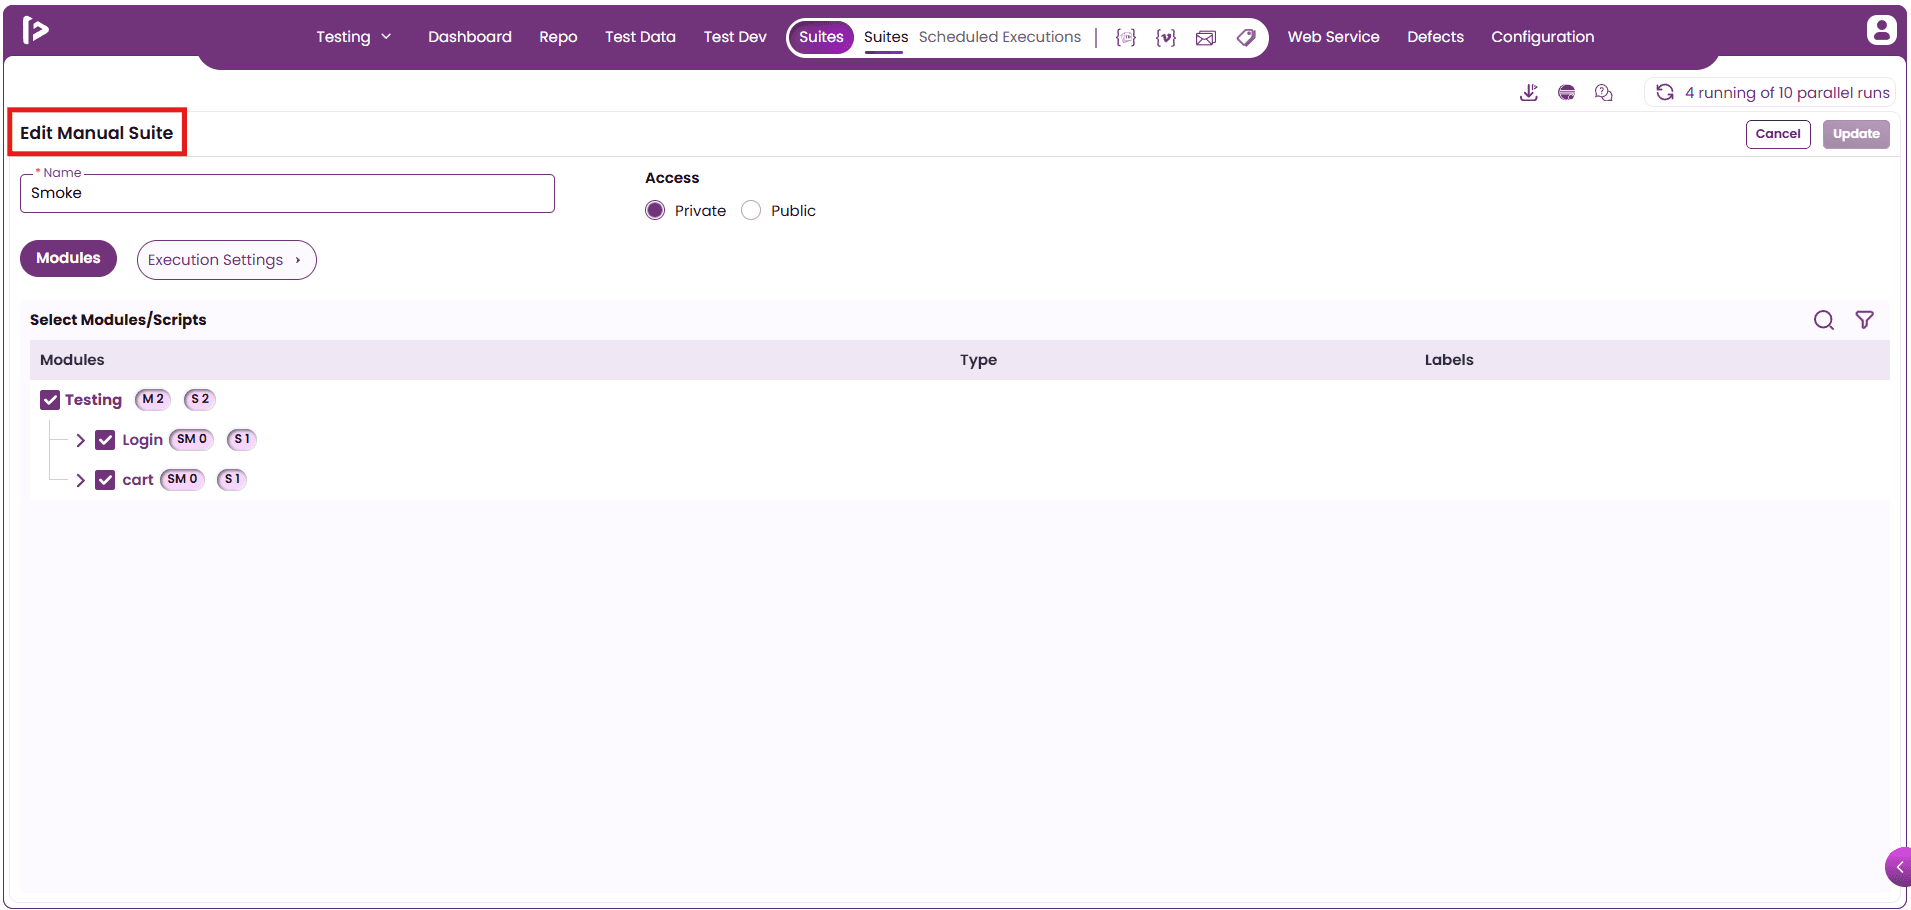
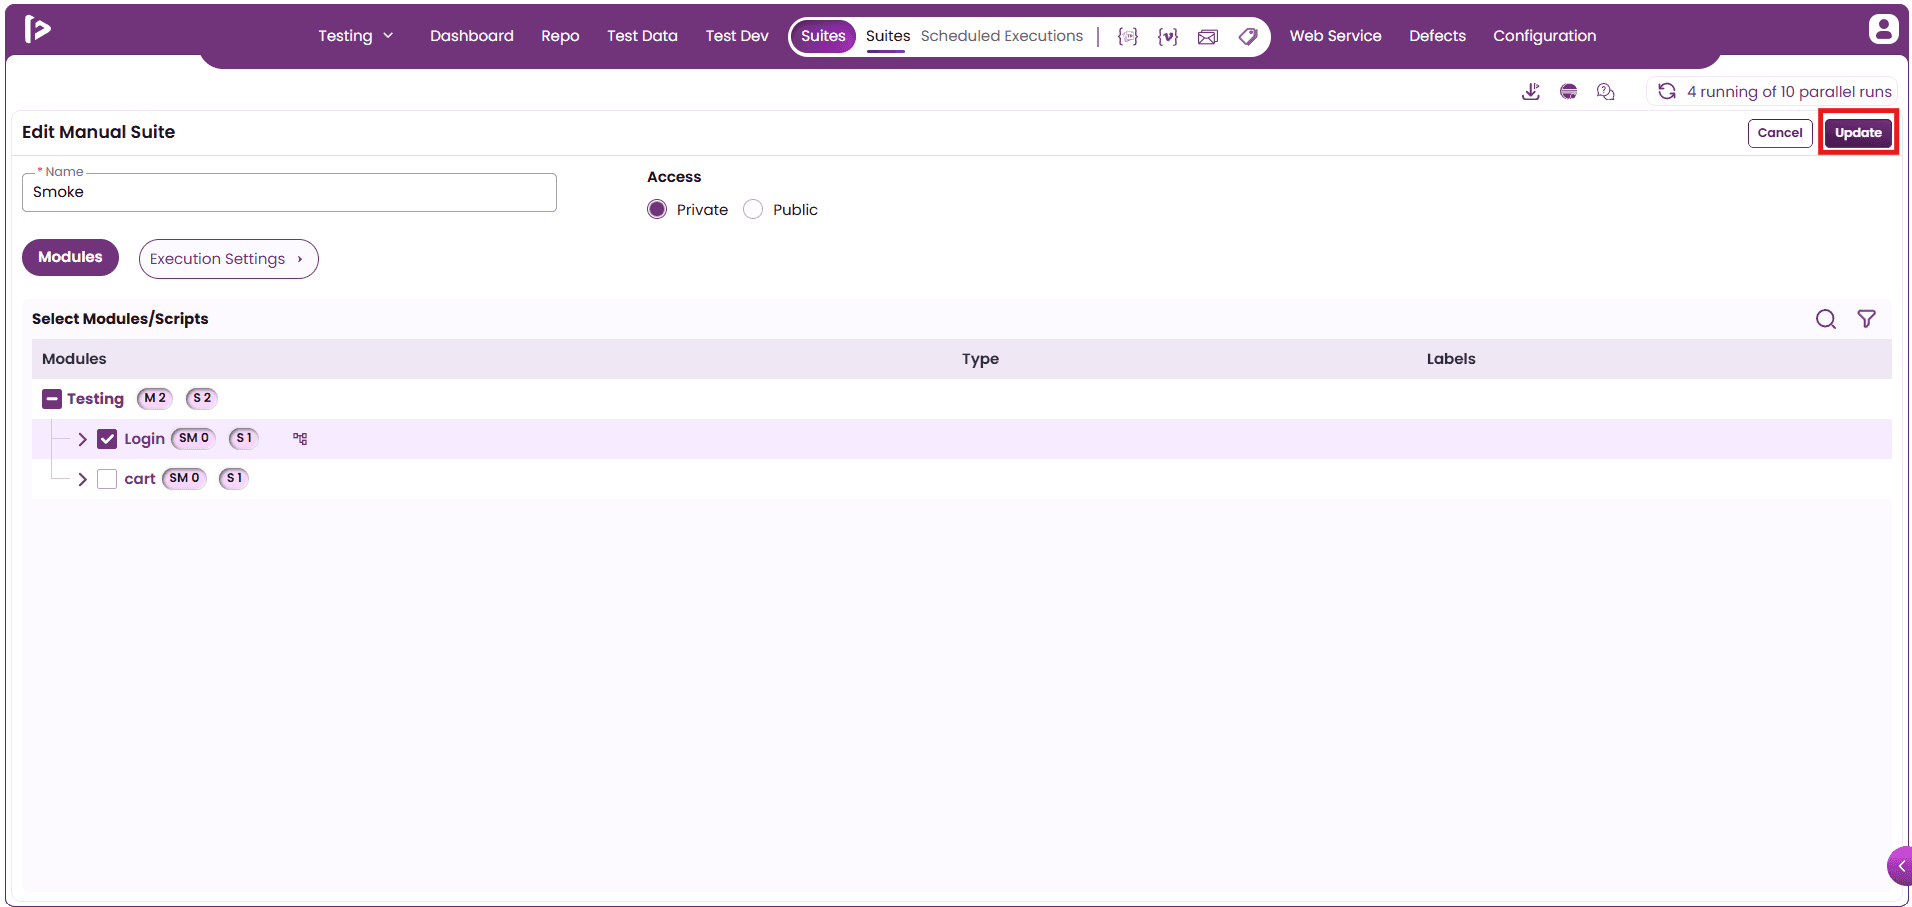
- On this page, fields such as Suite Name, Access Level, Modules, and Execution Settings can be edited. Make the necessary modifications and click on the 'Update' button to apply the changes to the suite.
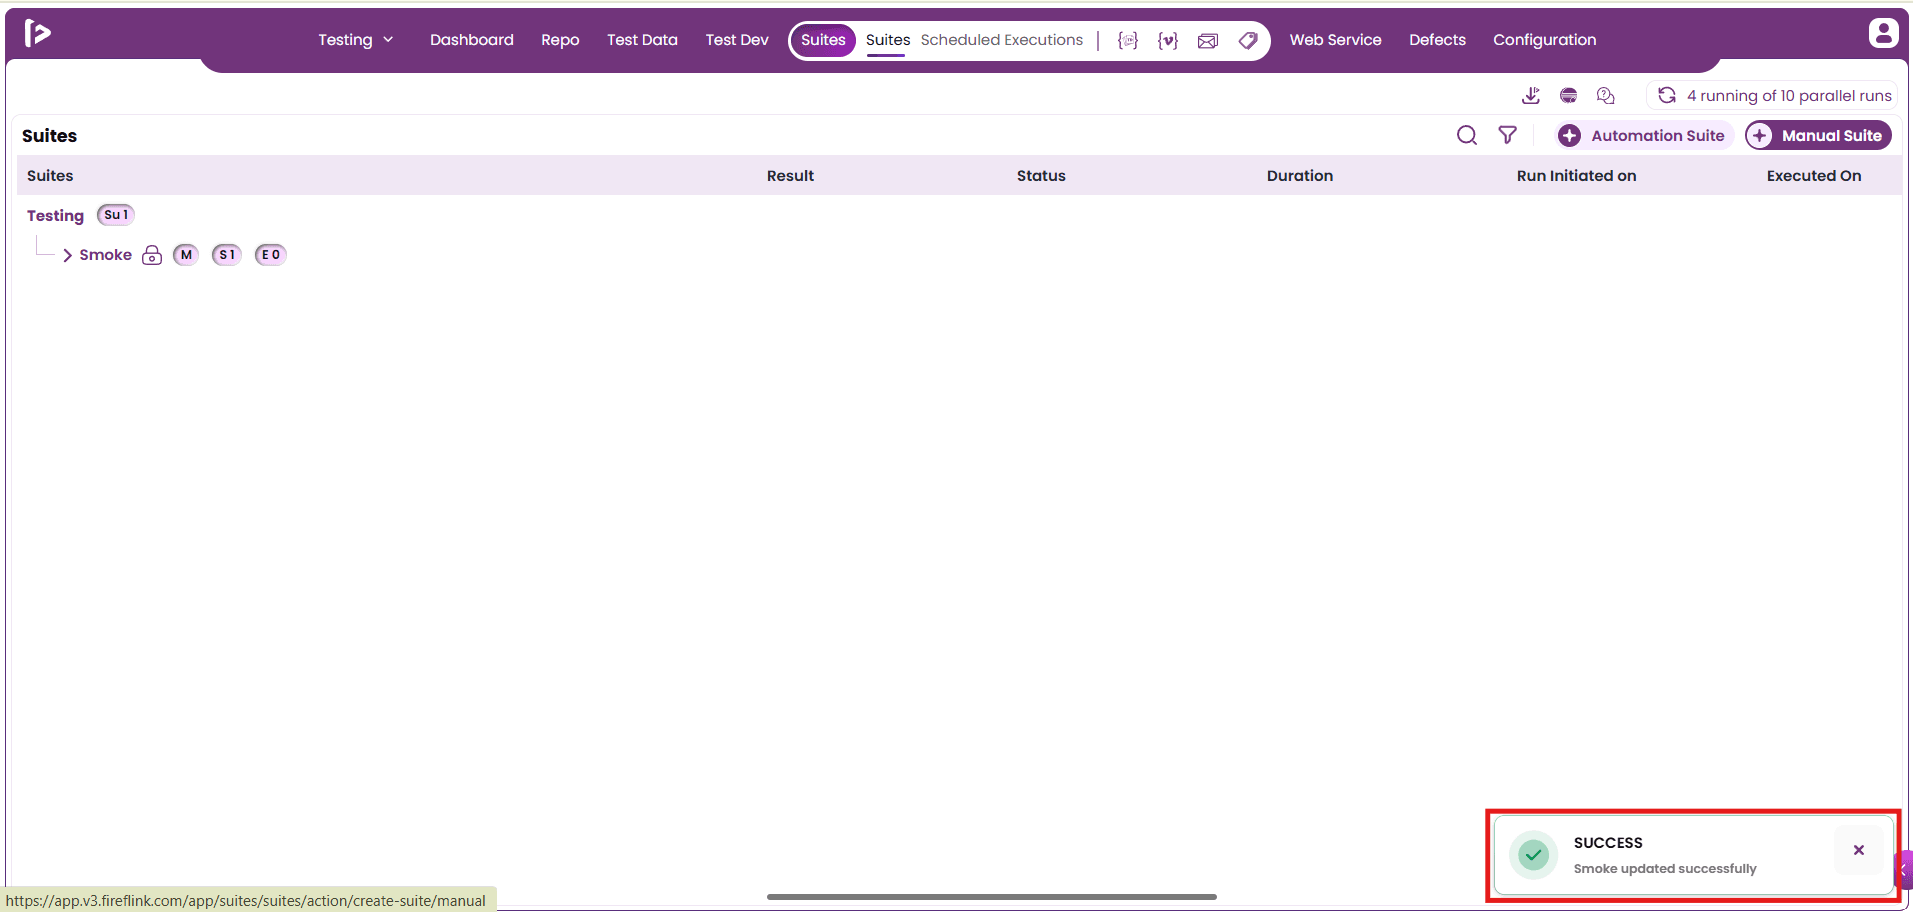
- Upon successful update, a confirmation popup "Suite updated successfully” will appear, as illustrated below.
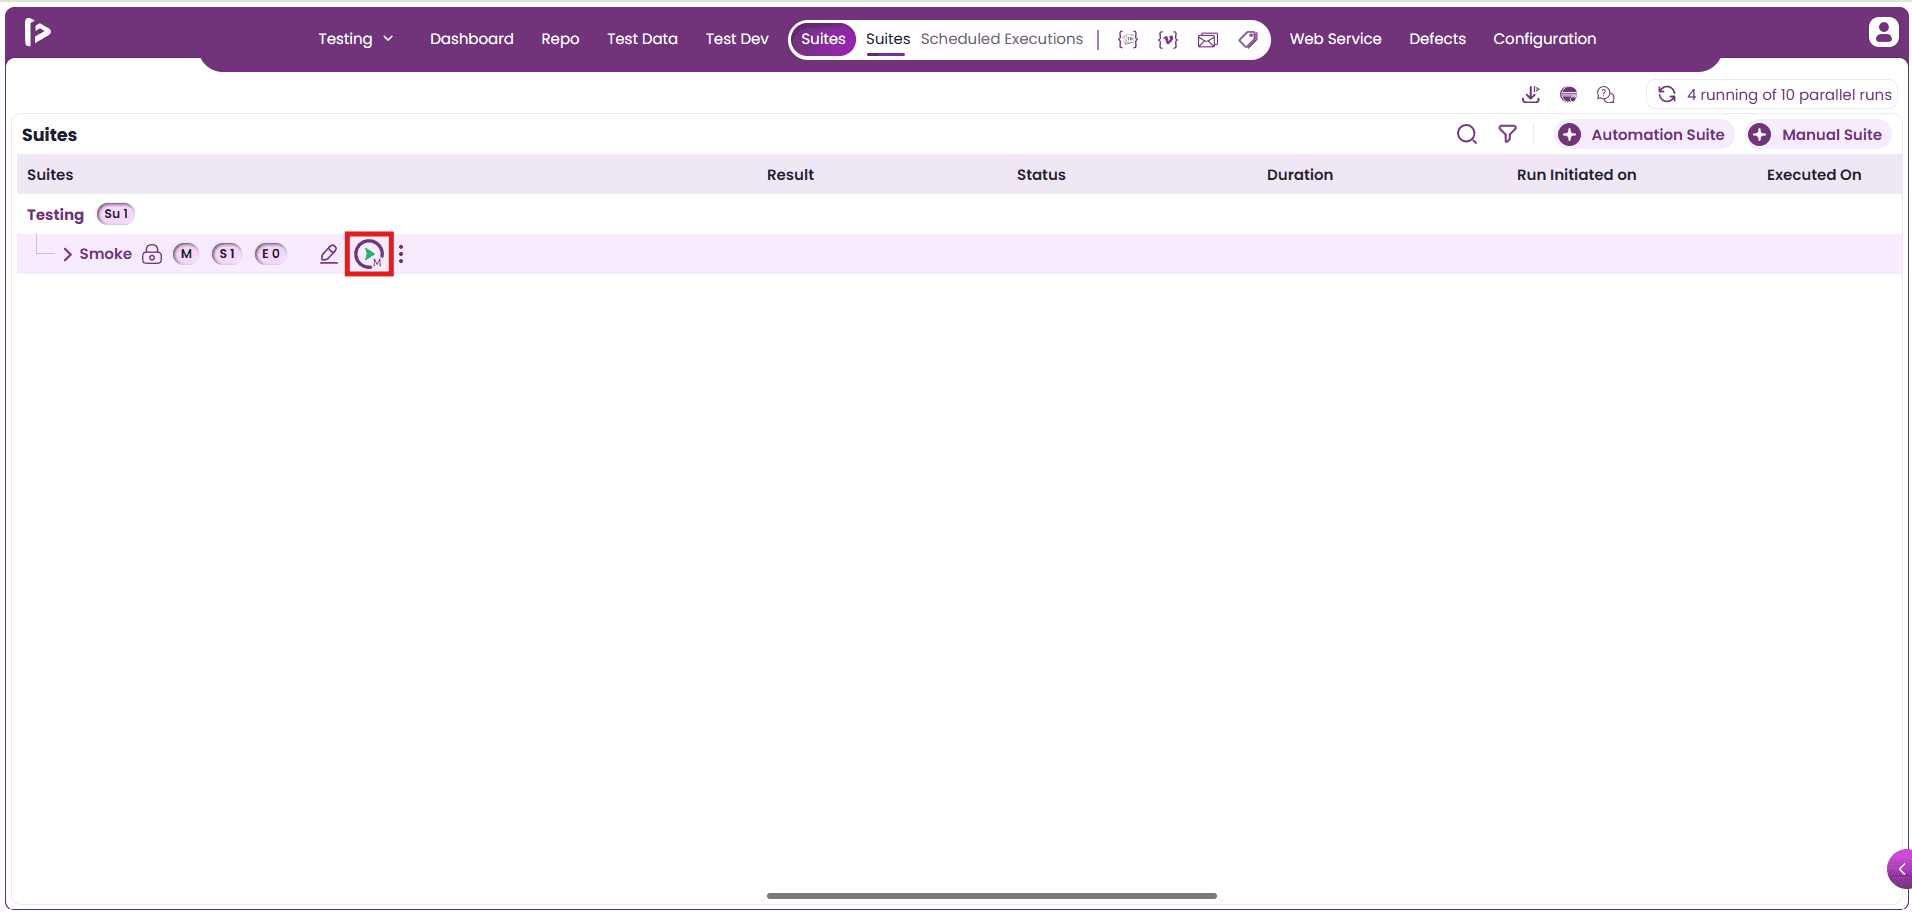
Run: To begin the execution of a manual suite, the user should follow the steps outlined below.
- Click the Run icon corresponding to the suite that the user intends to execute.
- Upon clicking, the Execution Run Slider will appear on the screen, offering a comprehensive interface to configure and initiate the test execution process.
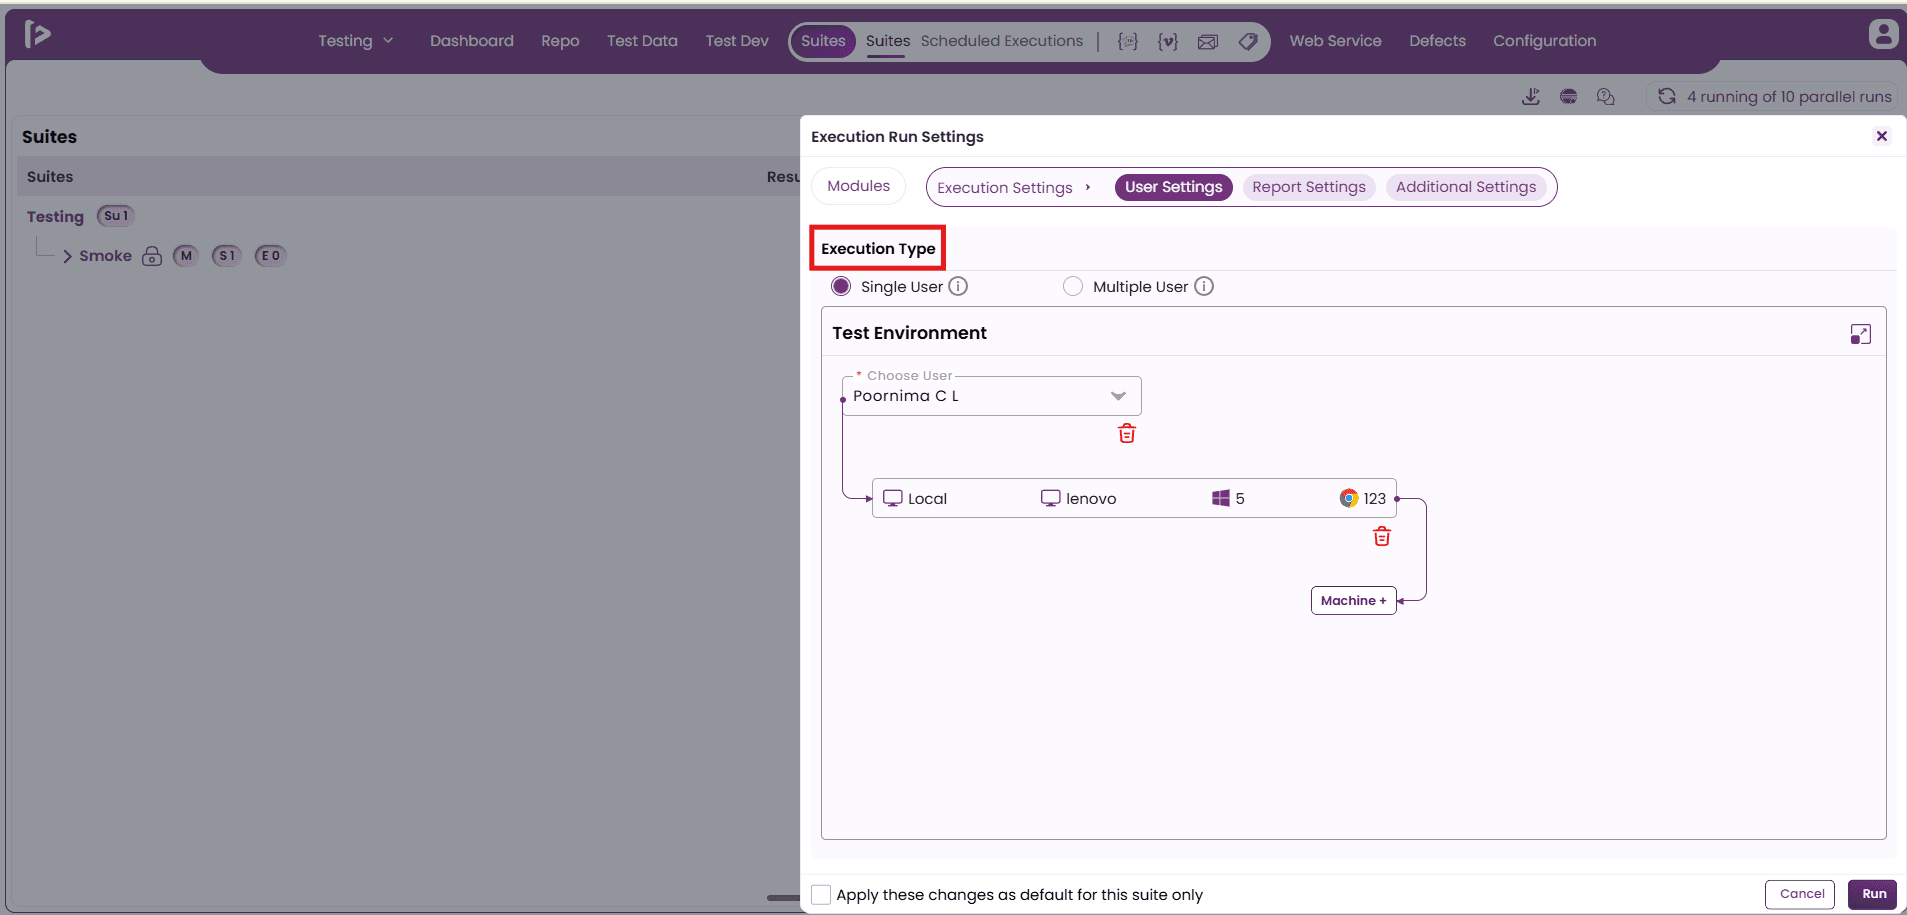
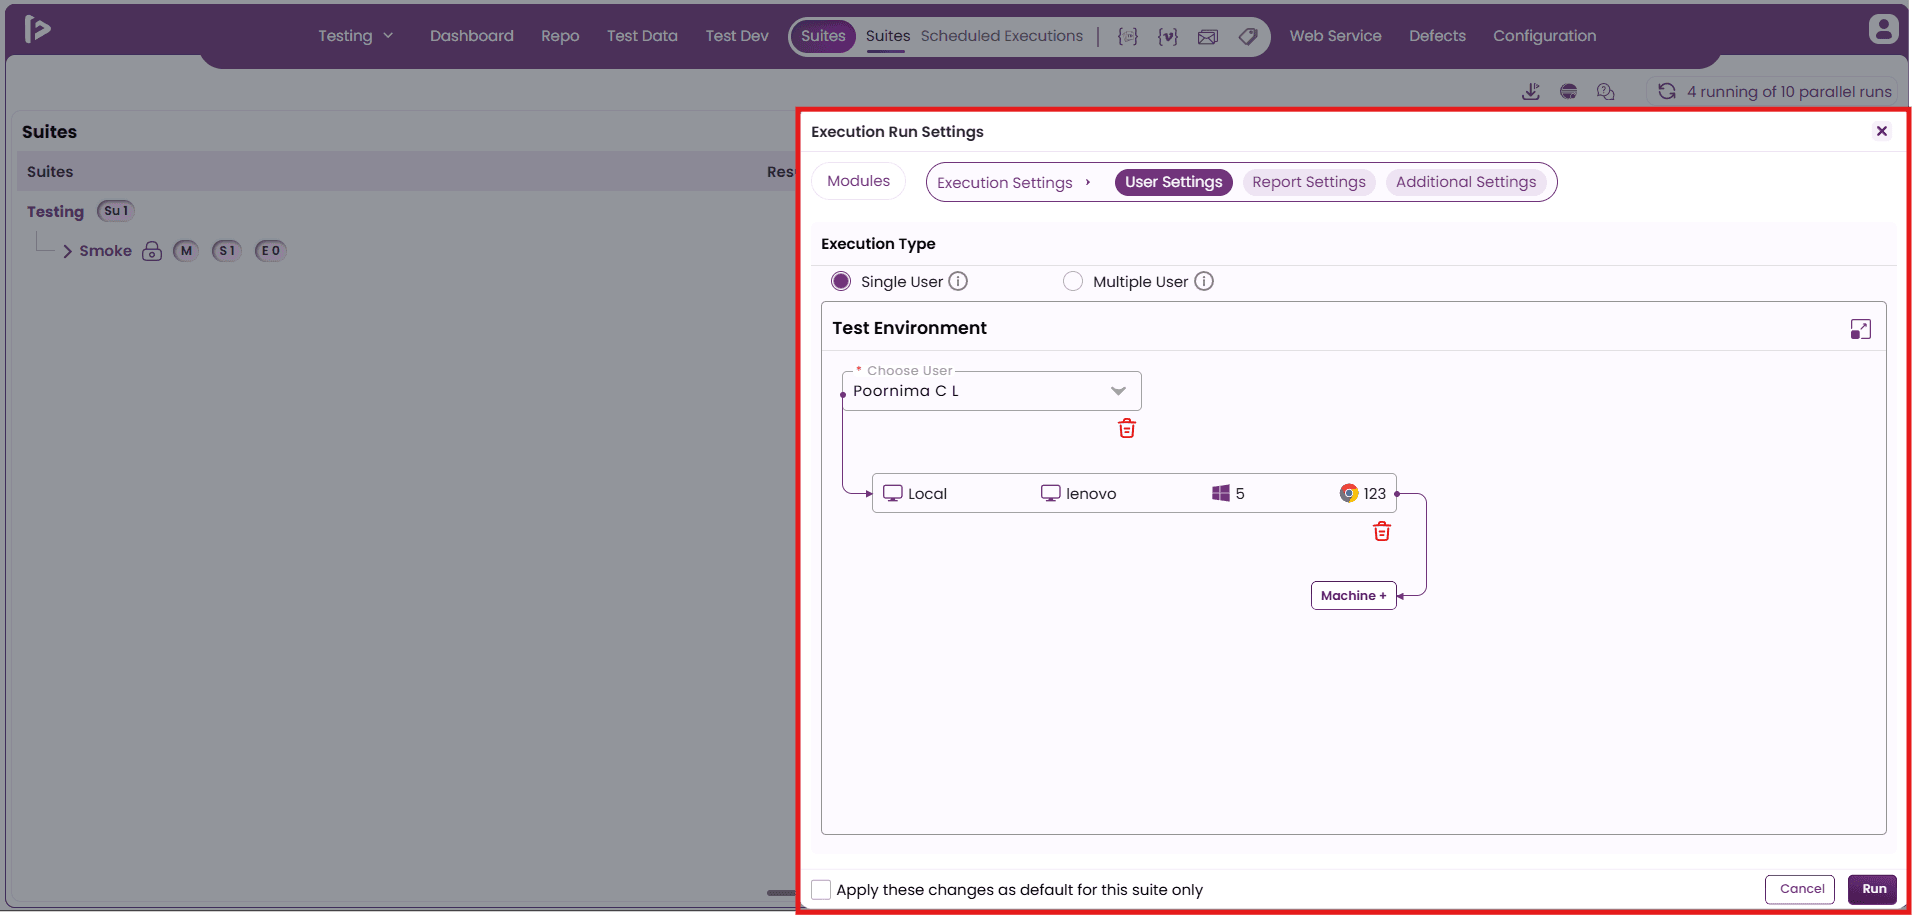
- Within the Execution Run Settings Slider, users can review and modify all necessary configurations related to manual execution.
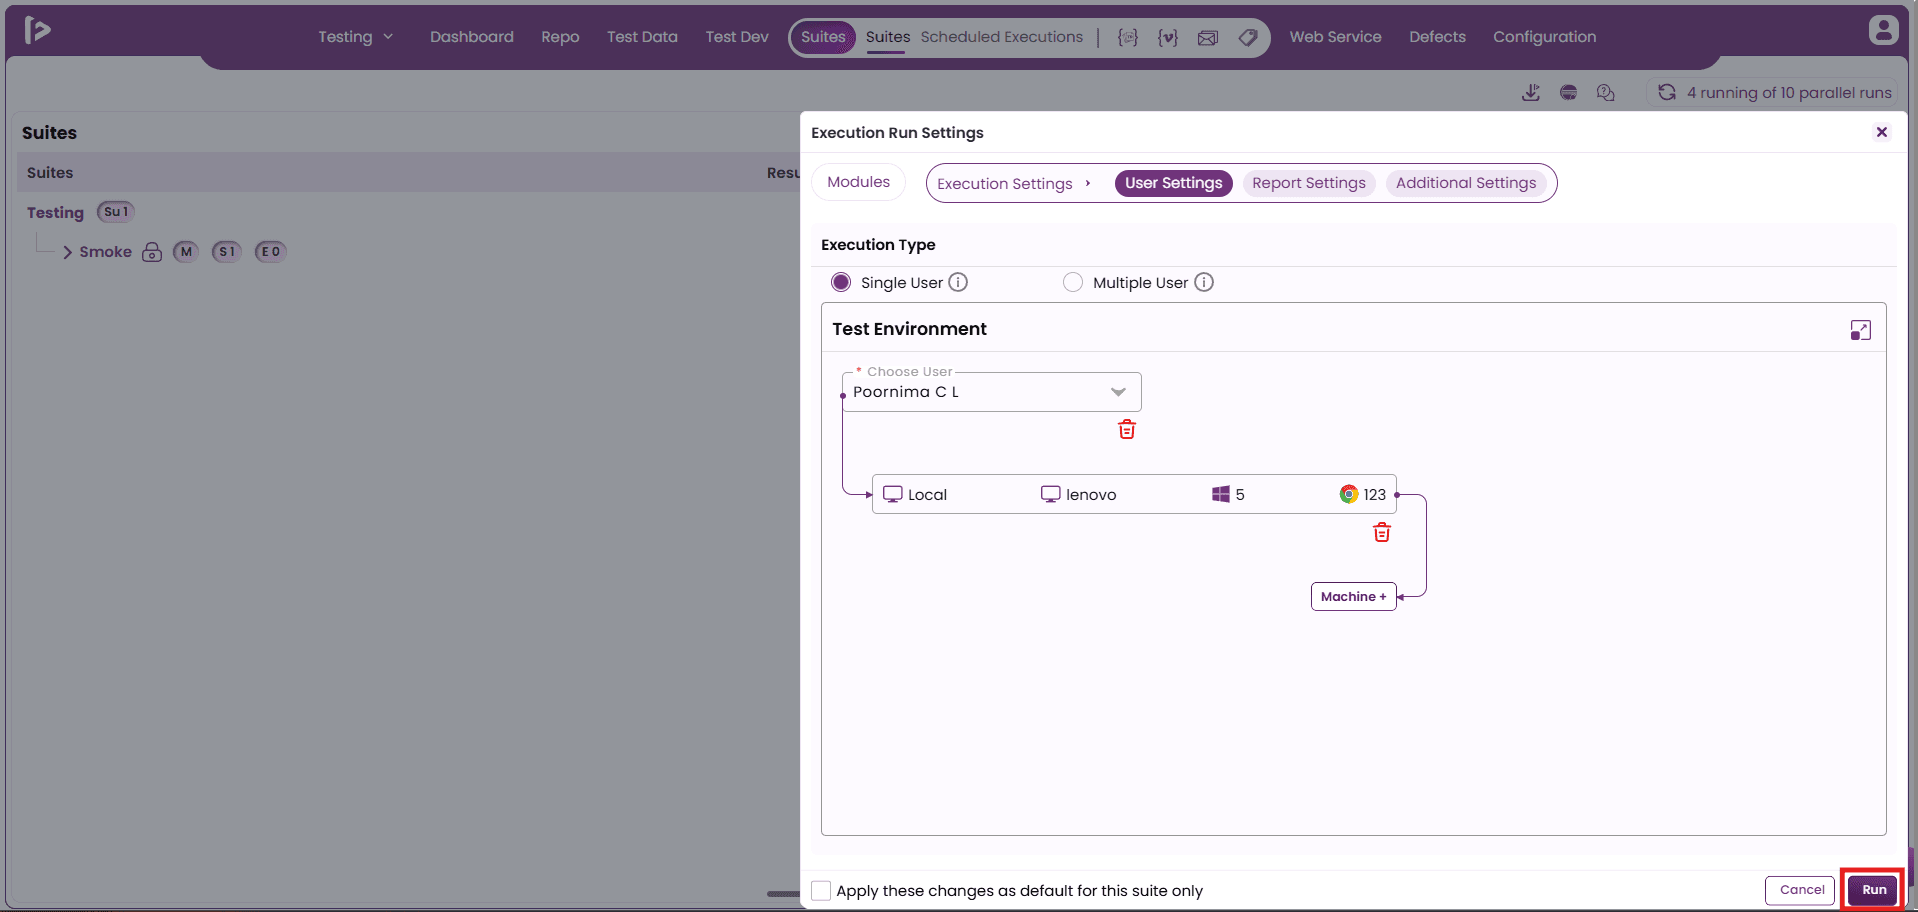
- After reviewing and updating all necessary configurations, the user should click the "Run" button within the slider to initiate the execution of the suite.
- After clicking the "Run" button, the execution status within the execution panel will update to "Running," and a new Execution ID will be generated.
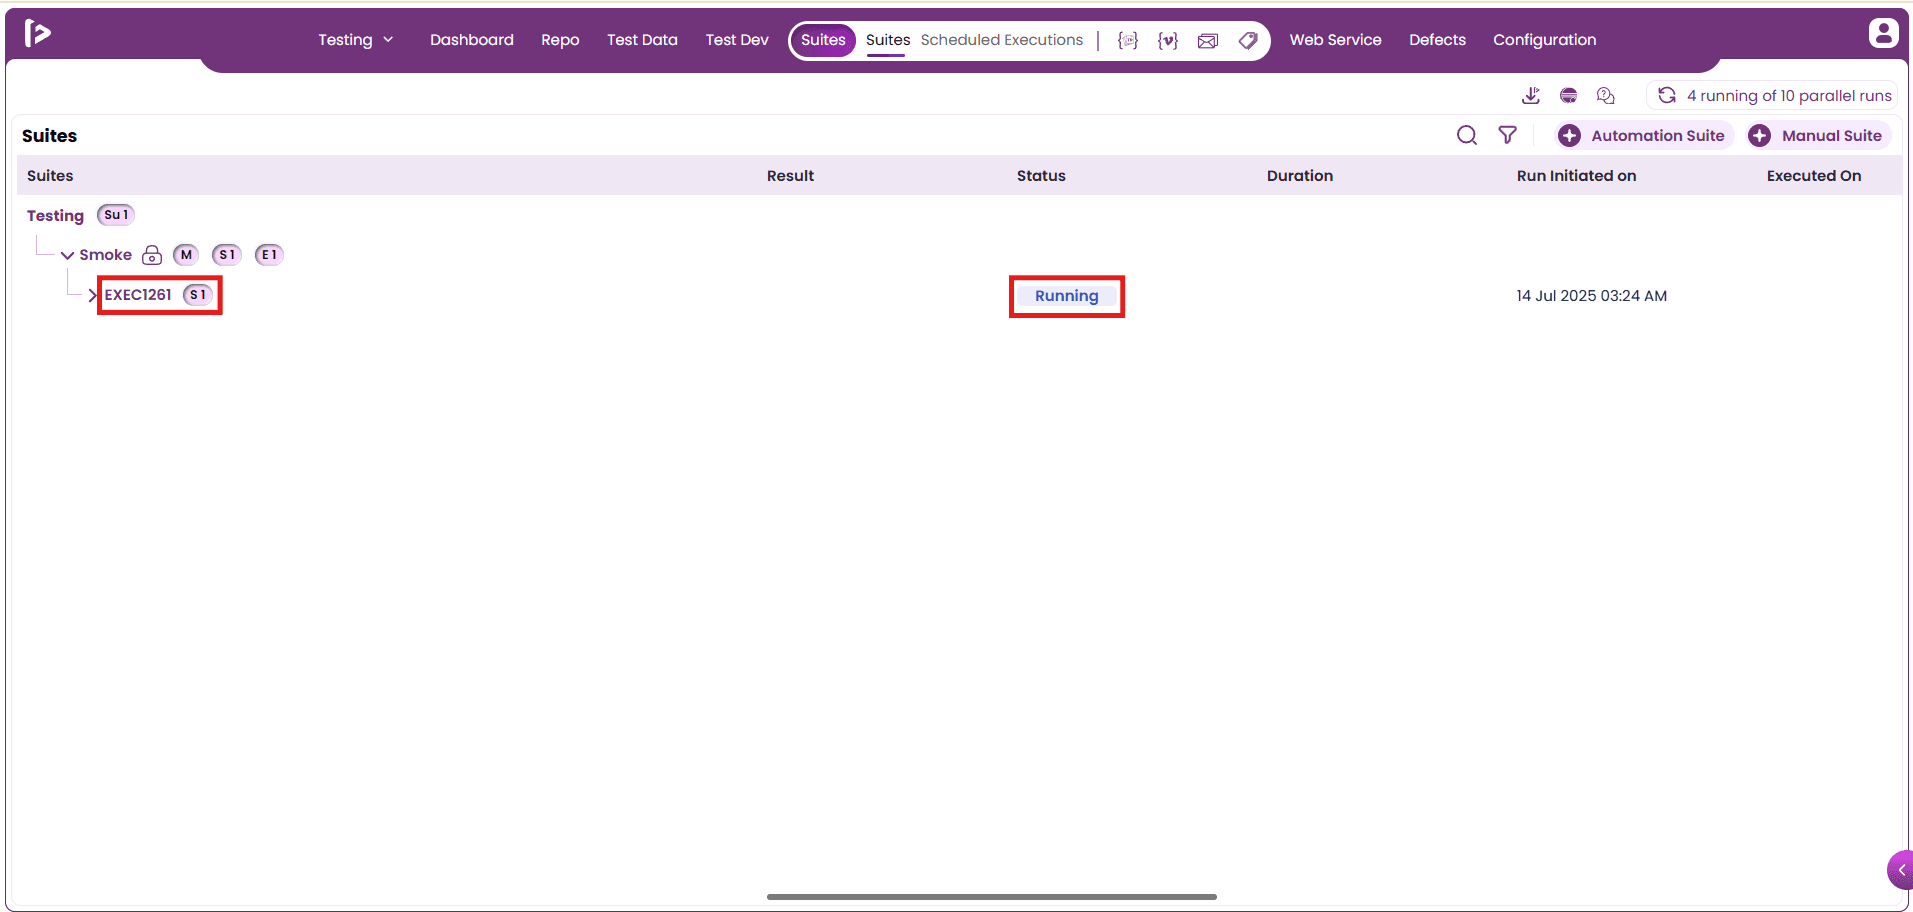
- Click on the "Running" status to access the Manual Execution Interface.
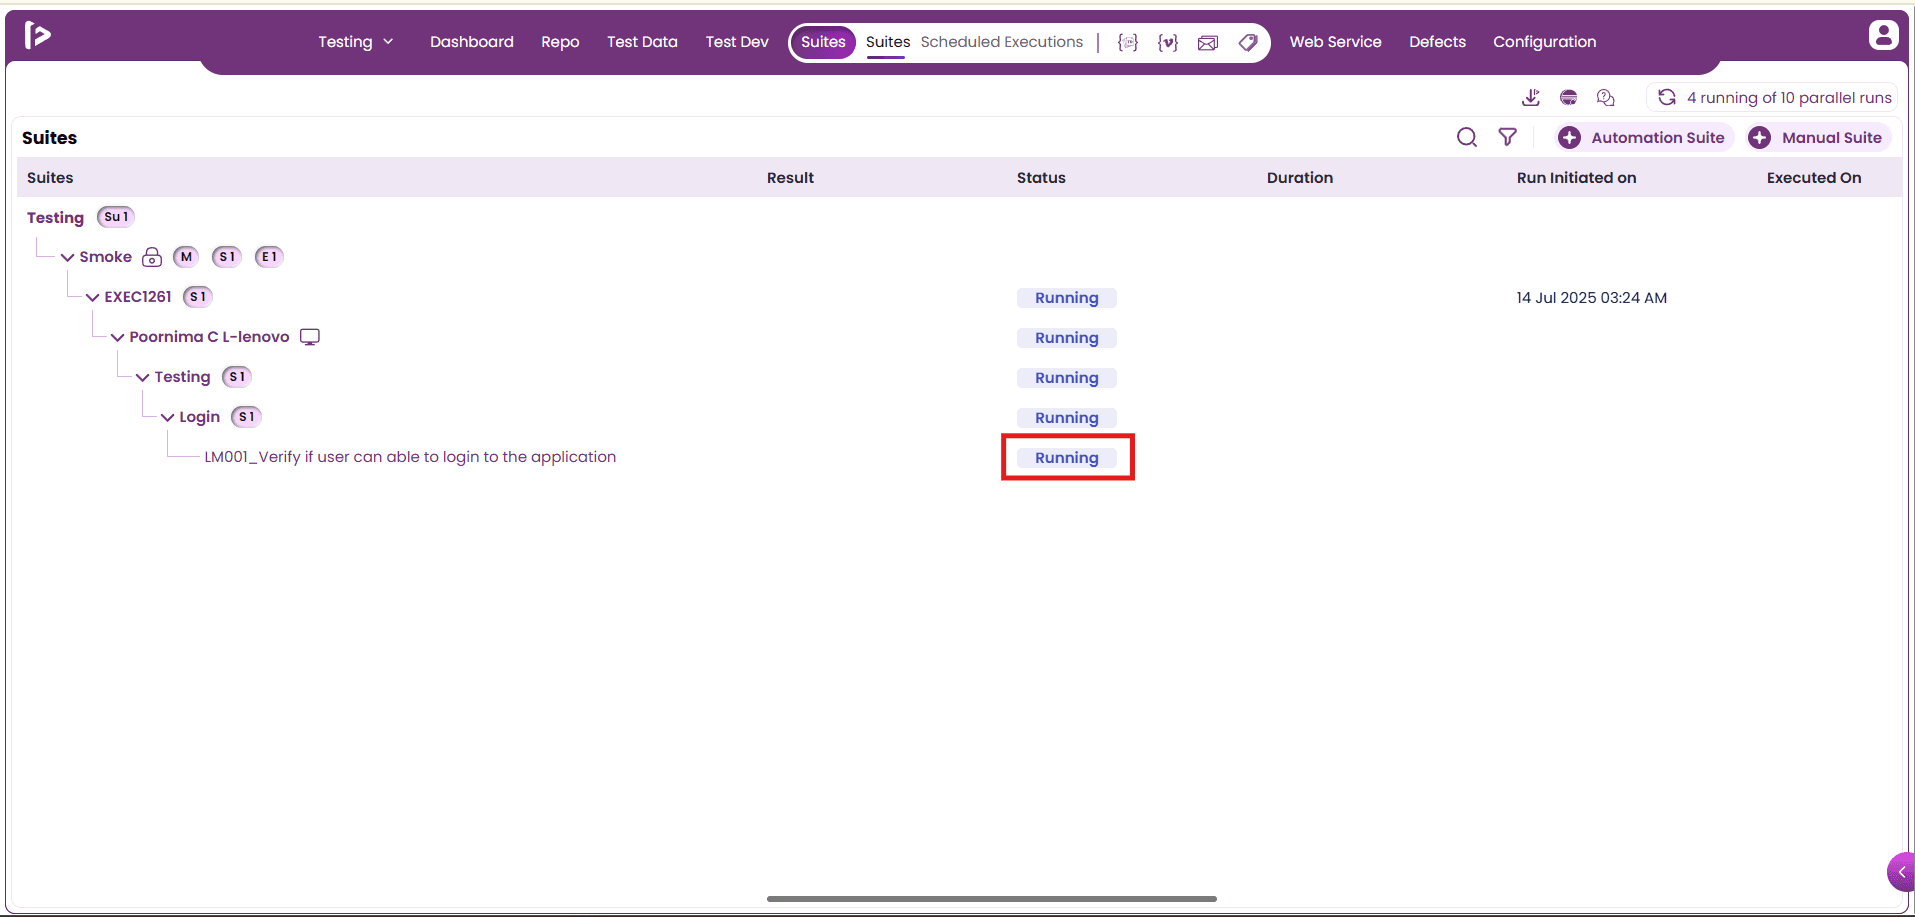
- Upon clicking, the Execution Slider will appear on the screen.
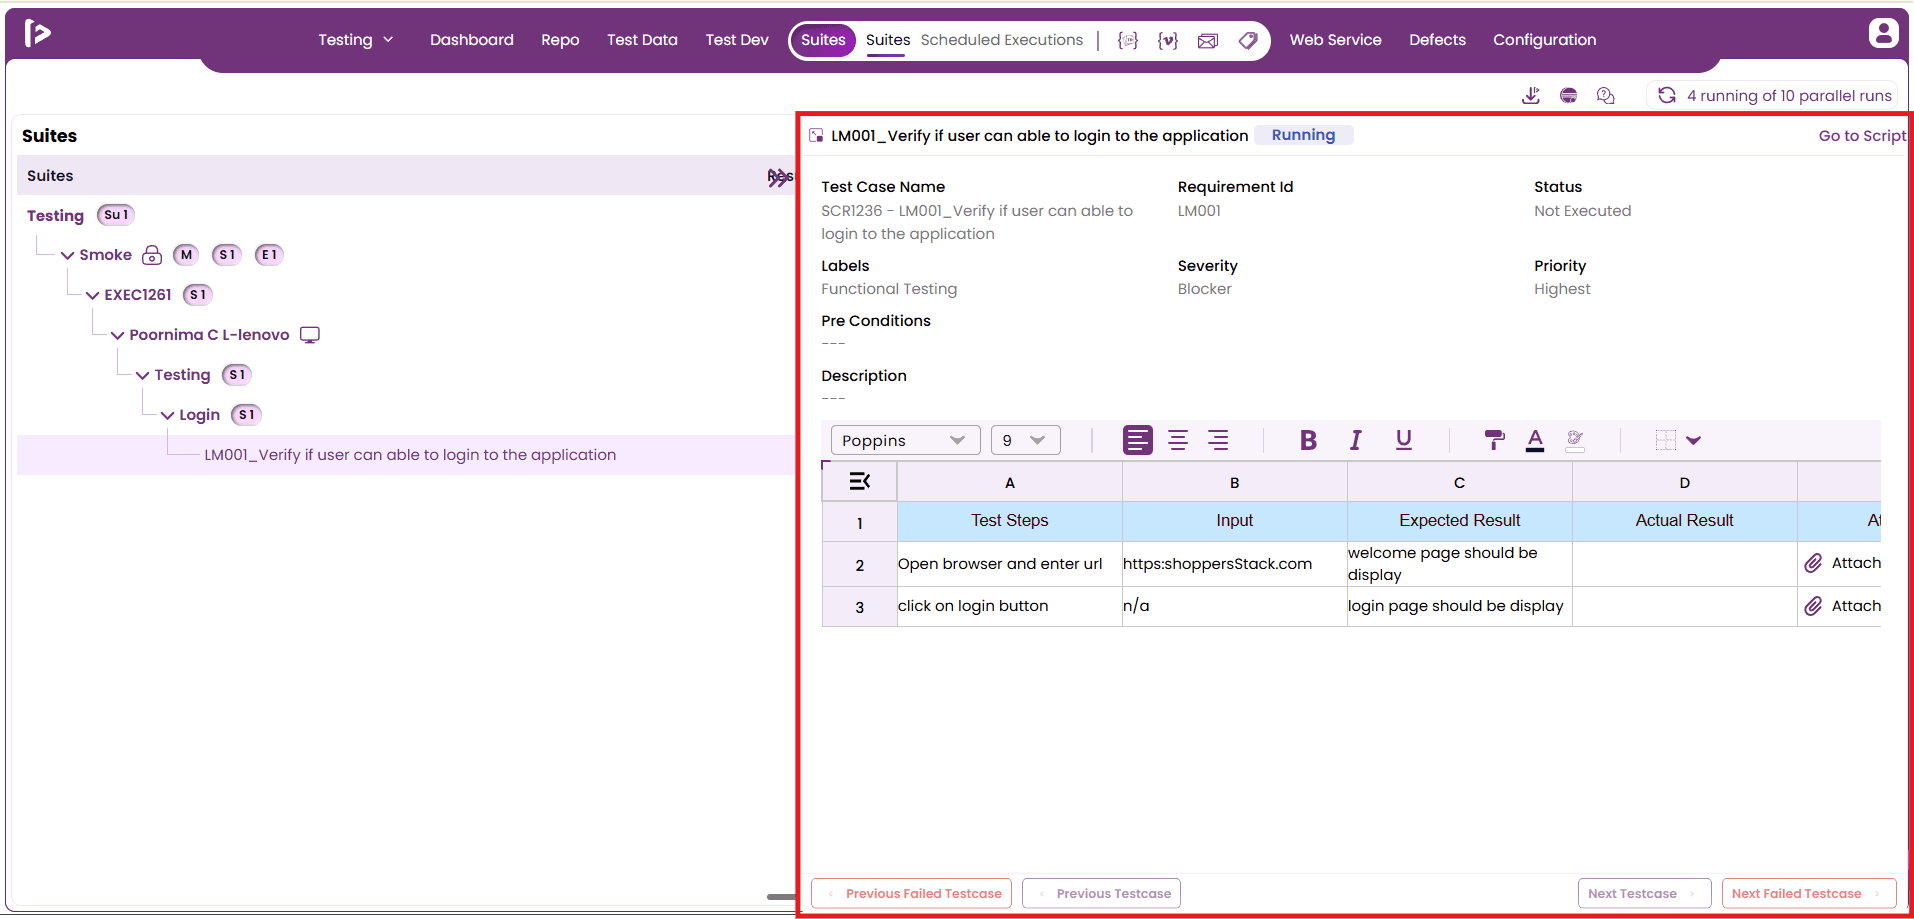
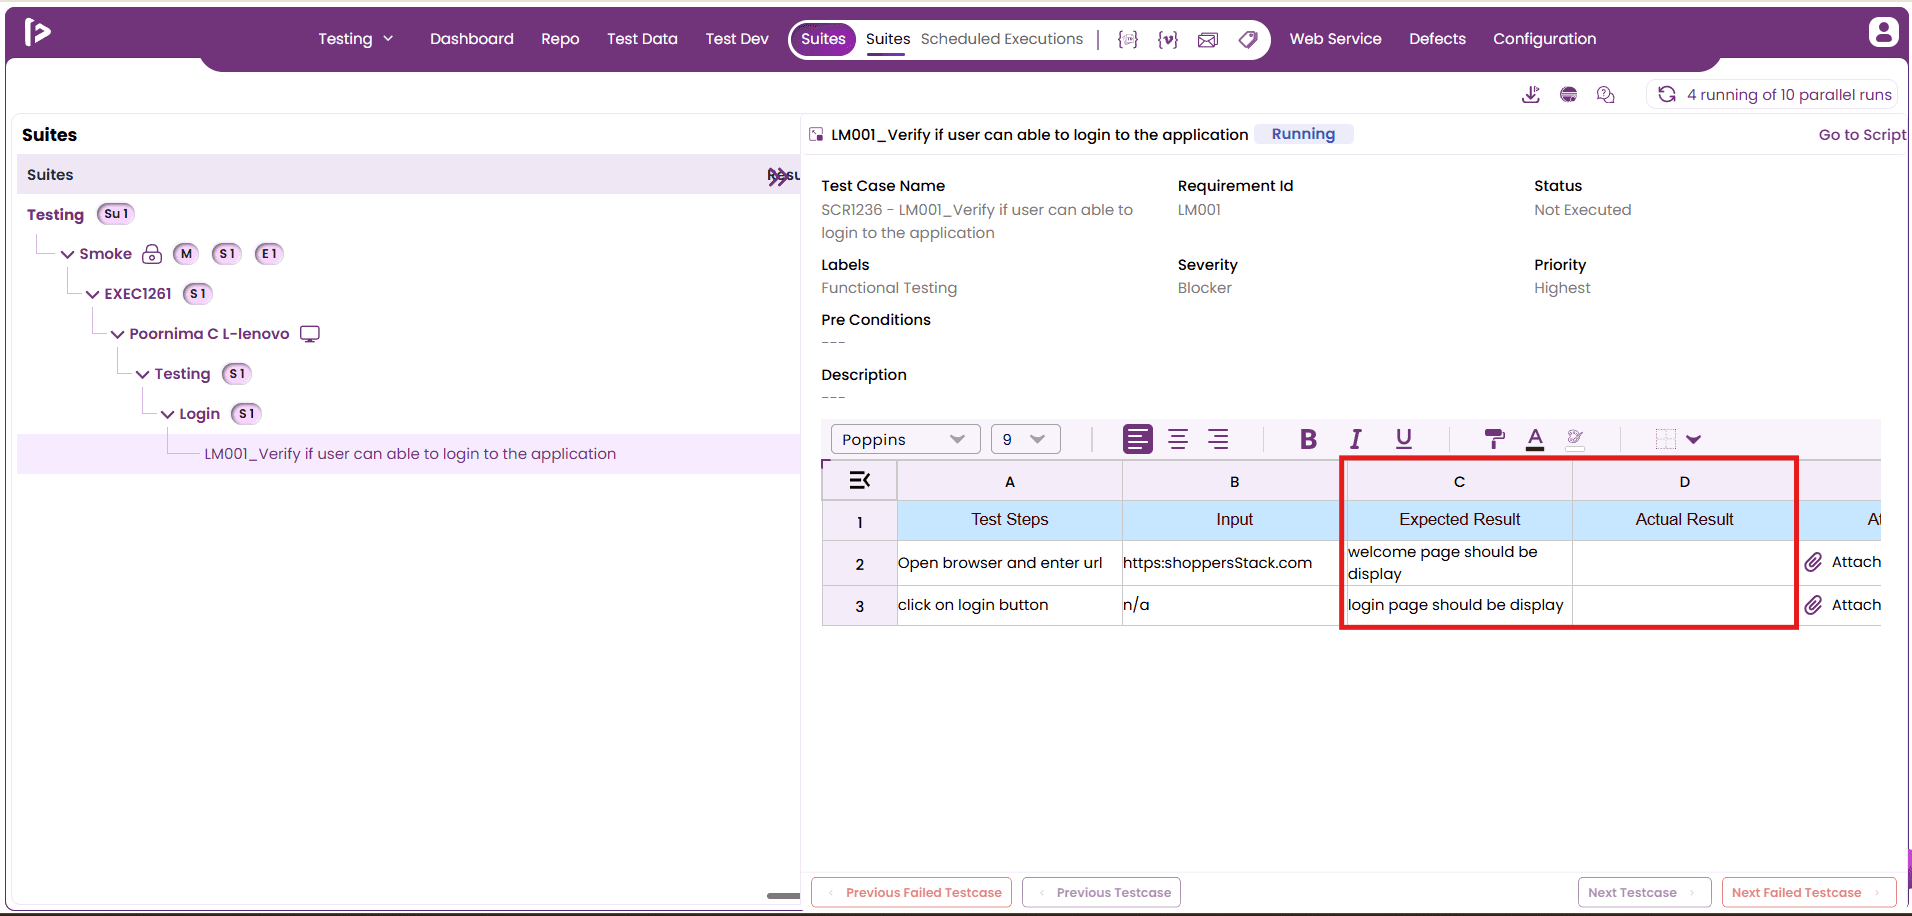
- The user is required to execute each test case manually and compare the actual results with the expected outcomes.
- Based on the outcome, the user should mark each step or test case as "Passed" or "Failed," "Skipped" or “Warning” take any appropriate action as required.
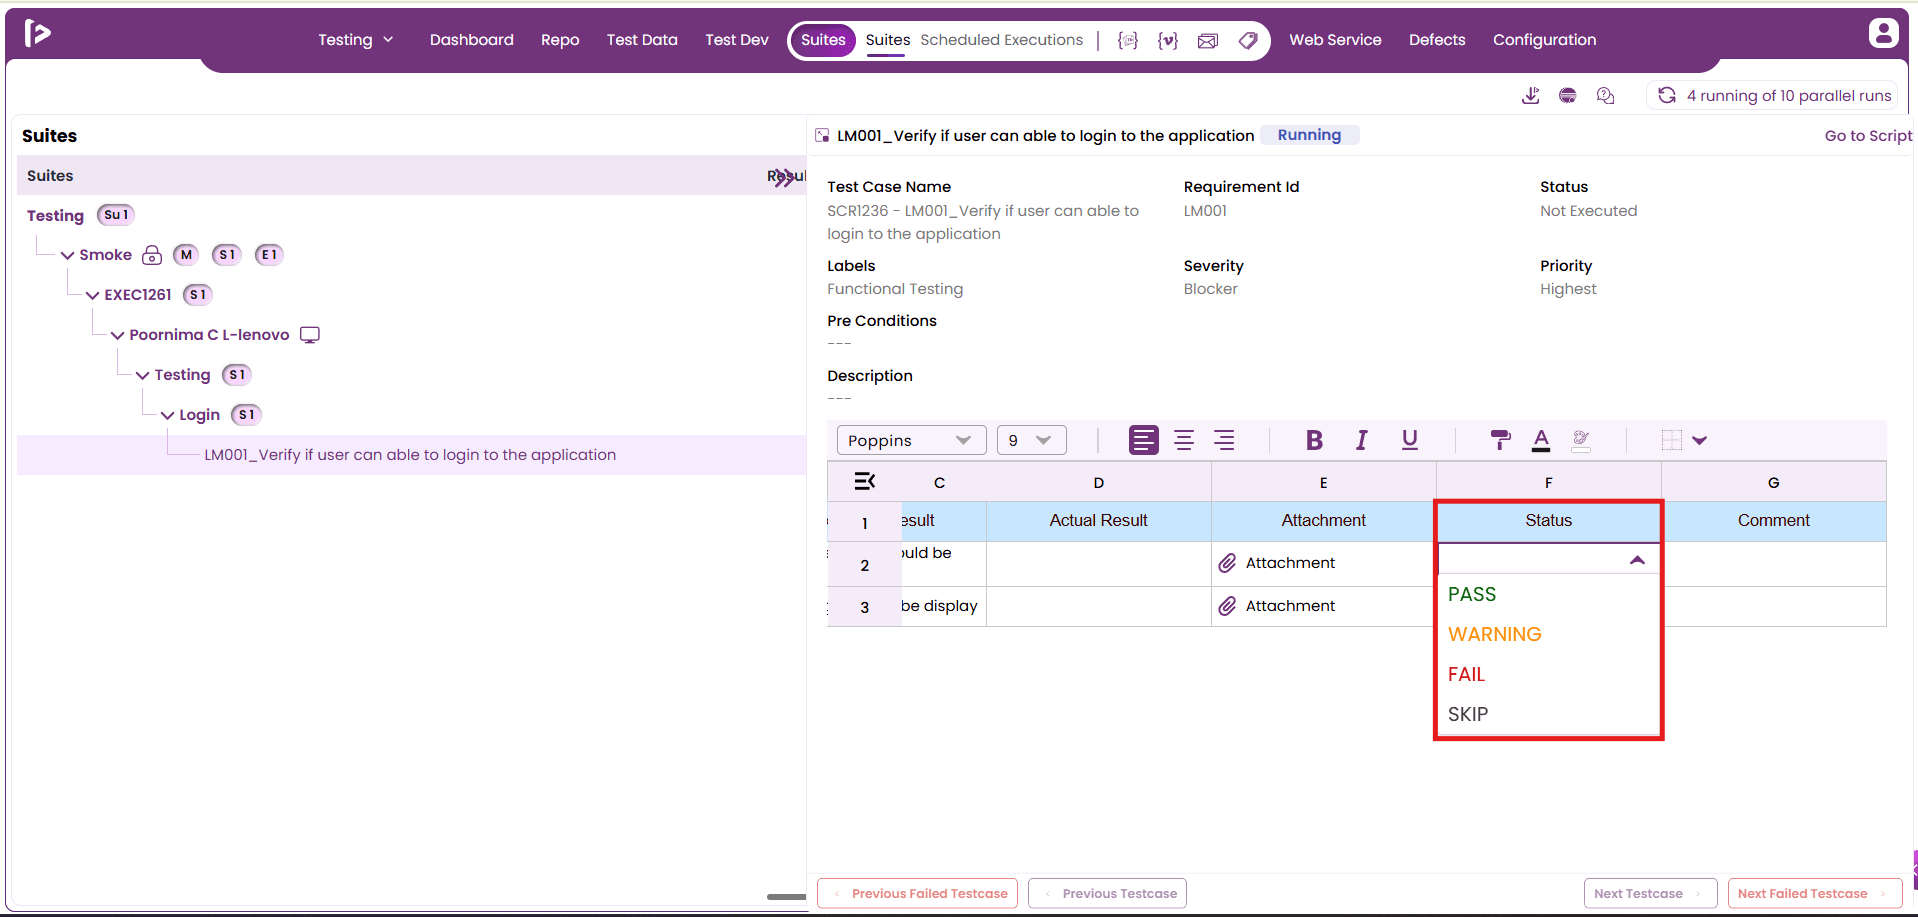
- Once the status of the test case is updated, the changes will be saved automatically. The status will then reflect as "Passed", "Failed", “Warning” or “Skipped” based on the selected outcome, as illustrated below.
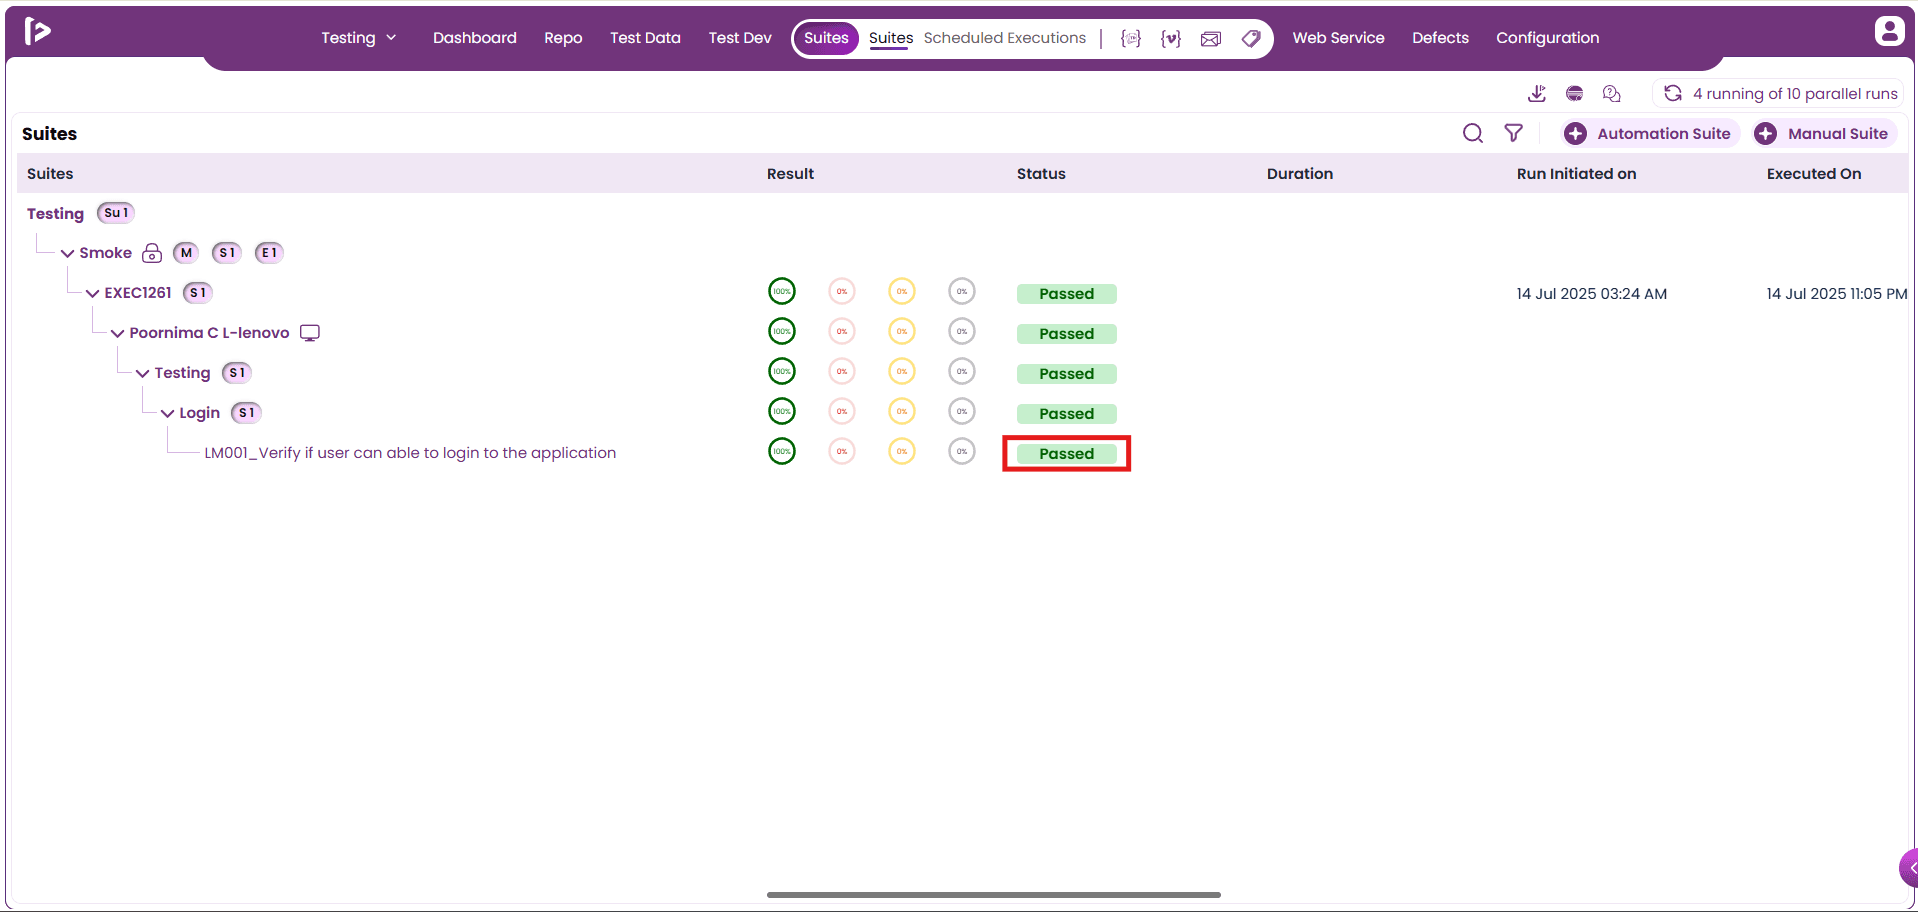
More Features: In FireFlink, the Manual Suite interface includes a More Options menu, typically located next to each suite entry. This menu provides access to options such as Details, Delete, and Clone, allowing users to view suite metadata, remove a suite, or duplicate it as needed.
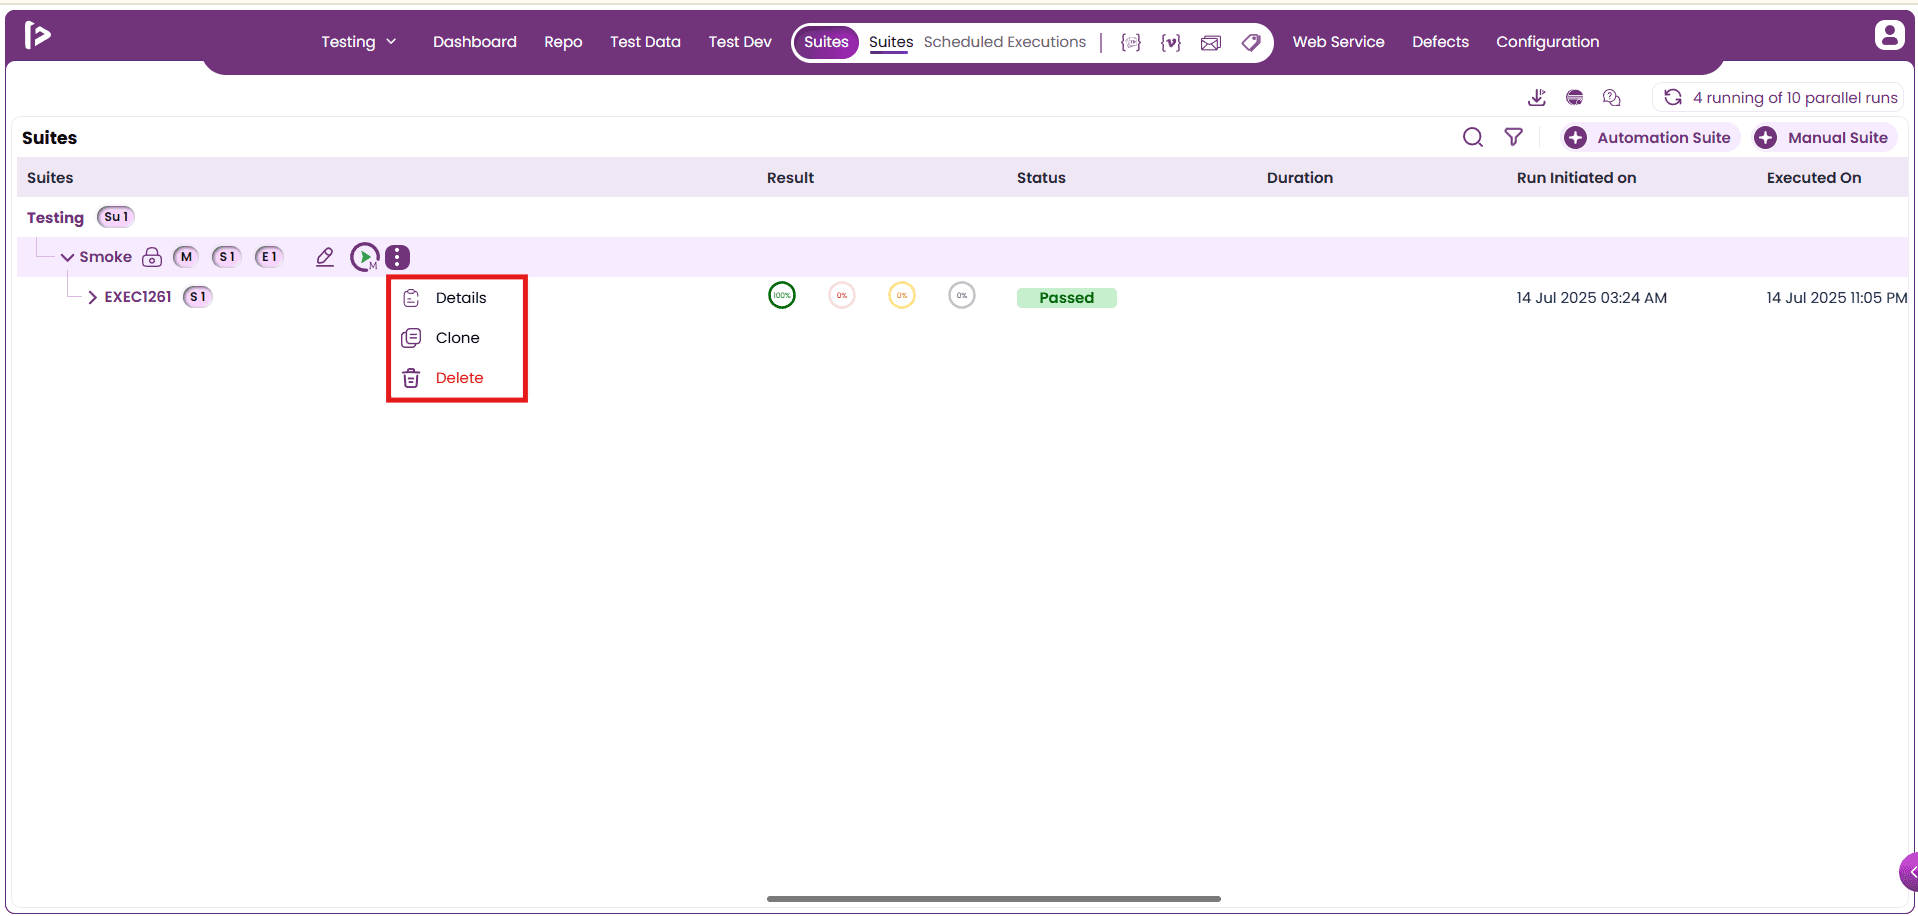
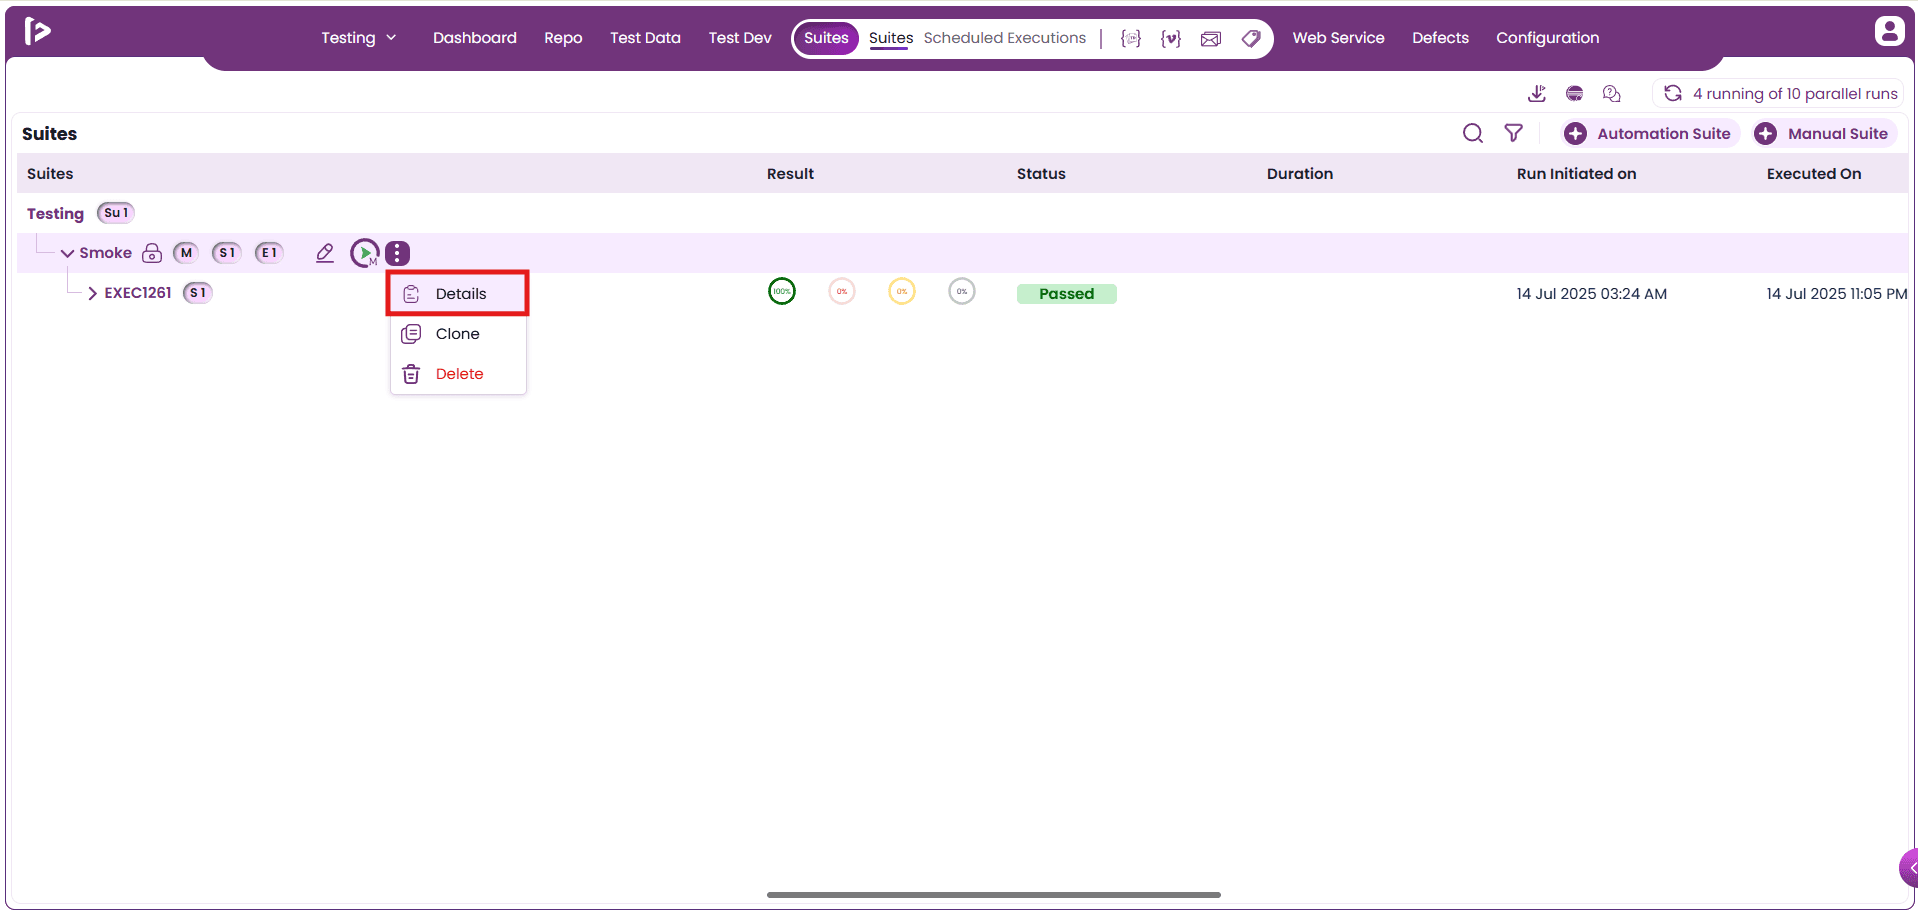
1. Details: To view information related to the created suite, follow the steps below.
- Select details from the dropdown menu.
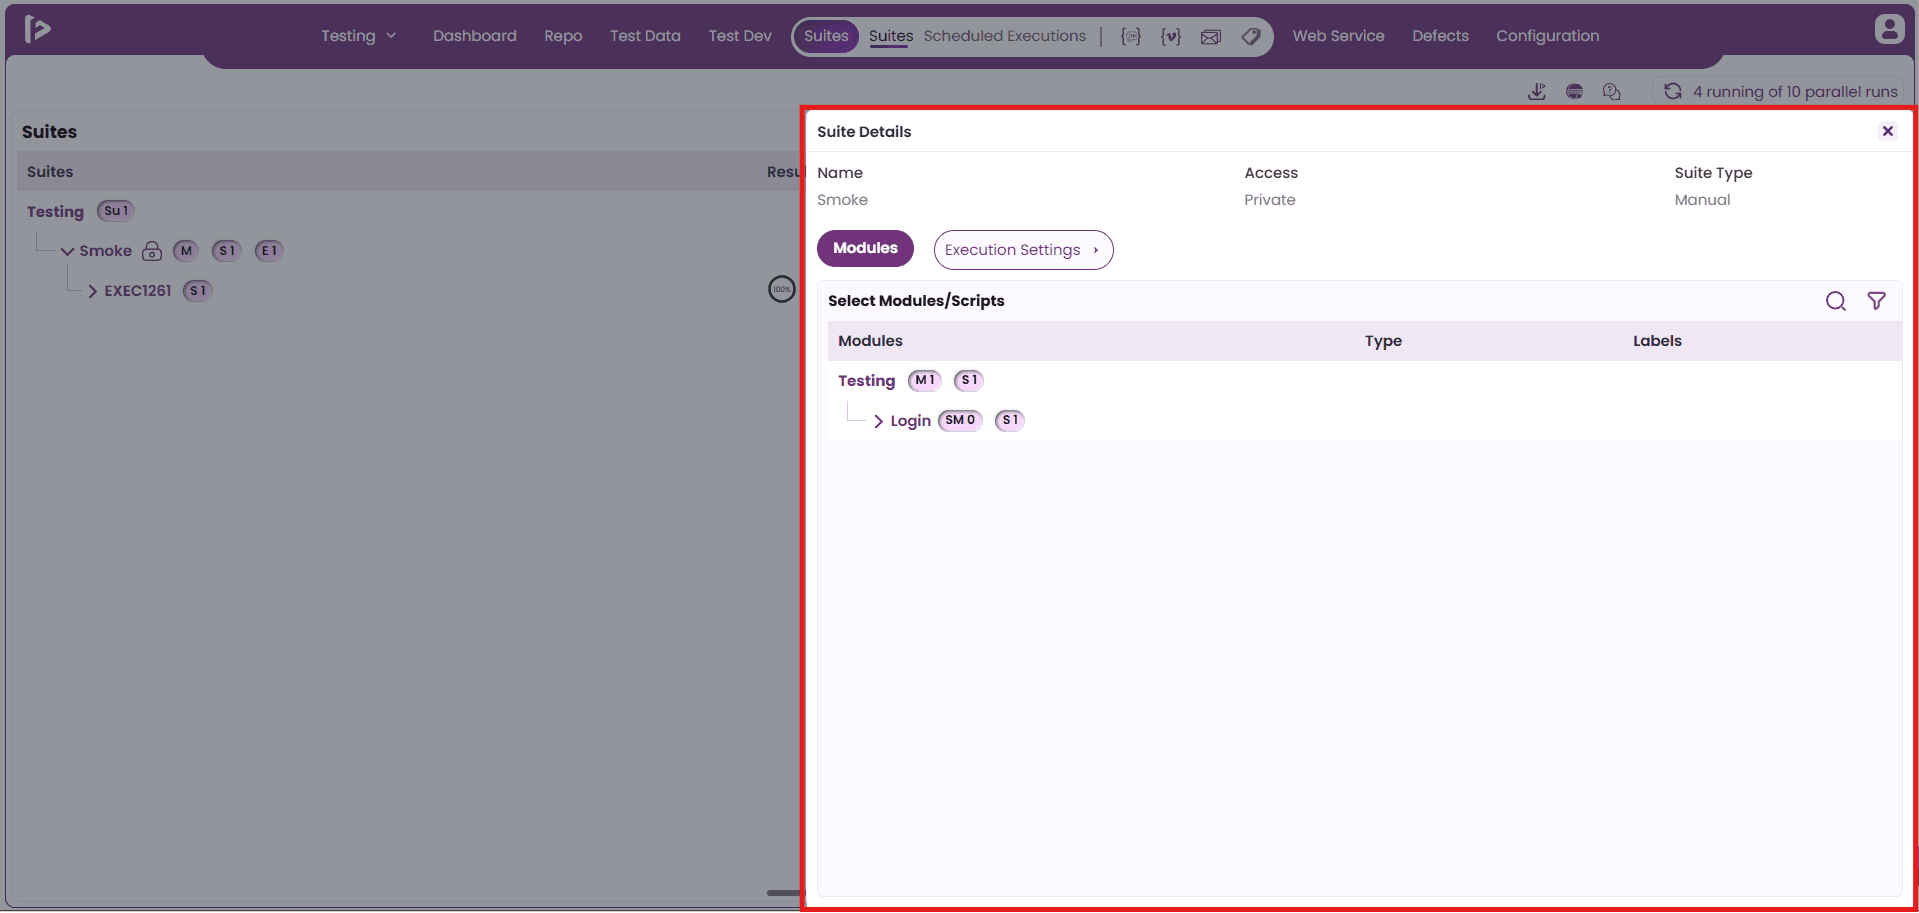
- The Suite Details slider will appear on the screen. The Details section typically includes the following information:
- Suite Name: Displays the title or unique identifier assigned to the manual suite.
- Access: Indicates the visibility and permission settings associated with the suite.
- Suite Type: Specifies whether the suite is categorized as a manual or automation suite.
- Execution Settings: Provides a summary of the configured execution settings, including user preferences, report configurations, and additional settings.
- Modules: Lists the modules associated with the suite, highlighting the functional areas or groups of test cases included.
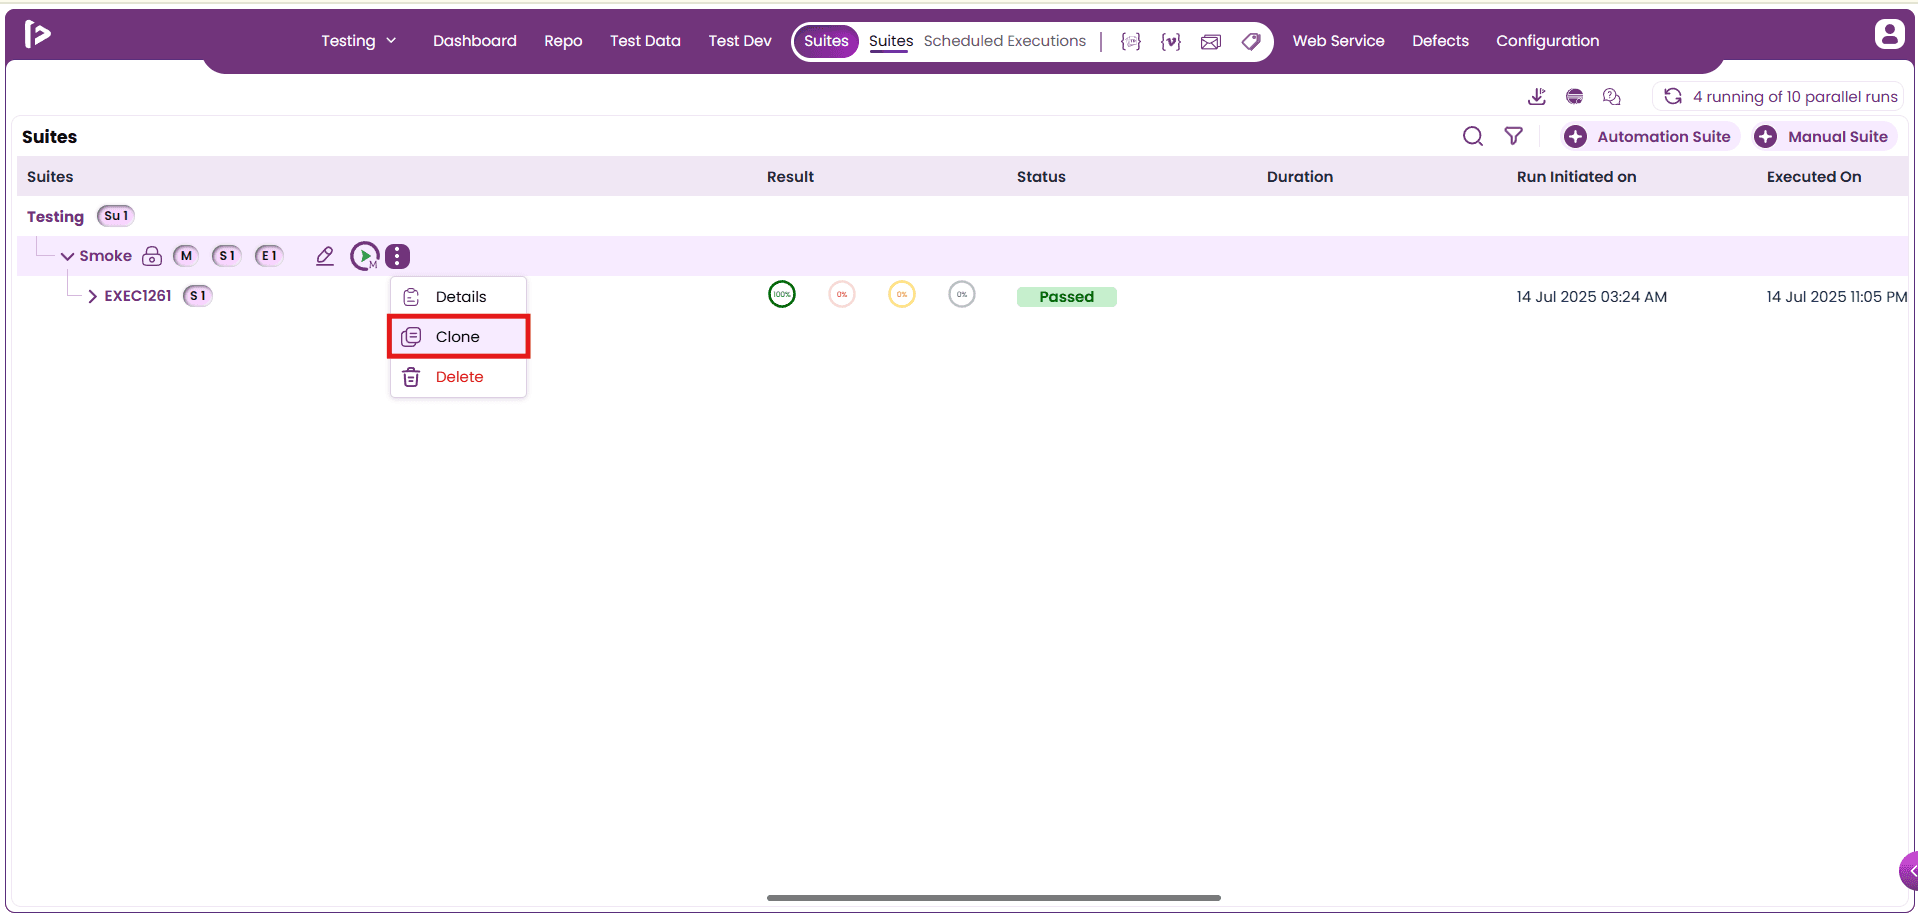
2. Clone: The Clone option in a Manual Suite enables users to create an exact duplicate of an existing suite, including all associated test cases, modules, settings, and configurations. This functionality is especially beneficial for reusing test structures or creating similar suites with minimal additional effort. Steps to clone the suite are as follows:
- Select Clone from the dropdown menu.
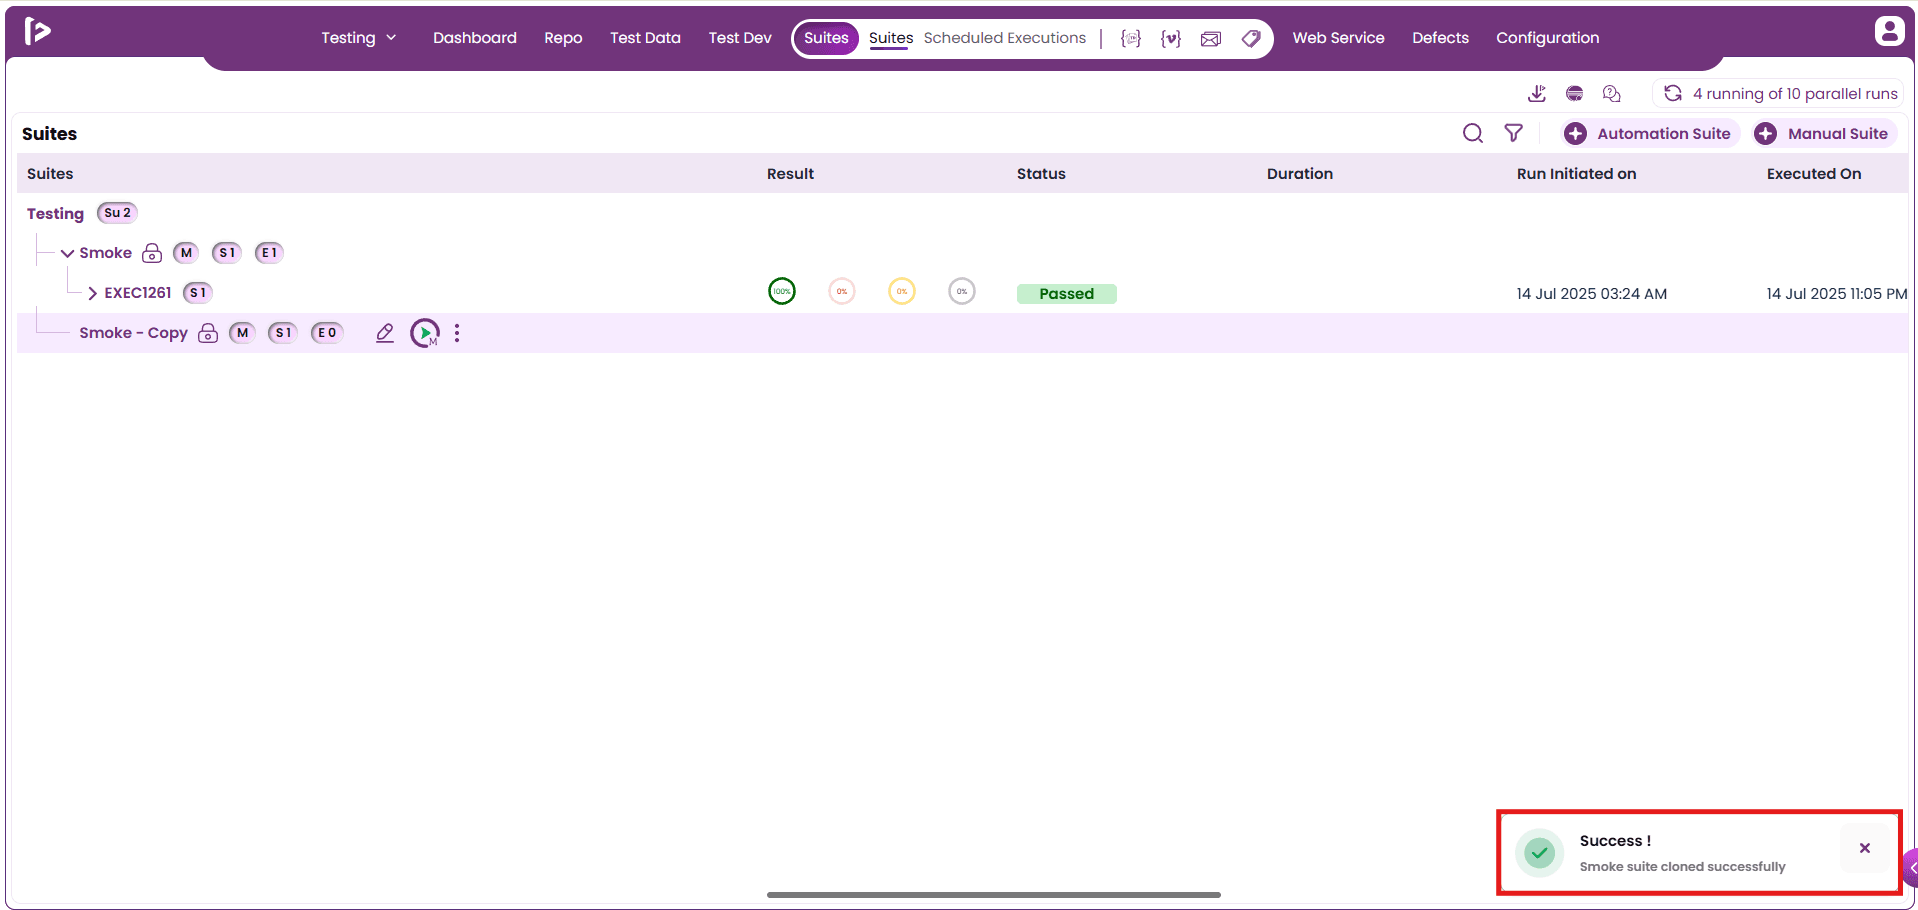
- A copy of the suite will be created, along with that, the user will also receive a confirmation message stating that the suite has been cloned successfully.
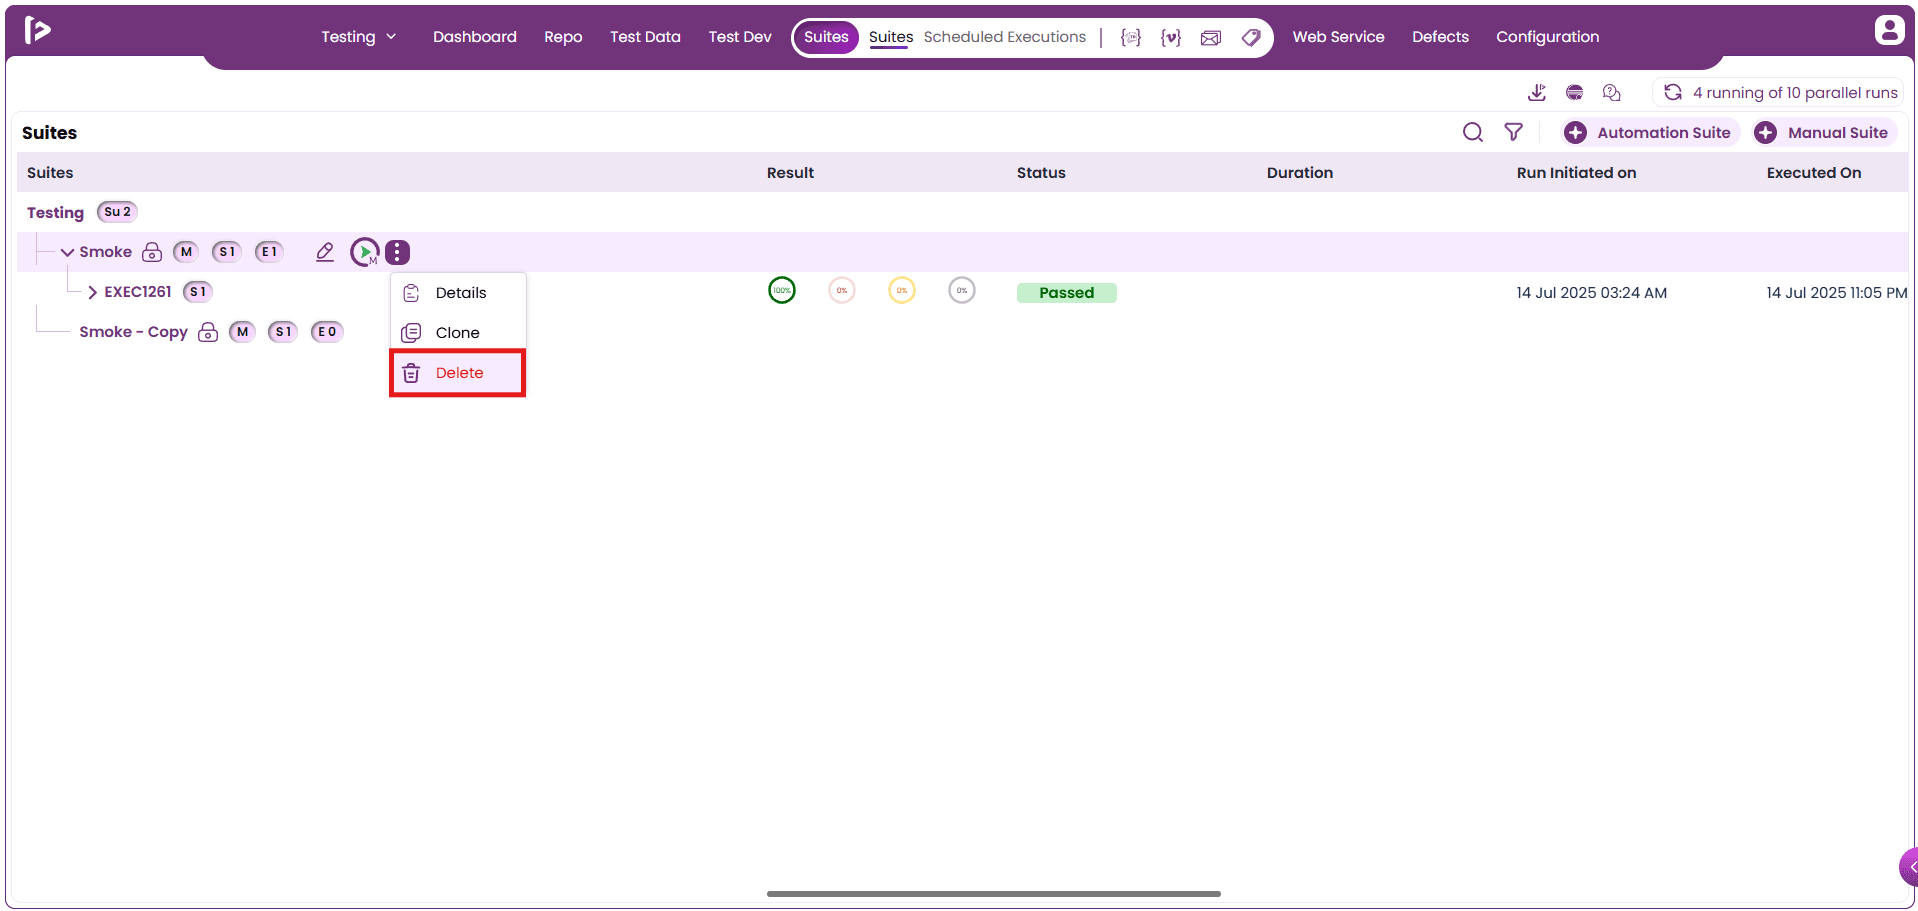
3. Delete: The Delete option enables users to permanently remove a manual suite from the FireFlink system. This action is irreversible and will result in the deletion of the suite along with all associated test cases, modules, execution history, and related data. Steps to delete the suite are as follows:
- Choose the Delete option from the dropdown menu.
- A popup will be displayed. Click on the Delete button.
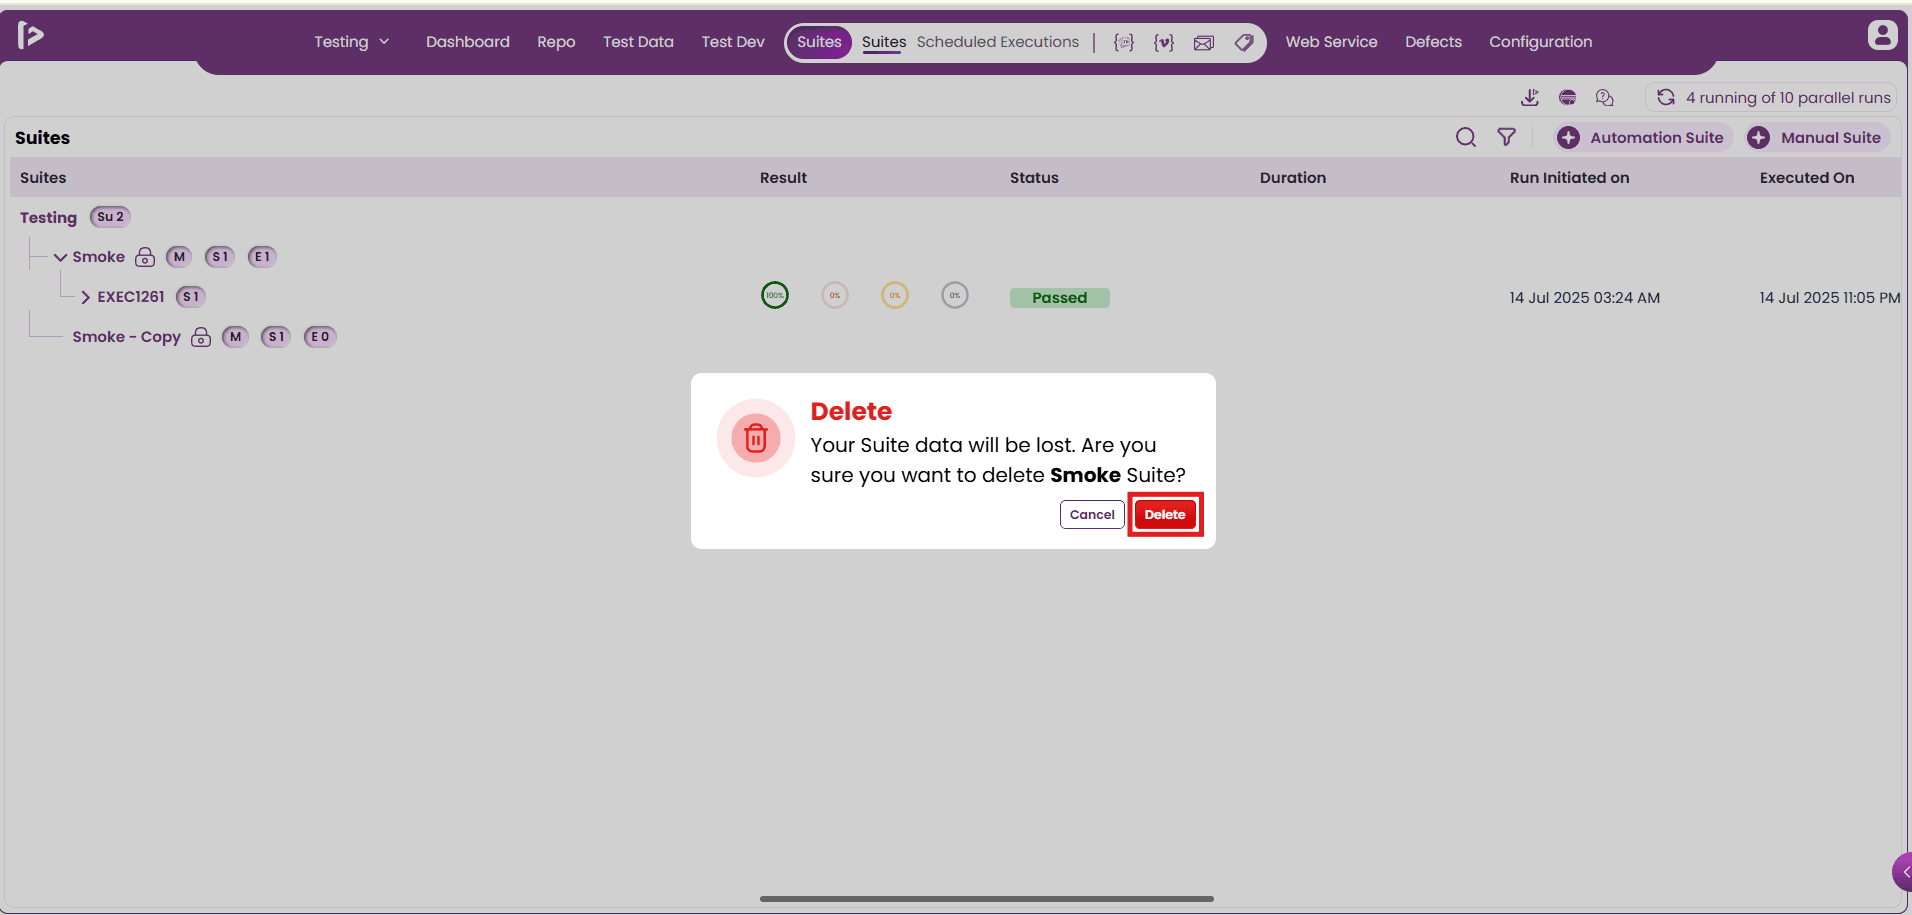
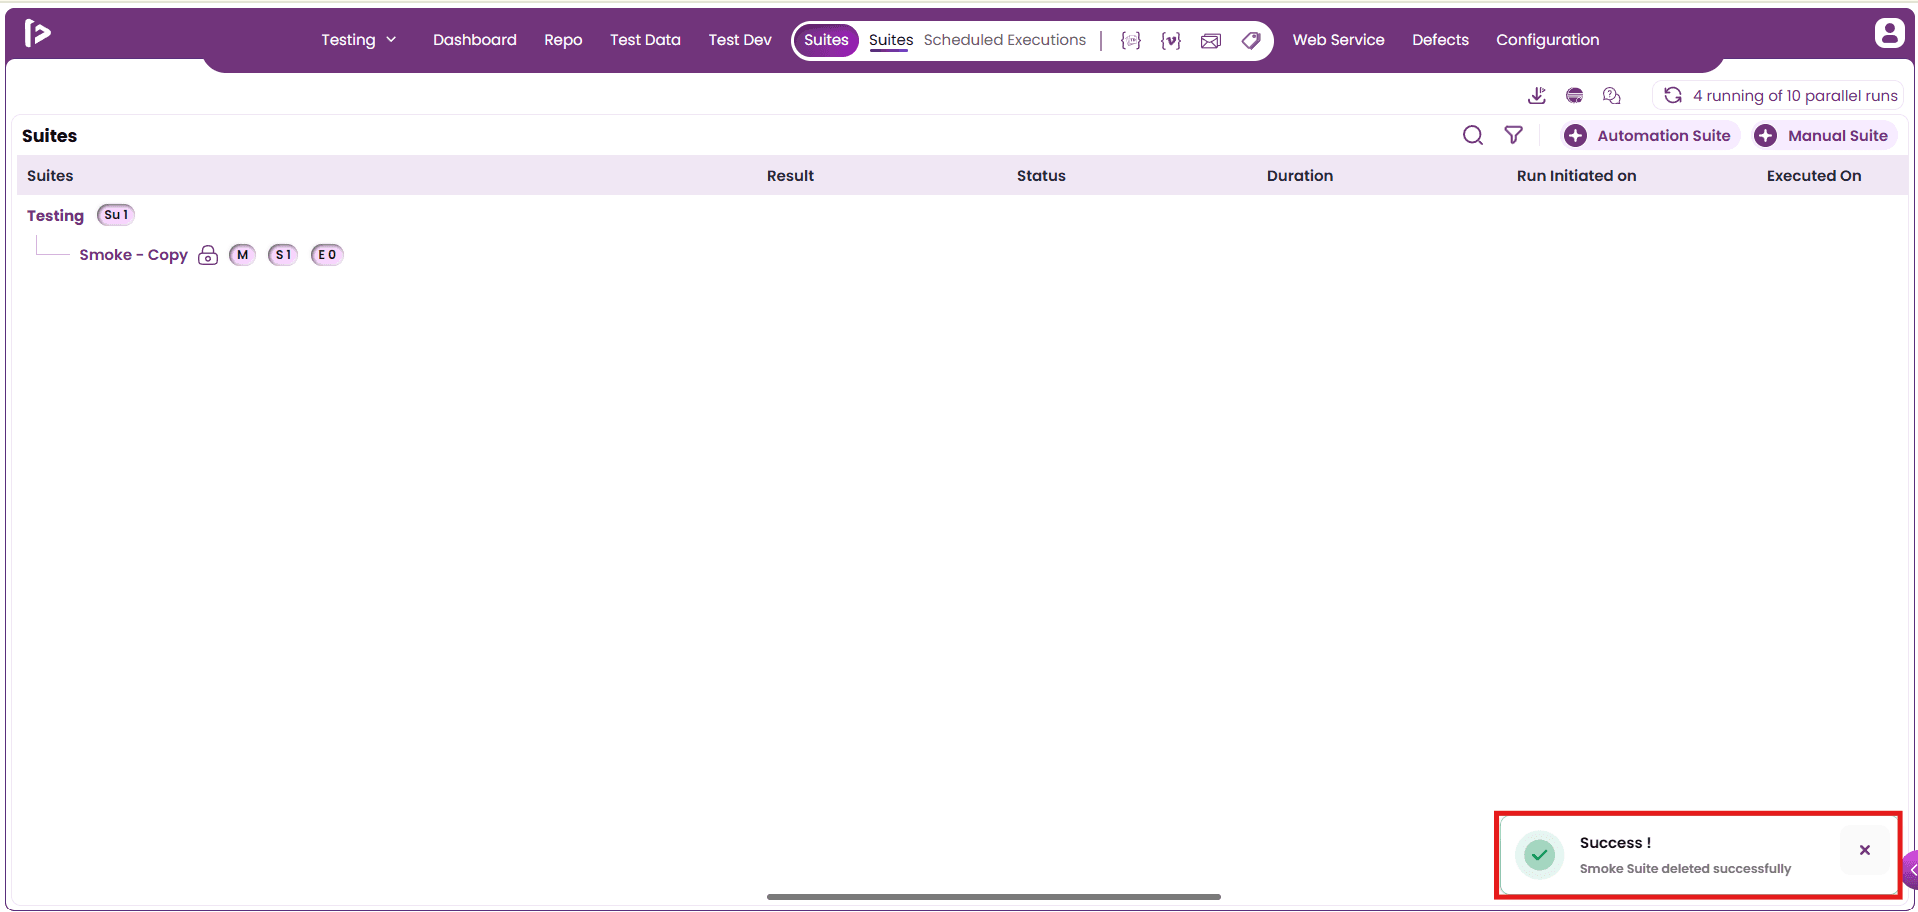
- This action will permanently remove the suite from the project, and a confirmation popup stating Suite deleted successfully will be displayed to the user.
Enhanced features for executions
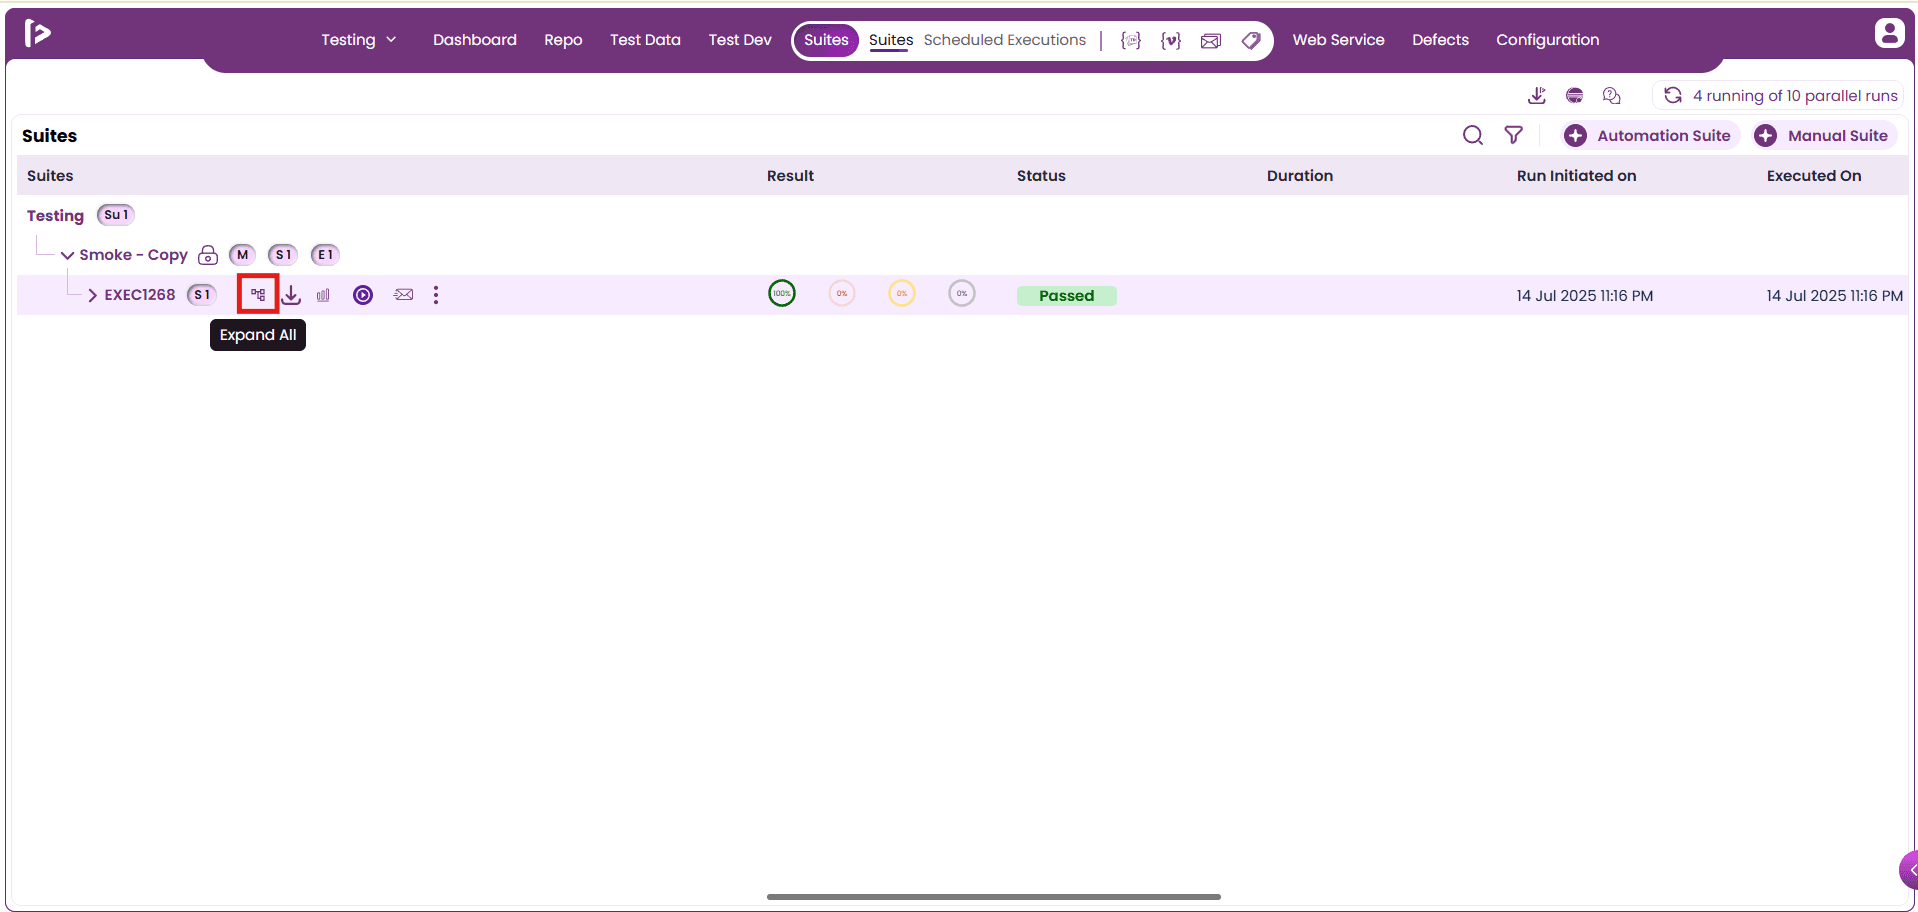
Expand all : The Expand All feature enables users to view all test cases and their execution details within a suite by expanding the entire suite hierarchy with a single click.
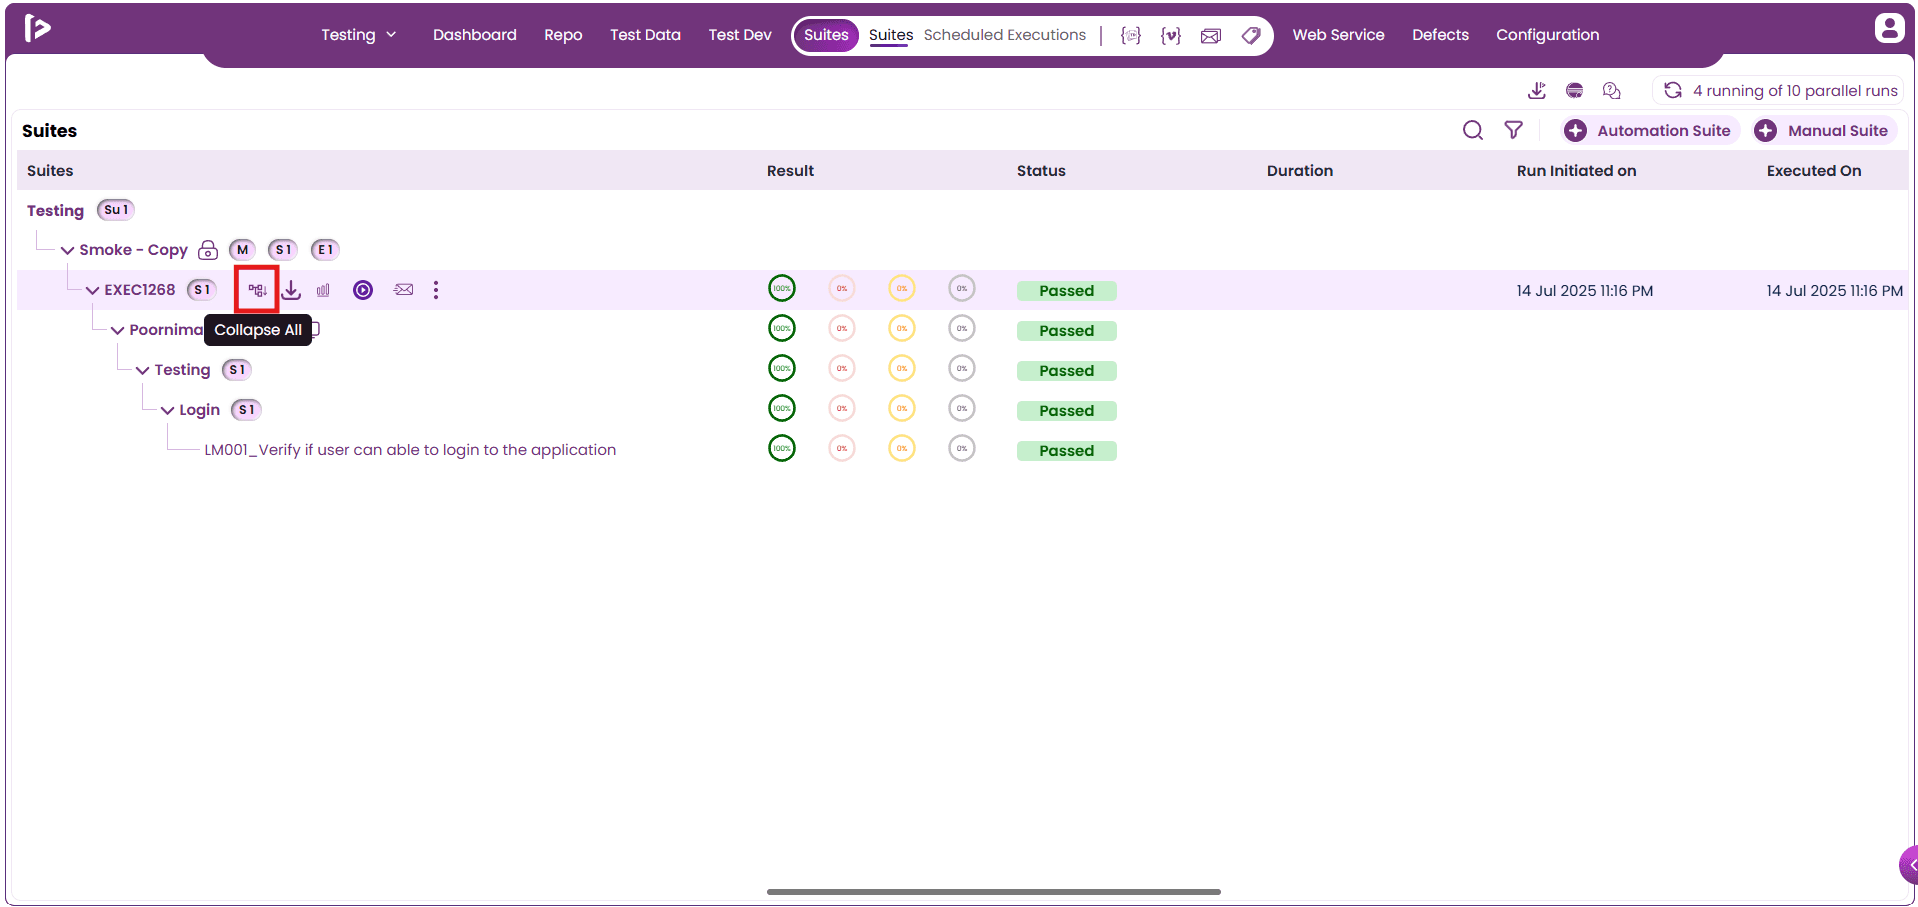
Collapse all : The Collapse All feature allows users to minimize the expanded test suite hierarchy, making the view more organized and easier to navigate.
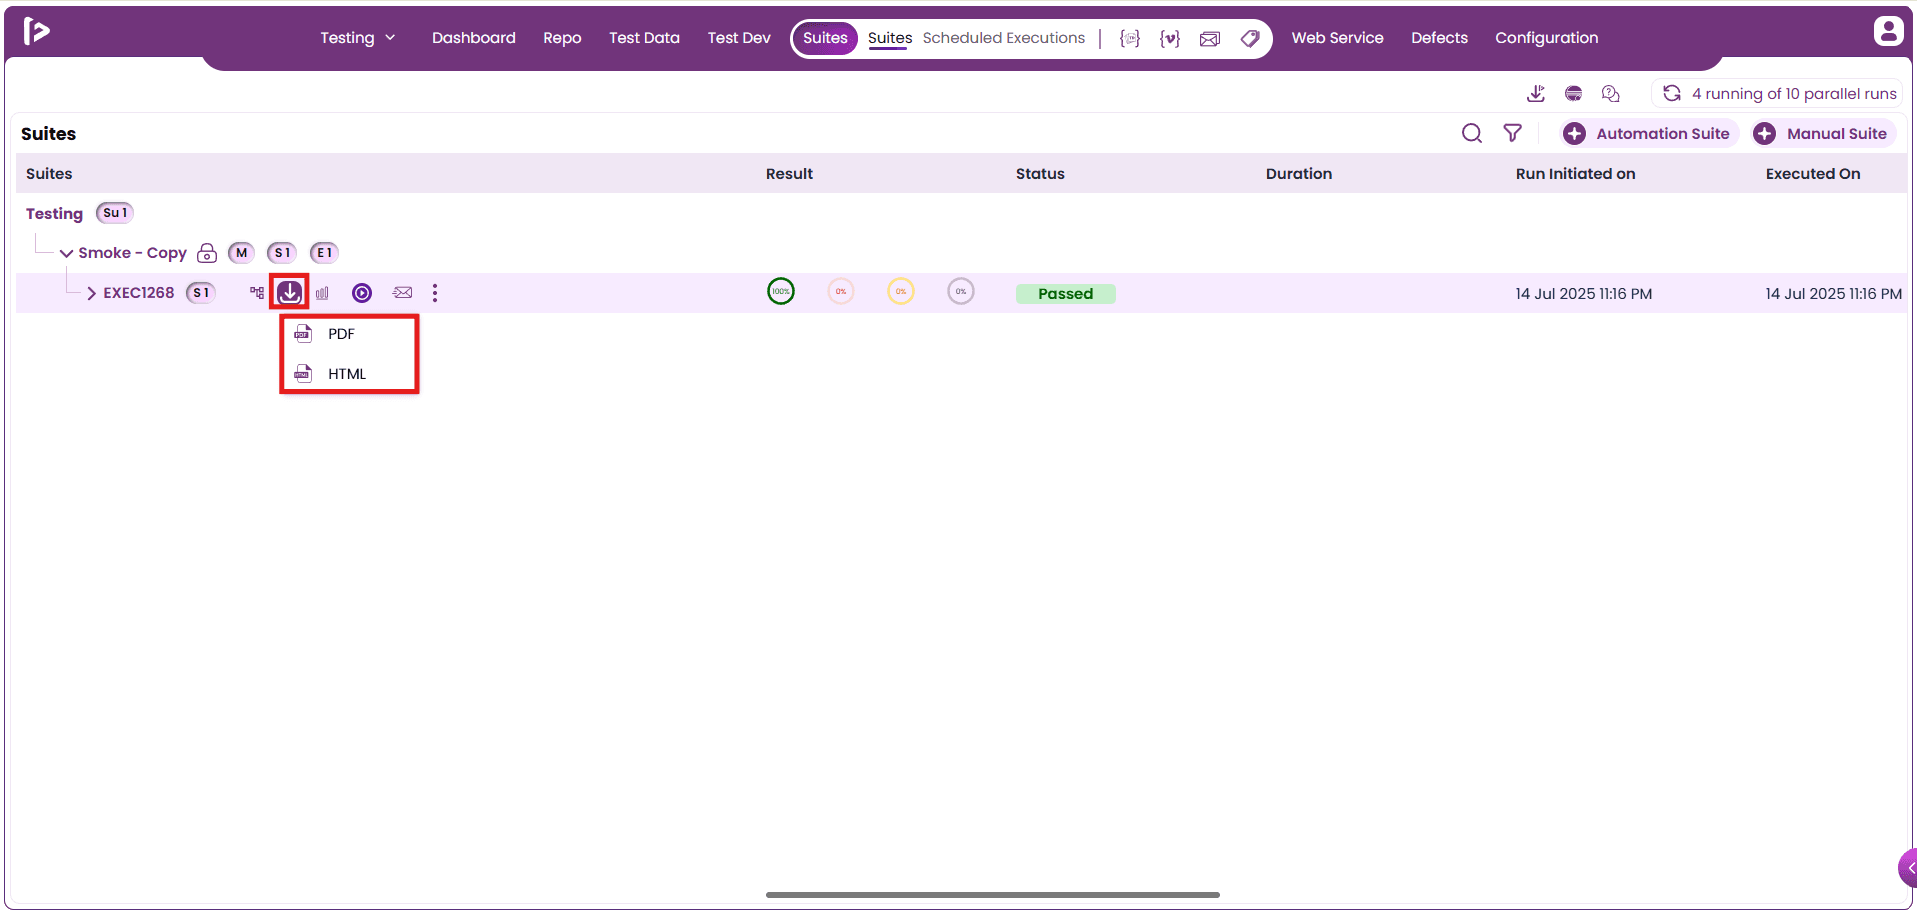
Download : The Download feature allows users to export execution reports for a selected suite, providing offline access and facilitating easy sharing of results. Upon clicking the download icon, users are presented with two format options:
-
PDF : Generates a well-formatted, print friendly execution report in PDF format, making it suitable for formal documentation or sharing with stakeholders.
-
HTML : Exports the report in an interactive HTML format, accessible through any web browser. This format is useful for in depth review, offering collapsible sections and a navigable structure.
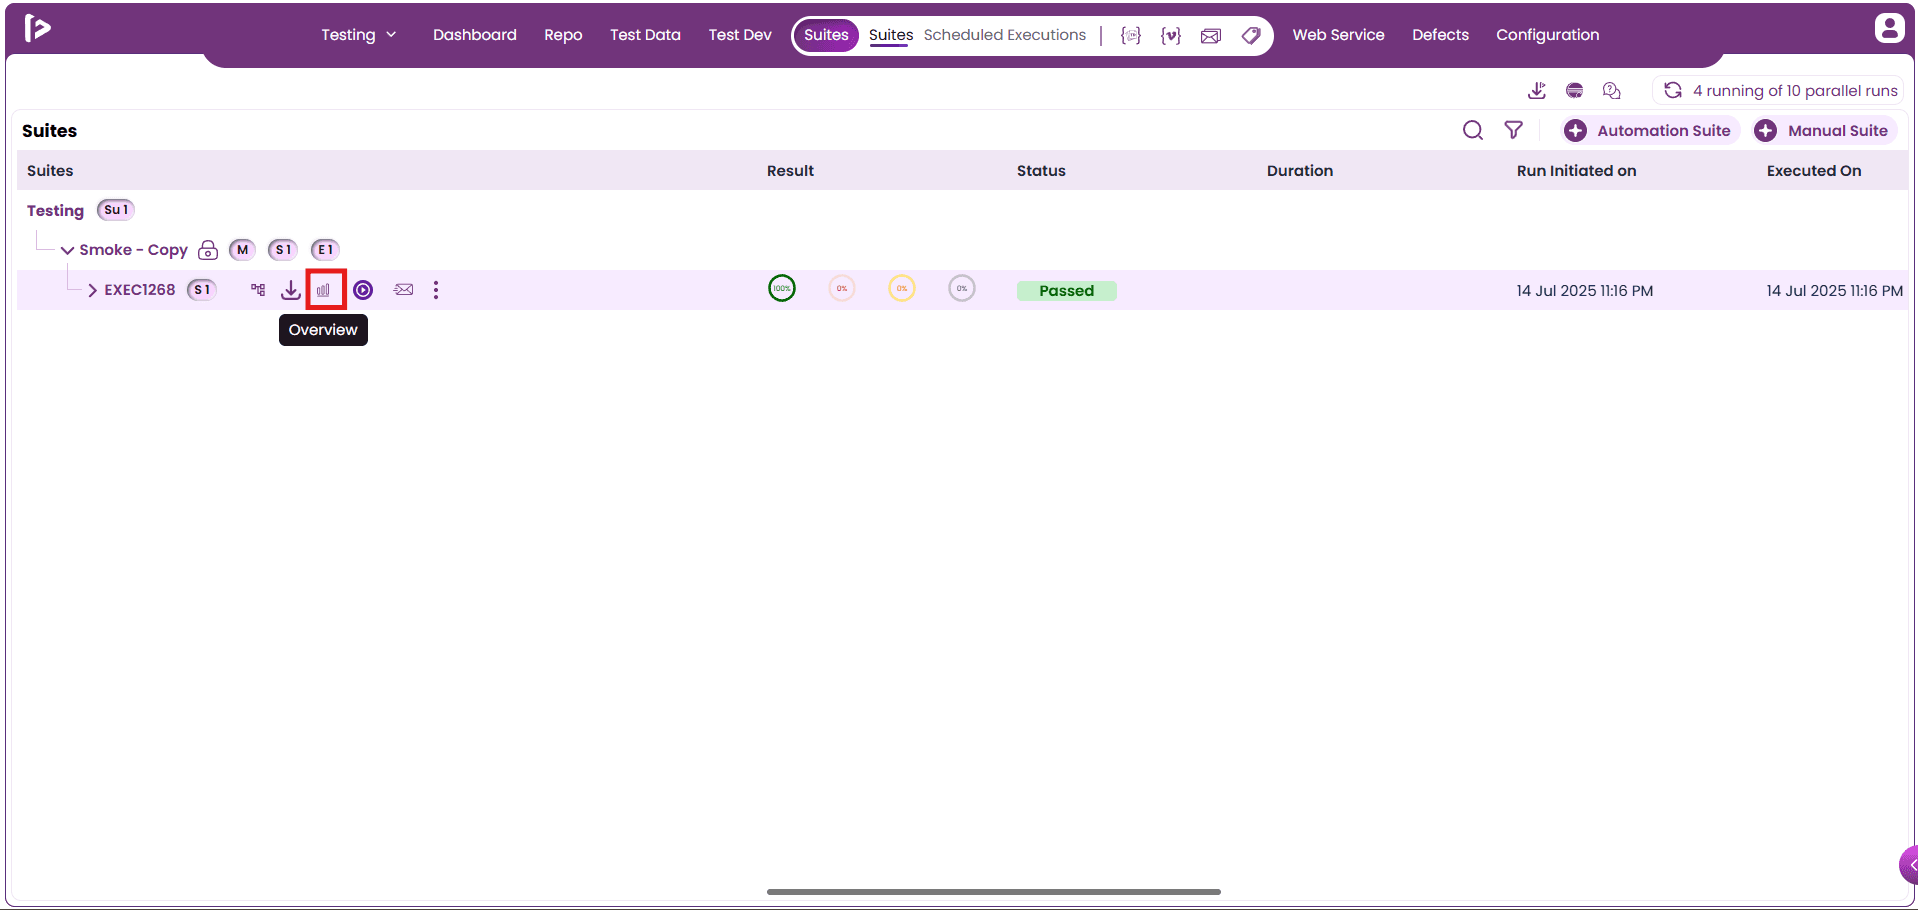
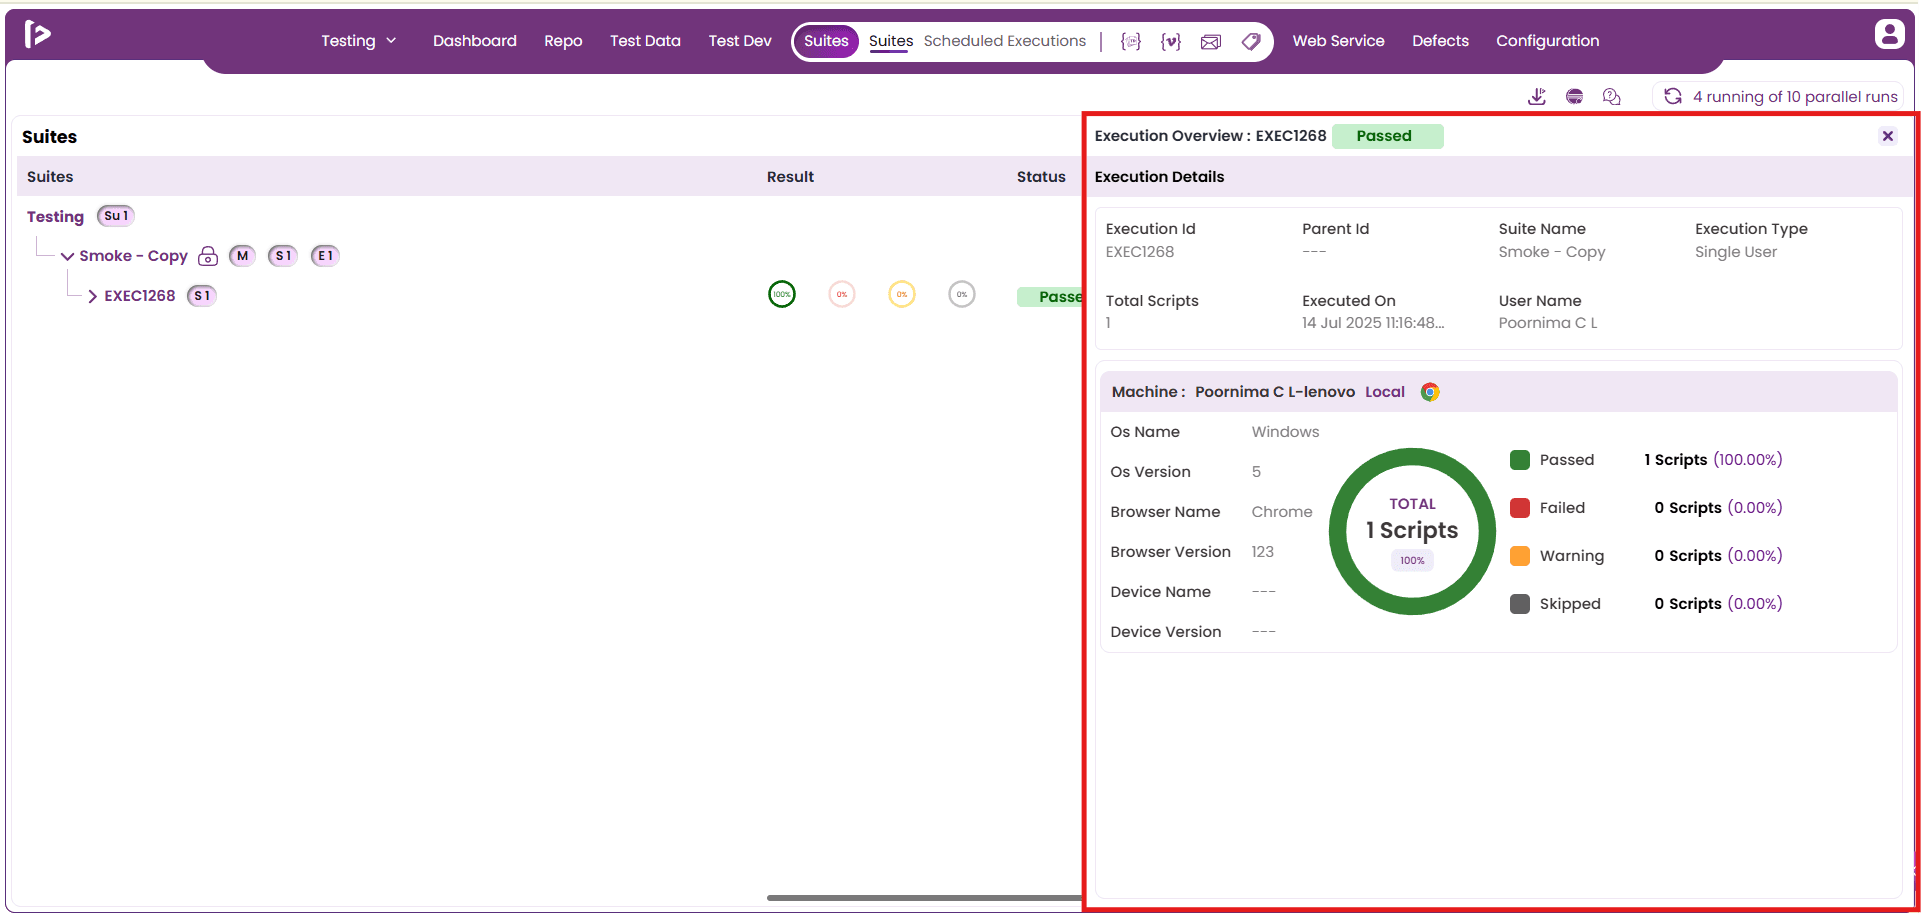
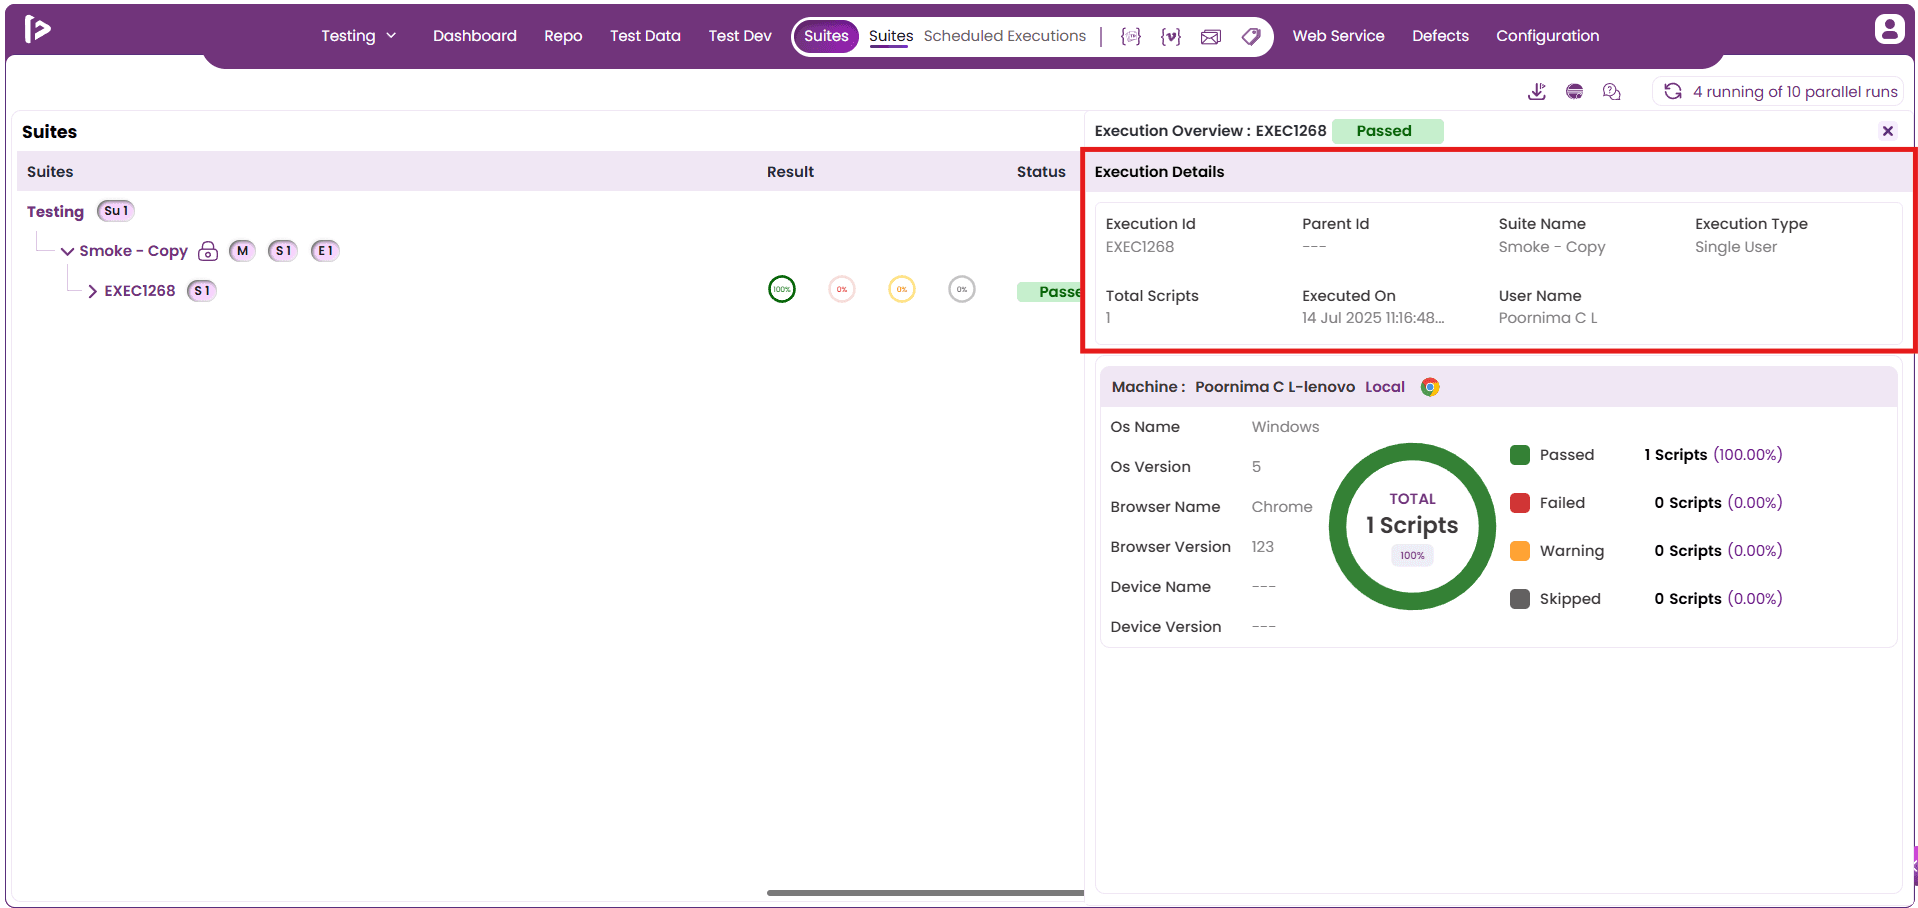
Overview : The overview section provides a summarized view of the execution details, including the execution ID, parent ID, suite name, execution type, total scripts, execution date, and user name. Steps to use overview:
- Click on the Overview option.
- The screen will display the Execution Overview dashboard, categorized primarily into two sections:
- Execution Details: This section provides a summary of the test run's specifics, such as Execution ID, Suite Name, Total Scripts, and Execution Date.
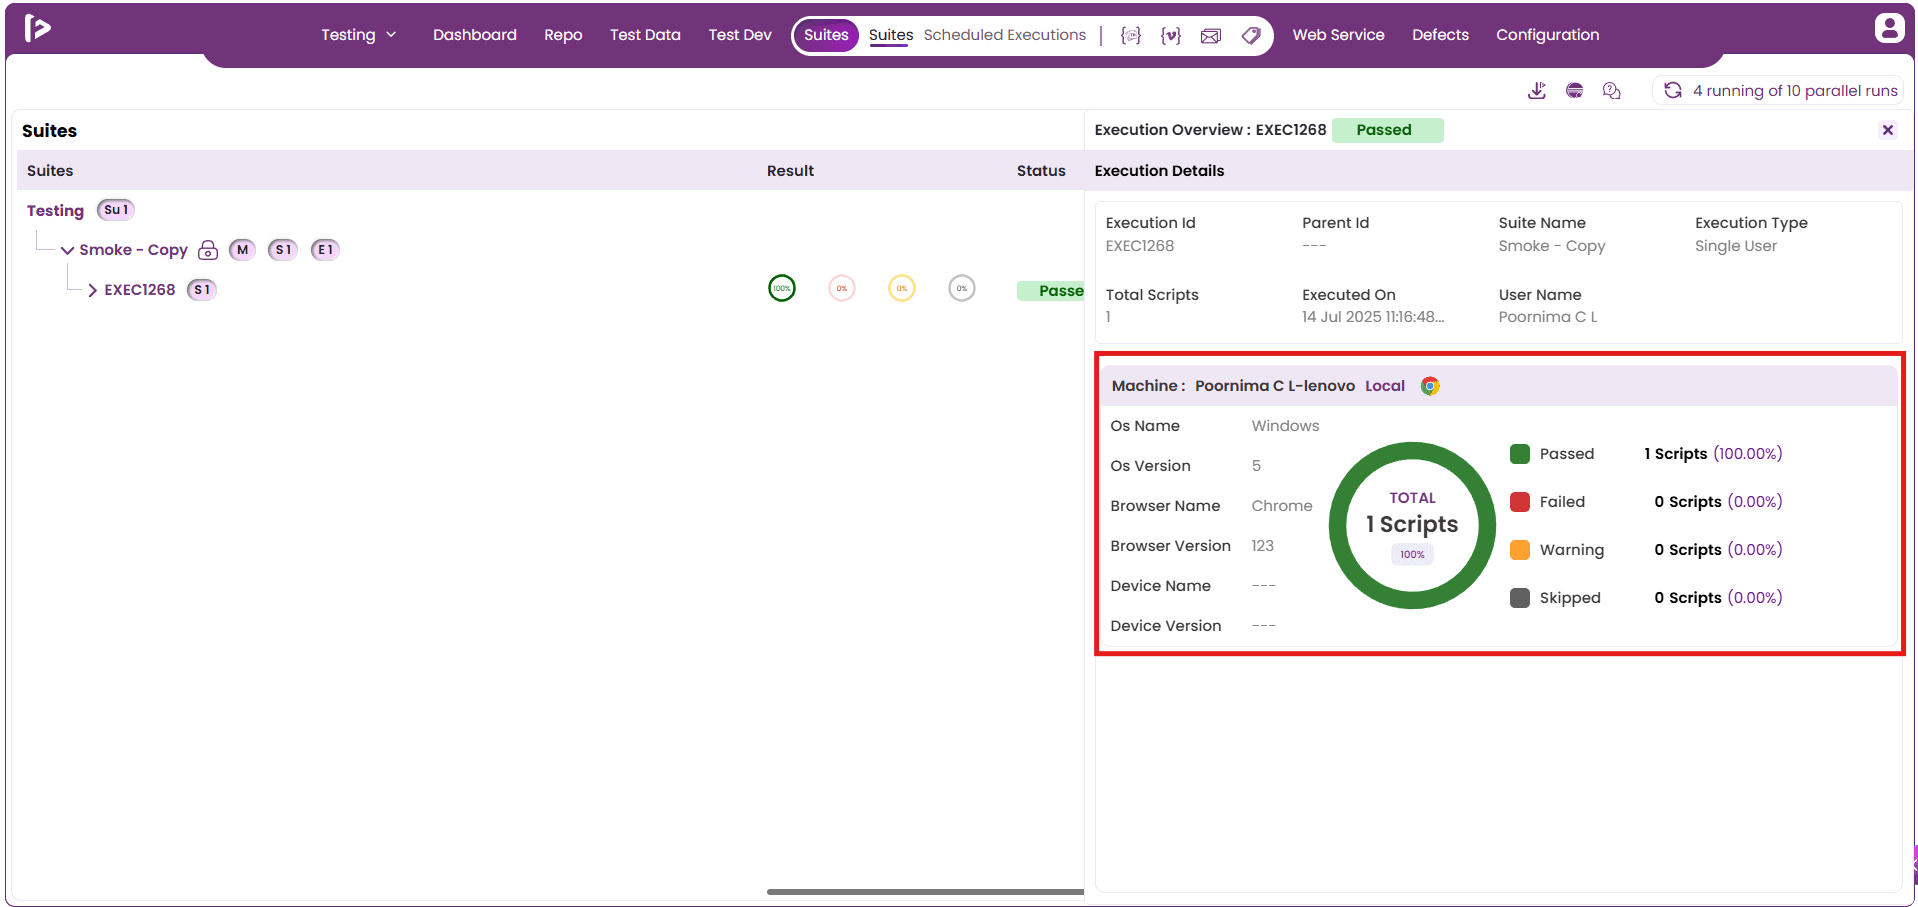
- Machine Details and Parallel Run Slider: This section or a related component presents information about the test execution environment, including the status of parallel runs via a slider indicating X running of Y parallel runs.
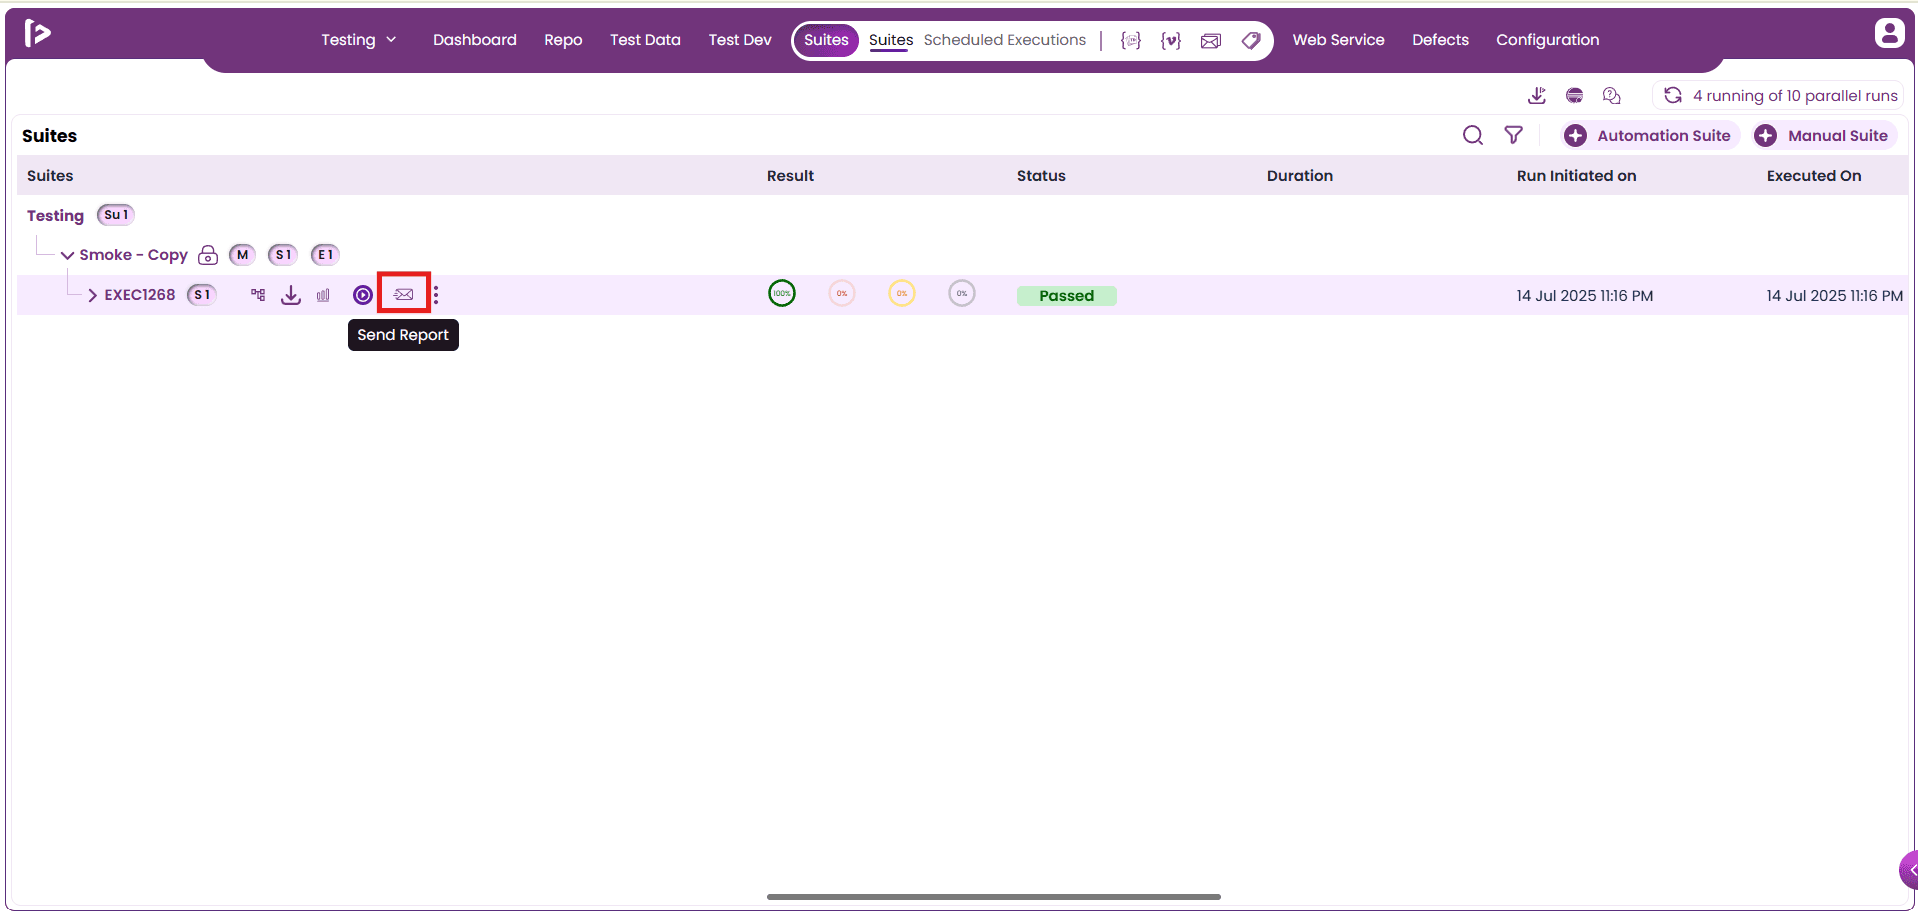
Send Report : The Send Report feature allows users to share the execution results of a test suite via email or other configured communication channels.
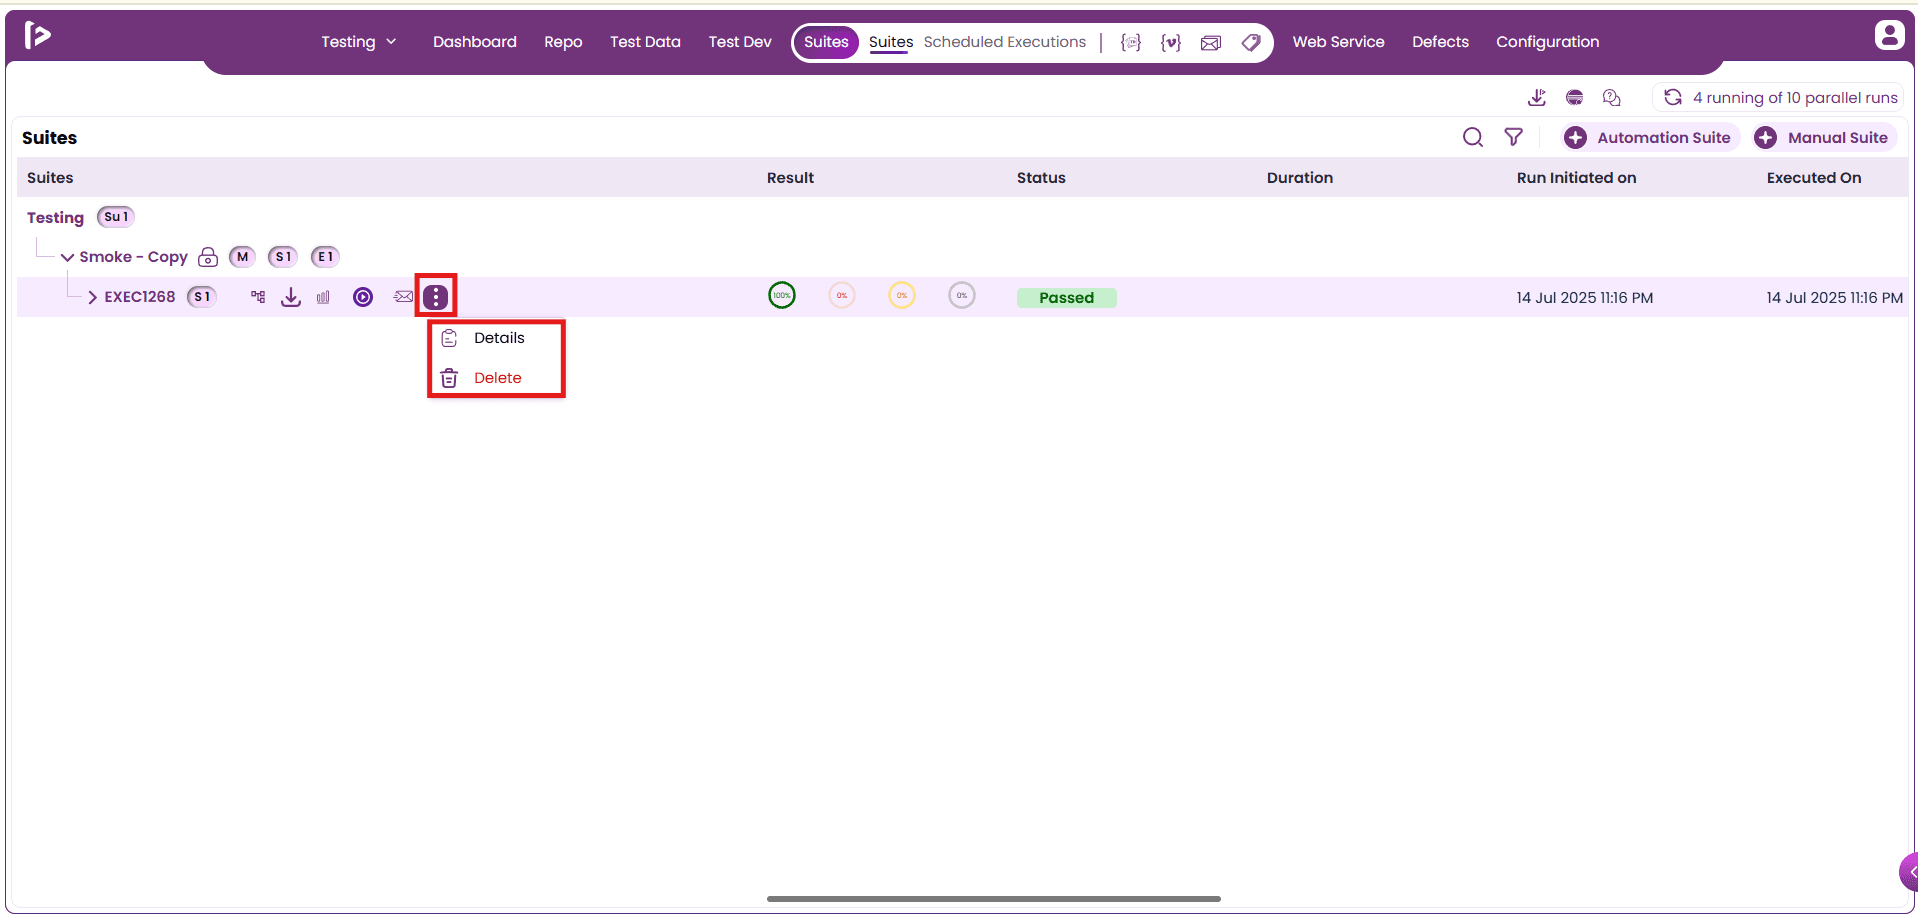
More options : The More option, represented by an ellipsis, provides additional actions for a specific test execution. It includes options such as Details to view comprehensive execution information and Delete to remove the execution record.
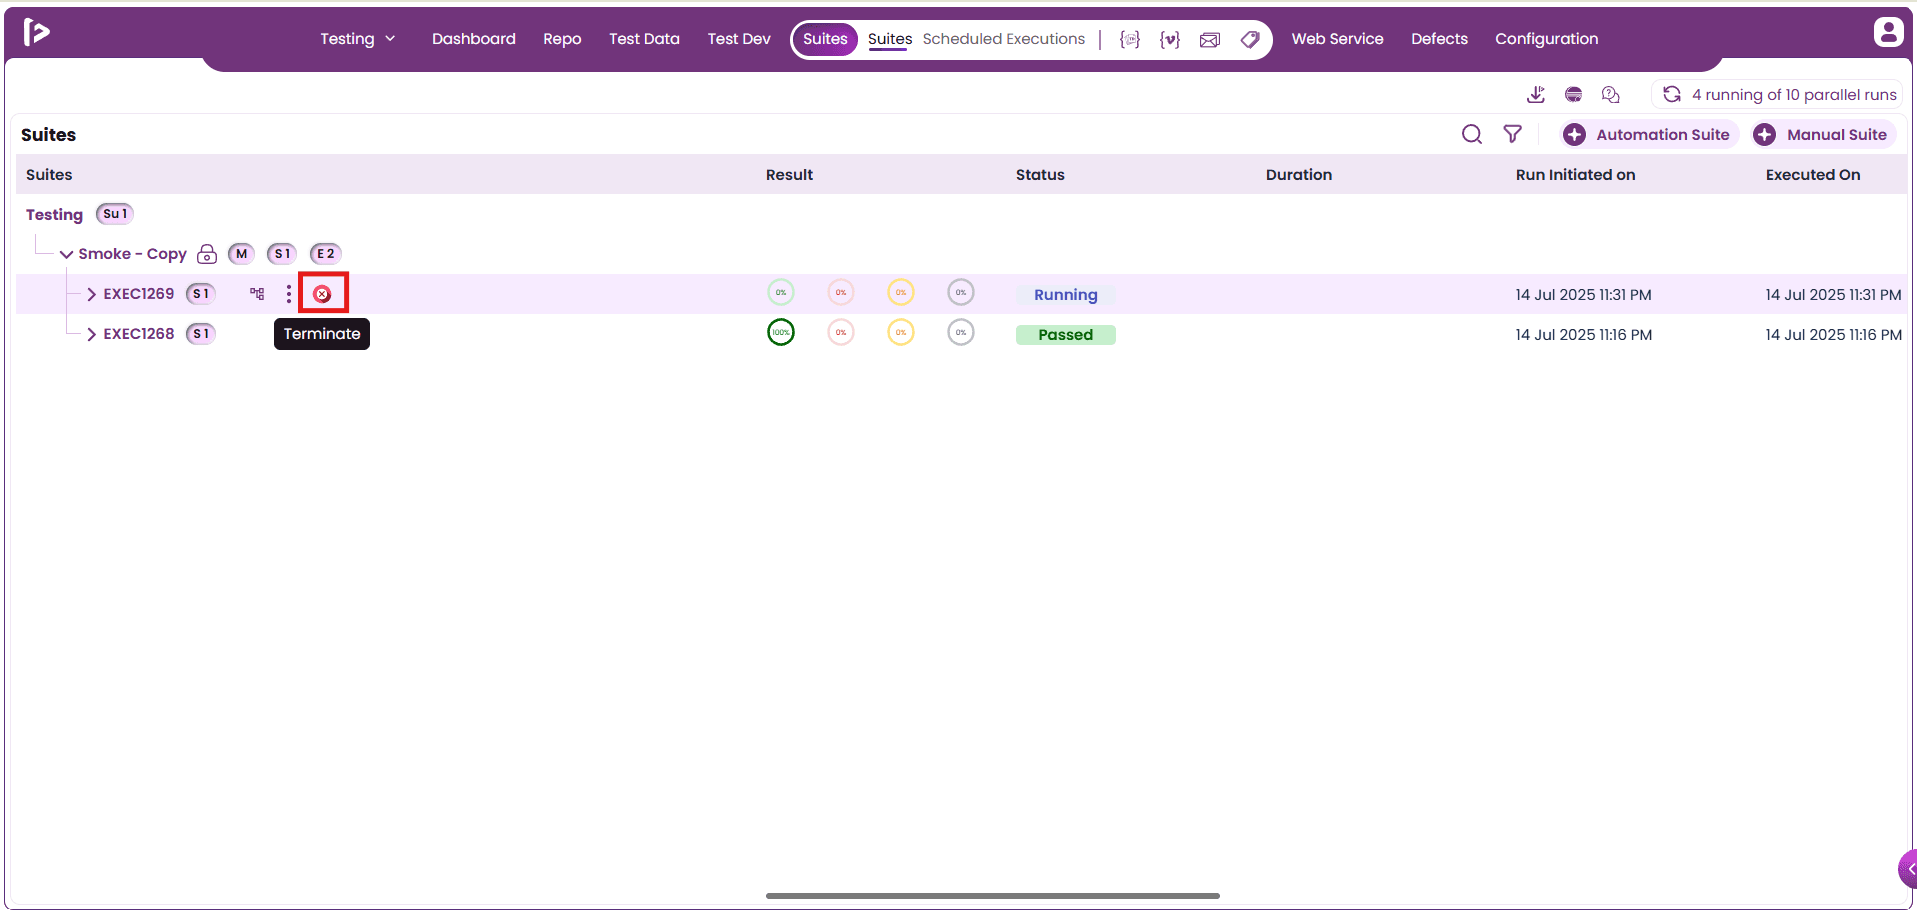
Terminate : The Terminate option, represented by a stop icon, allows users to prematurely stop a running test execution.
Search Functionality
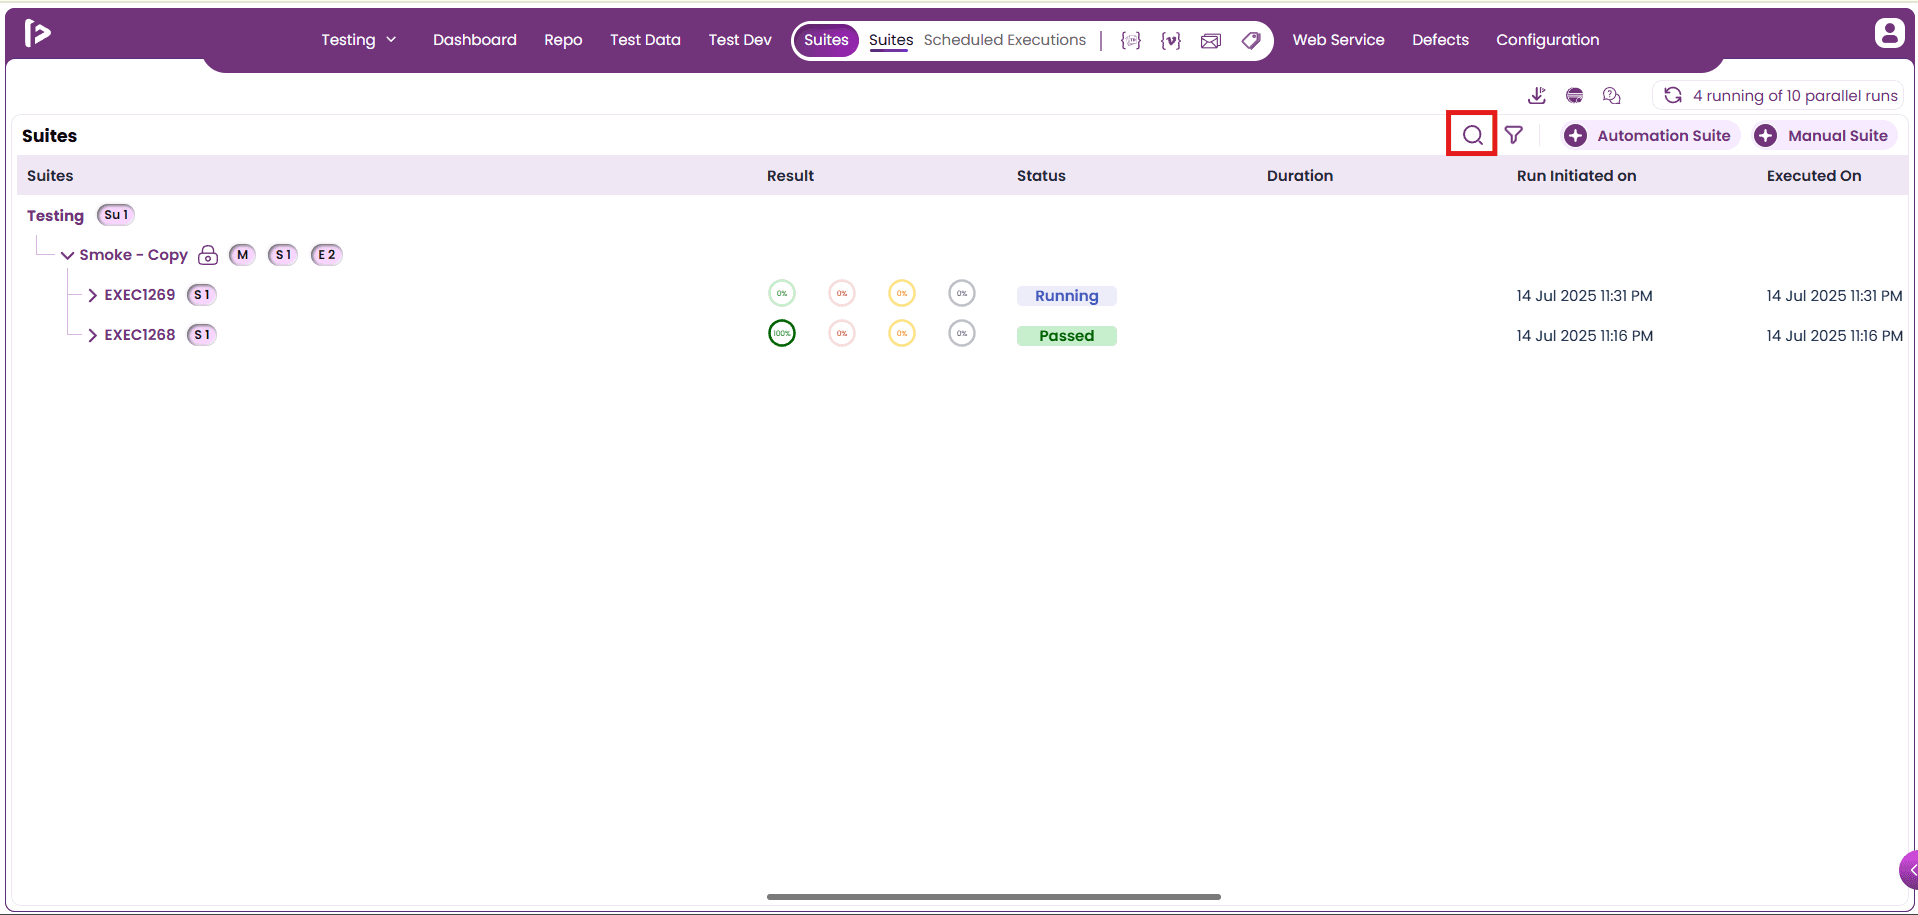
This search feature allows users to quickly locate specific information within an application or platform by entering keywords or phrases into a search bar. The below steps illustrate the process of filtering the data using search features.
- Click on the Search icon as shown below.
- Enter the data the user wants to search in the search bar and press the Enter key.
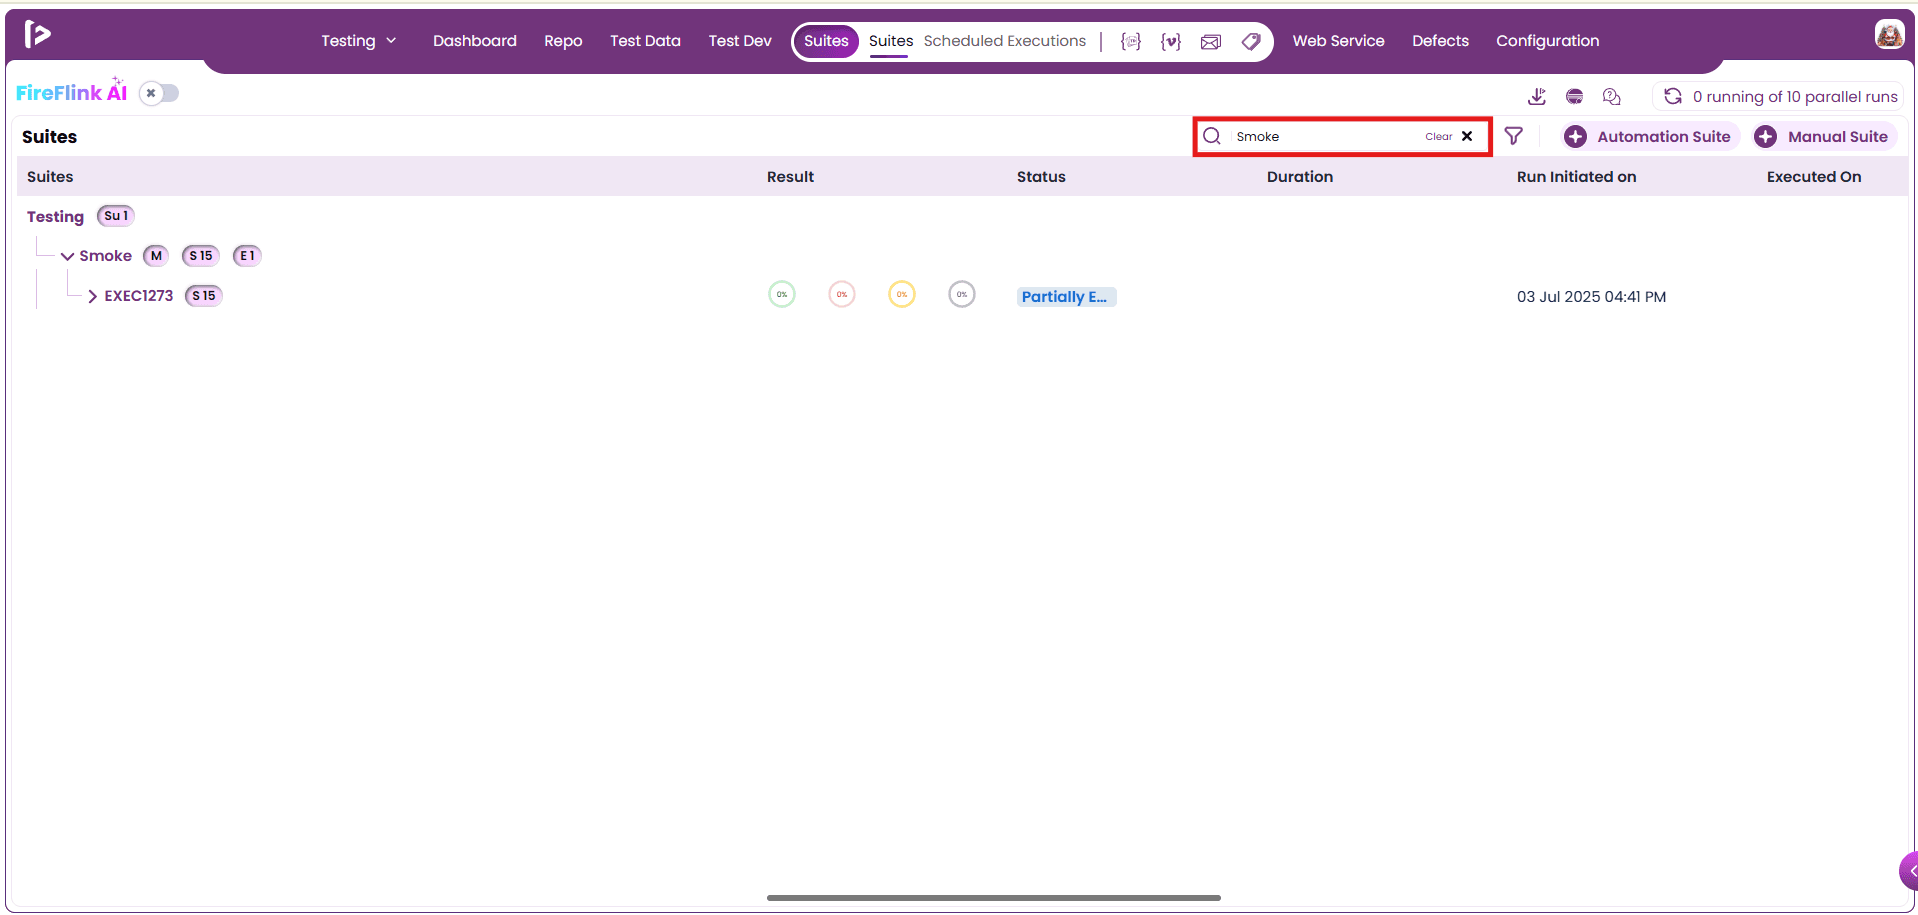
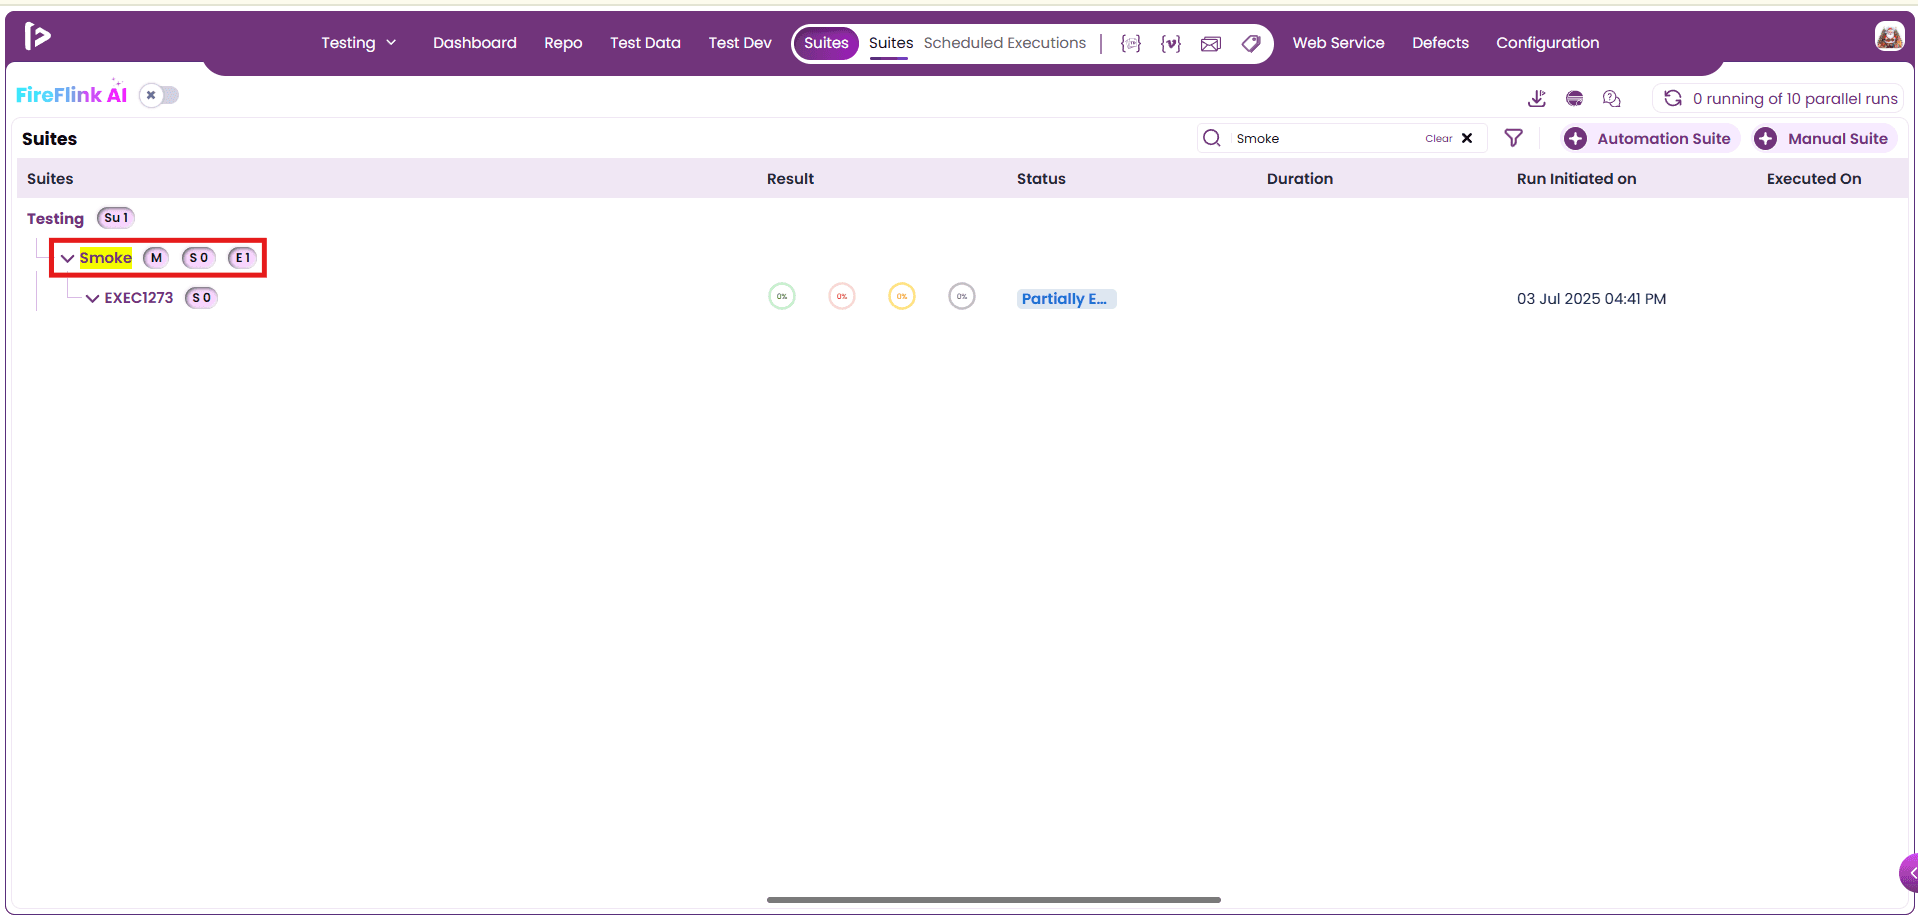
- It filters the data and displays it as shown below.
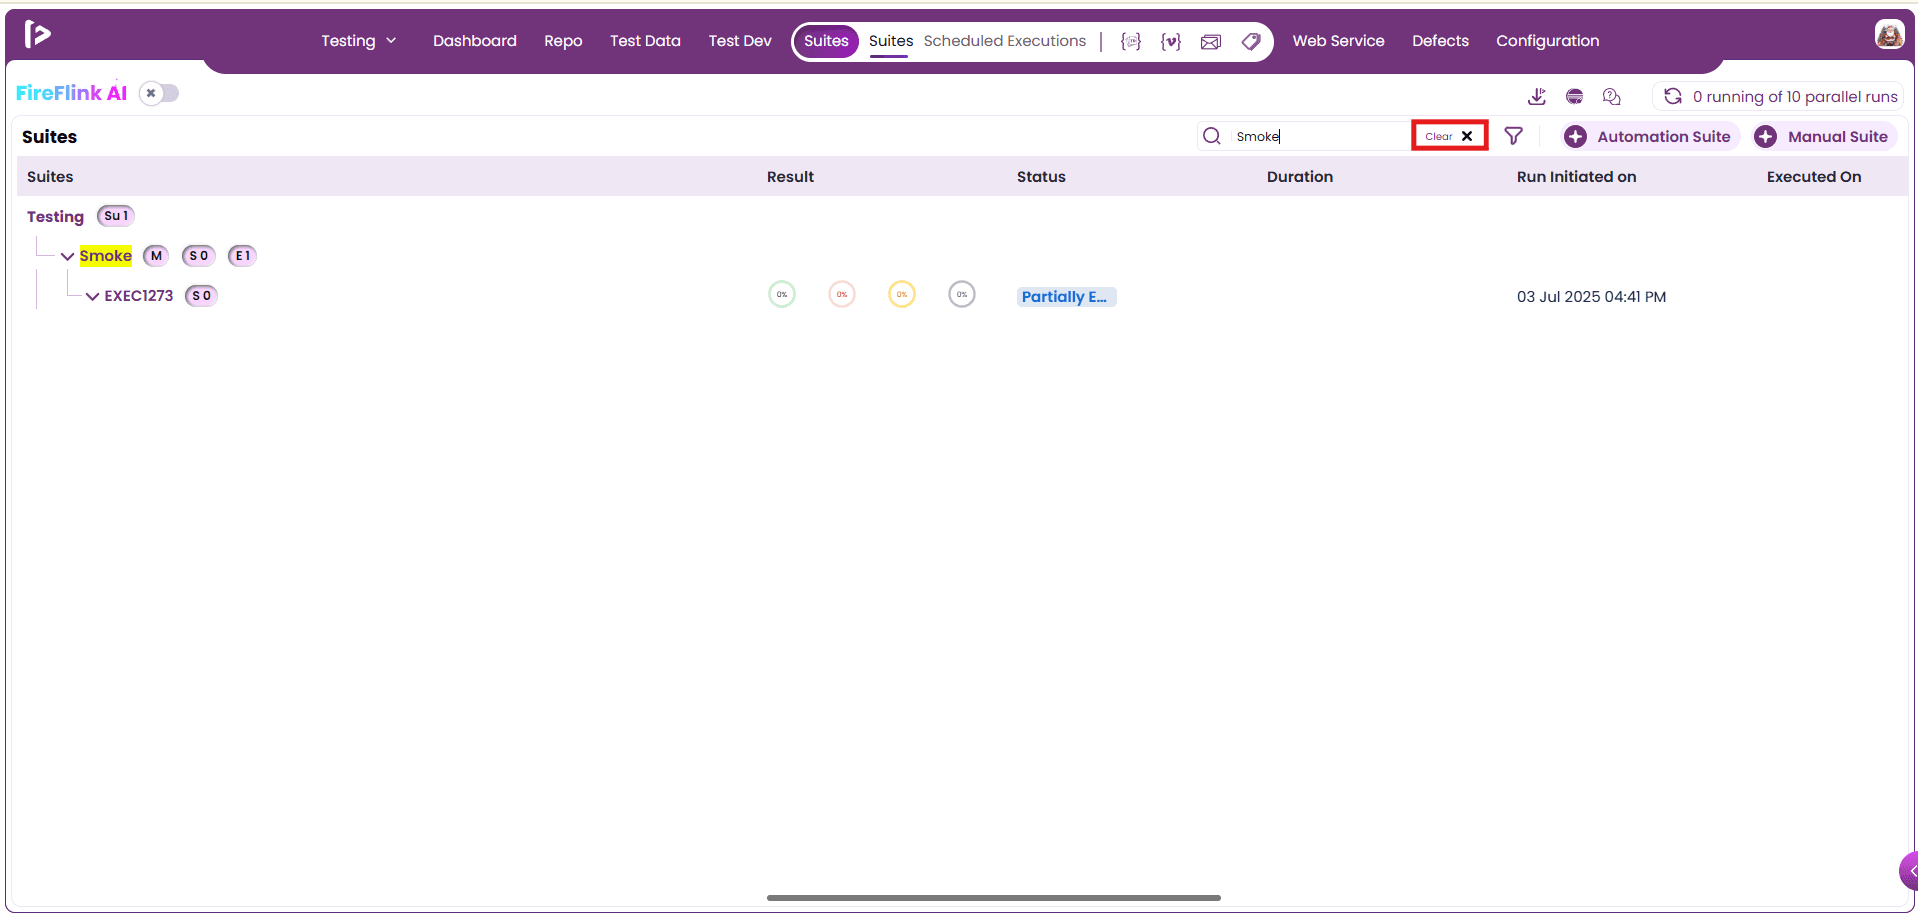
- To clear the search, click on the Clear or Close buttons.
Filter Functionality
The filter functionality allows users to narrow down the list of manual suites displayed in FireFlink based on specific criteria. This helps users quickly find relevant suites by excluding unrelated or unnecessary entries, making it easier to manage large collections of test suites. The steps to apply the filter to the suite is as follows:
- On the test suite listing page, locate and click the filter icon at the top-right corner of the page.
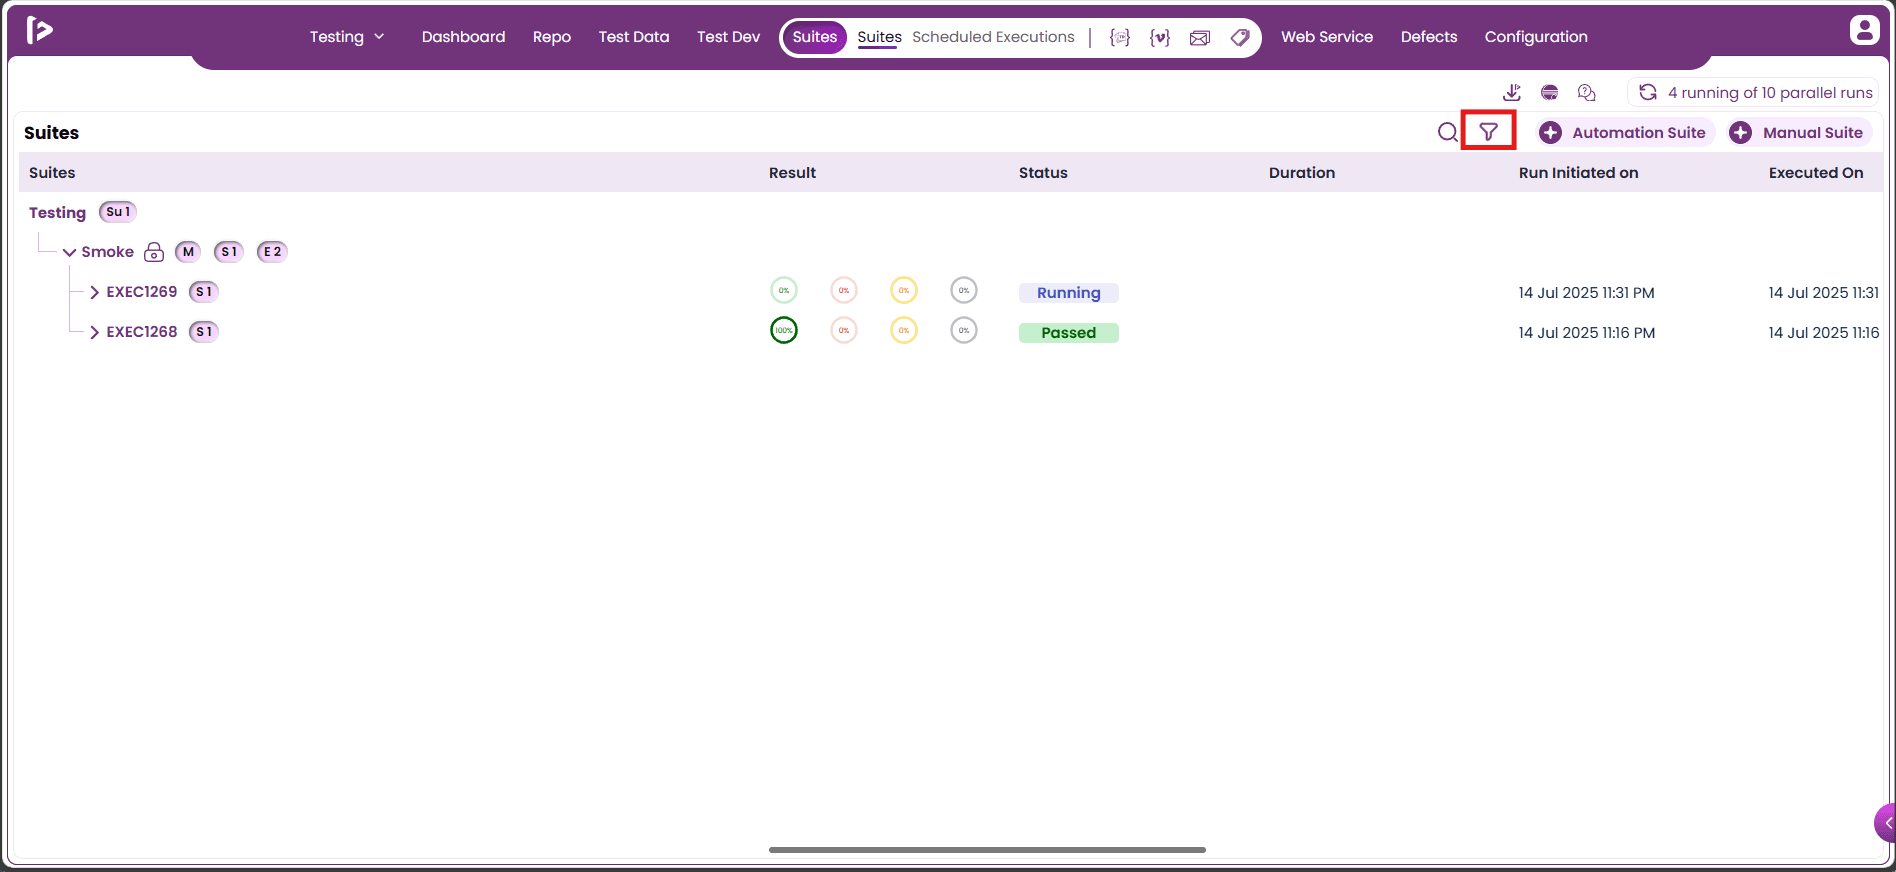
- Once clicked, the filter panel will appear on the screen. This panel allows you to customize your search based on multiple filtering options. After selecting the desired filter criteria, click the Apply button at the bottom of the filter panel.
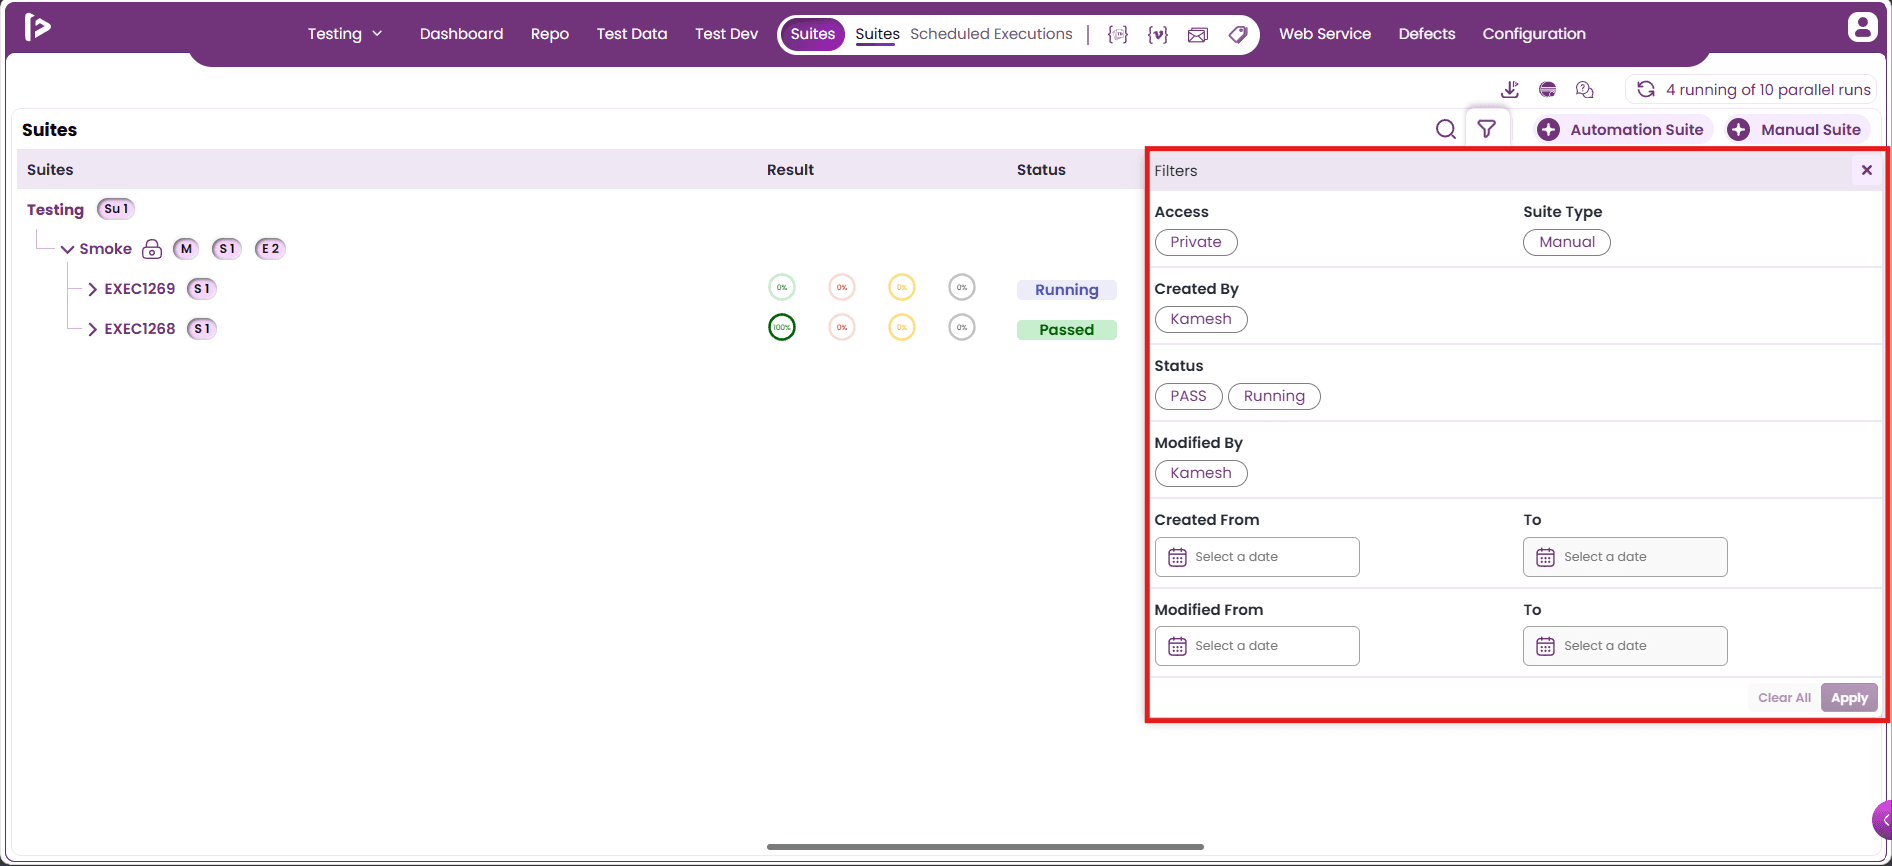
- Once applied, the suite listing will automatically update to display only those suites that match the selected filter conditions.