Defects
A defect is a deviation between the expected and actual behavior of an application identified during testing.
The Defect section in FireFlink enables users to record, manage, and track these issues throughout their lifecycle. It helps teams assign responsibility, prioritize fixes, and maintain clear visibility of project quality.
Navigation
All Project > Individual Project > Top navigation bar > Defect
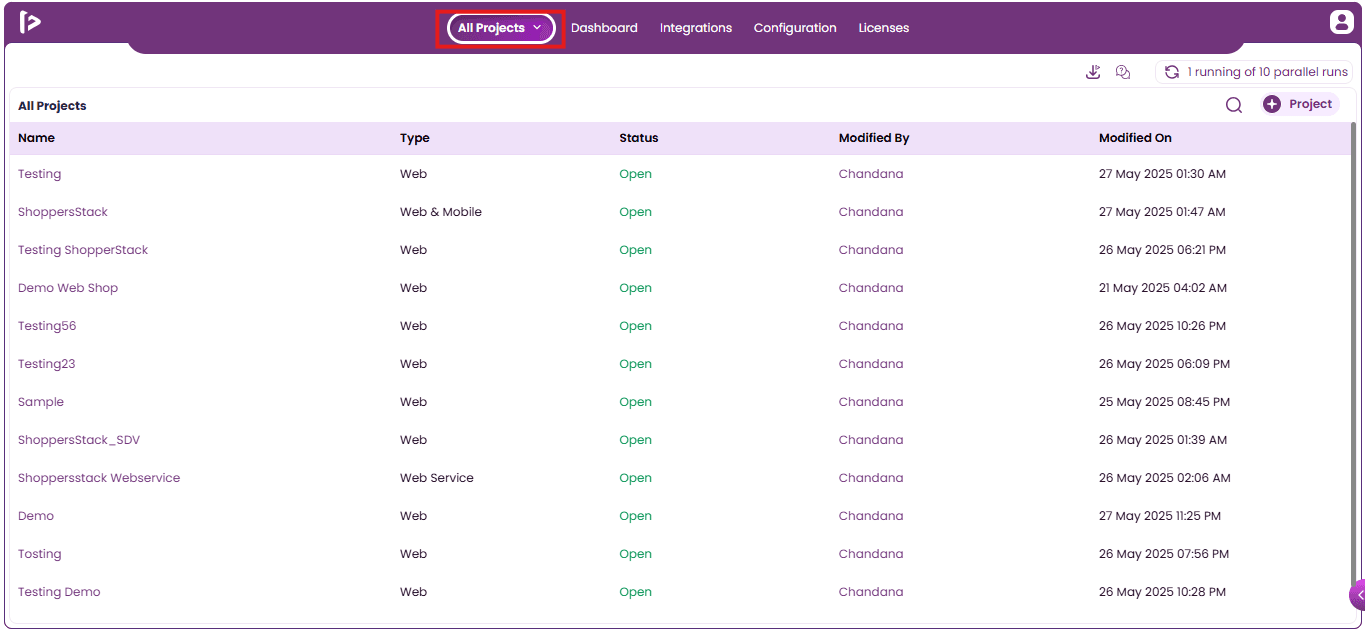
- As soon as the user logged in, they will be navigated to All projects level. and select the desired project from the All Projects options.
- Upon selecting, the user will be navigated to Project Level. Select Defect from the Top navigation bar.
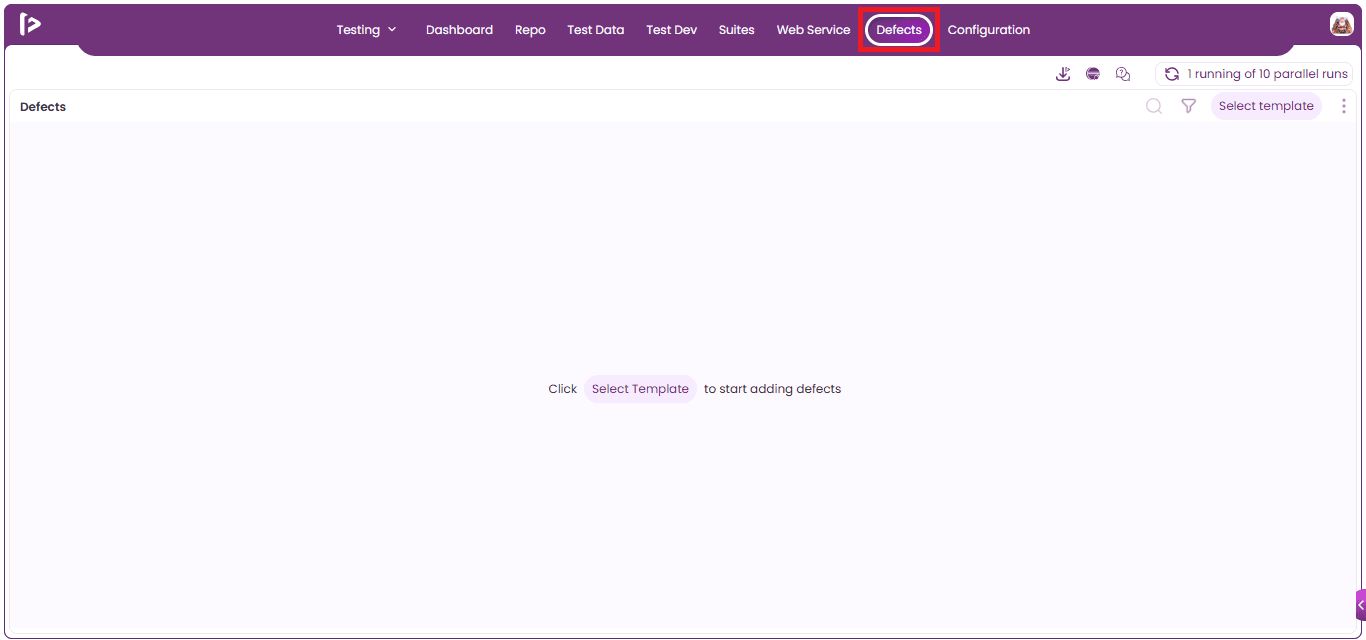
Steps to create a defect within FireFlink
Defects can be created within FireFlink in two ways. They are as follows
-
From the Defect section
-
From the Execution section (Create Issue icon)
Method 1 : Defect Section
- The Defect Section in FireFlink allows users to view, track, and manage all defects raised during test executions.
Steps to raise the defects within Defect Section are as follows
- The user should select the defect template initially to create the defect.
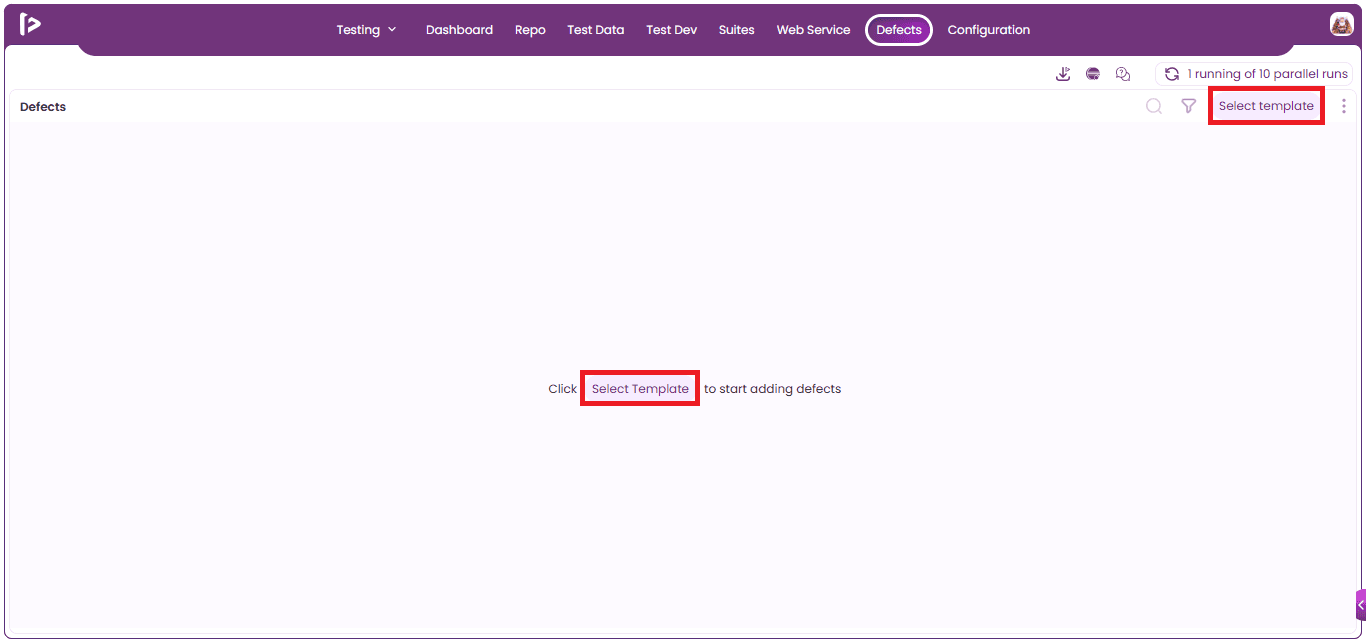
- After clicking the select template button, the Select Template slider will be displayed.
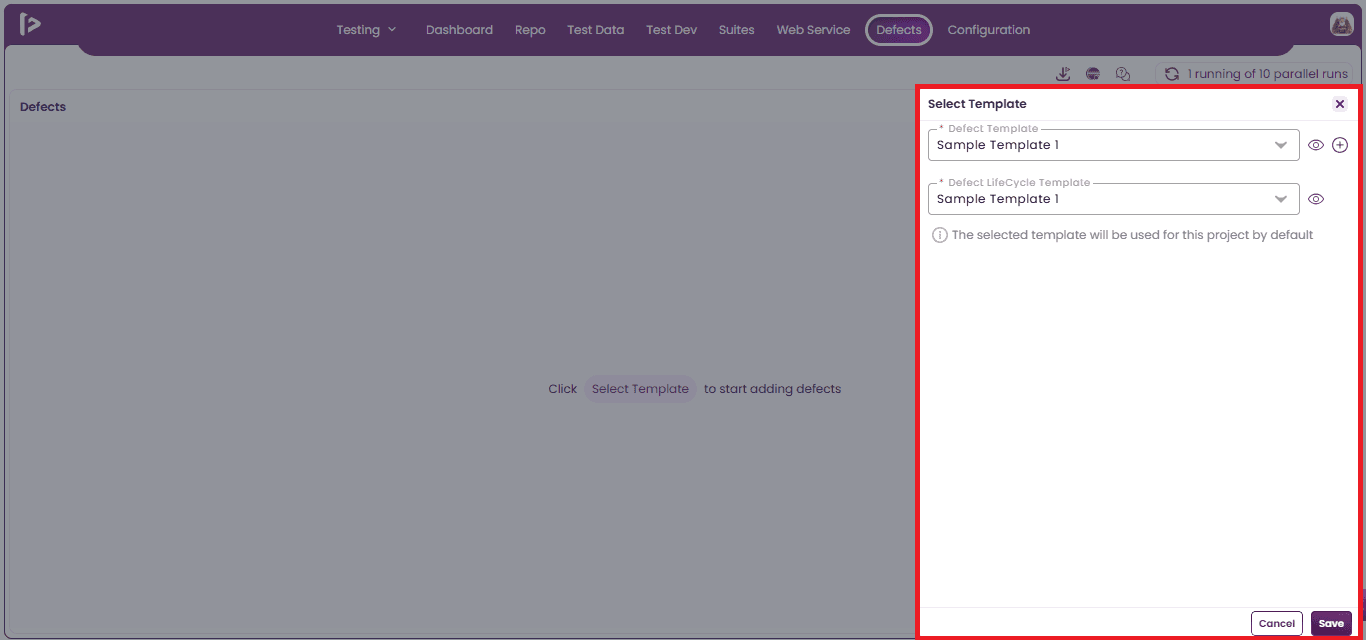
- The user needs to select the defect template from the dropdown as shown below.
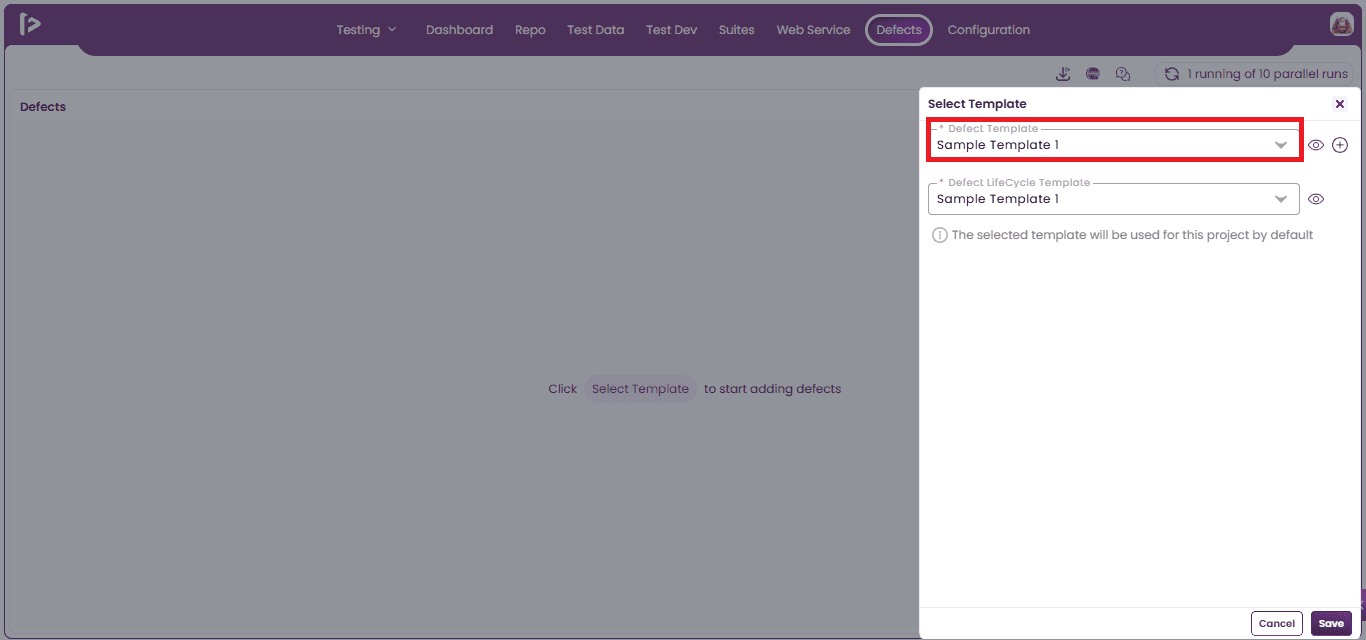
- The user needs to select the defect life cycle template from the dropdown as shown below.
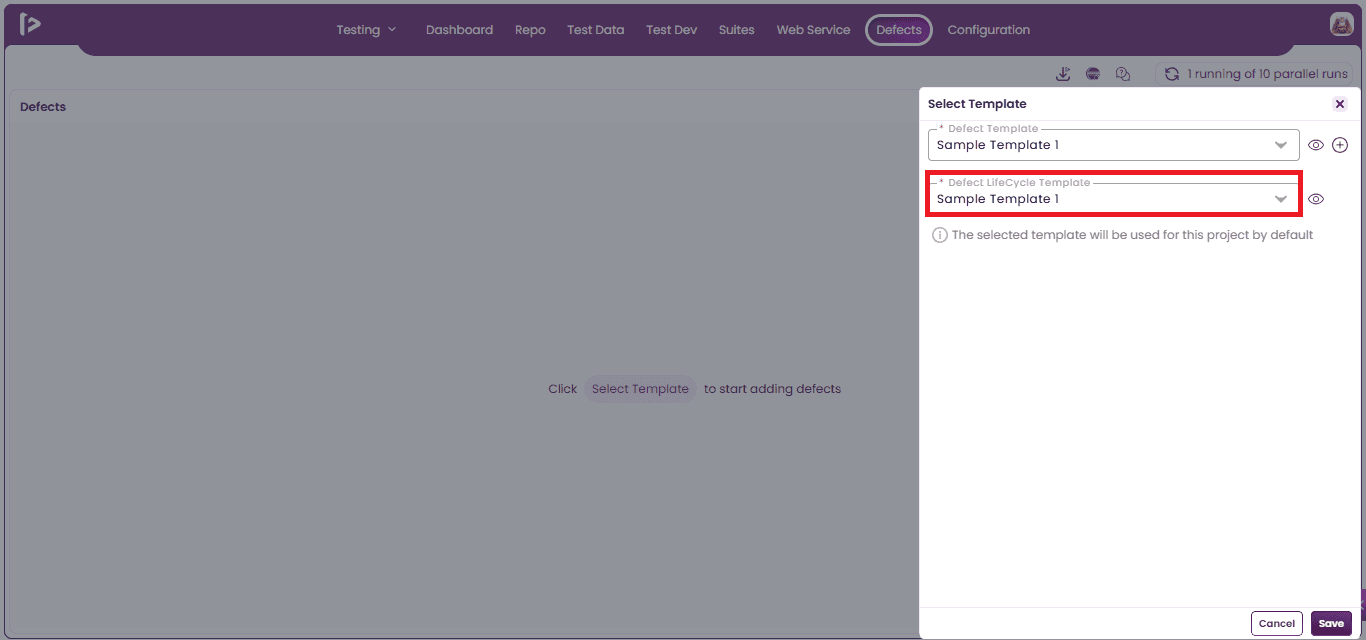
- After selecting the templates, the user needs to click on the save button as shown below.
- Note : Once a template is selected and saved, it will be set as the default defect template for all newly created defects within the project.
- The user can create the defect by clicking on the +Defect button shown in the below.
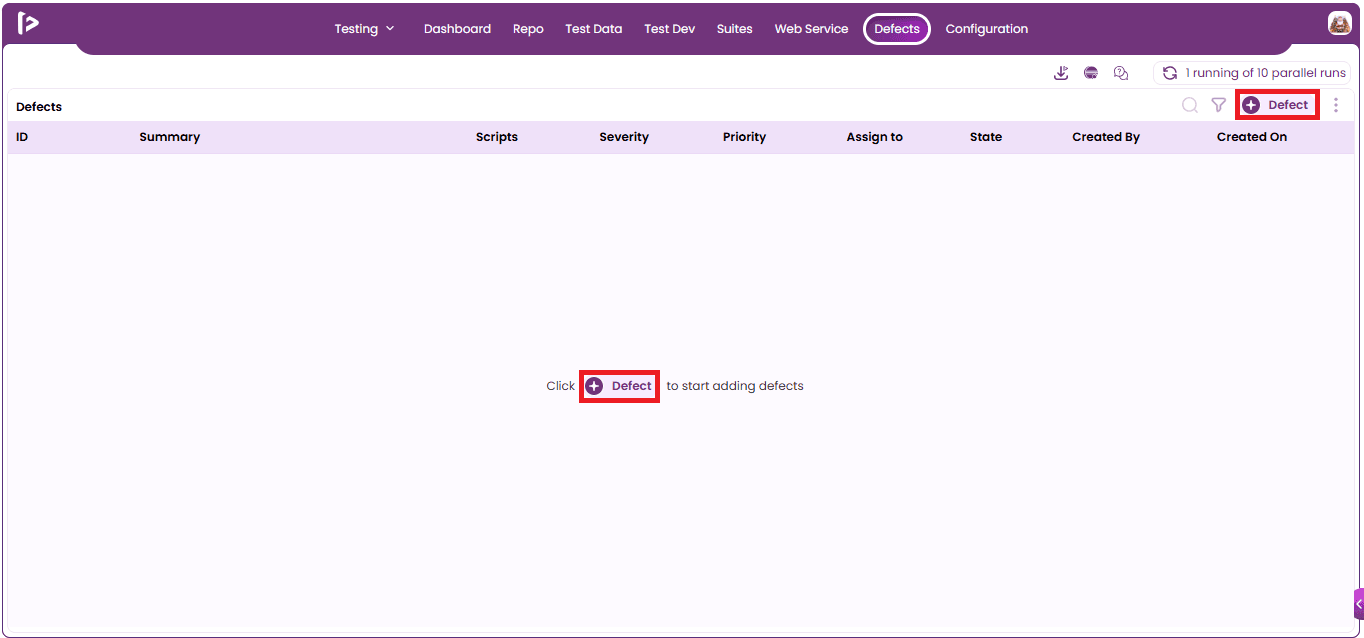
-
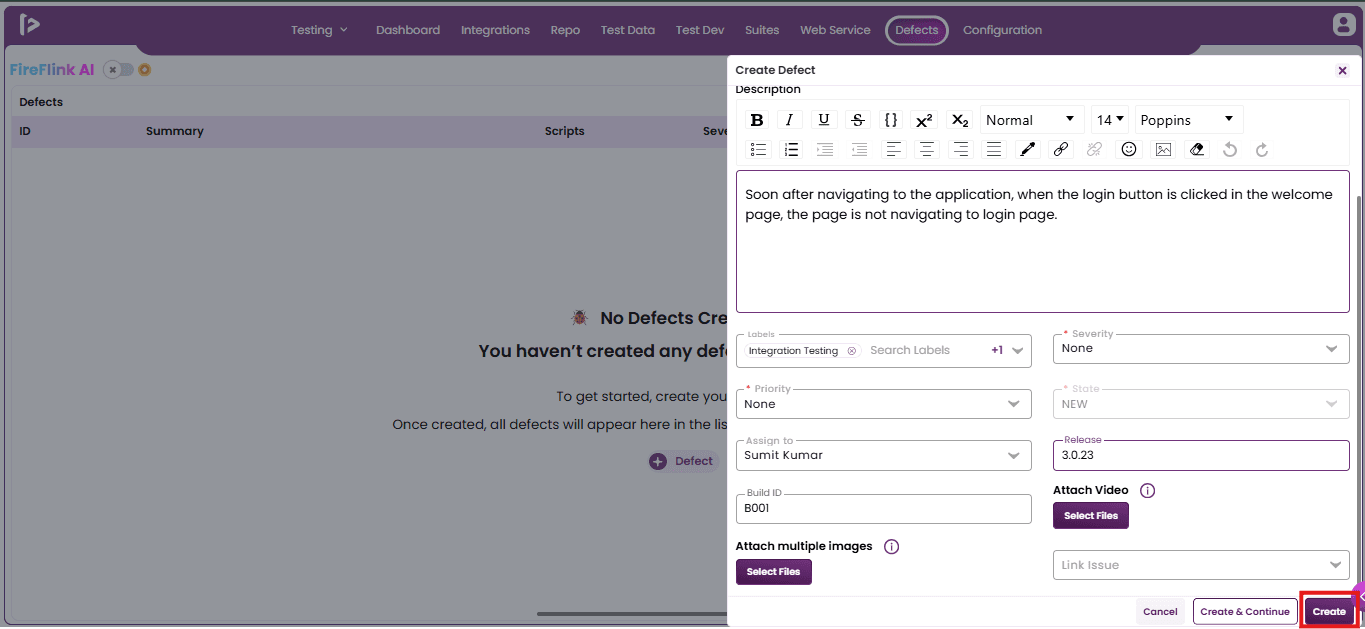
Once the user clicks on the "+Defect" button, a "Create Defect" slider will appear.
- In this slider, the user will be prompted to enter the defect details. This includes fields like defect title, description, severity, priority, and any other required information based on the organization’s setup.
- The user should ensure all details are filled in accurately to clearly convey the nature of the defect.
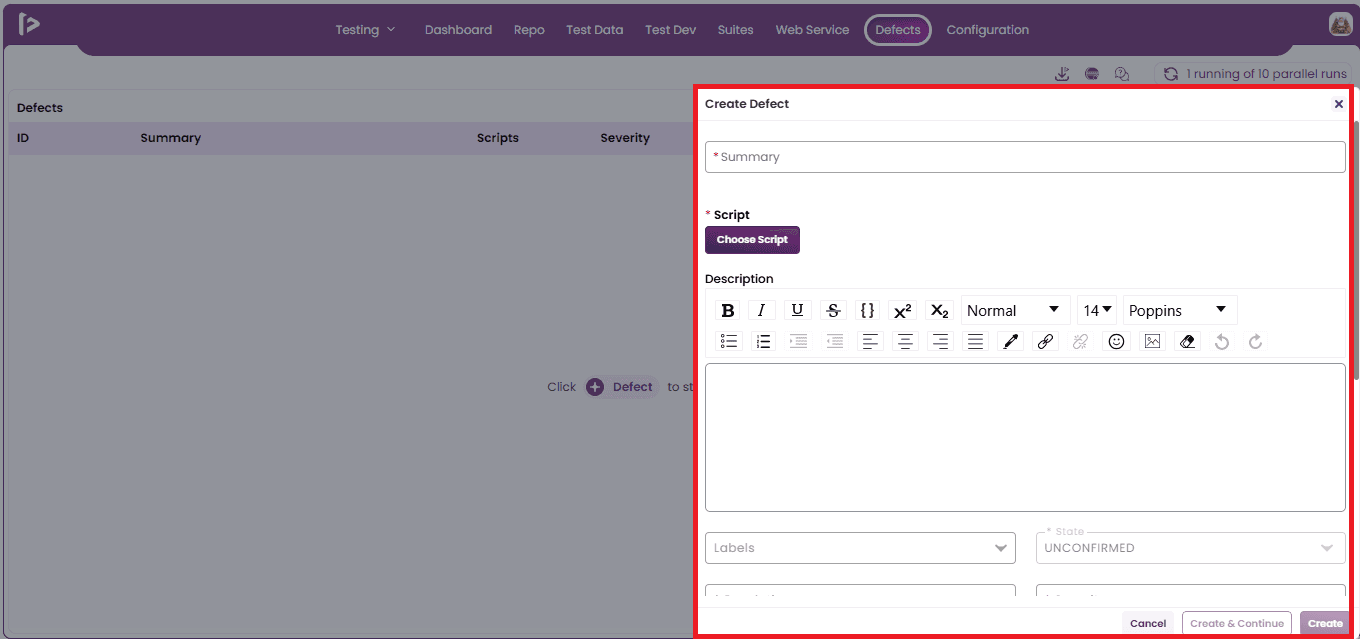
- Summary: Briefly describe the cause or nature of the defect.
- The user should provide a summary of the defect, explaining the type of issue encountered after execution.
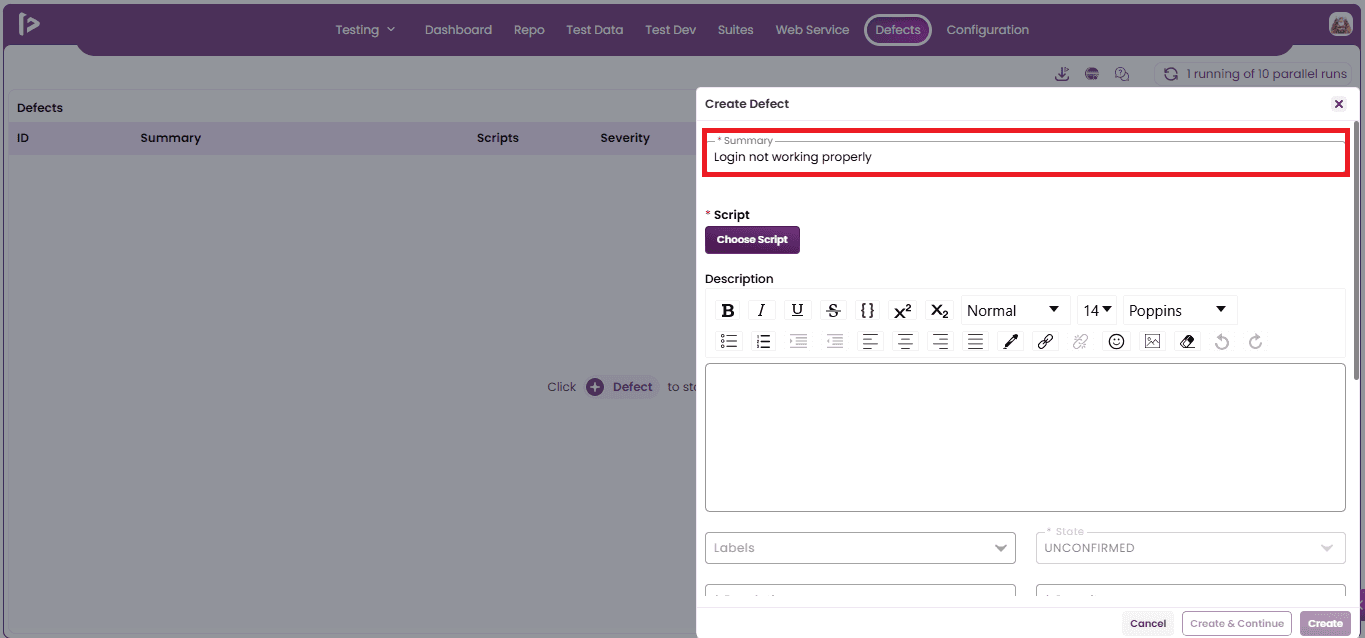
-
Choose Script: Select the script to which the defect belongs.
- The user should select the choose script button.
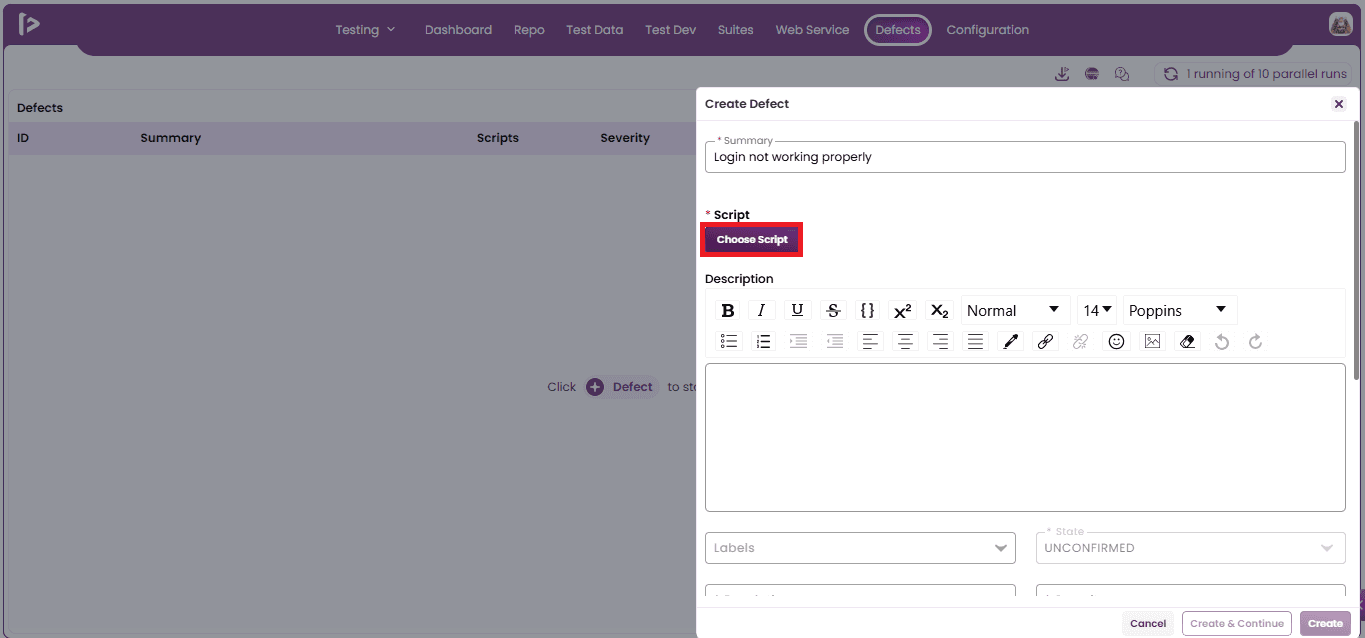
- As soon as the user clicks on the choose script button, the select script slider will be displayed.
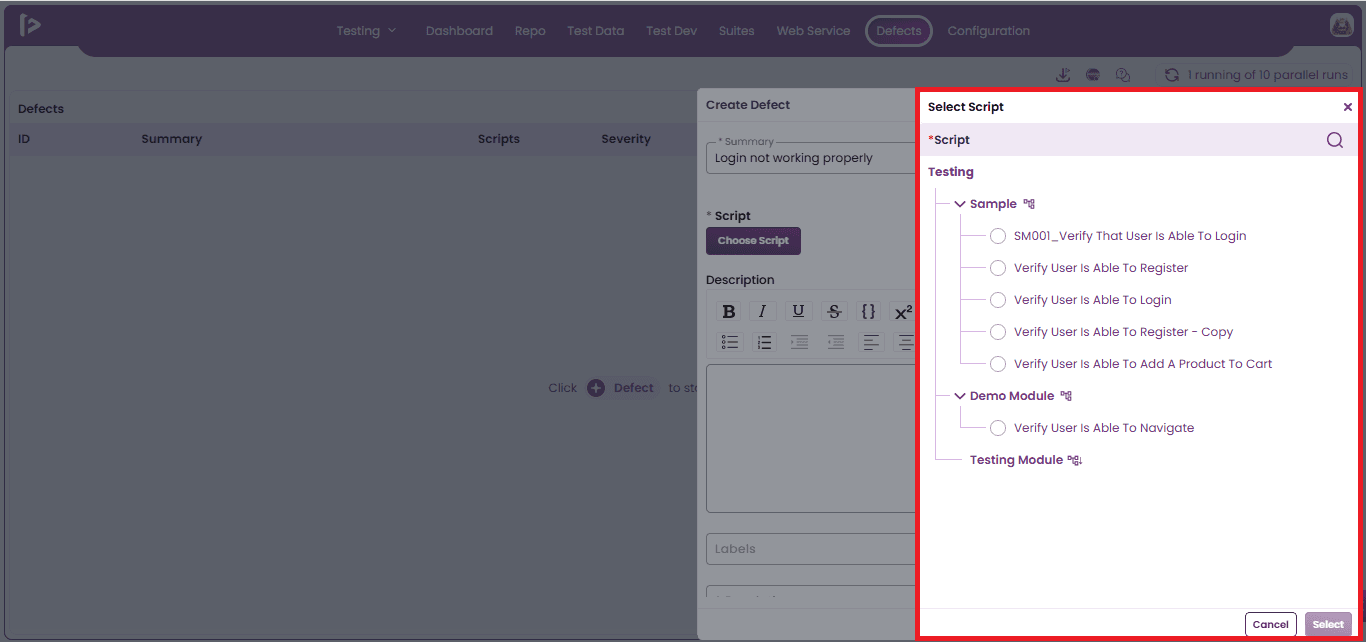
- As soon as the user navigates to the Scripts List, the failed script will be automatically selected and displayed. The user must then click the Select option to proceed.
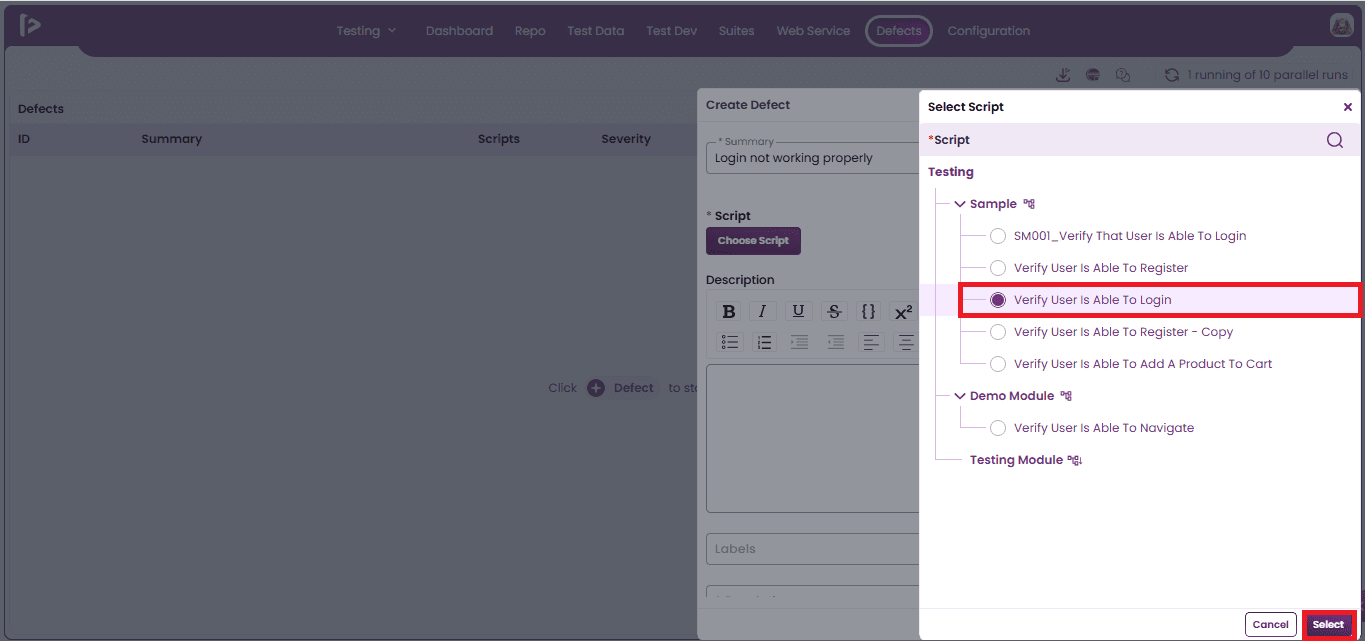
-
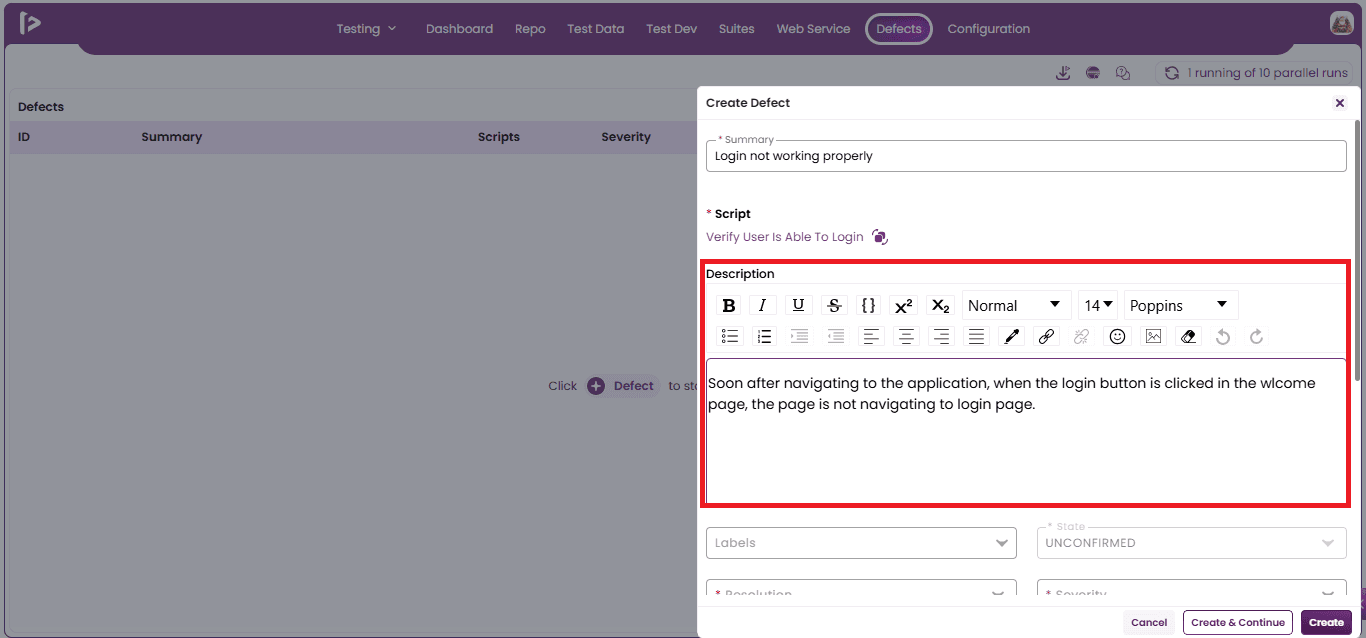
Description: Provide detailed steps to reproduce the defect.
- Provide clear steps to reproduce the defect. Otherwise include a brief description (at least 2 to 3 lines) explaining the issue and observed failure behavior to support analysis.
-
Label: Selecting Label refers to tagging the defect with a specific identifier or category (e.g., UI, Backend, Regression, Critical Flow). This enables better filtering, grouping, and reporting of defects across the lifecycle.
-
Severity: Selecting Severity refers to choosing the level of impact or seriousness of a defect. If you do not want to specify the severity, you must select the ‘None’ option.
-
Priority: Selecting Priority involves choosing the urgency level for addressing a defect, which determines how quickly it should be resolved. If you do not want to specify the priority, you must select the ‘None’ option.
-
State: Choose the status of the defect (e.g., Open, In Progress, Resolved, Closed).
-
Assign to: Assign the defect to the relevant developer or development lead for resolution.
-
Releases: Selecting Releases involves choosing the target release version or deployment milestone where the defect fix is planned to be delivered. This supports release management and prioritization alignment.
-
Build ID: Selecting Build ID refers to choosing the unique identifier of the application build in which the defect was observed. This ensures precise traceability to a specific compiled instance of the product.
-
Attach video: Optionally, attach a video recording of the failed steps.
-
Attach multiple images: If necessary, attach multiple images depicting different failed steps.
-
Link Issue: Selecting Link Issue refers to associating the current defect with another related issue (e.g., duplicate, blocked by, relates to, caused by). This helps in maintaining dependency tracking, impact analysis, and better visibility across interconnected defects.
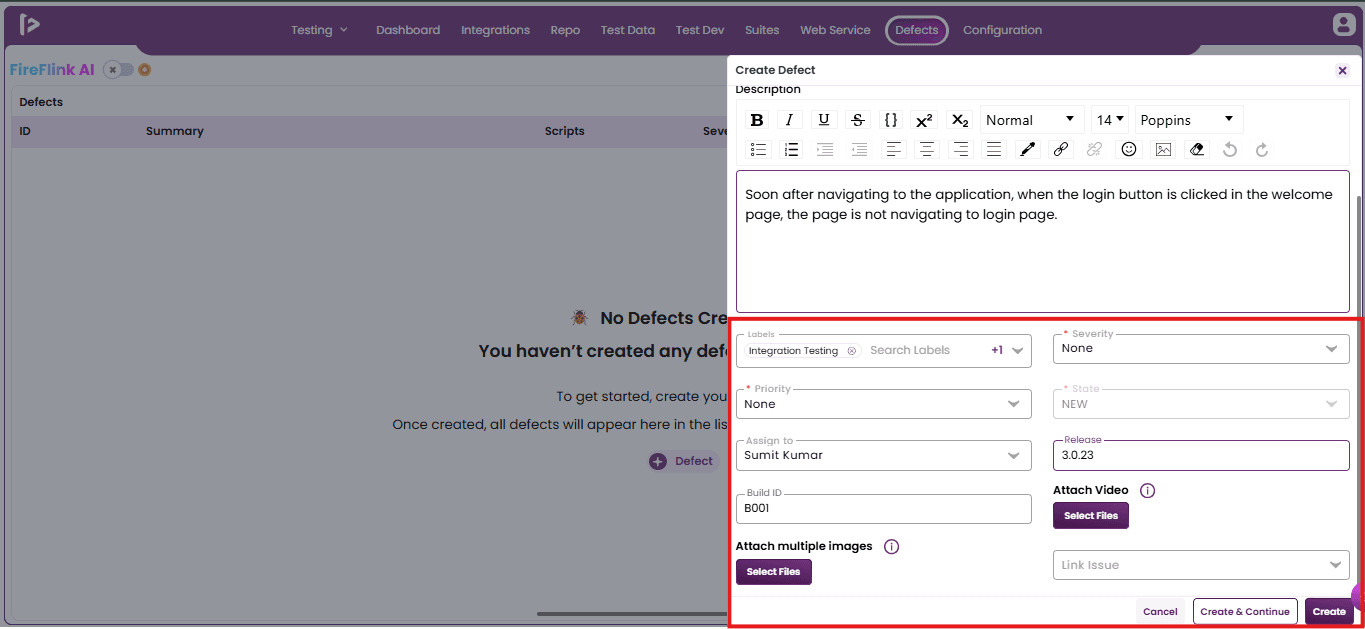
- Click on the Create button to create the defects.
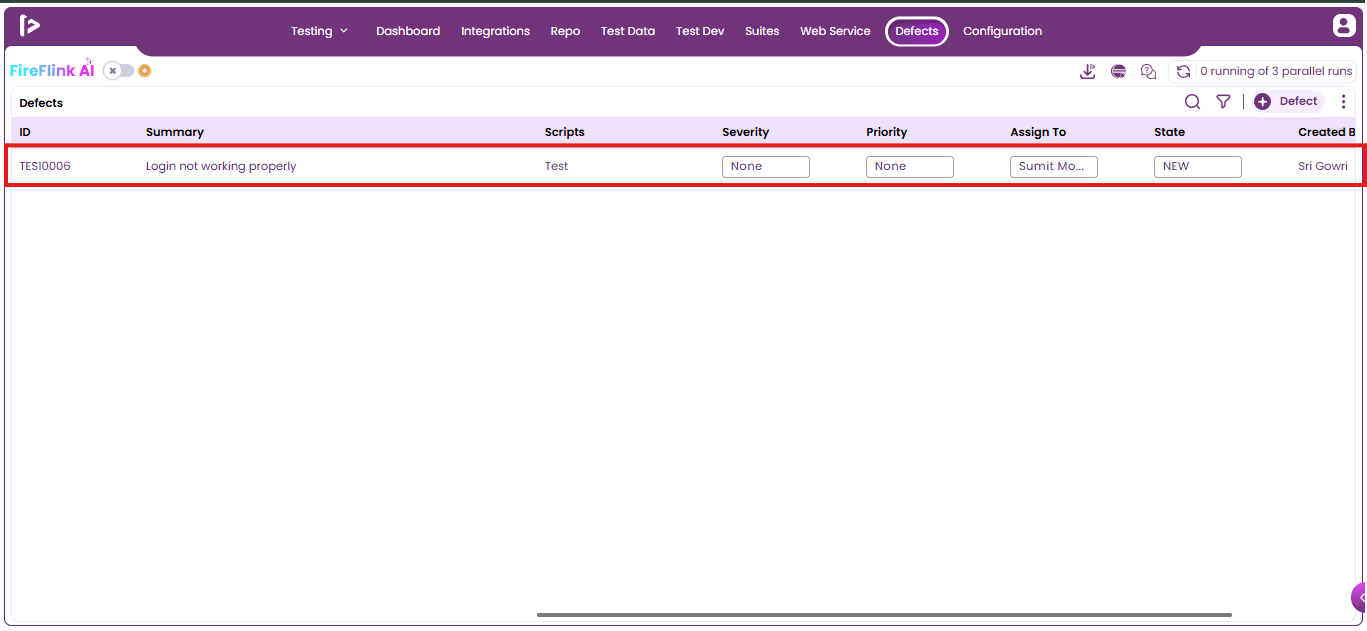
- Upon clicking, defect will be logged under the Defects section and is displayed as below.
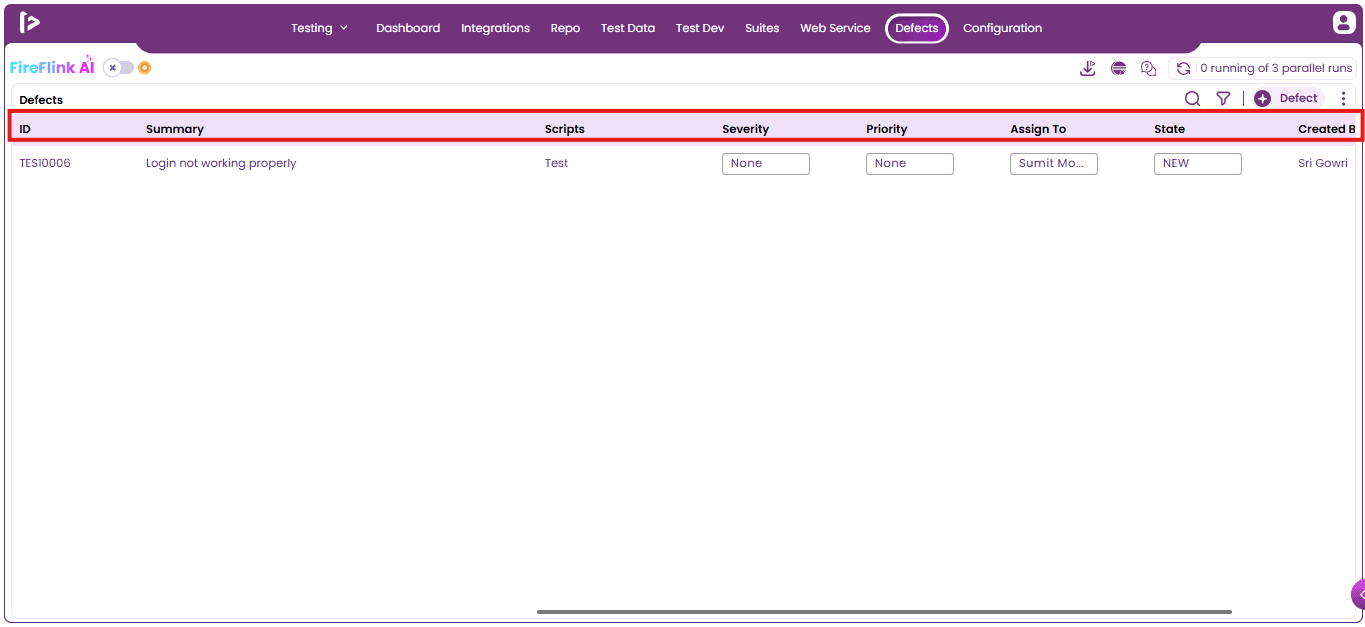
- Defects include the following columns as described below.
- Id : It displays the ID of the created defect.
- Summary : It displays the summary provided during defect creation.
- Scripts : It displays the failed script that was selected.
- Severity : It displays the selected level of impact or seriousness of the defect.
- Priority : It displays the urgency level for addressing the defect, which determines how quickly it should be resolved.
- Assign to : It refers to the person responsible for handling or resolving the defect or task. Users must select or specify the team member to whom the issue is being assigned.
- Created by : Created By indicates the user who reported or logged the defect or task. It shows the name of the person responsible for initiating the record.
- Created on : Created On indicates the date and time when the defect or task was created or logged.
Method 2 : Create Issue Icon
- Users can conveniently log defects directly within FireFlink by using the Create Issue icon available in the Execution section of Scripts or Suites. This feature enables users to both raise and track defects seamlessly, with the option to integrate and log them into third-party defect management tools for streamlined issue handling and resolution.
Steps to raise the defects using Create issue icon as follows :
- Click on the Execution section.
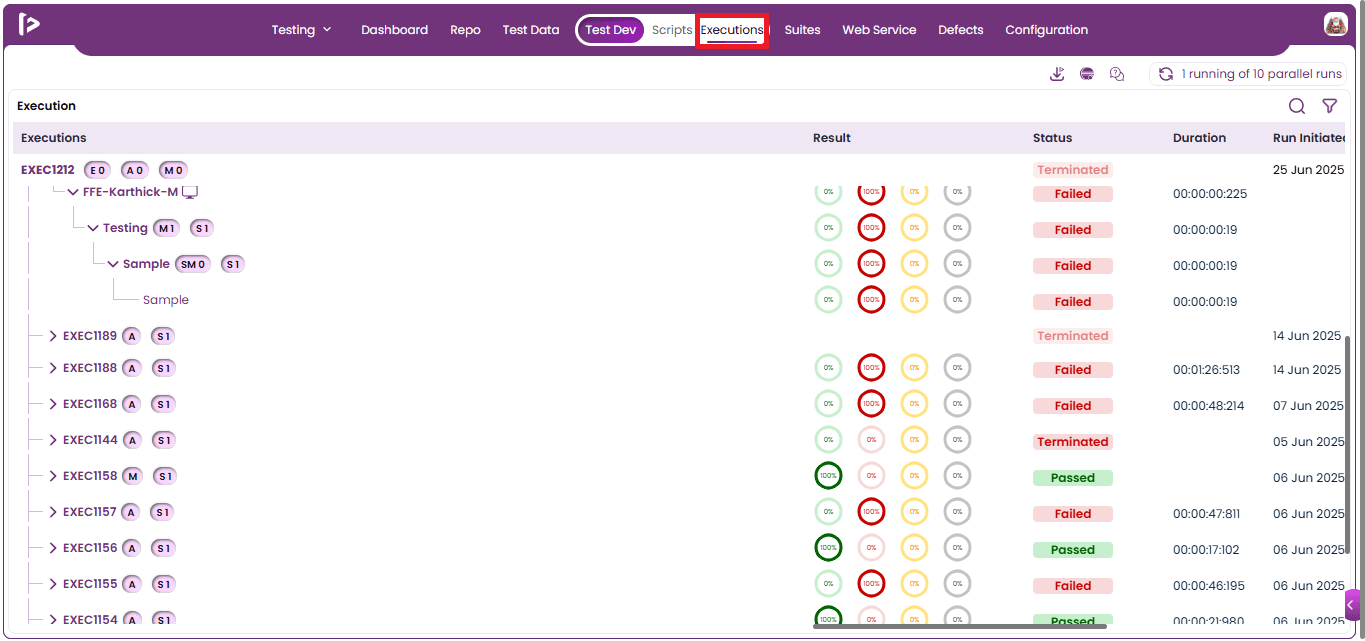
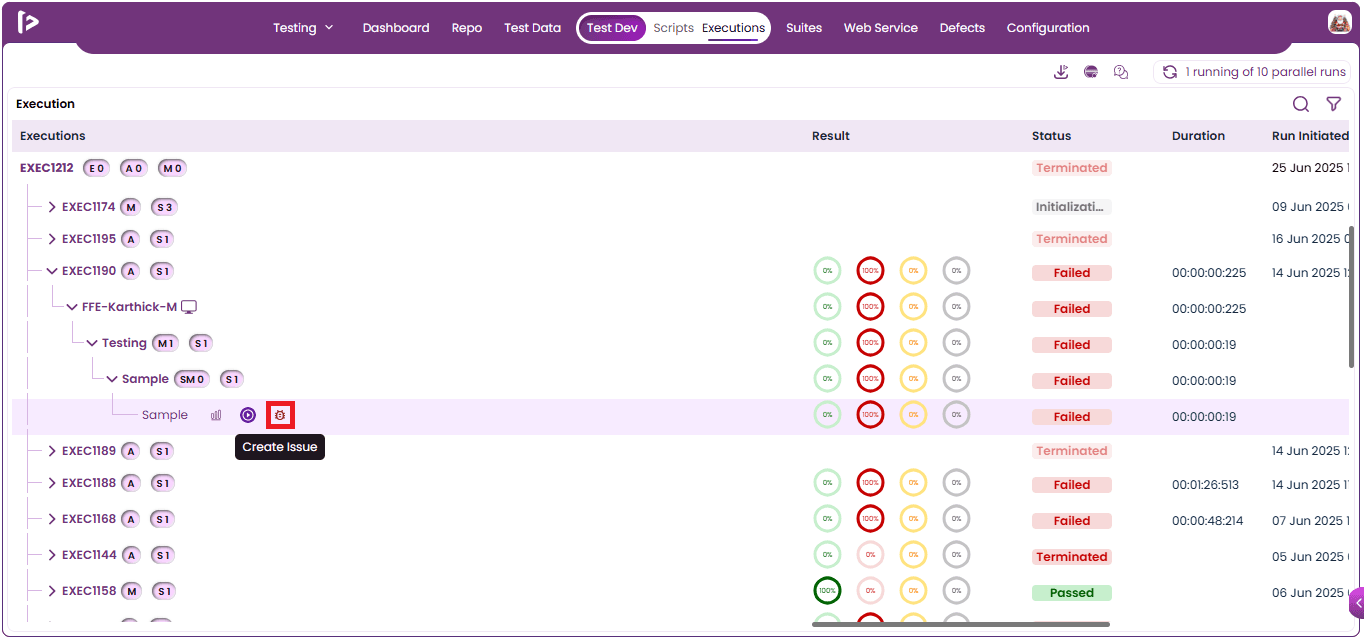
- Select any failed suite and hover over any failed test suite to view the create issue icon.
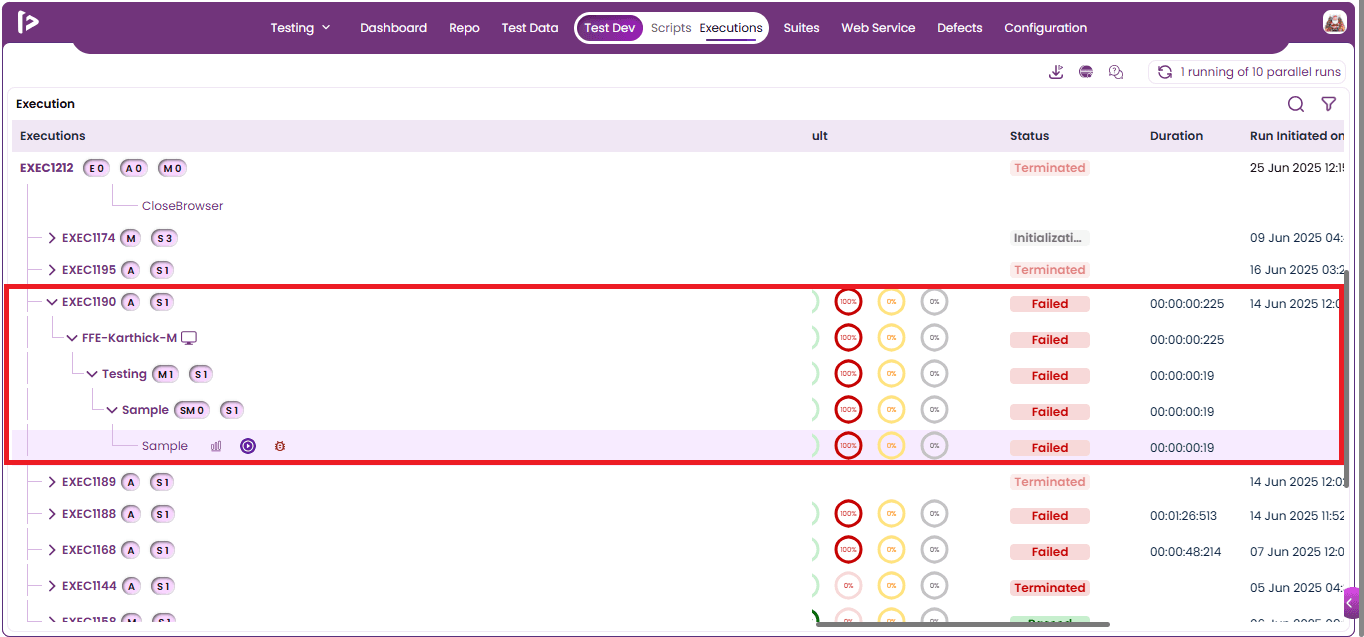
- Click on the create issue icon.
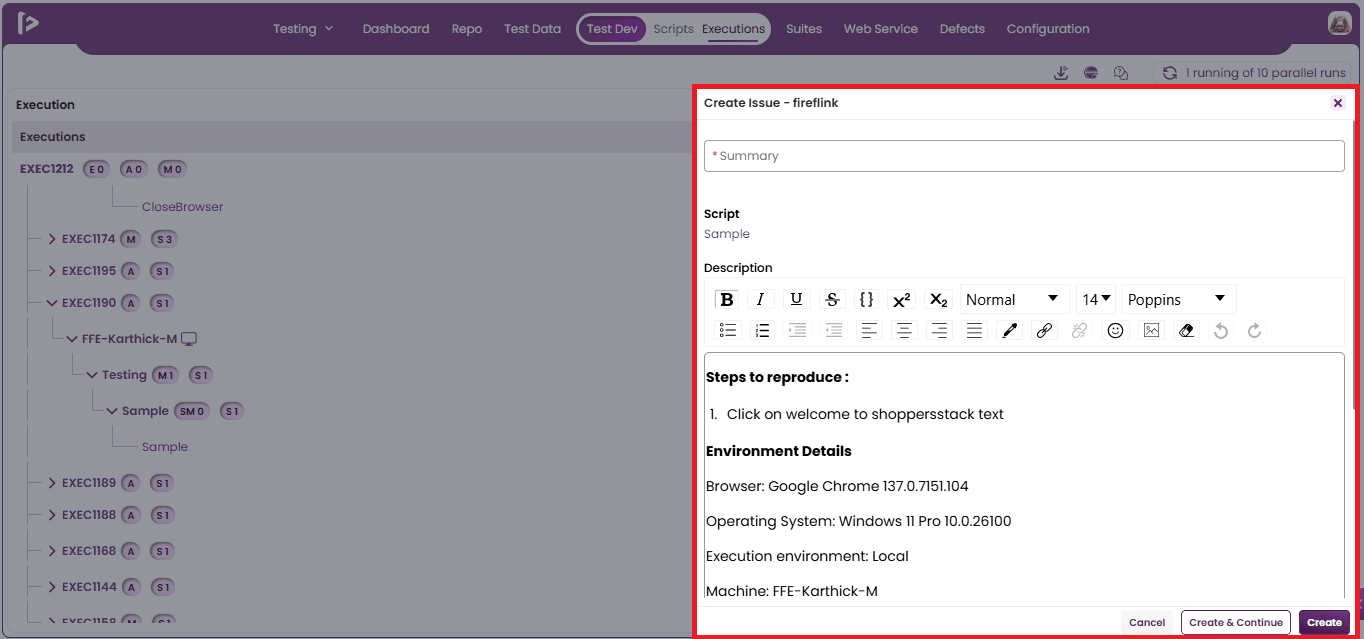
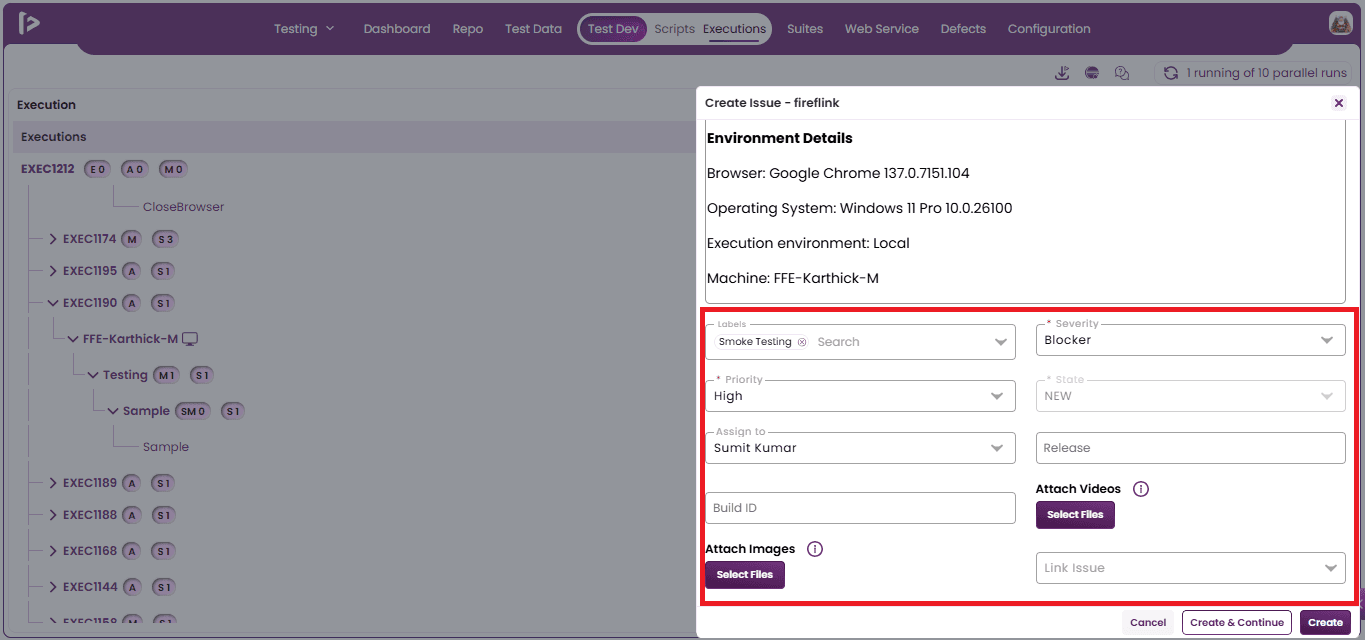
- Upon clicking on the Create issue icon , Create issue FireFlink slider will be displayed.
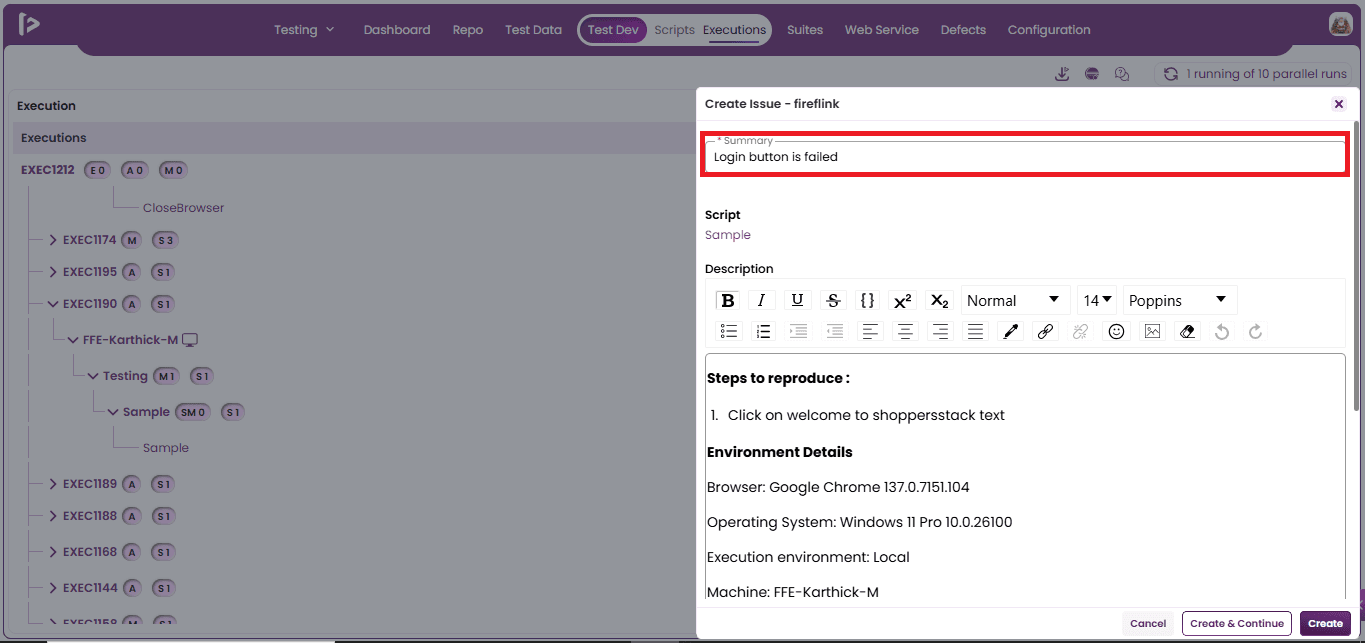
- Write a summary of the defect.
- Fill all the required fields with proper details.
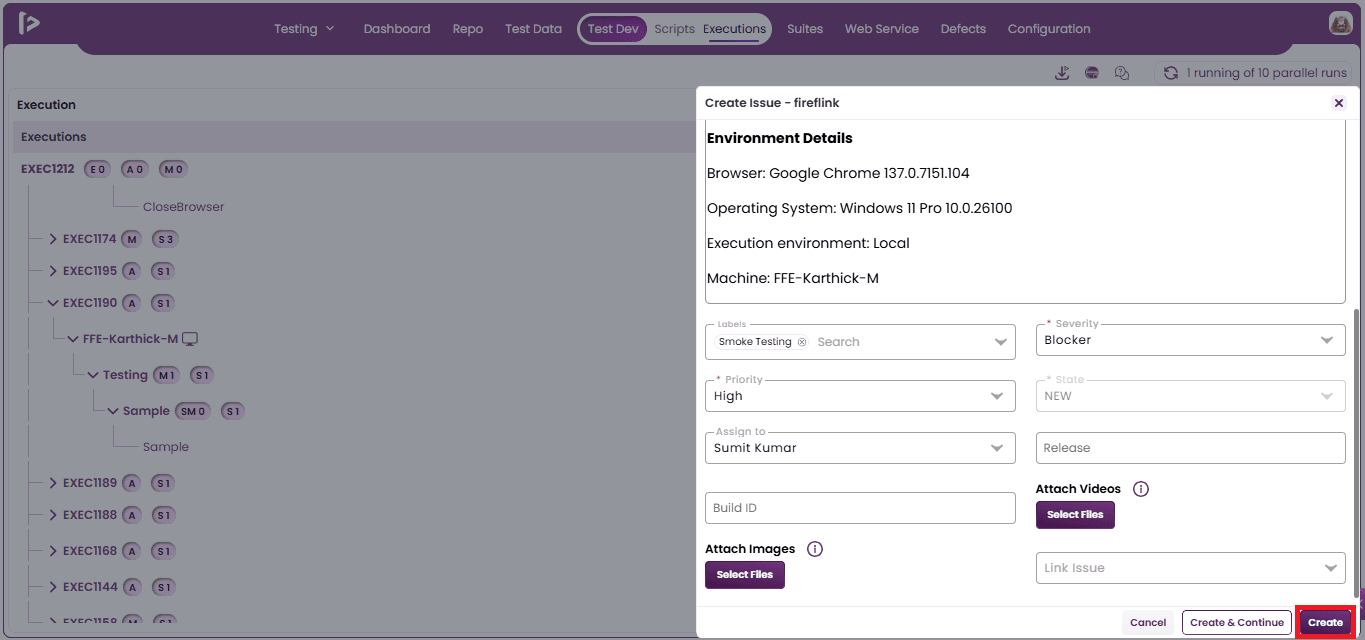
- Click on the create button that is displayed below.
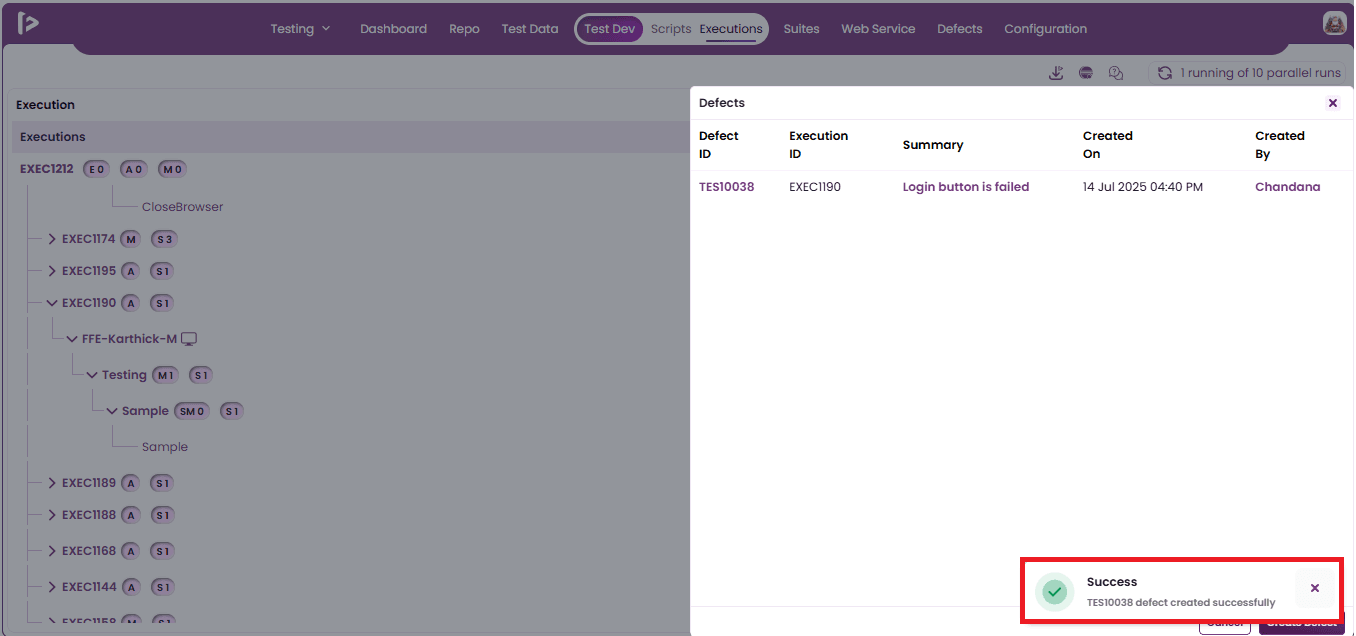
- The successful message popup will be displayed as shown below.
Edit Functionality
Steps to edit the defects are as follows;
- To modify defect details, the user needs to click the corresponding defect ID as shown below.
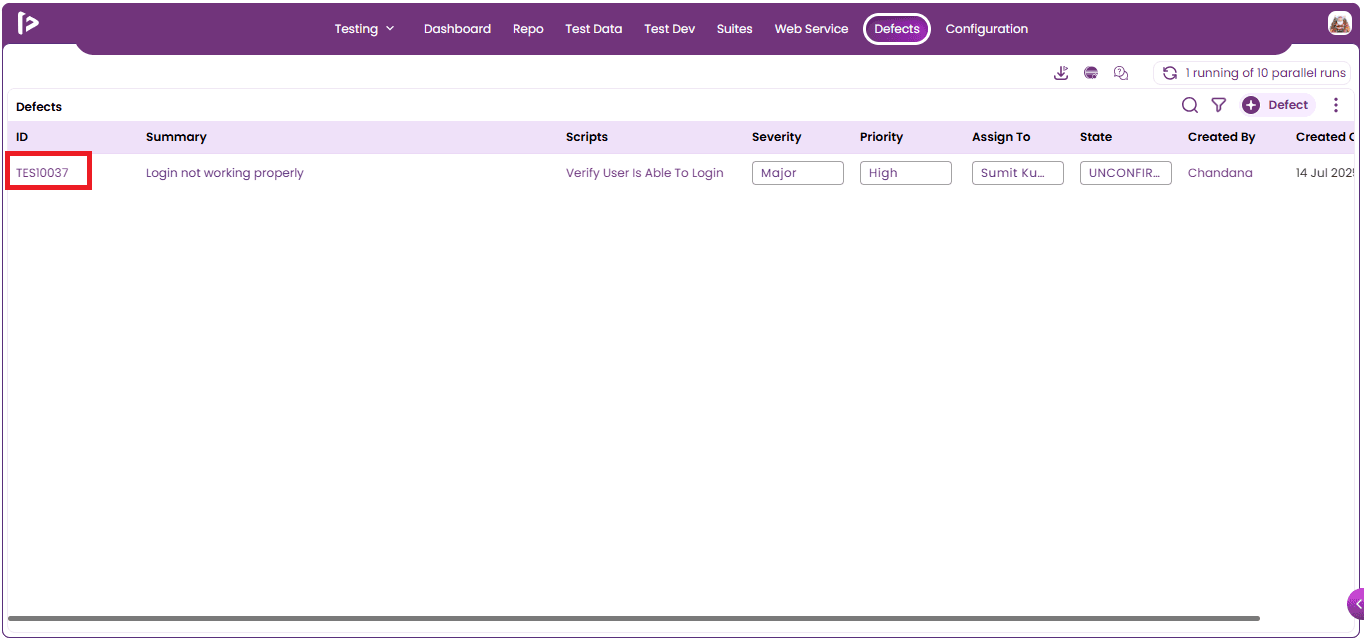
- The prompting slider will be displayed.
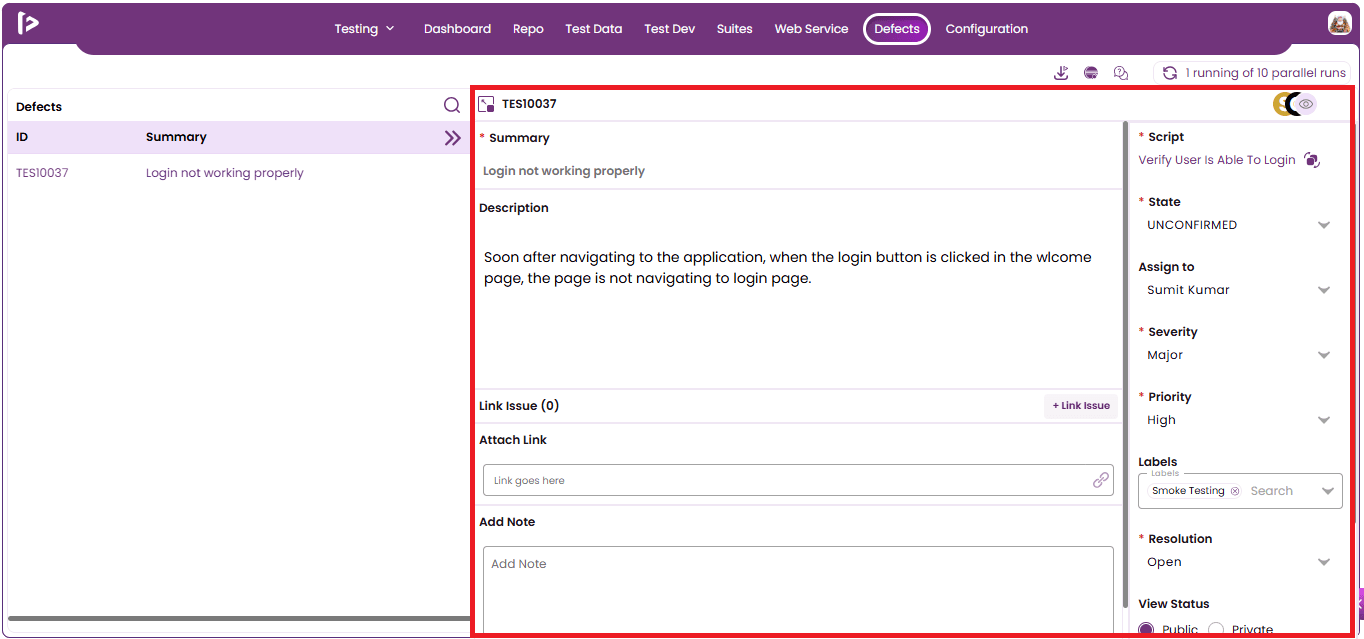
- Users can link an issue by clicking the "+Link Issue" button.
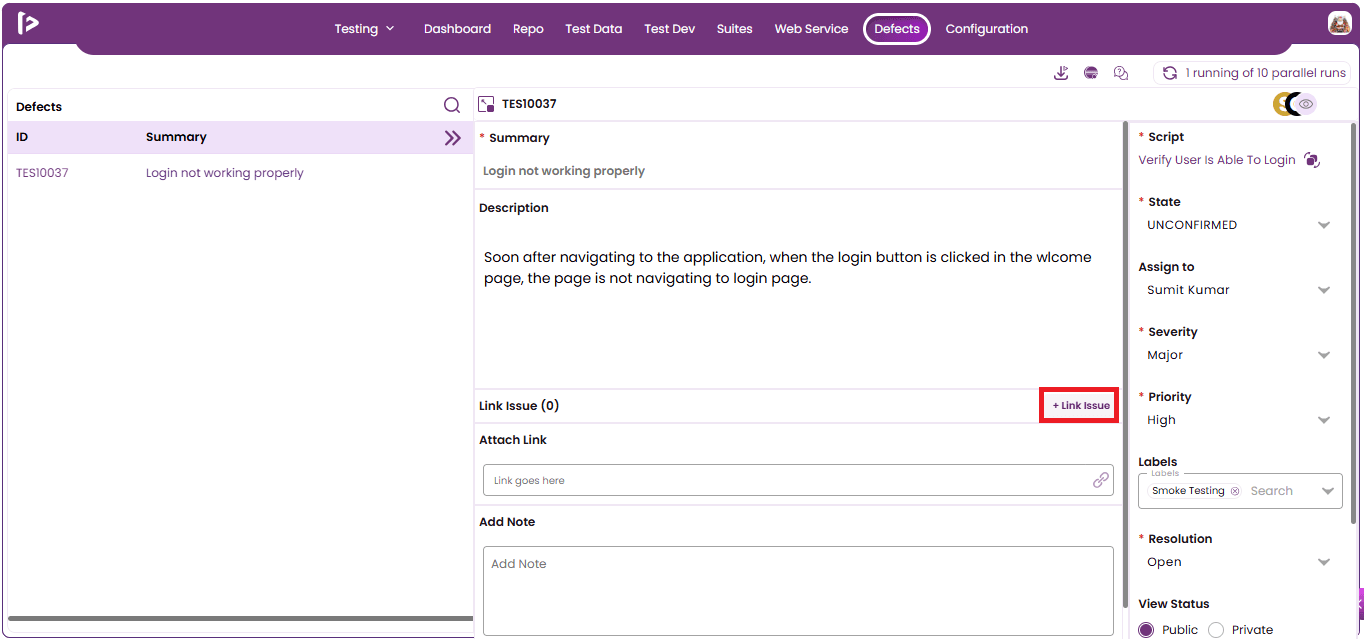
- Then, choose the defect to which the issue should be linked.
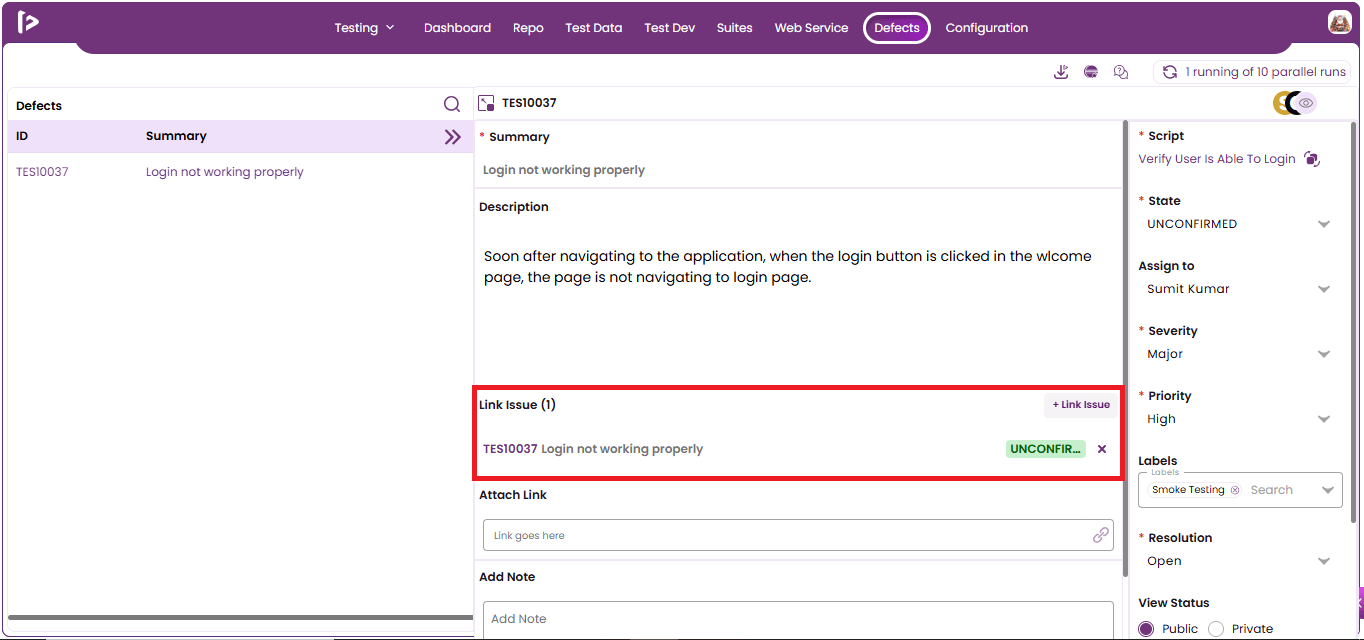
- To add an attachment, click the textfield. Files will be selected from the local machine and attached. And the user needs to add a note for the defect.
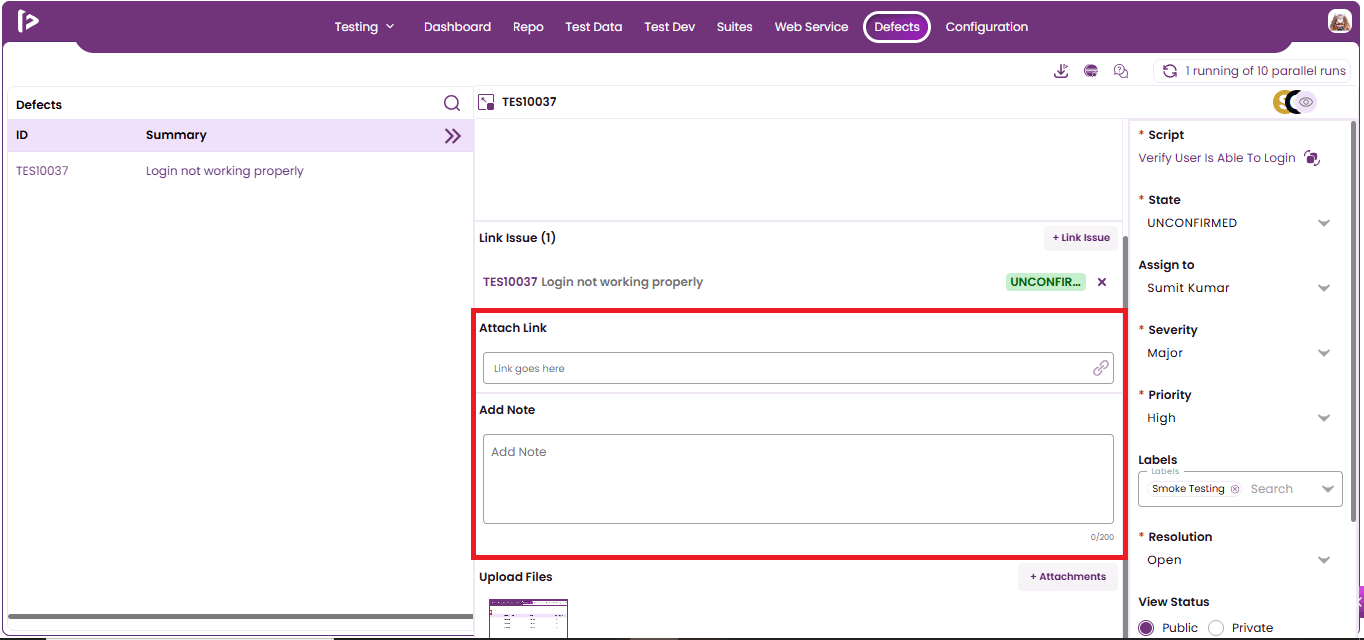
- FireFlink includes miscellaneous features such as the Watch feature.
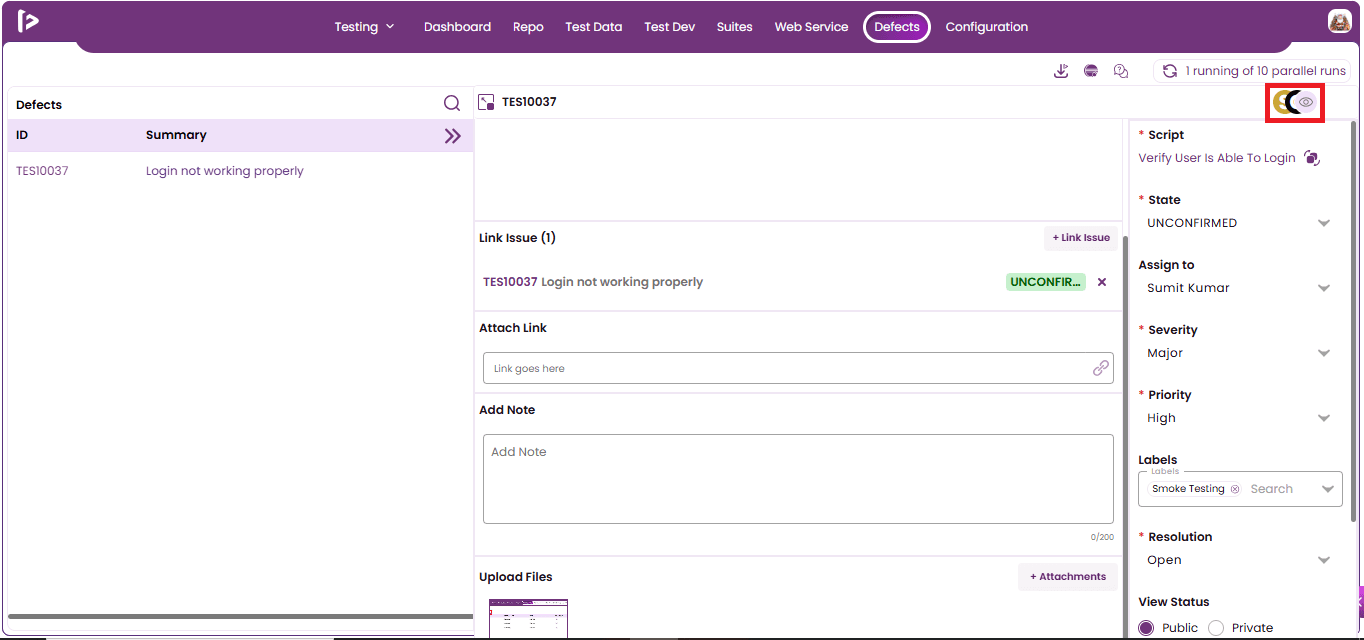
Watch Feature : The "Watch" functionality allows users to receive notifications about updates on specific issues. It’s a way to stay informed about progress or changes without being directly assigned to the issue.
- Click on Watch Feature, it displays the popup as shown below
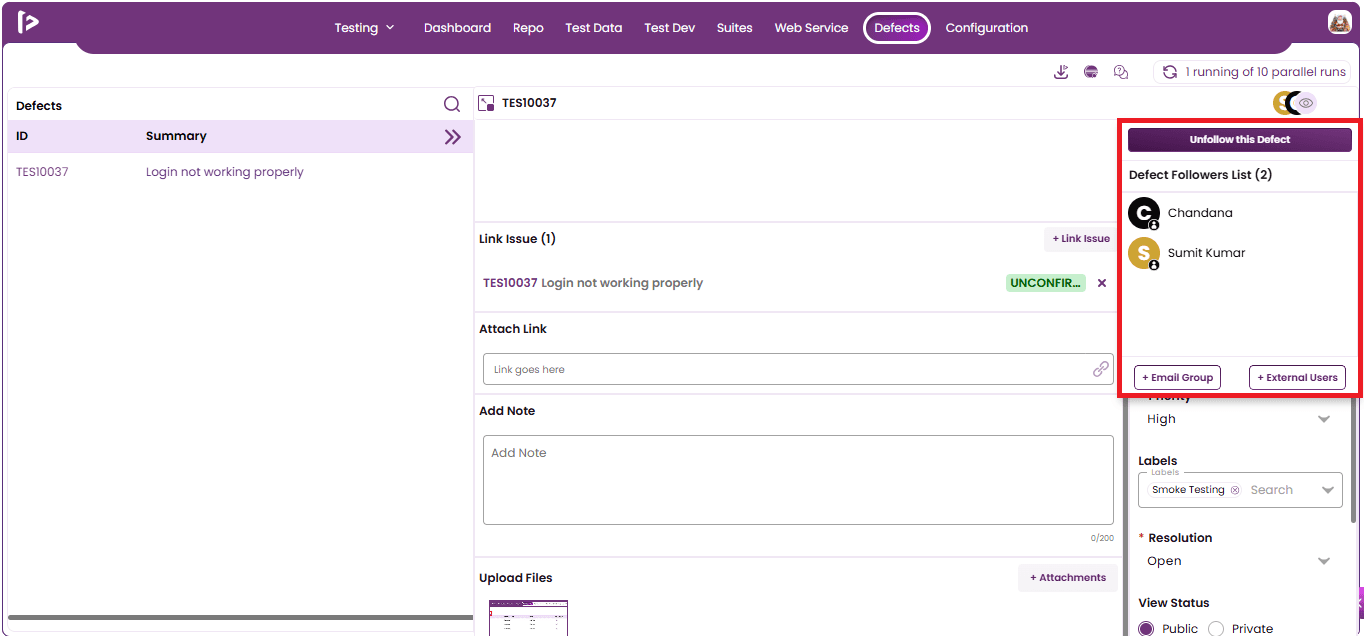
- Users can add an email group by clicking the "+Email Group" button.
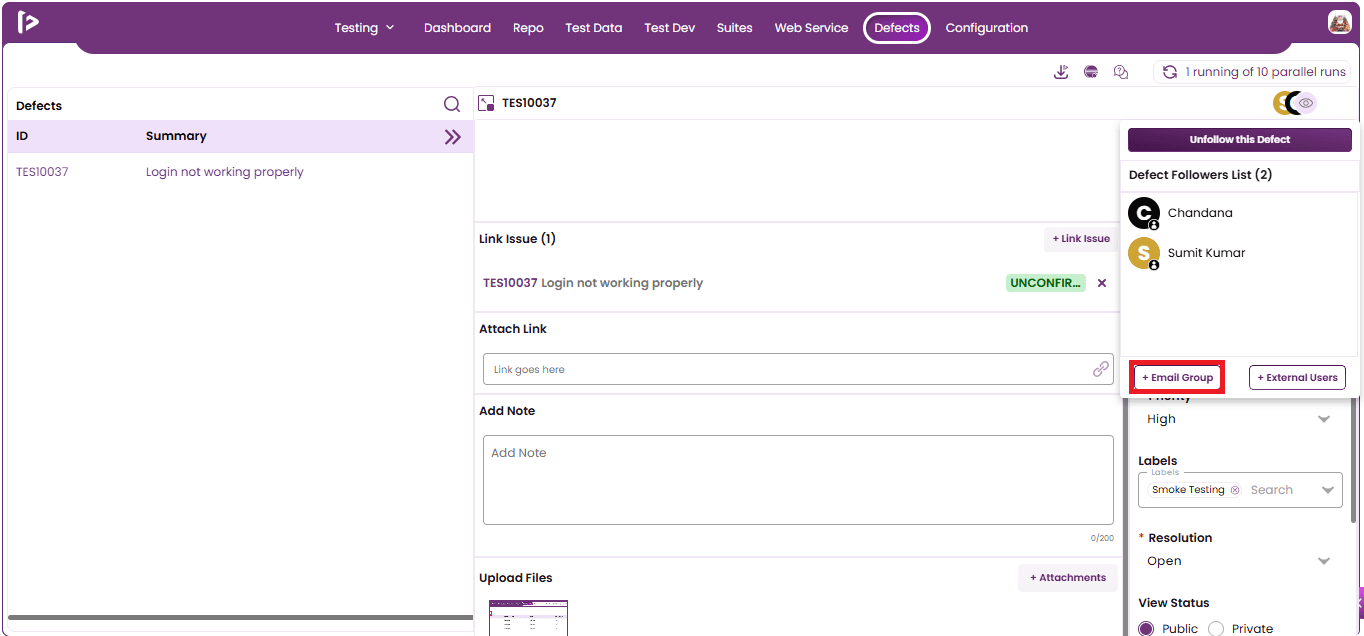
- After selecting an email group, the added popup will be displayed as shown below.
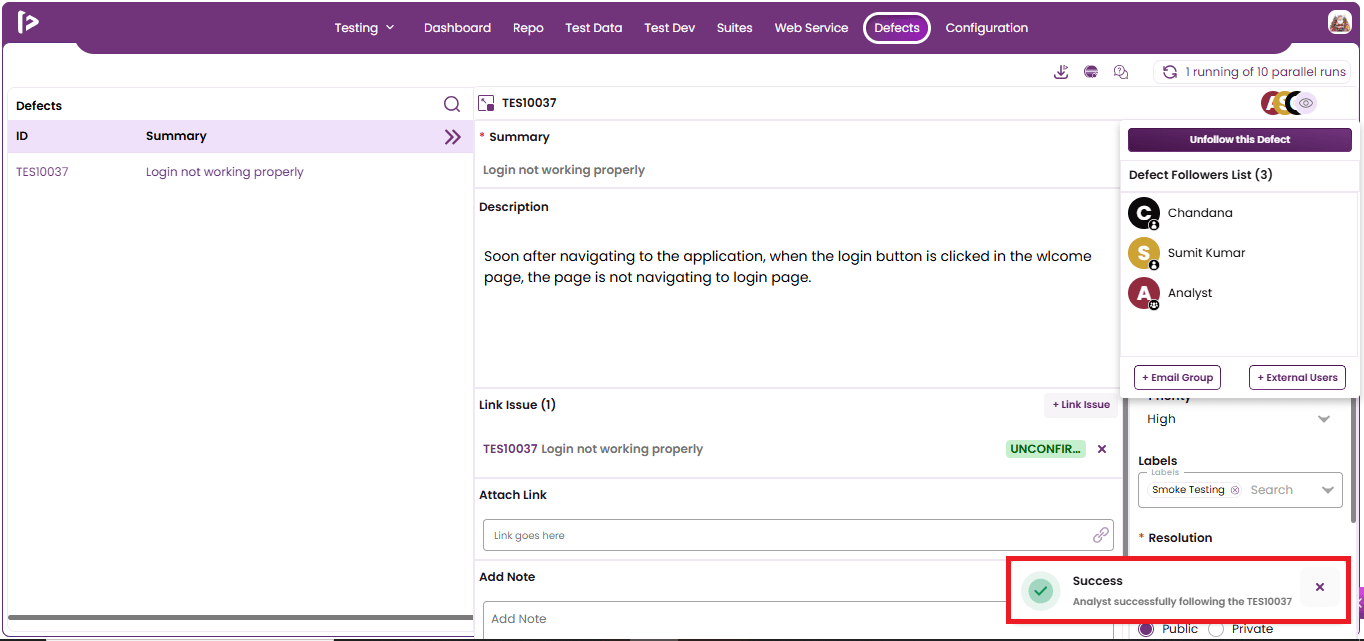
- The name of the added email group will be displayed as shown below.
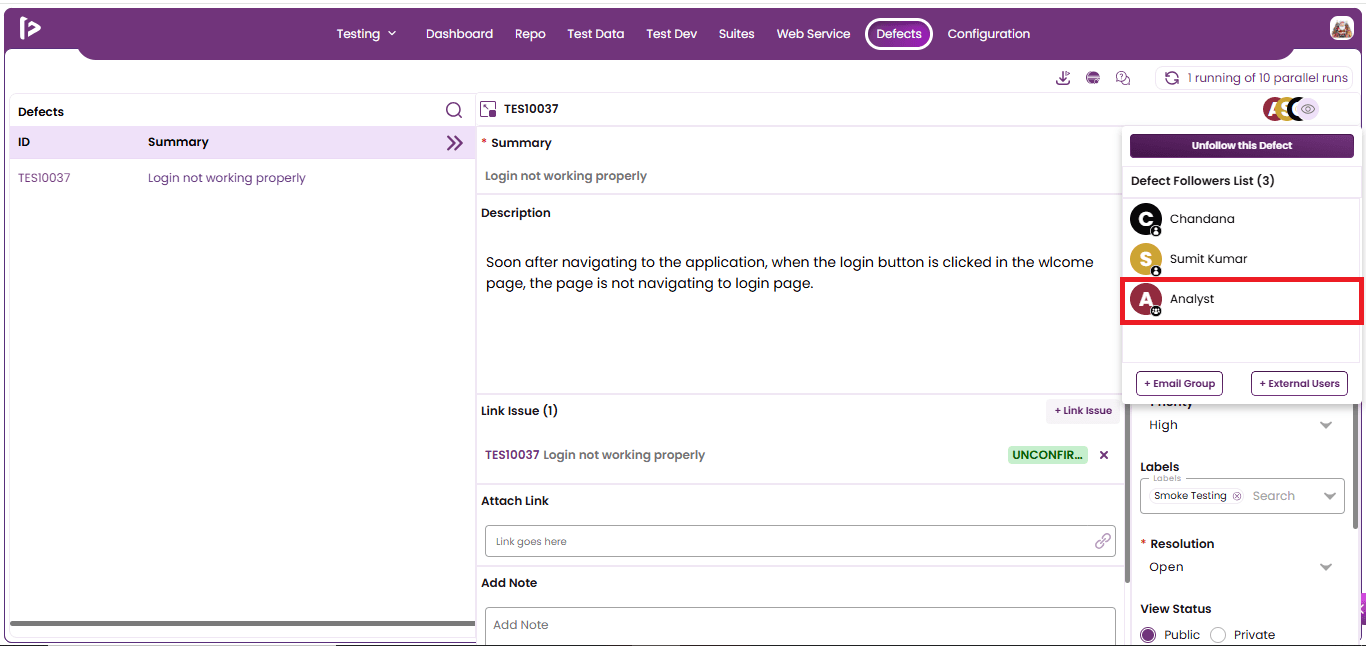
- Users can add an external user by clicking the "+External Users" button.
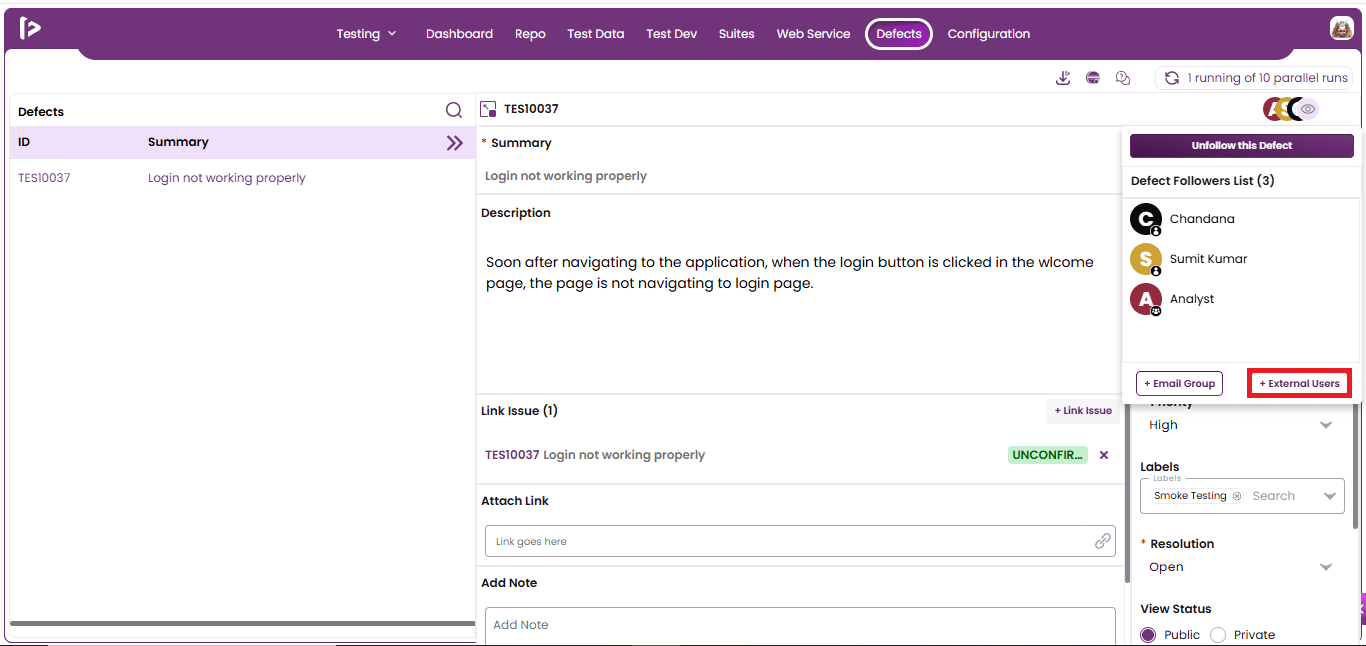
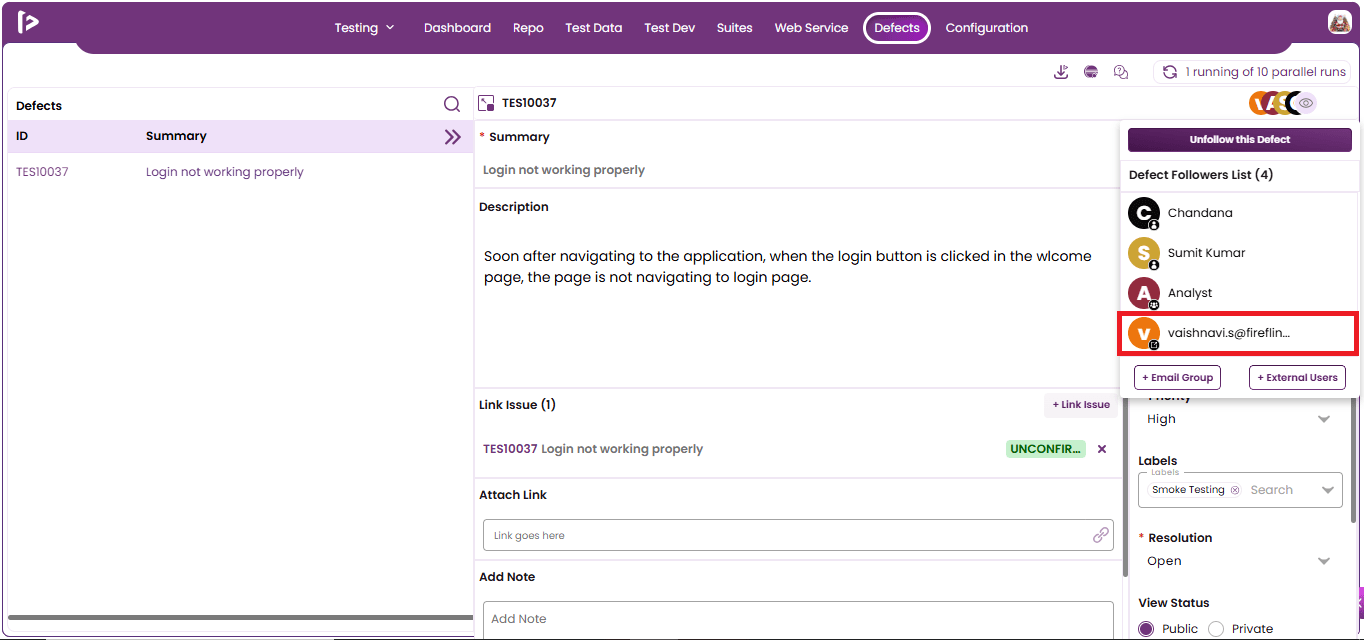
- After selecting an external user, the added popup will be displayed as shown below.
- The email of the added external user will be displayed as shown below.
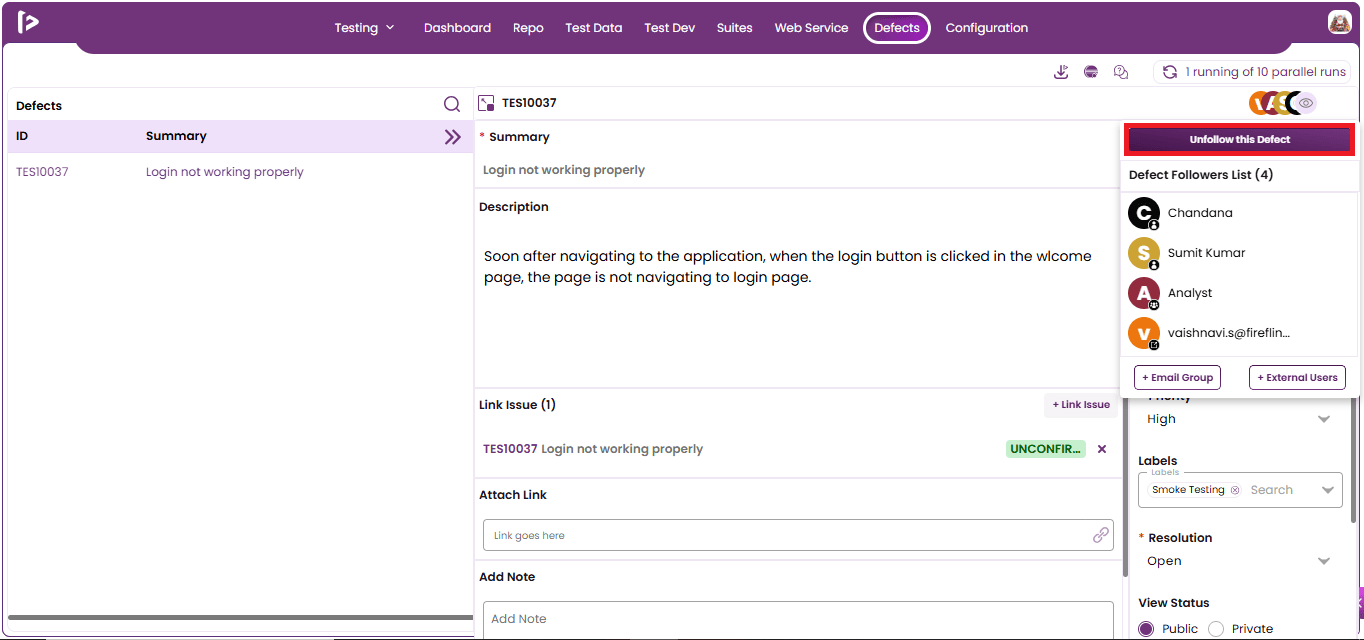
- To follow or unfollow the defect, users can click the button below.
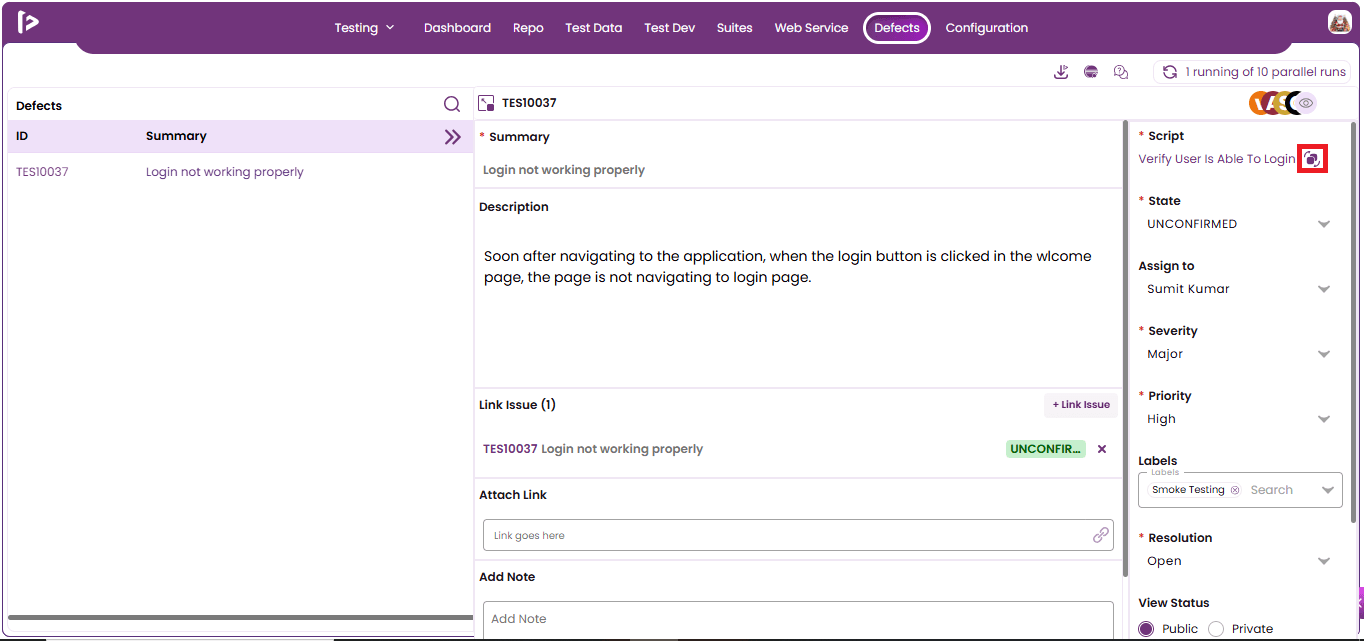
- Users can select a script by clicking the Script button.
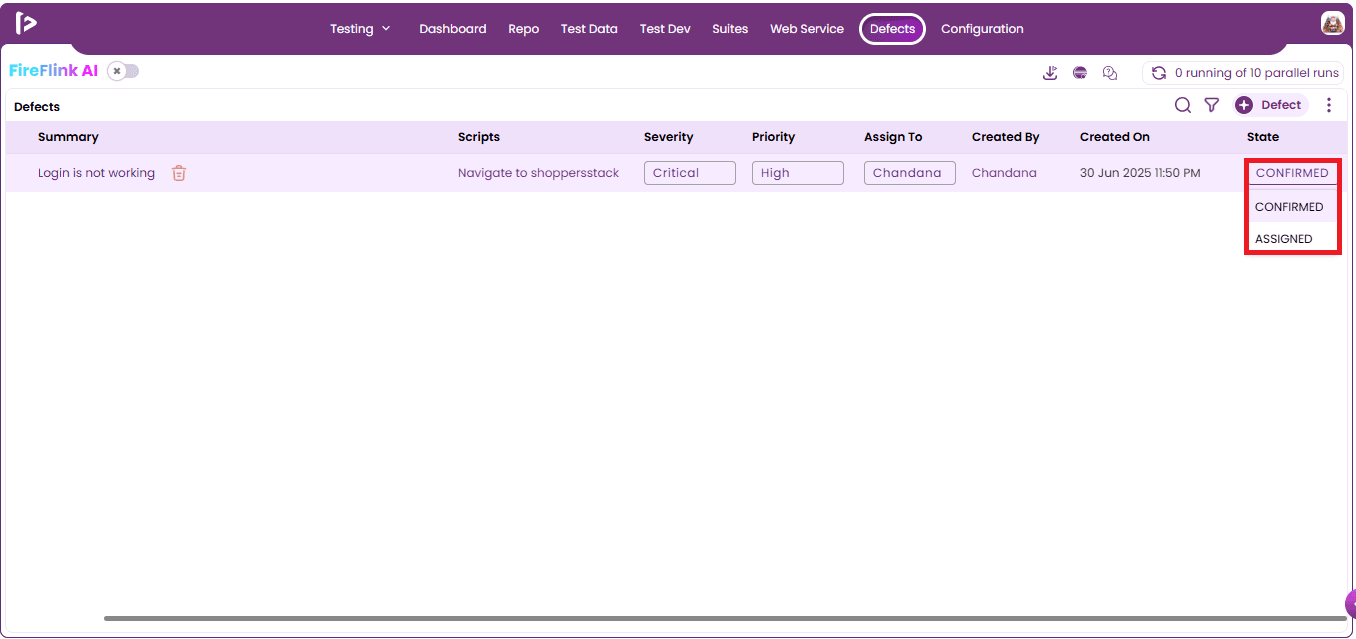
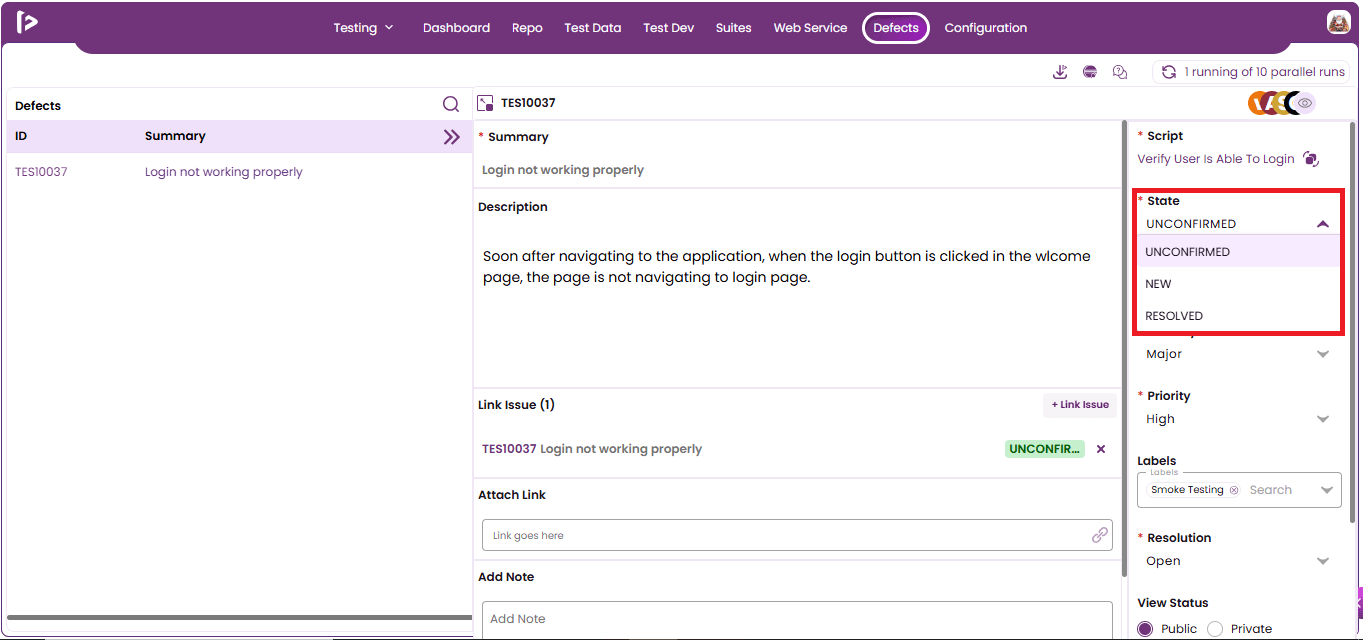
- Users can edit the state of the defect by selecting an option from the dropdown.
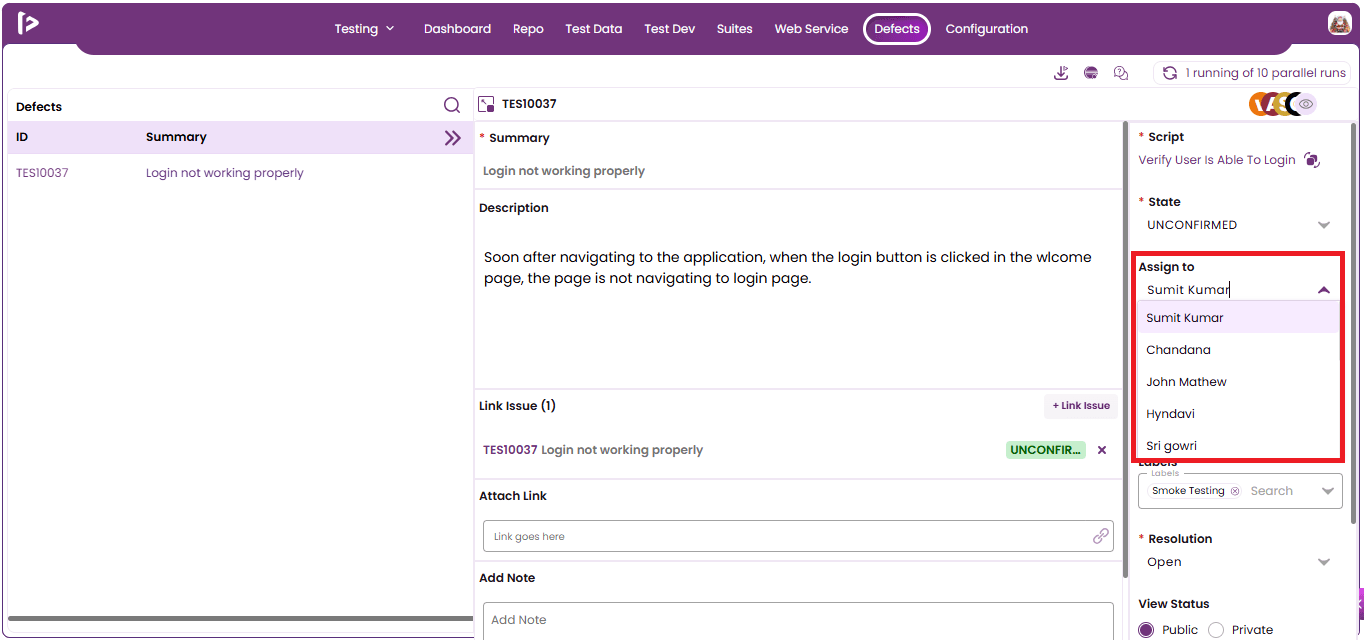
- The user can assign the defect to a specific test engineer by selecting an option from the dropdown.
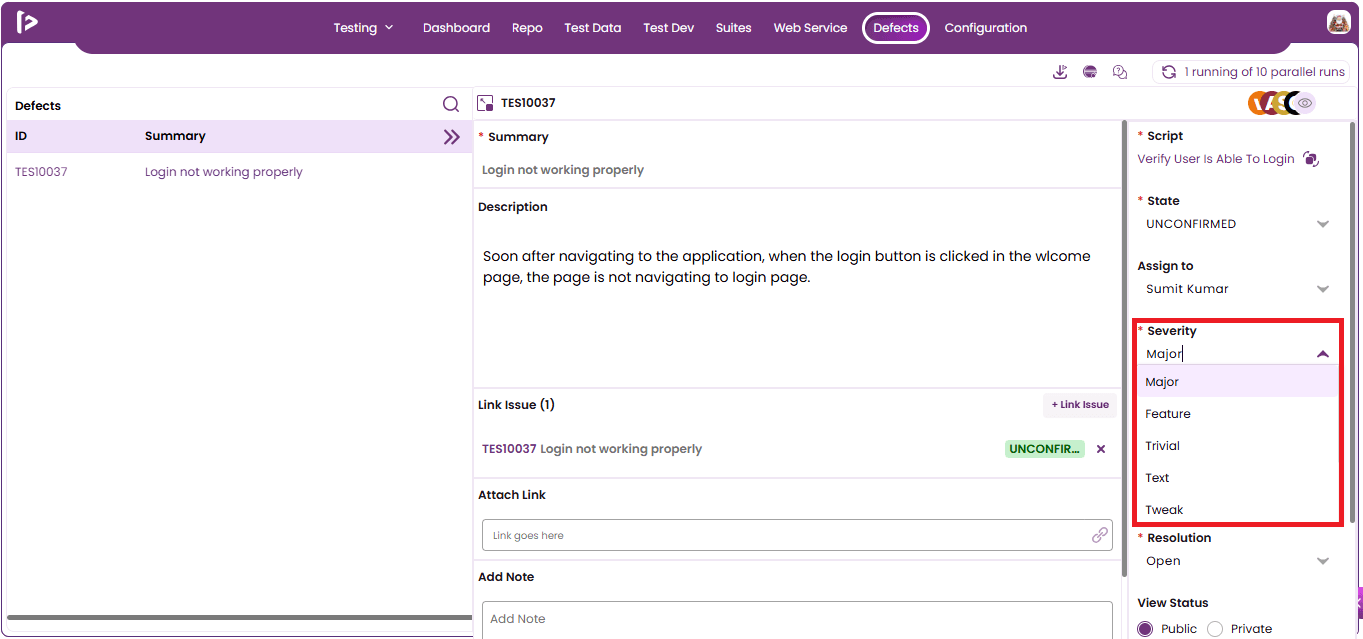
- The user can change the severity by selecting an option from the dropdown menu.
- The user can change the priority by selecting an option from the dropdown menu.
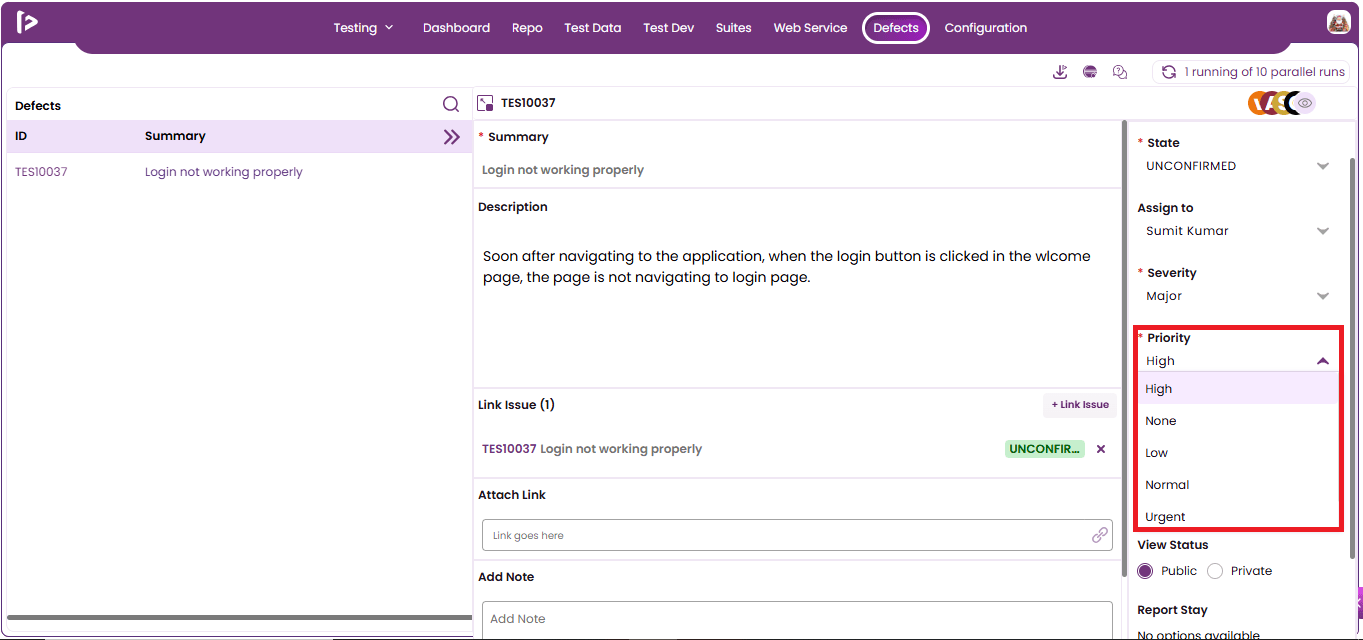
- The user may optionally provide the label, resolution, and view status in the given text fields and dropdowns, as they are not mandatory.
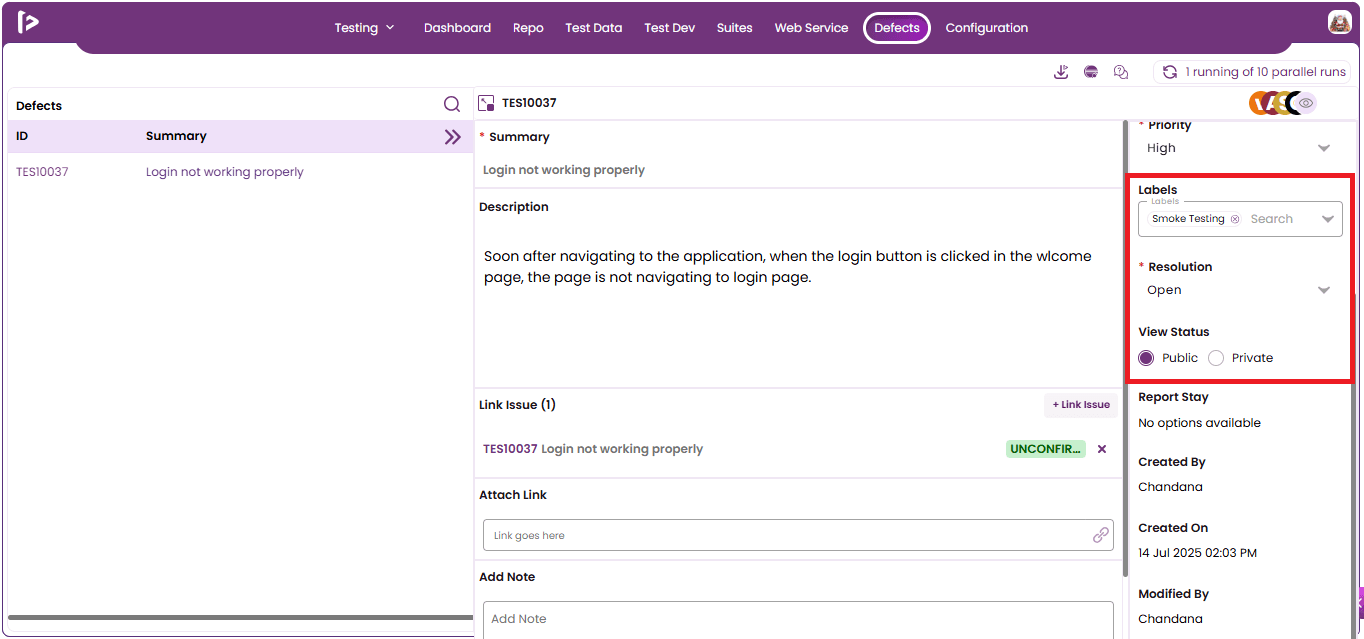
- The user can view defect details using these options.
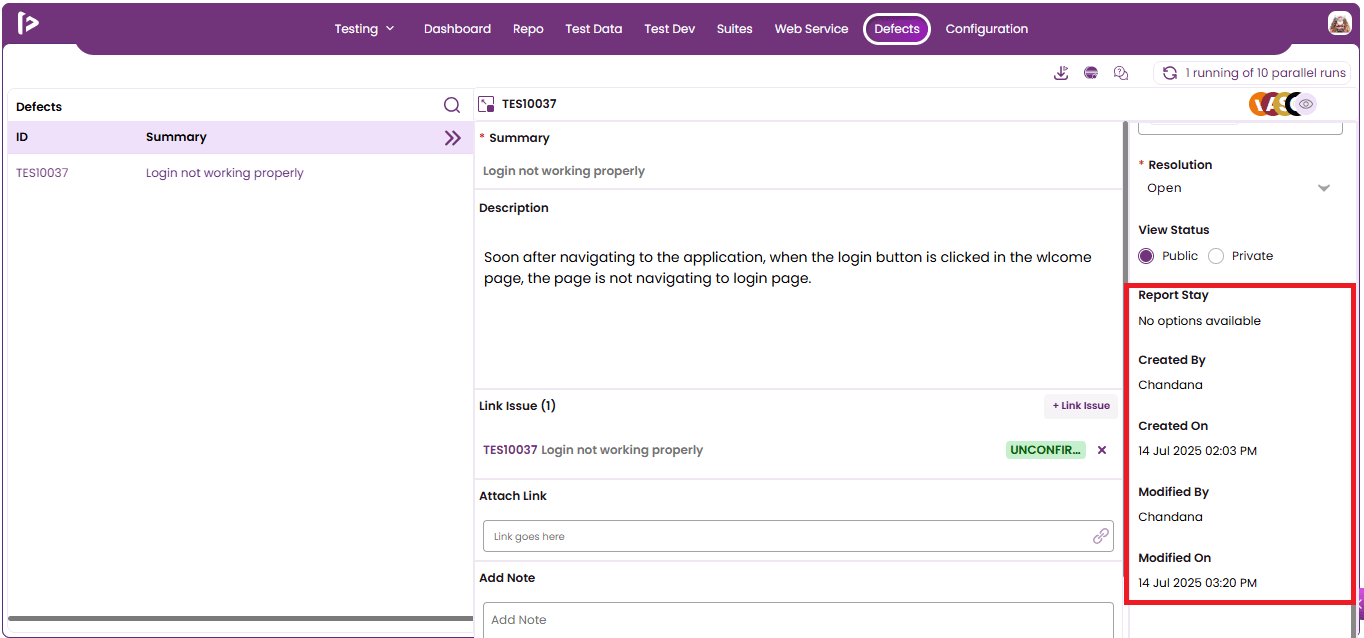
Delete Functionality
Steps to delete the defect are as follows;
- Mouse hover on the defect summary then the delete option will be visible. The delete option becomes visible when the user hovers over a created defect.
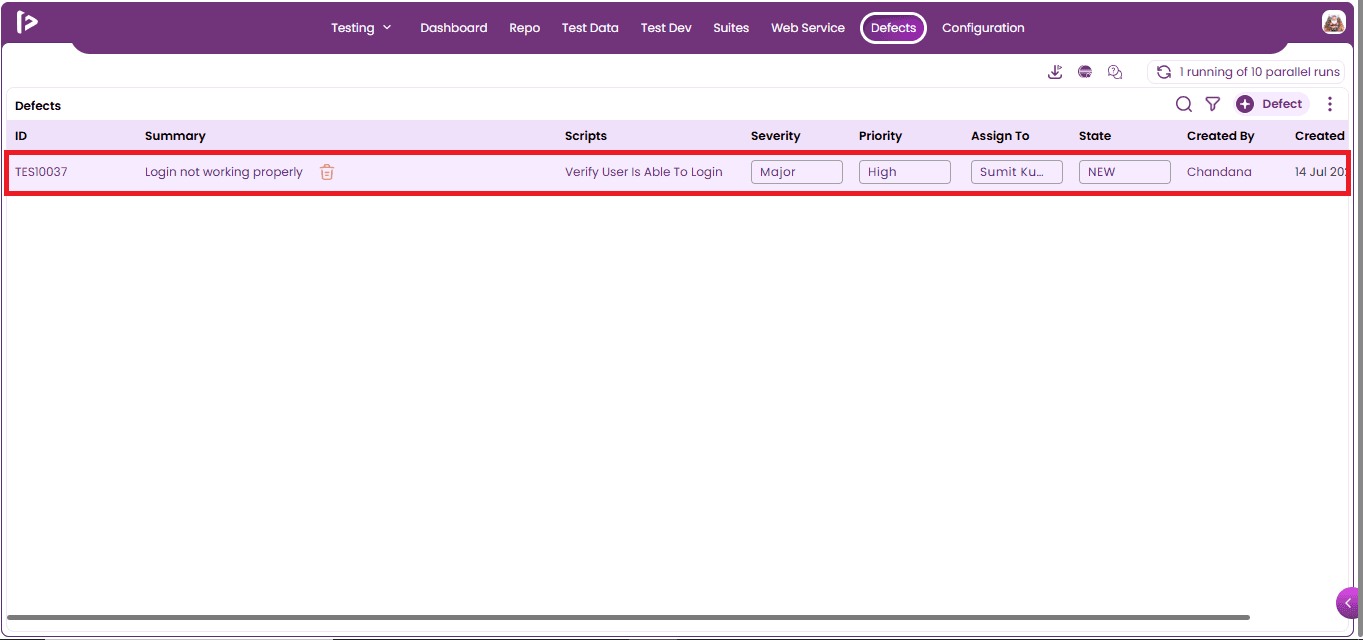
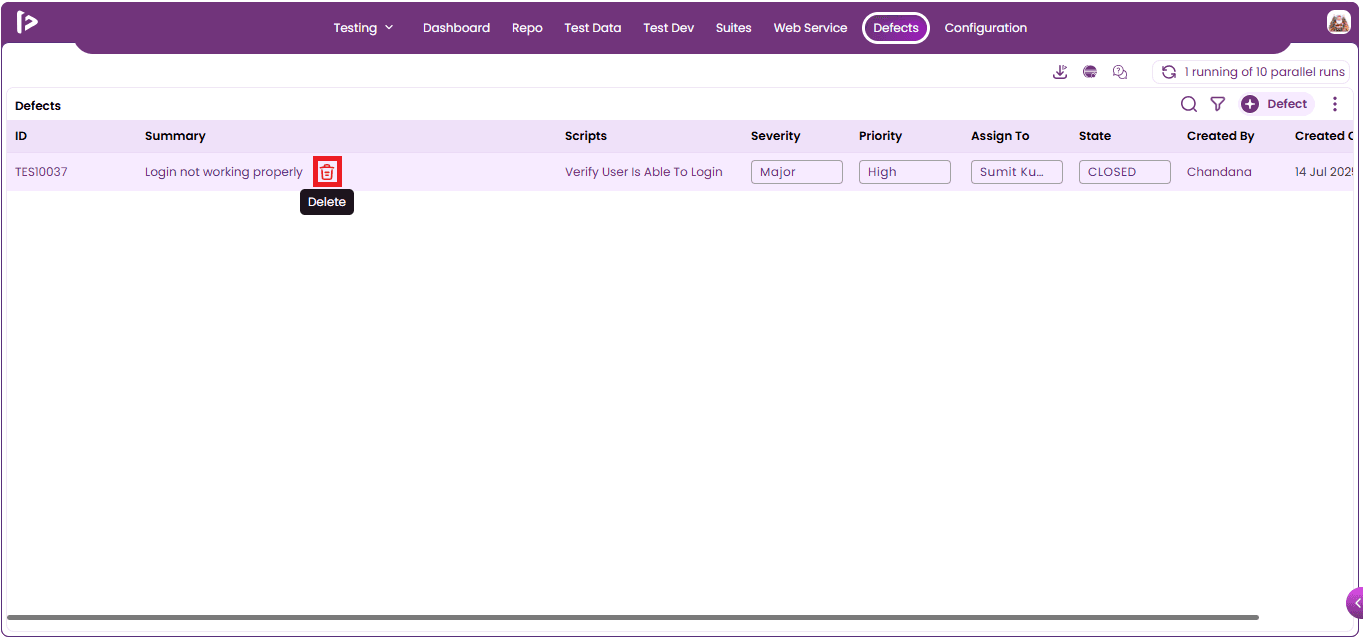
- Change the defect status to closed. Hovering over the summary will make the delete option visible to the user.
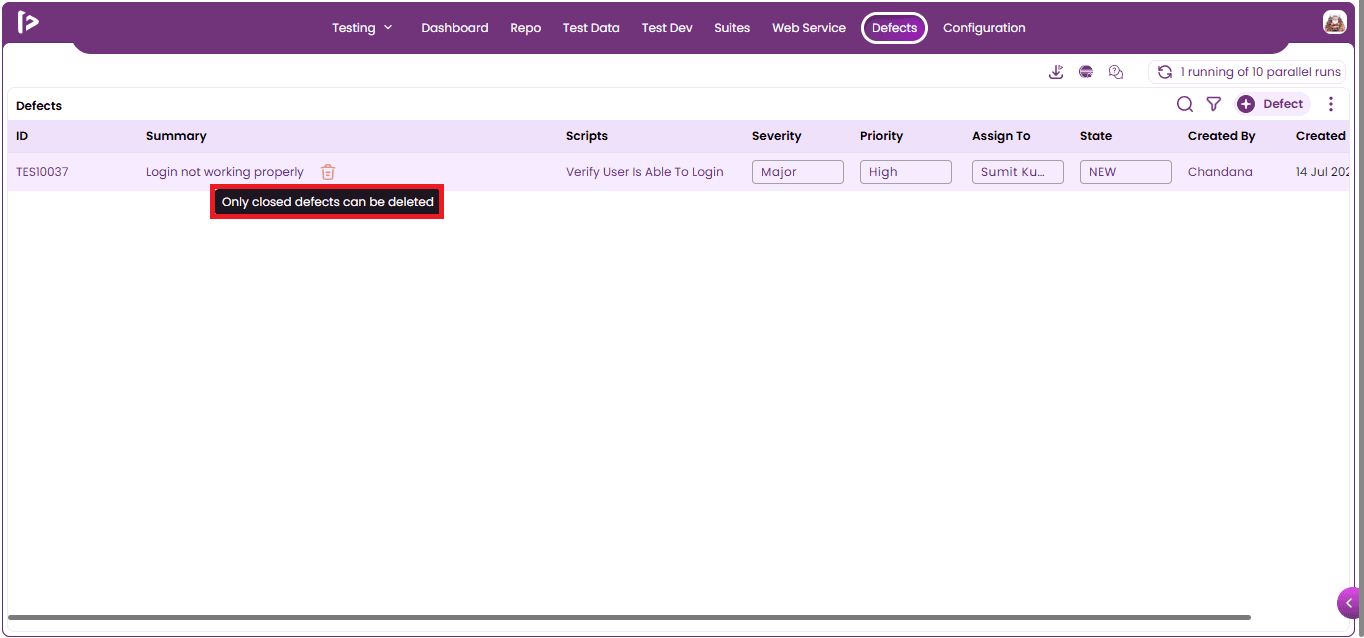
- Click on the delete option that is displayed as shown below.
- The delete popup will be displayed.
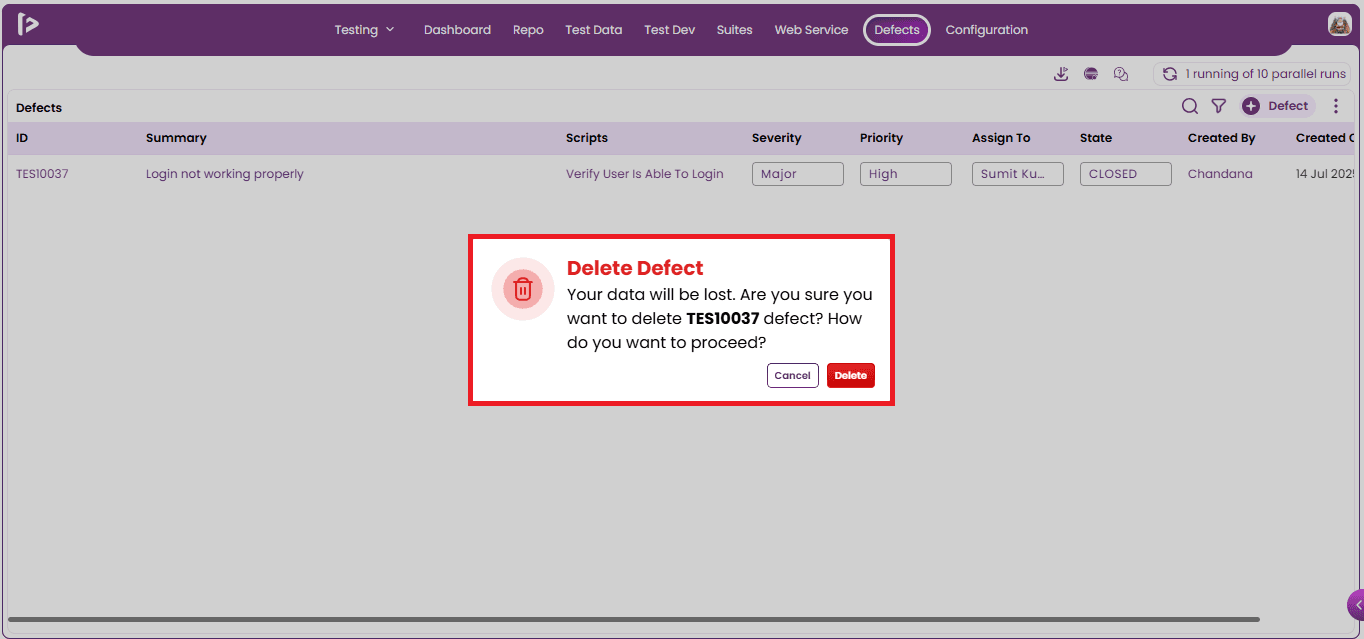
- The user can see both the options : Cancel and Delete. Click on the Delete button.
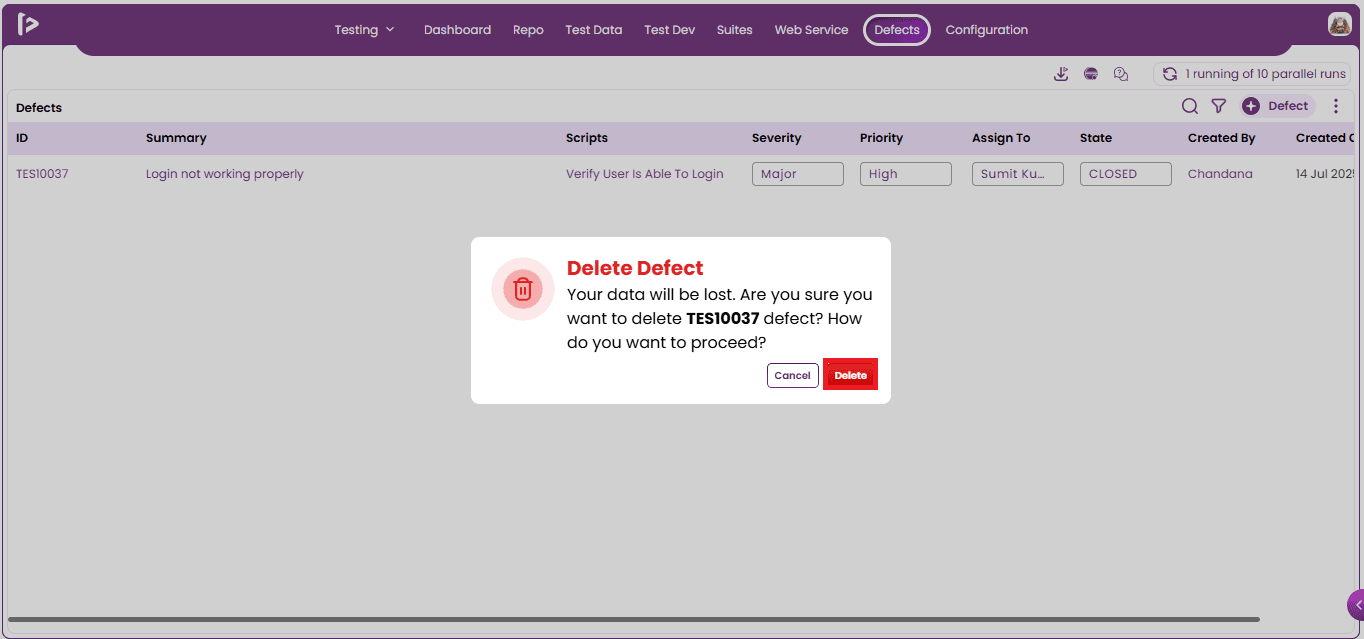
Search Functionality
Steps to search the defect are as follows :
- Click on the search button located in the top right corner.
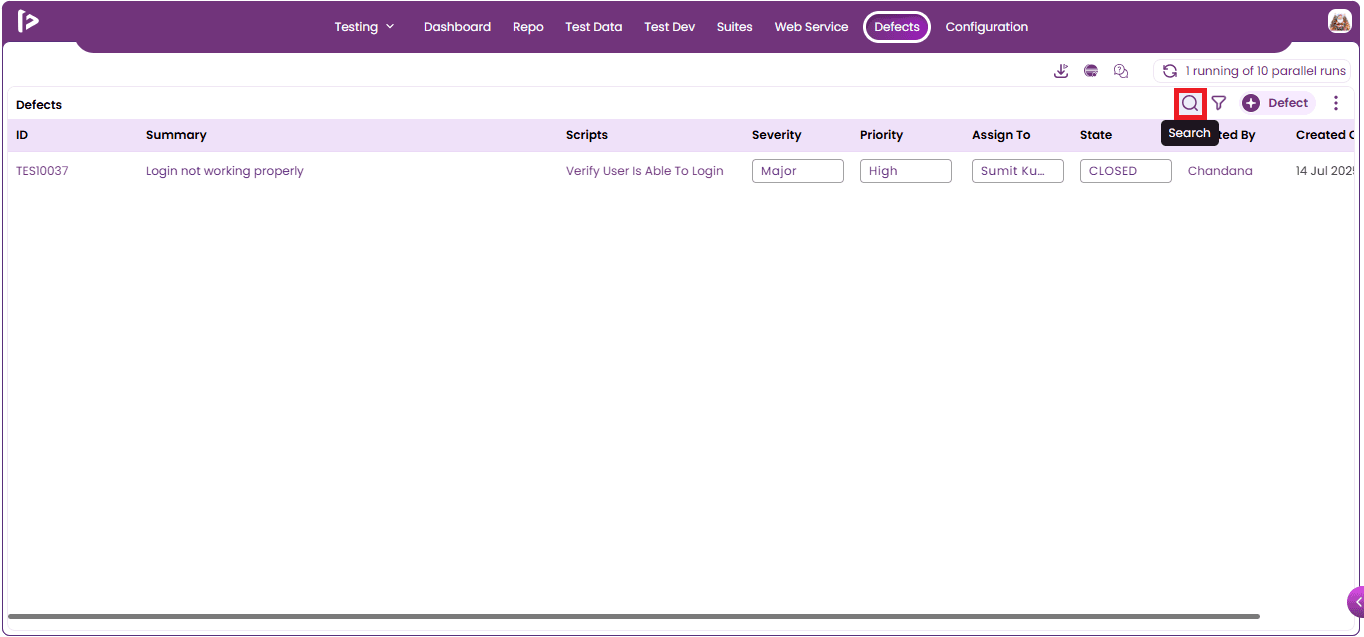
- The search text field will be displayed as shown below.
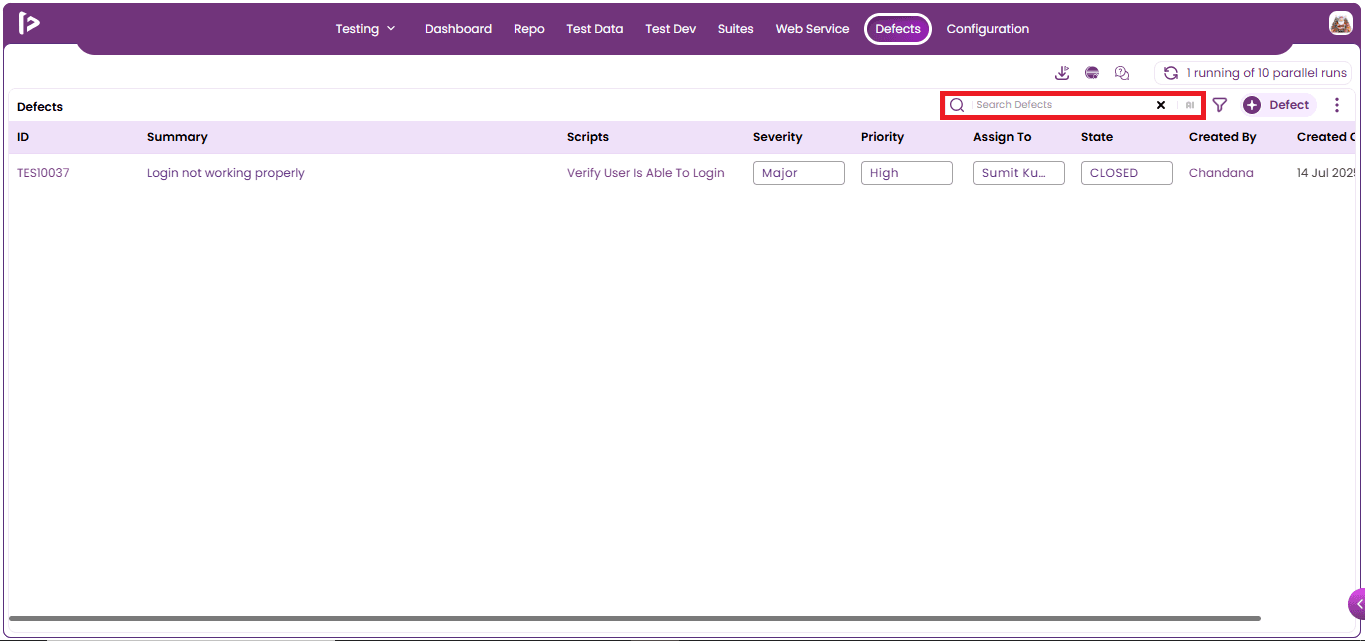
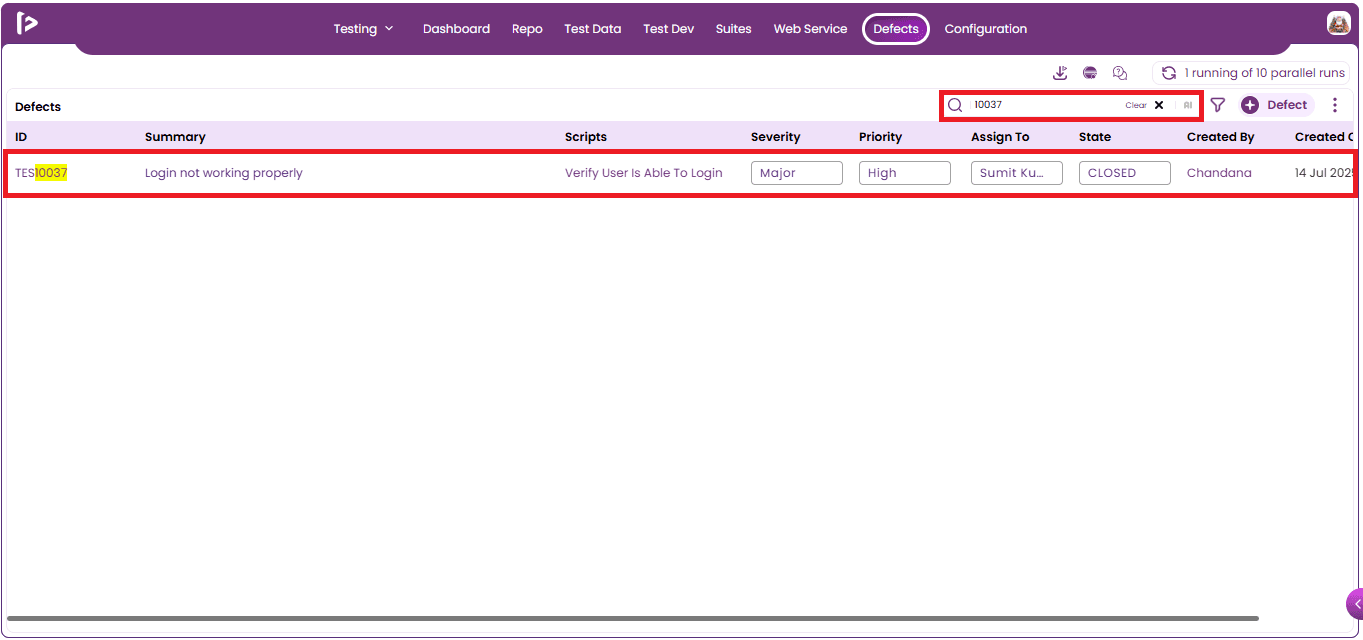
- If the user wants to search for any defect, then they need to type either the defect name or by the id.
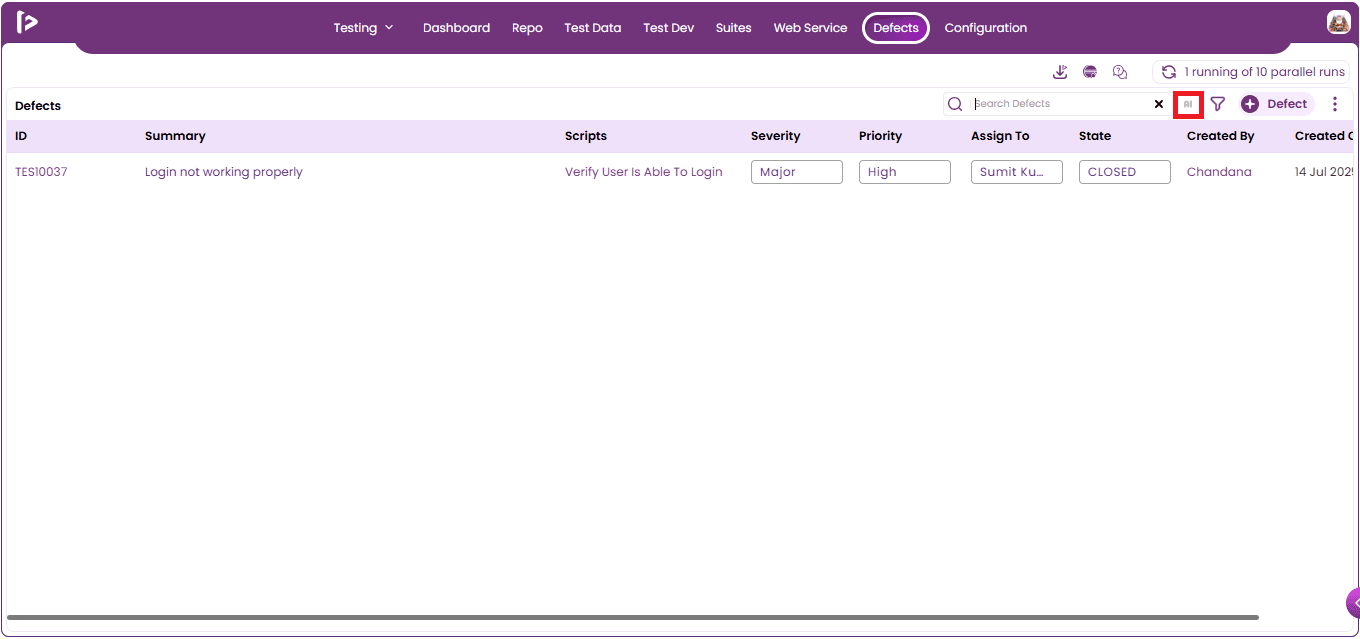
Note : The user has another option that is AI which is in the search text field to search for any defect .
Filter Functionality
Steps to filter the defect are as follows :
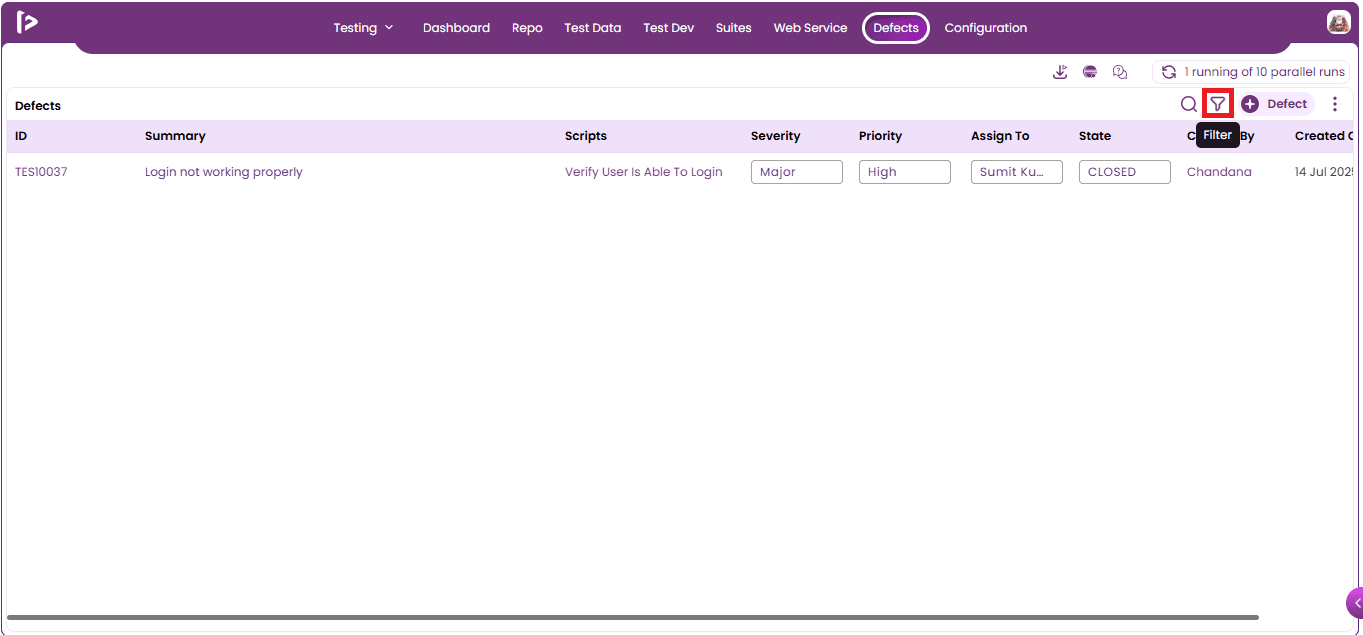
- Click on the filter option located in the top right corner.
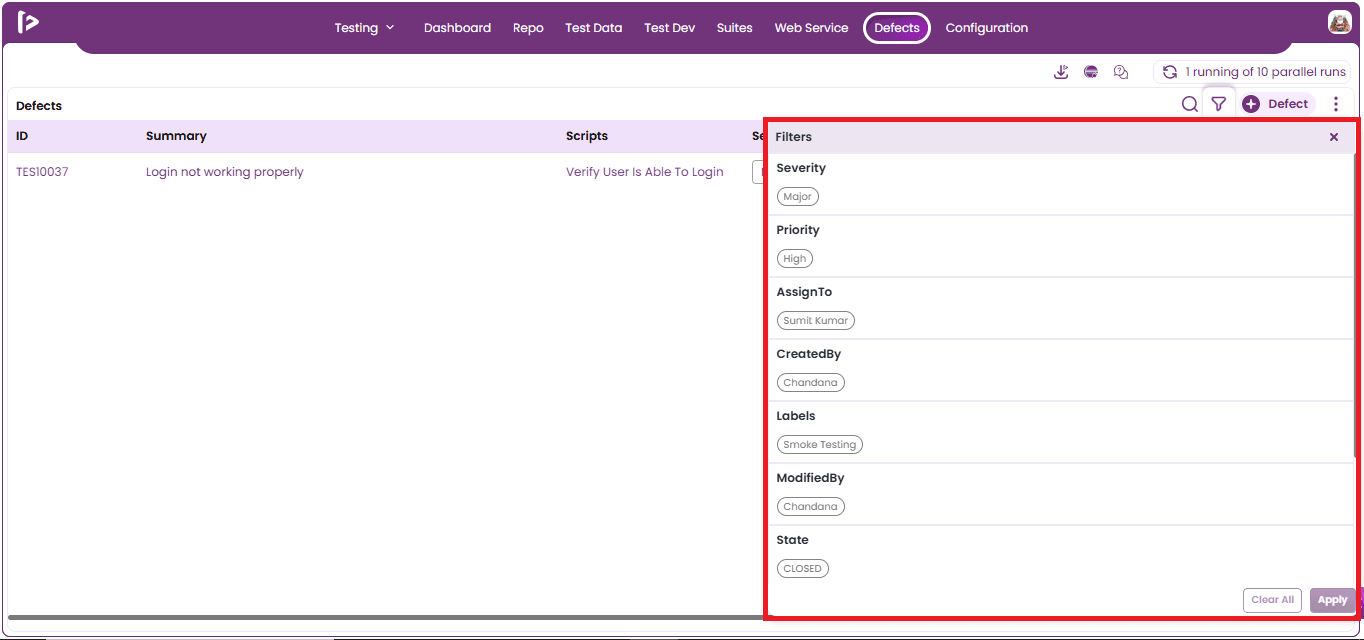
- The Filters slider will be displayed.
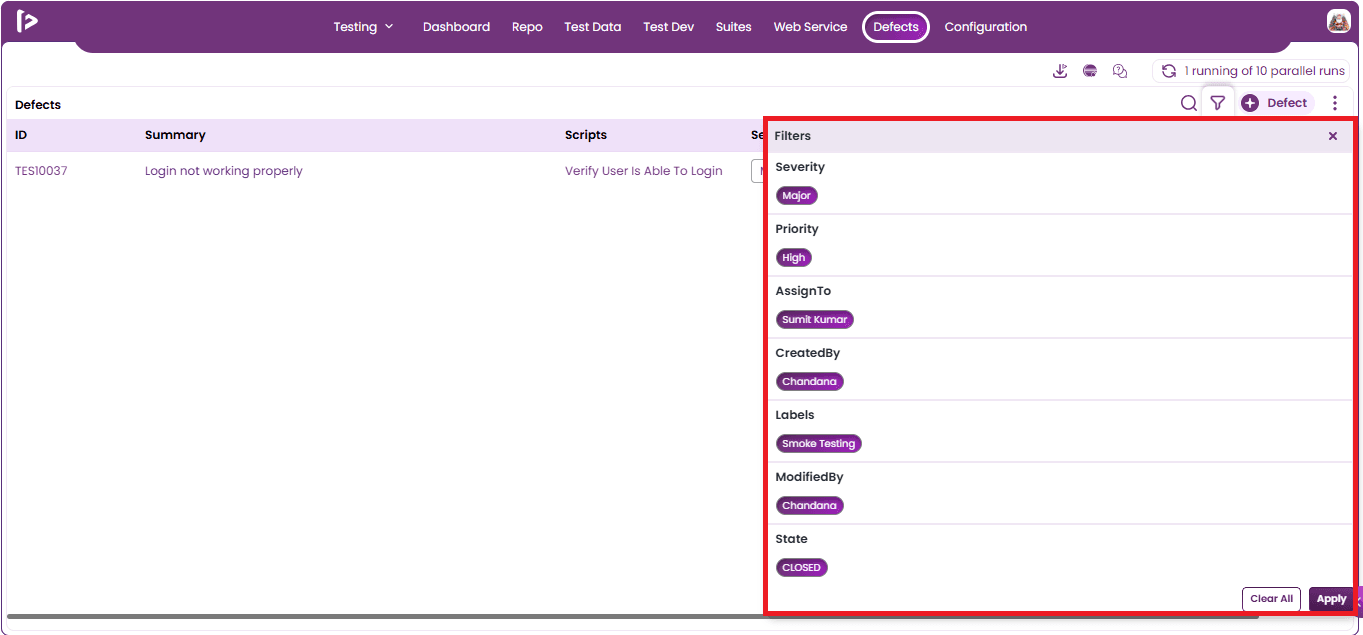
- Select all the required details which are shown in the slider.
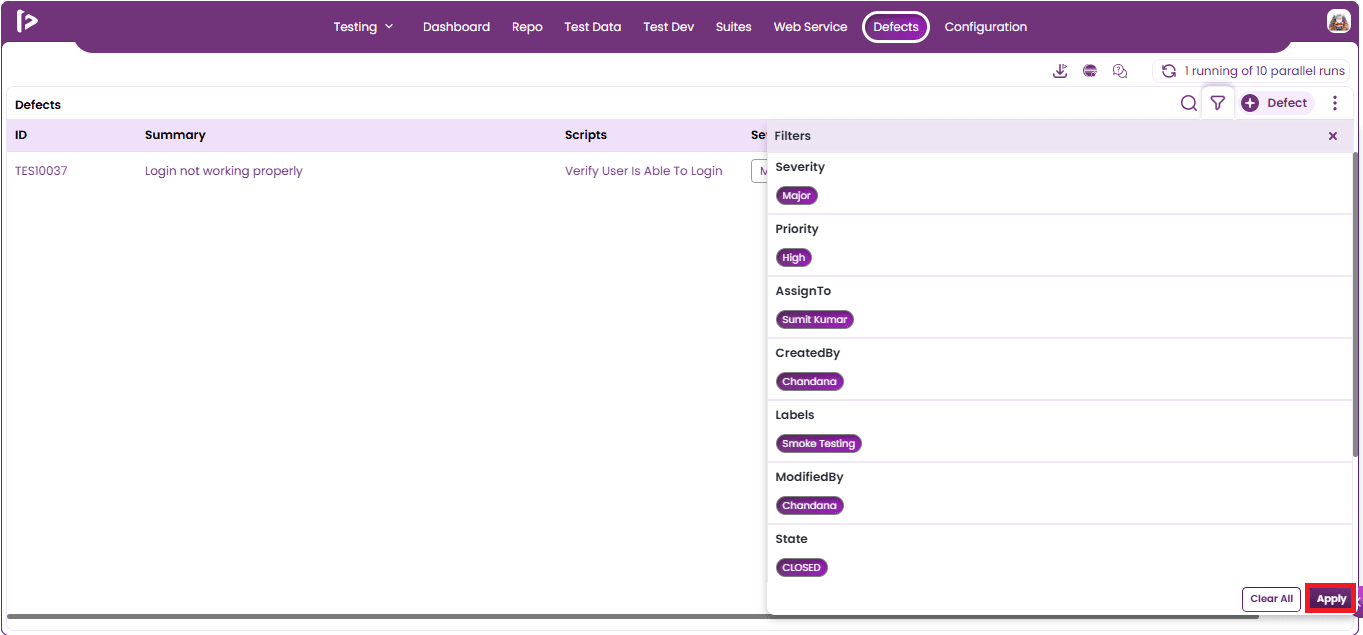
- Click on the apply button.
More Functionality
Steps to view extra feature of the defect are as follows :
- Click on button.
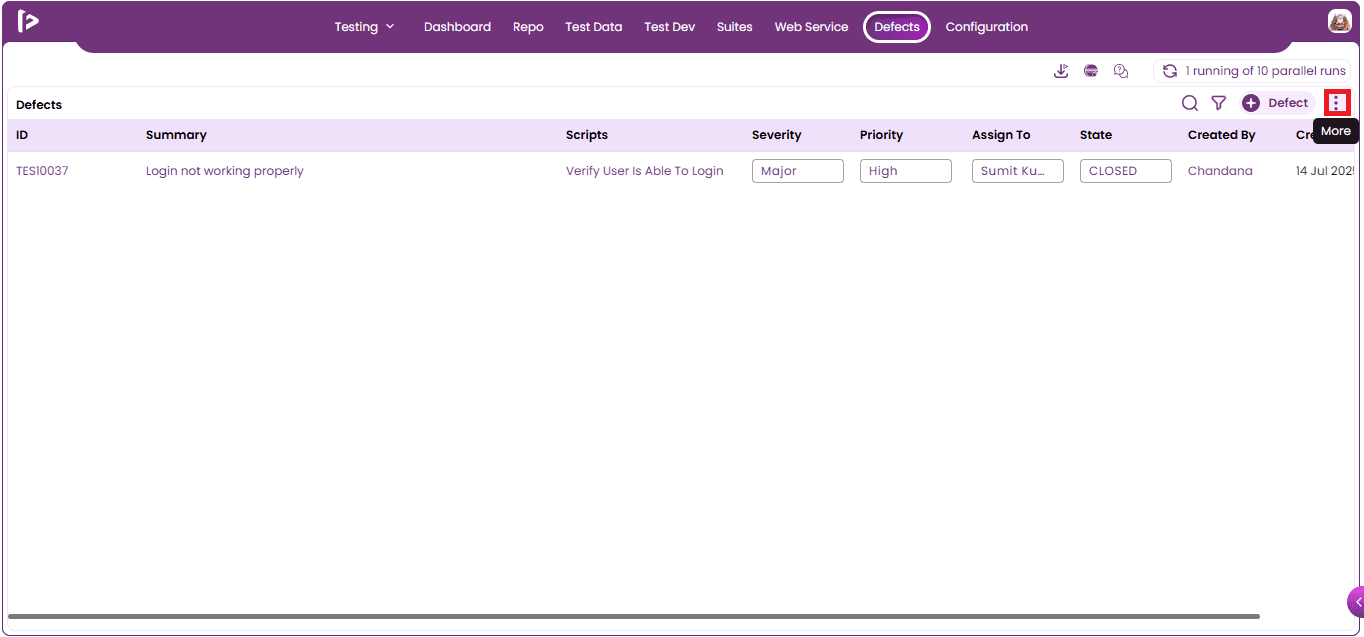
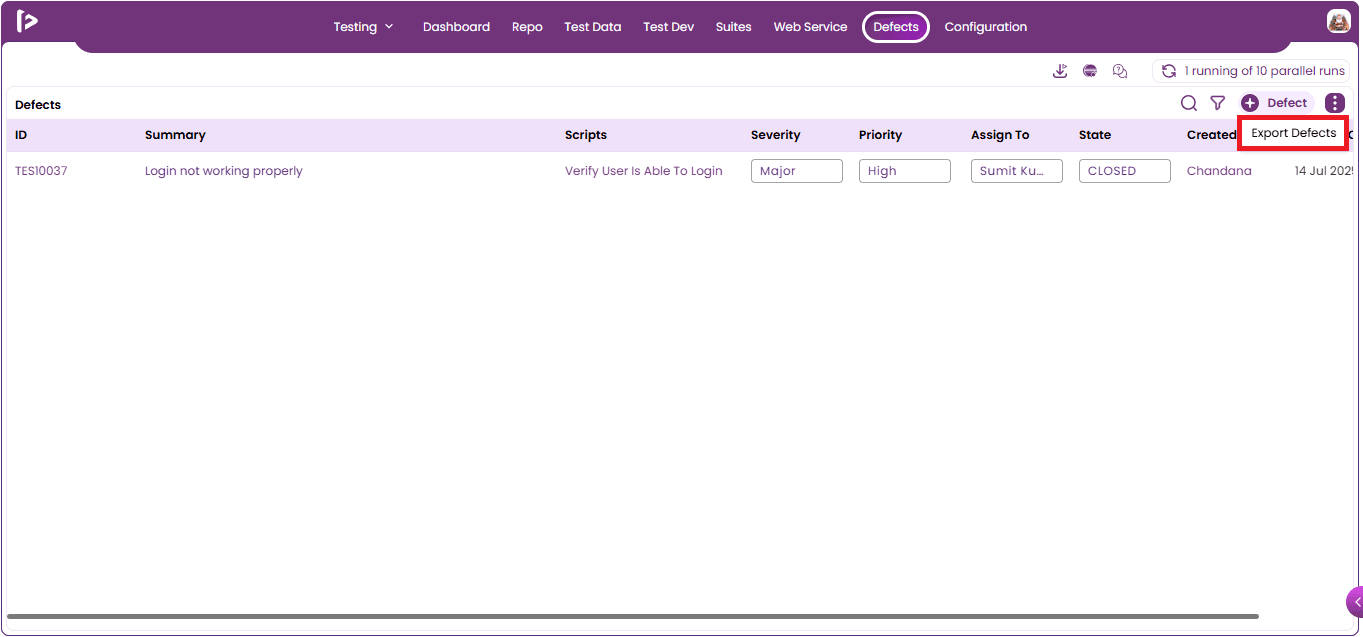
- The export option will be displayed. If the user wants to export the defect, they can use this option.
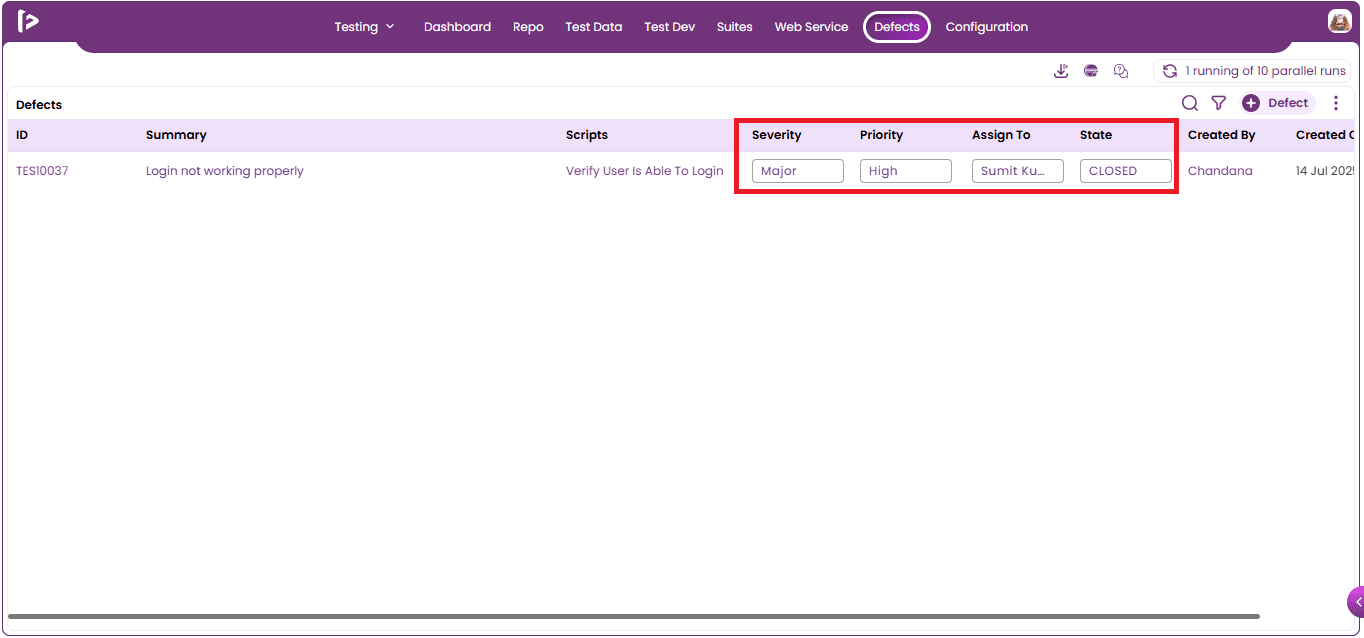
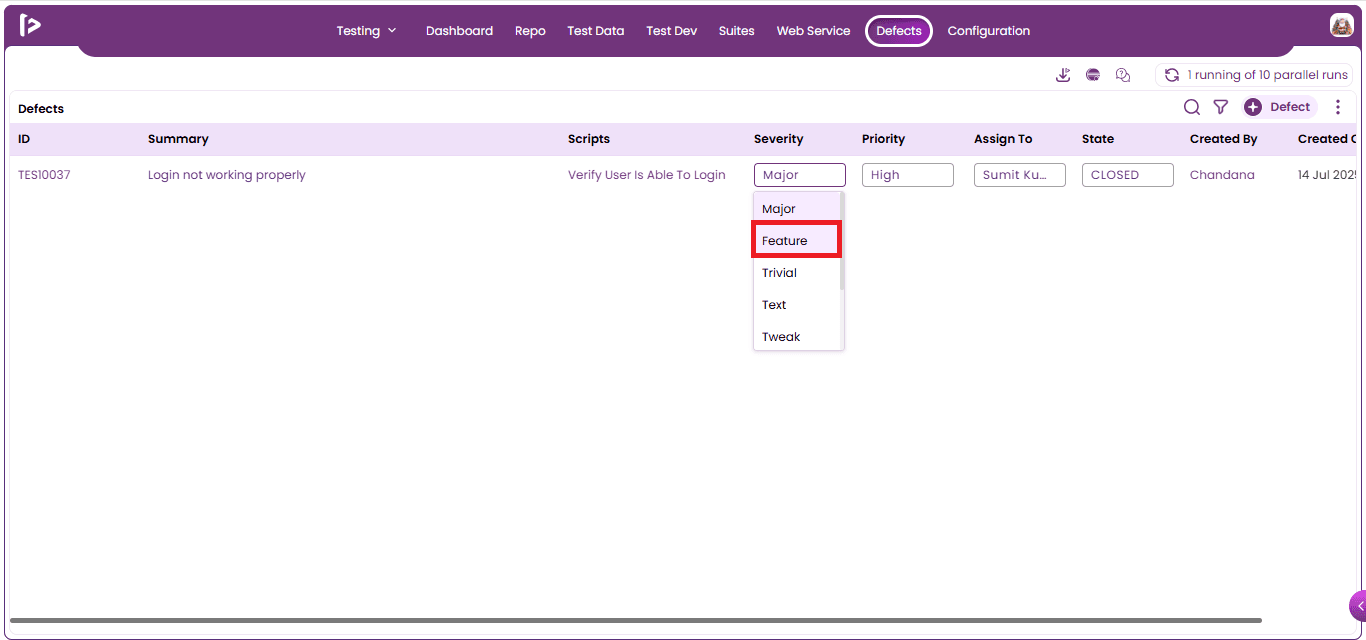
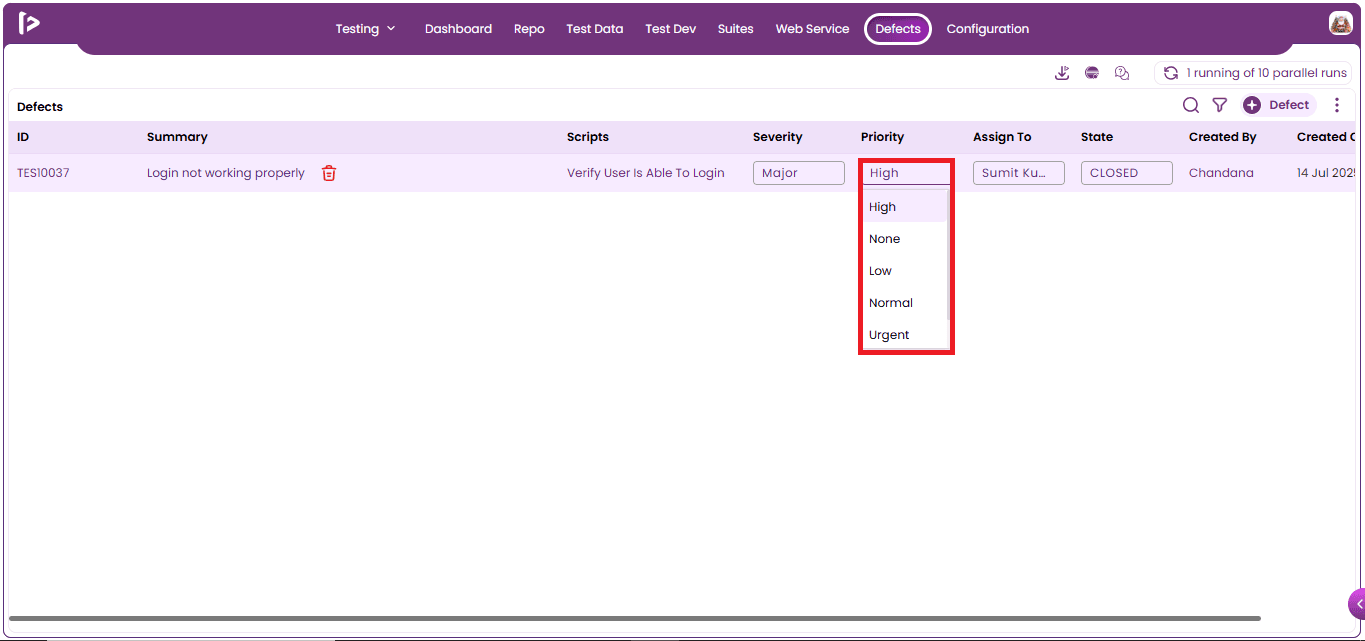
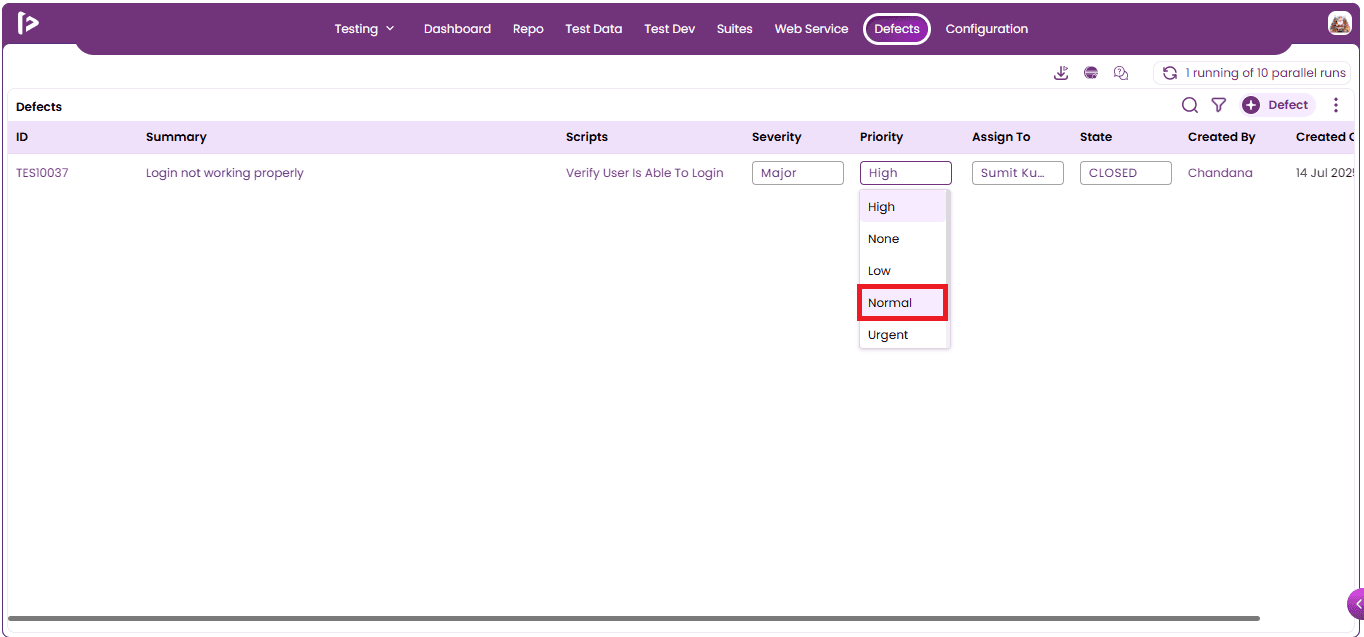
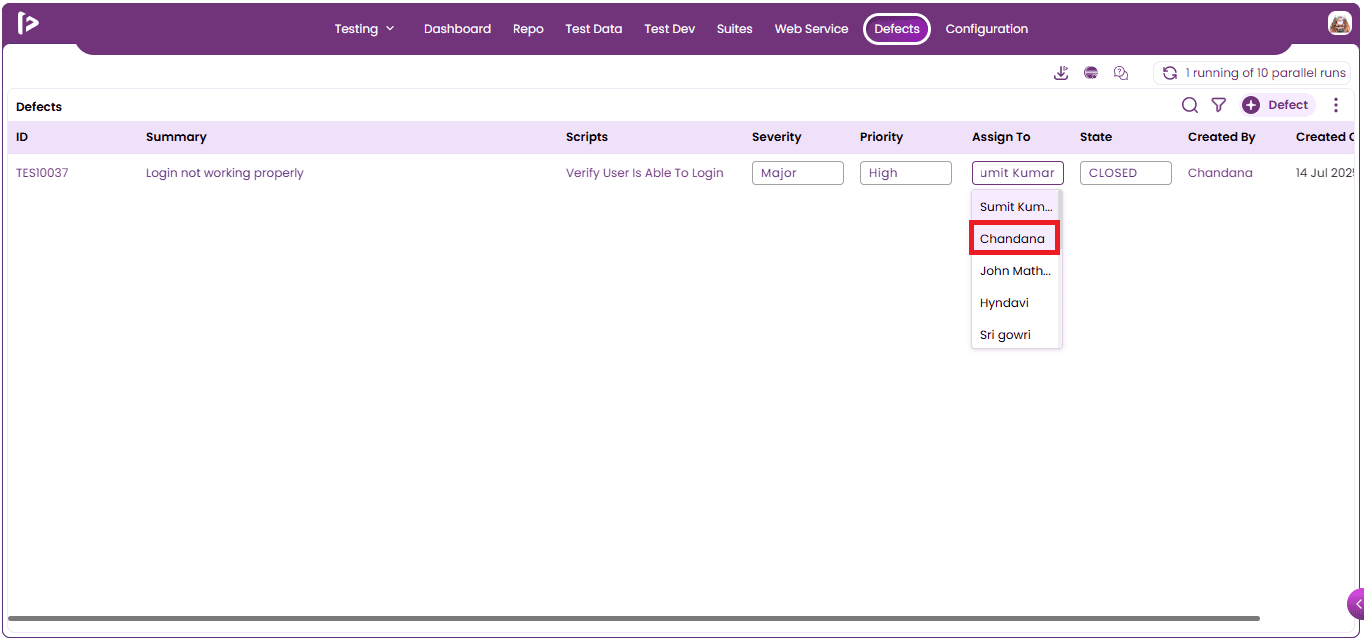
Note : If users want to edit Severity, Priority, Assigned to, State, they can simply click on the corresponding dropdowns present for each column as shown below.
Severity : Steps to select severity are as follows,
- Users need to click the severity, upon which dropdown will be displayed.
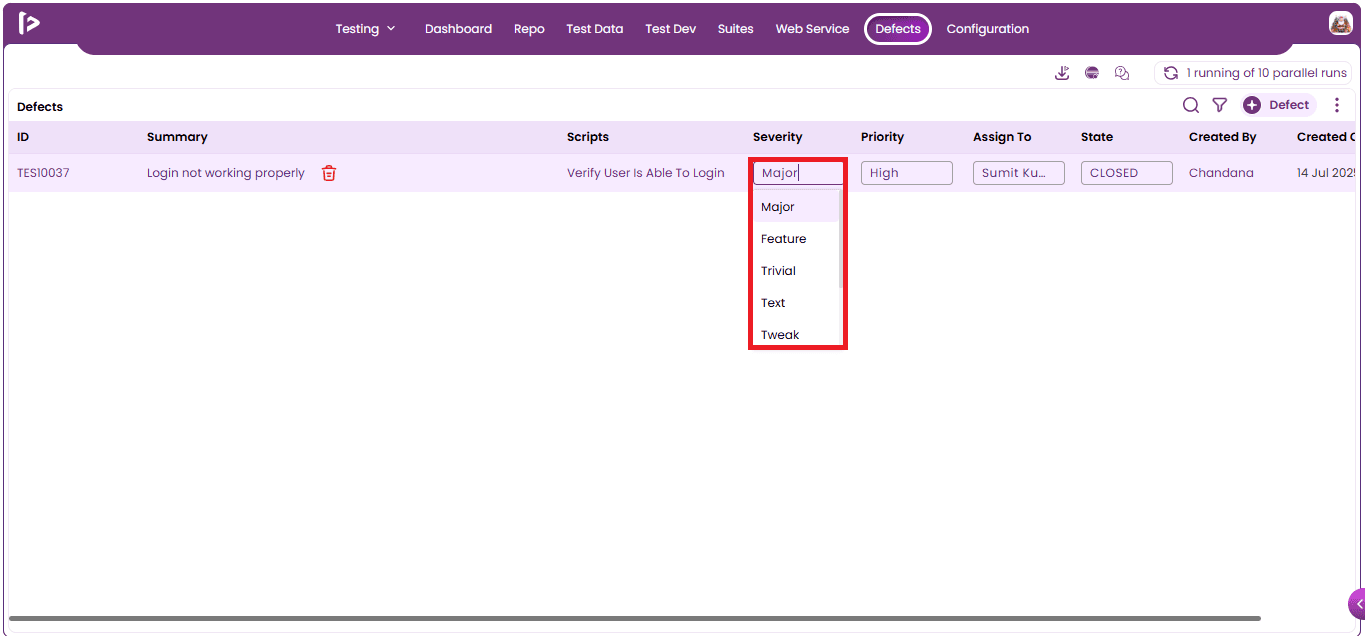
- Users must select the appropriate severity from the dropdown based on the defect.
Priority : Steps to select priority are as follows,
- Users need to click the priority, upon which a dropdown will be displayed.
- Users must select the appropriate priority from the dropdown based on the defect.
Assigned to : Steps to assign the defect are as follows,
- Click the Assigned to, upon which the dropdown will be displayed.
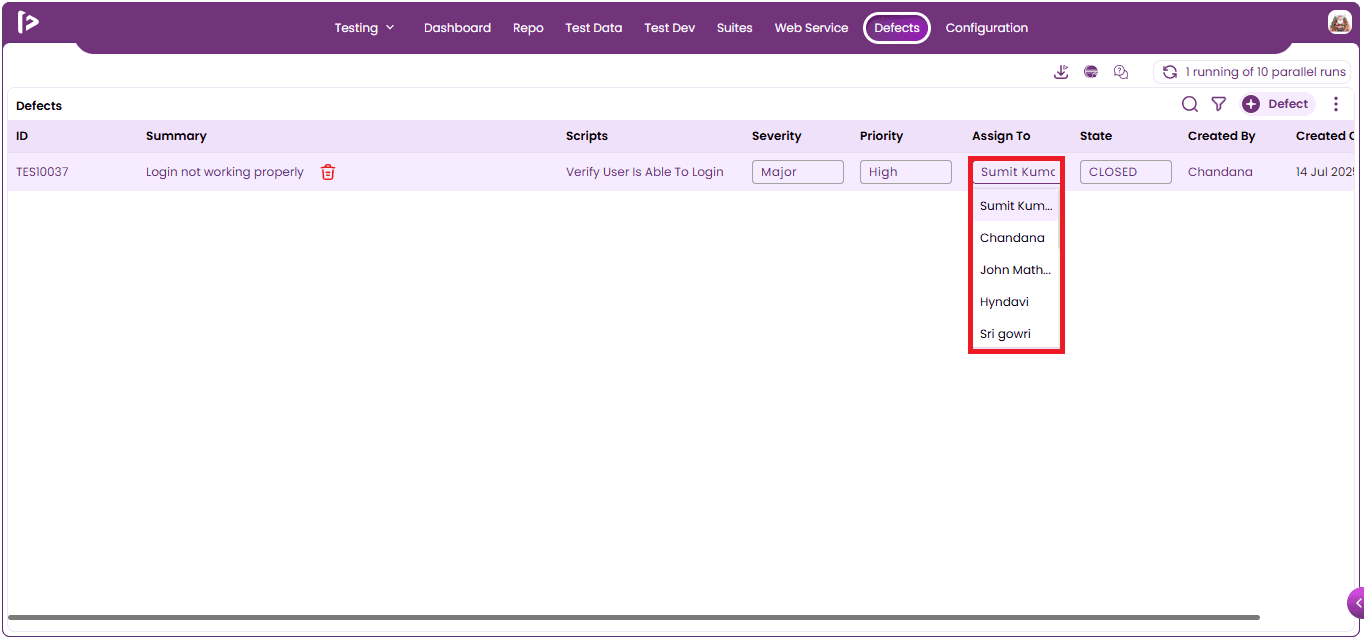
- Select the user from the dropdown for assigning the defect.
State : Steps to change the state of the user are as follows,
- Users need to click on the State, upon which a dropdown will be displayed. To change the defect state, the user can choose the desired option from the dropdown menu.