Projects
FireFlink is an AI-powered, high-speed, scriptless test automation platform designed to streamline the creation, execution, and management of automated test scripts for different applications. It supports seamless integration with various tools and provides robust features for efficient test lifecycle management. It is classified into two levels;
- All Projects Level or License Level
- Individual Project Level or Project Level
The All Projects level, also called License Level, offers a comprehensive overview of each project's key details, including the project name, type (such as Web, Web & Mobile, Mobile, Web Services, Salesforce and MS Dynamics), and status (Opened, Closed, or Archived). It also displays information about the last user who modified the project and the timestamp of the modification. From this section, users can conveniently perform actions like editing, deleting, archiving, or unarchiving projects, all within the same section. This is where the user creates the project.
Navigation
- Once we log in to FireFlink, the user will be landed on the All Projects Level by default.
- This section allows users to create and manage projects within the License.
Steps to create a Project
The ‘+Project’ button, located in the top right corner of the screen, is used to initiate the creation of a new project.
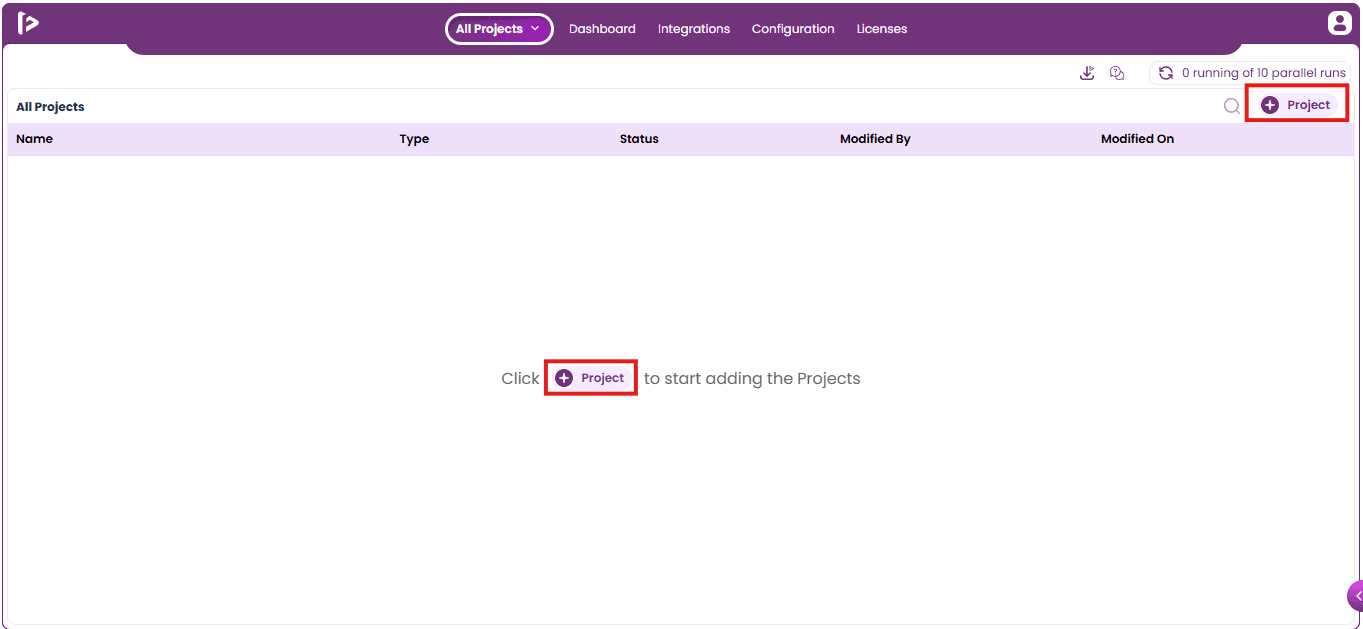
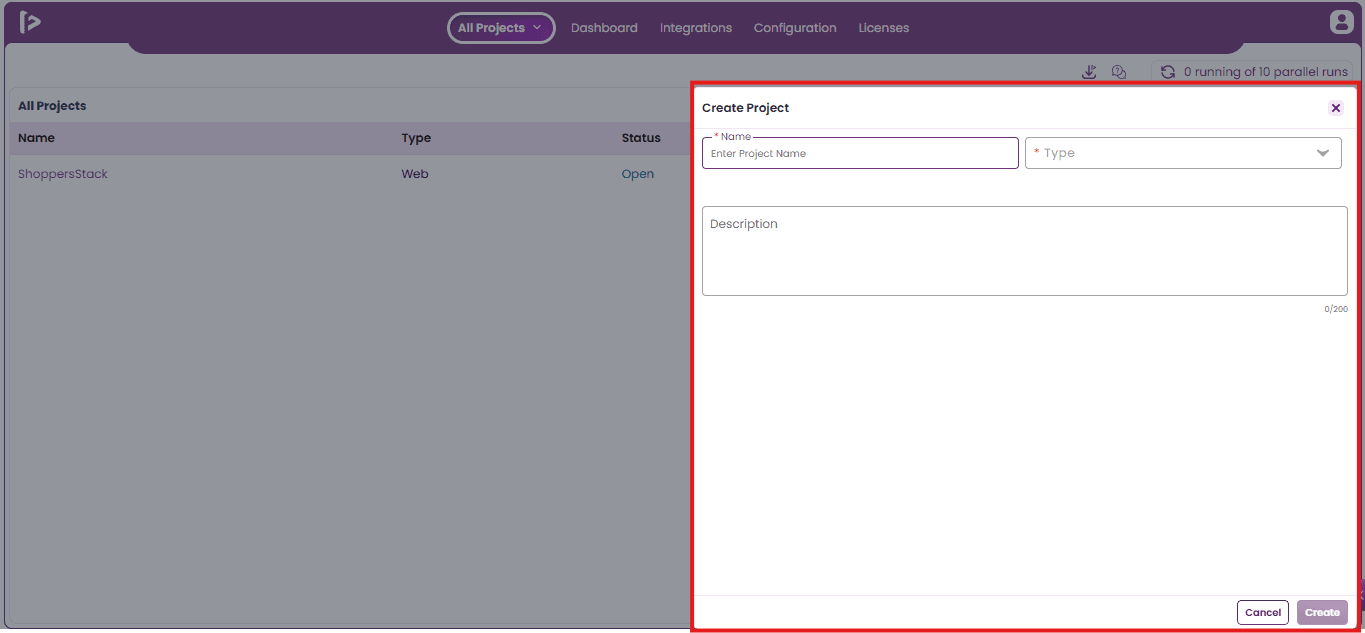
Upon clicking this button, a slider window titled "Create Project" will appear, allowing users to enter the necessary project details.
- The "Create Project" slider window contains three key fields: Name, Type, and Description.
- Name: This is a required field where you enter the name of the project.
- Type: Also a mandatory field, it allows you to select the project type from a dropdown menu. FireFlink offers multiple project types like Webservices, Web, Mobile, Web & Mobile, Salesforce and MS Dynamics options to choose from. (Note: Once the Project is created, we will not be able to change the Project type.)
- Description: This optional field is used to add relevant details or context about the project being created.
To create a Web-type project, follow these steps:
- Provide an application name in the Project Name field (mandatory).
- Select "Web" as the project type from the dropdown list (mandatory).
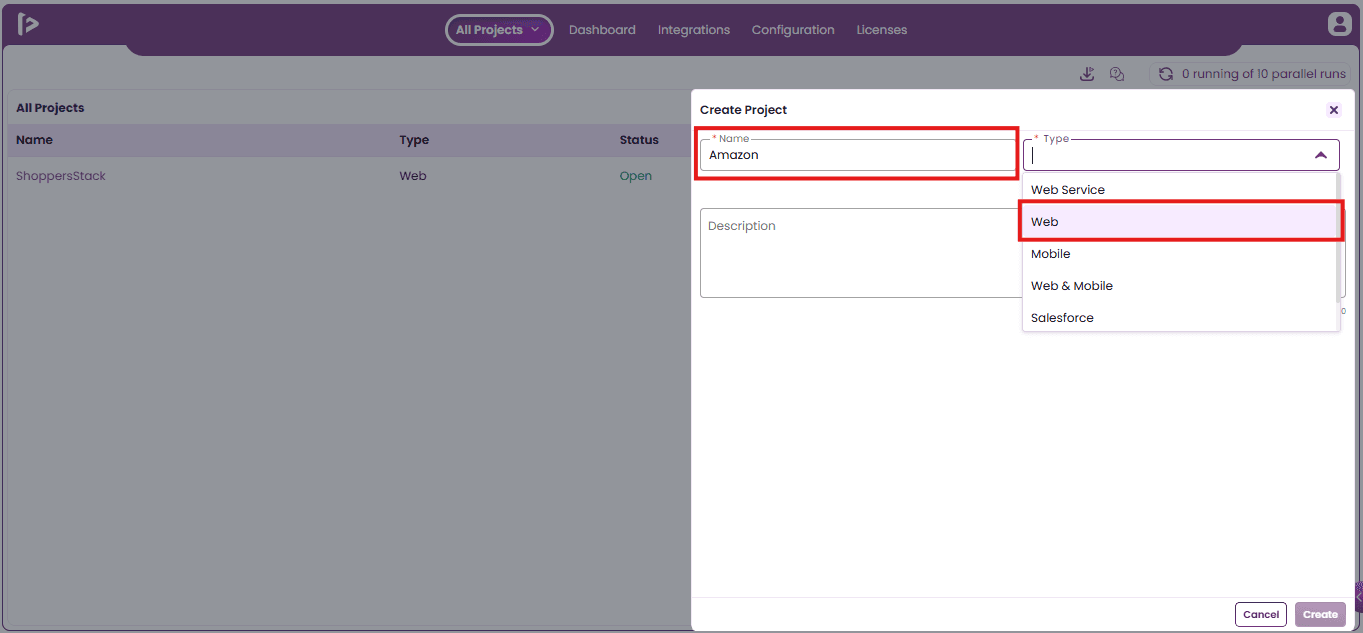
- After selecting the "Web" type, an additional field will appear prompting the user to enter the URL of the application (this field is optional and can be skipped).
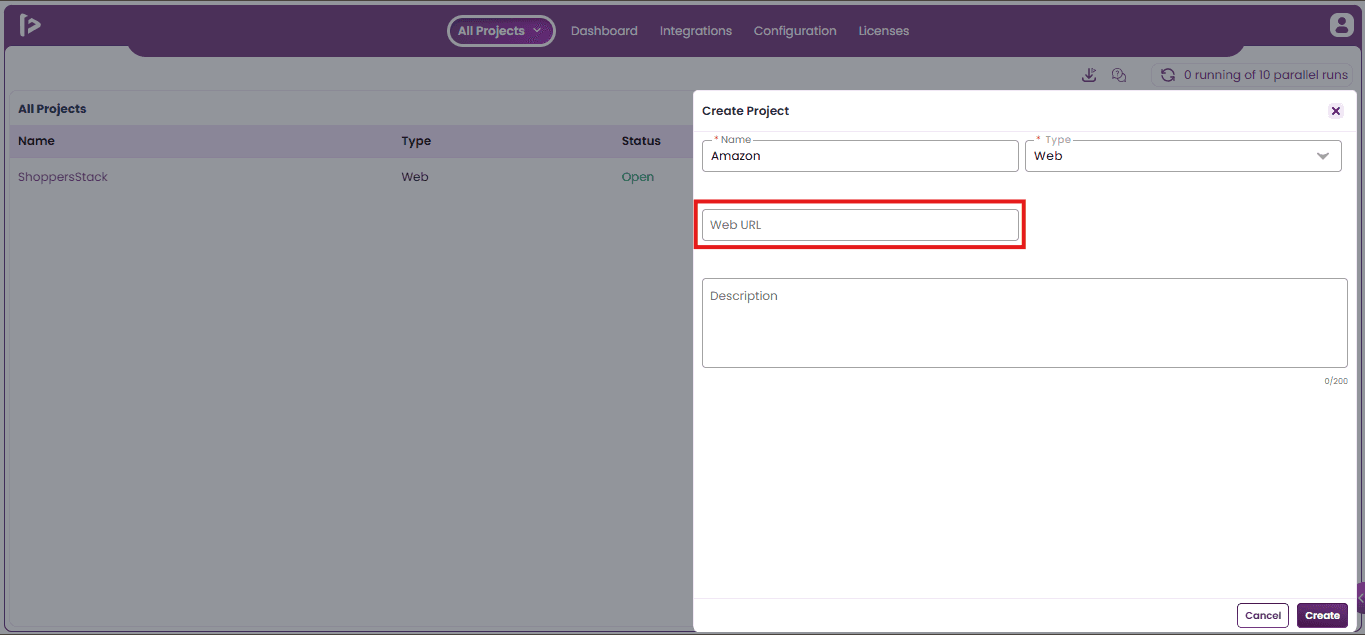
- Once all required fields are filled, click the Create button.
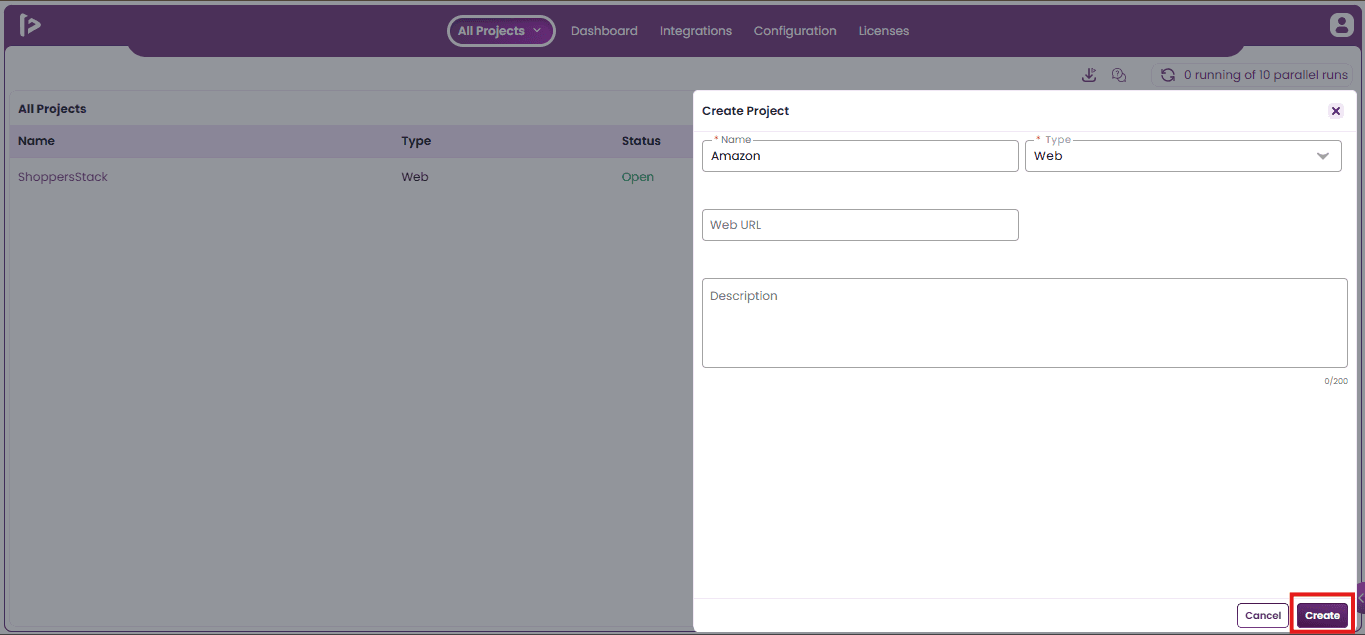
- Once the project is created, the user will be redirected to the Test Dev section at the Individual Project Level.
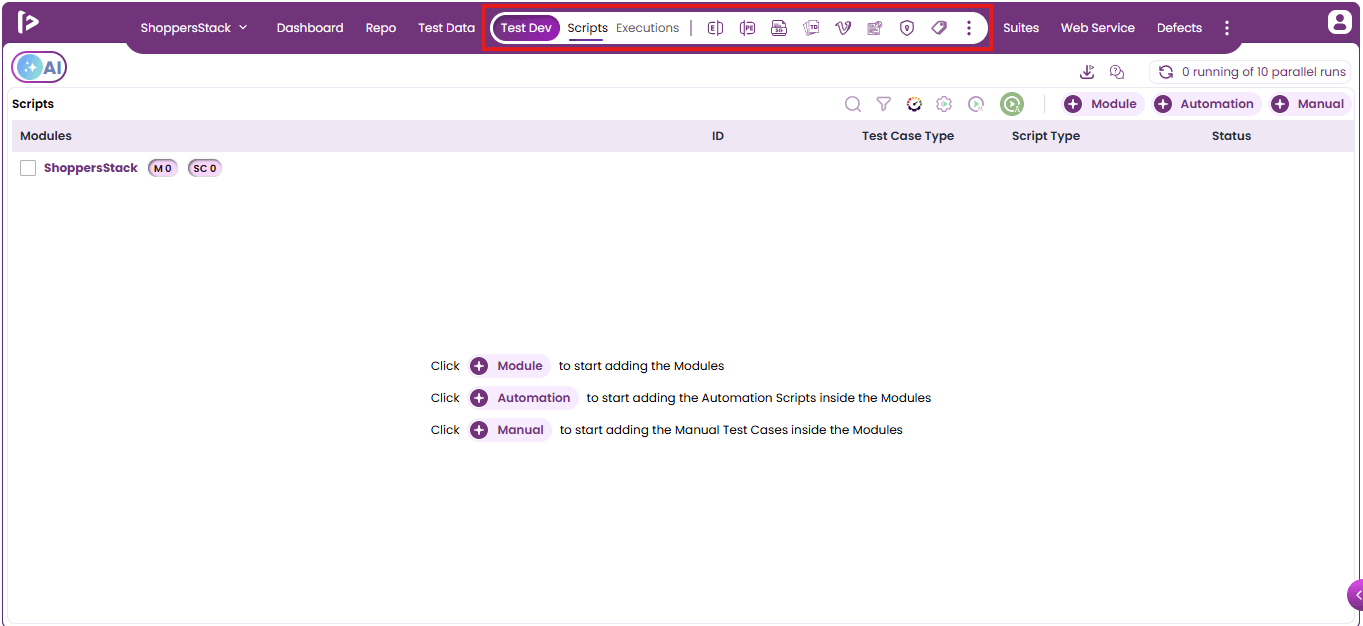
NOTE: Likewise, users can create Web Services, Mobile, Web & Mobile, Salesforce, and MS Dynamics project types by simply selecting the desired option from the given Type dropdown menu.
Individual Project Level
- The Individual Project Level, also called Project Level in FireFlink, refers to the specific workspace where testing resources for a specific project are created, organized, and managed.
- It allows users to configure project-specific settings such as test development, environment setup, defect management platforms, and automation suites.
- Each project functions independently, enabling tailored execution, tracking, and reporting based on the requirements of that particular project.
Steps to view Project Details within Project Level
Click on the Project Level dropdown as shown below.
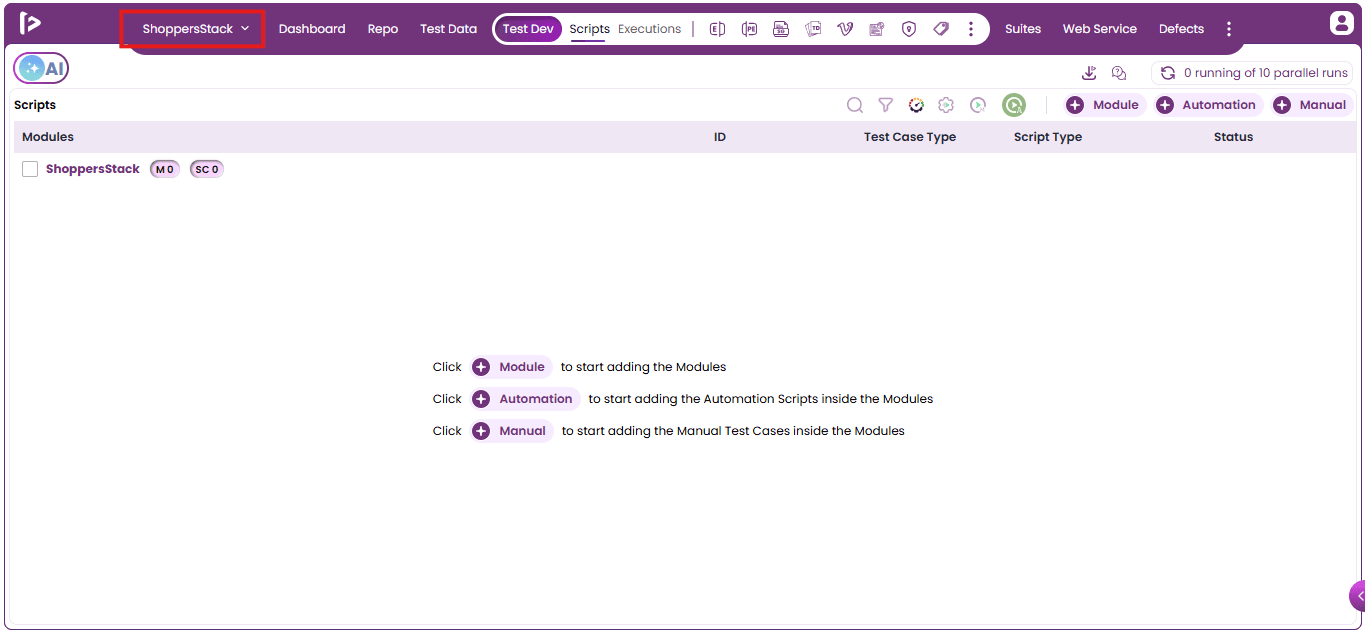
Upon clicking, the user will be navigated to the Project Details page. It includes the information such as;
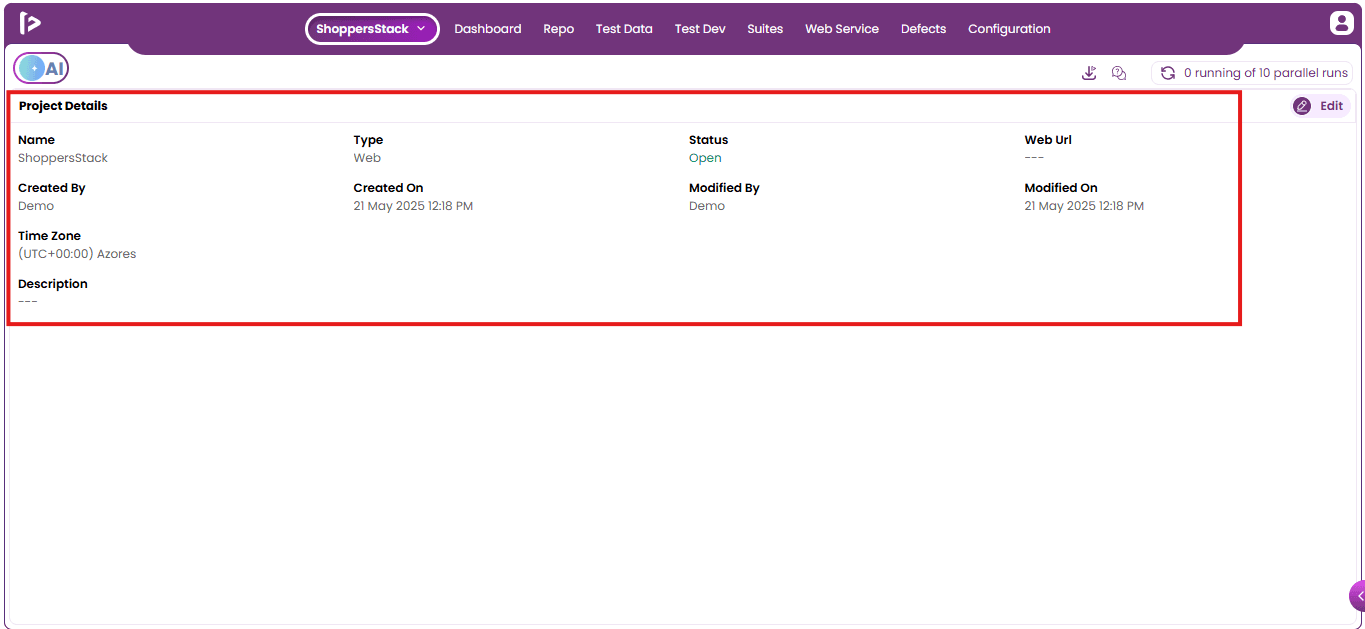
It includes the information such as;
- Name: Displays the project's name.
- Type: Shows the selected type of the project.
- Status: Indicates the current status of the project.
- Web URL: Reflects the application URL provided by the user while creating the Project.
- Created By: Identifies the user who created the project.
- Created On: Specifies the date and time when the project was created.
- Modified By: Name of the user who last modified the project.
- Modified On: Displays the date and time of the most recent modification.
- Time Zone: Indicates the time zone configured for the project.
- Description: Contains a short summary or details entered during project creation.
Steps to edit the project at the Project Level
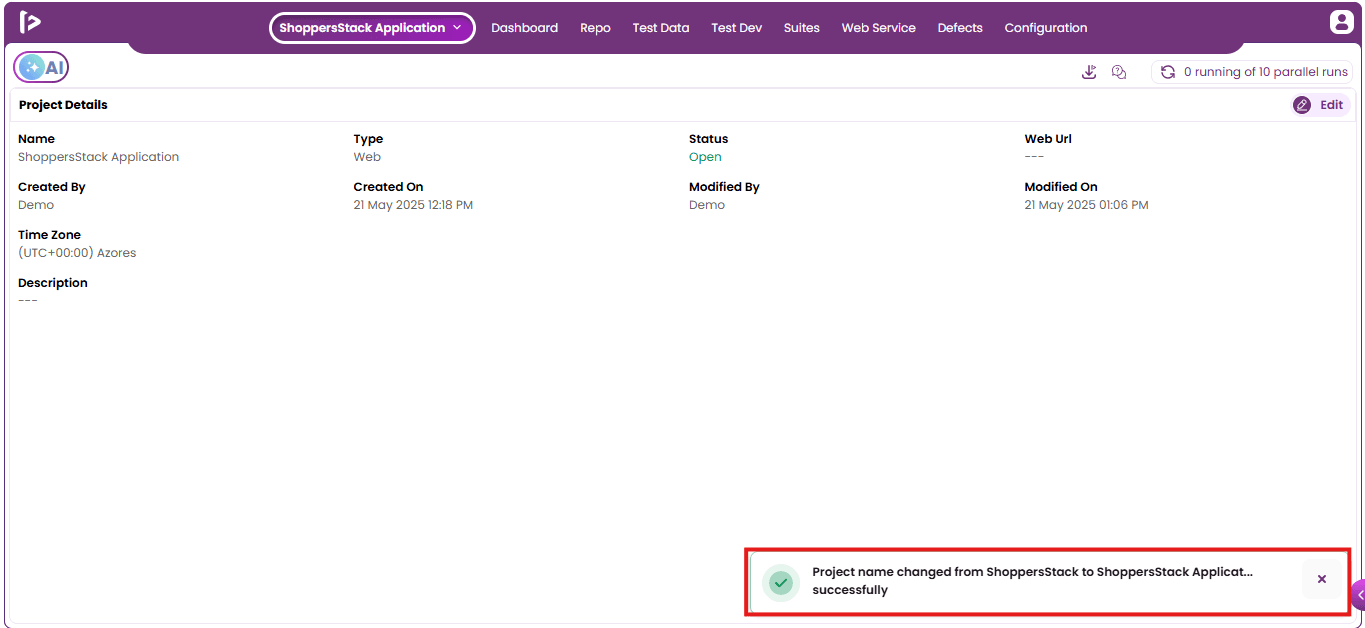
To edit the project, click on the edit icon.
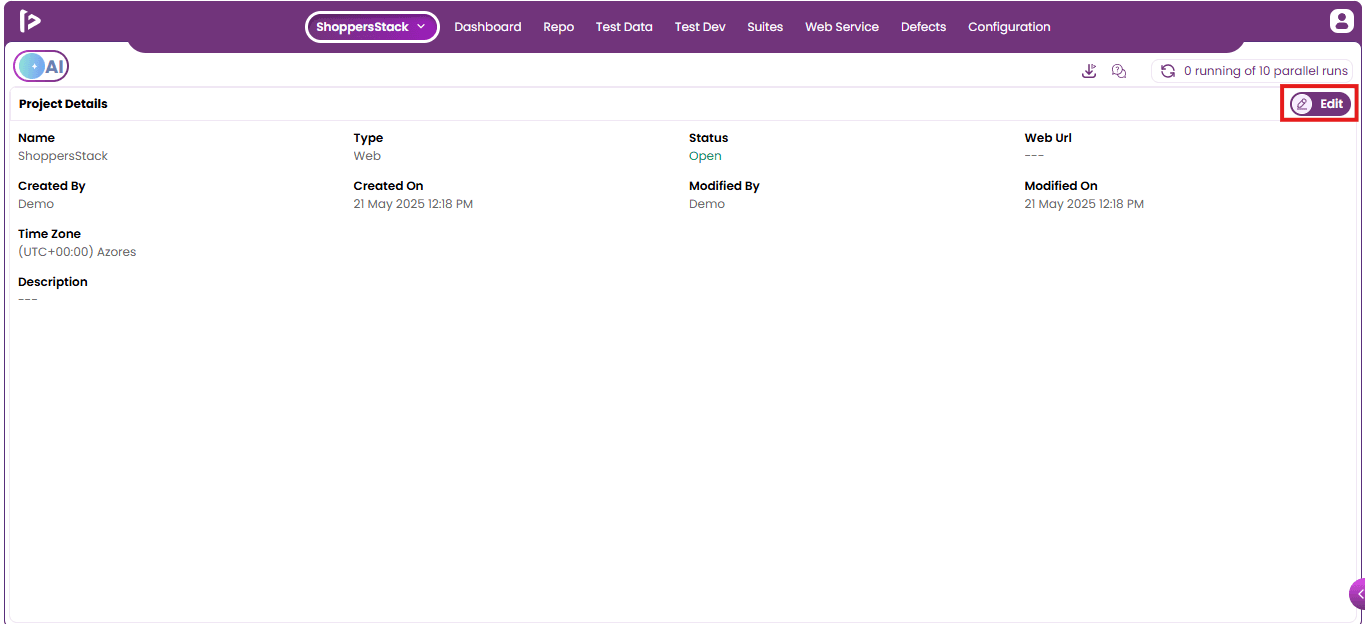
Upon clicking the edit icon, the Edit Project slider window will be displayed. In this window, all fields are editable except for the Type.
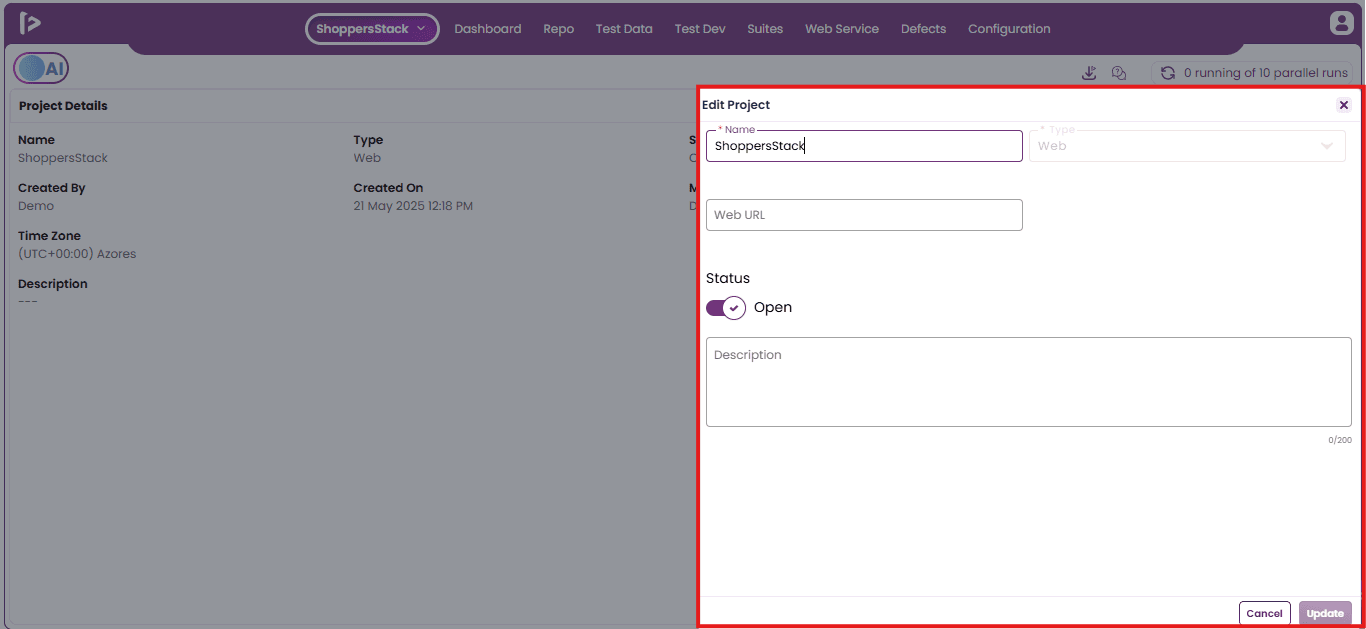
Users can update project details as needed, and once the changes are made, clicking the Update button will save and apply the modifications.
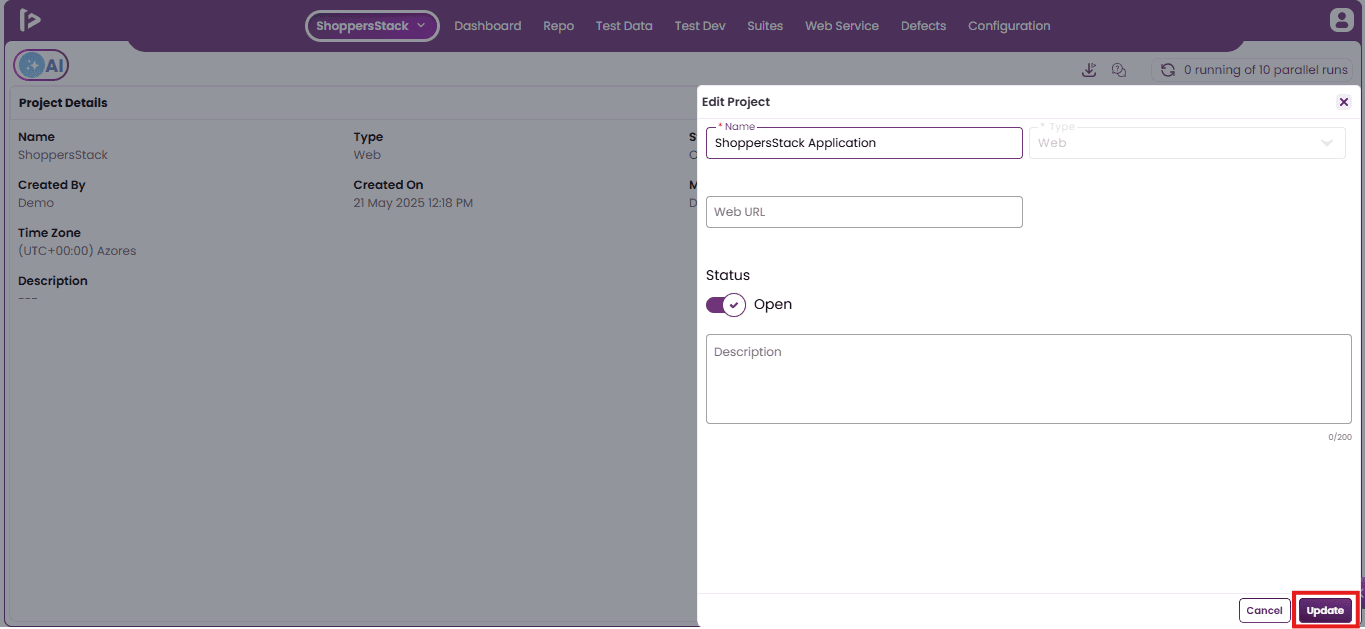
Upon modification, a success message will be displayed as shown below.
Projects List Display
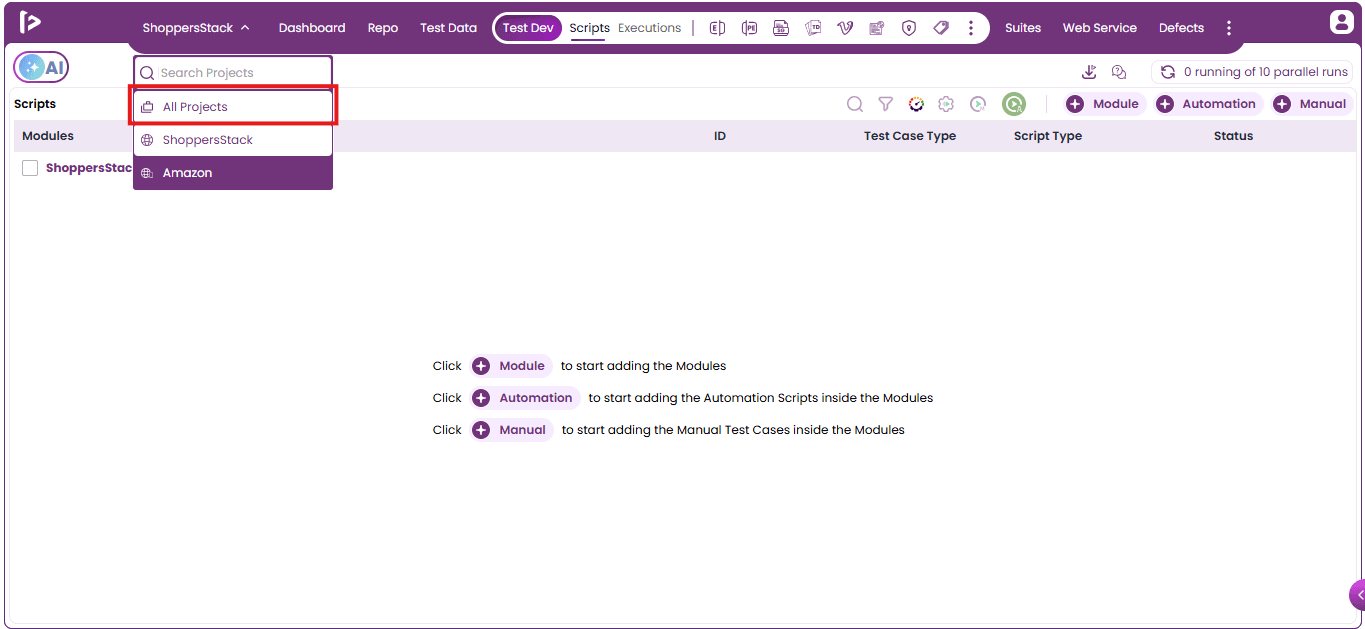
To view all created projects, navigate back to the All Projects level by moving the mouse cursor on the Project Level dropdown.
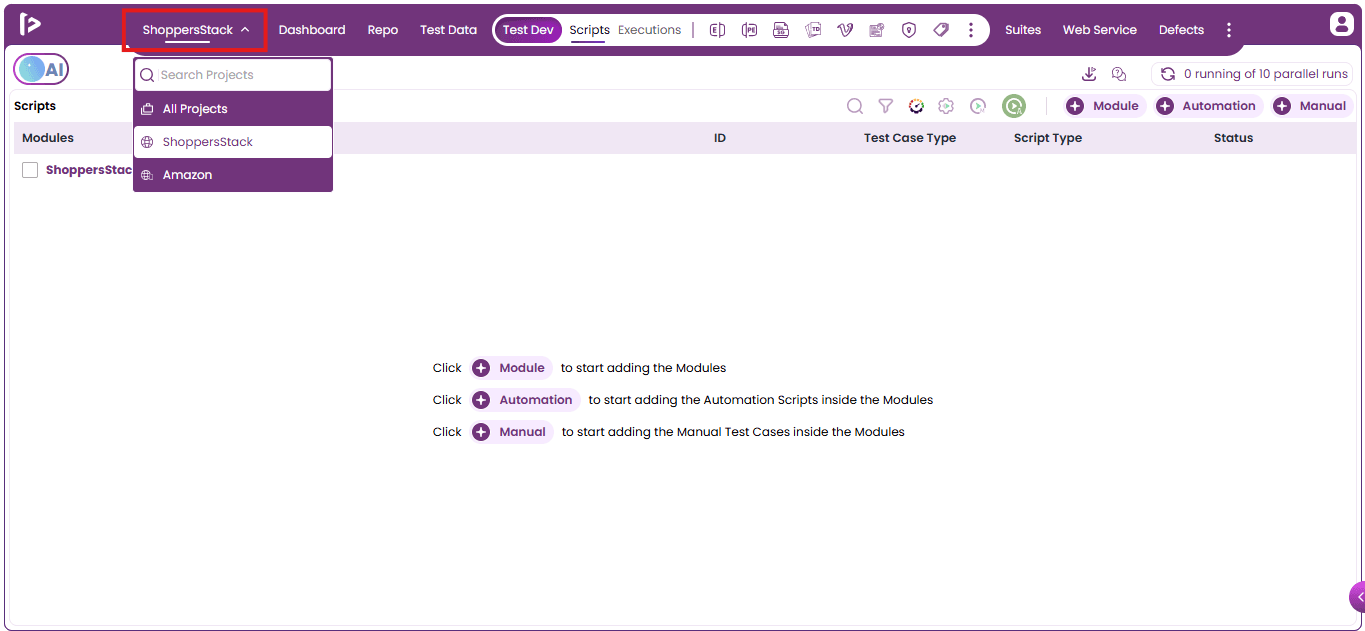
Select All Projects option from the dropdown as shown below.
Upon selecting, the user will be directed to the All Projects level, and all the created projects will be displayed as shown below.
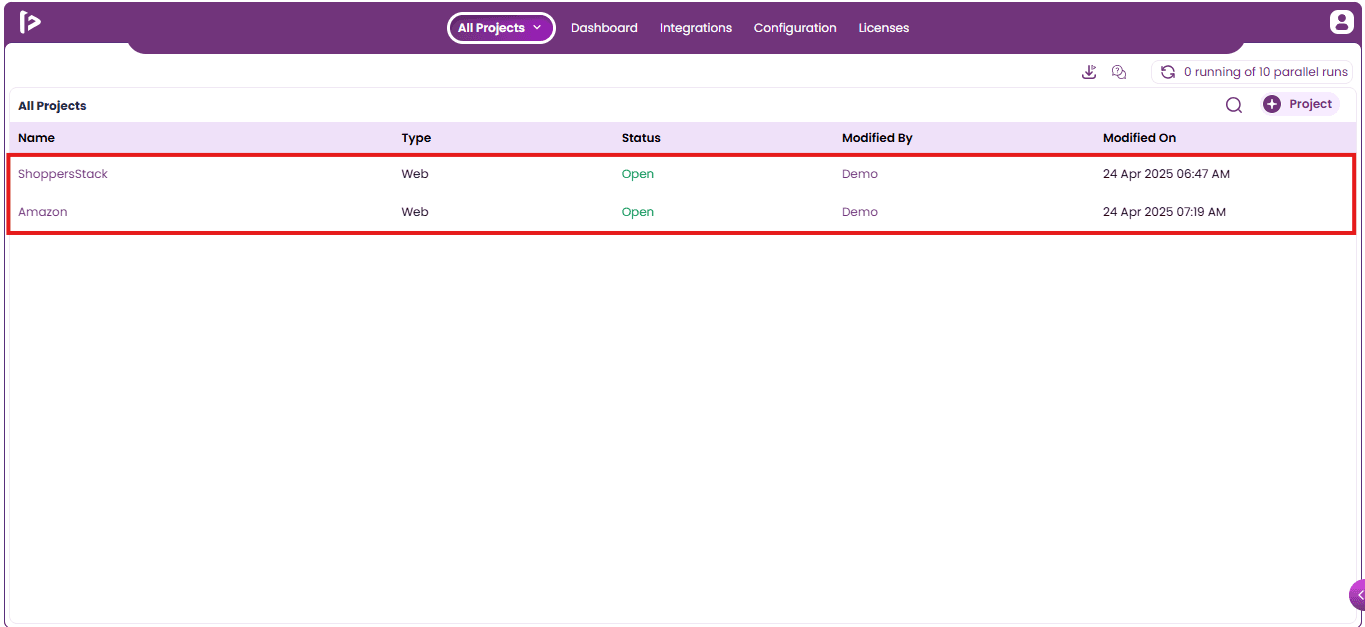
The list of projects includes five columns fields, as detailed below:
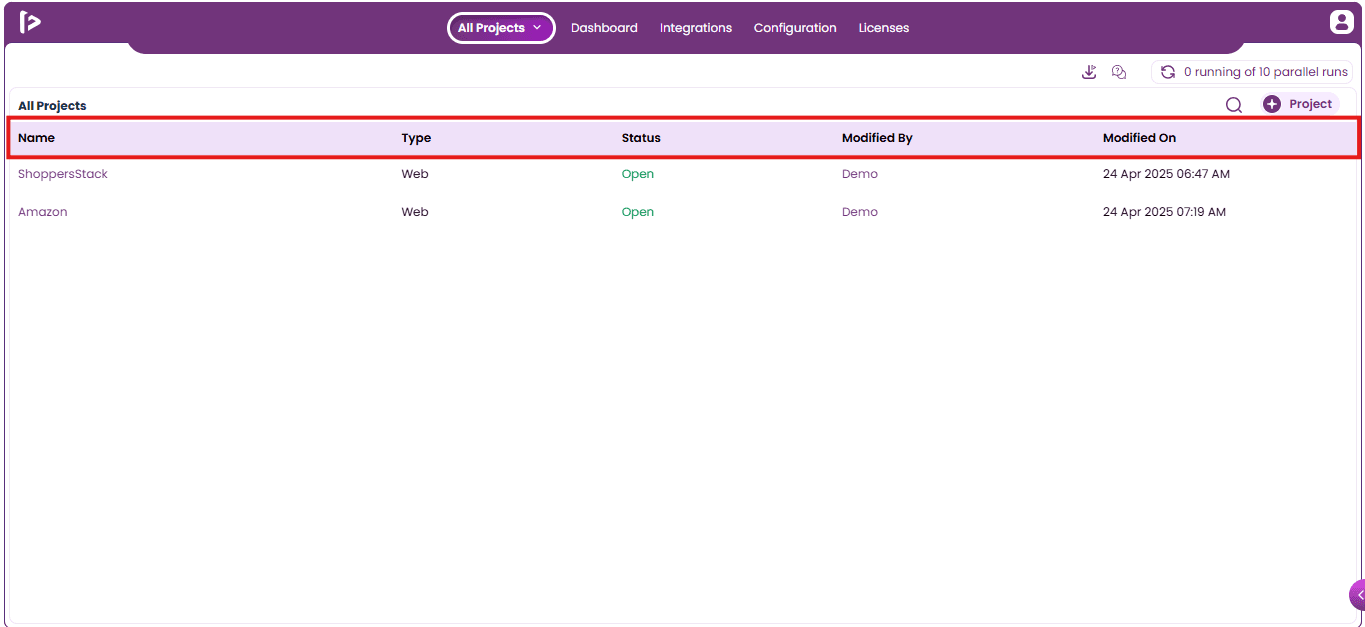
- Name: Displays the name of the project. It serves as a clickable hyperlink that navigates directly to the Test Development section of the selected project.
- Type: Indicates the type of each project—such as Web, Mobile, Web Services, Web & Mobile, Salesforce or MS Dynamics —as selected during the project creation process.
- Status: Shows the current status of the project, which can be Open, Closed, or Archived.
- Open: When a project is created, its status is set to Open by default, indicating it is an ongoing project. Projects with an Open status cannot be archived or deleted. To change the status, select the Edit Project icon and set it to** Closed**.
- Closed: Once the project is completed or paused, we can change its status to Closed using the Status Toggle Button under the ** Edit Project** Slider. i. Only closed projects can be archived or deleted. ii. Once the project is closed, we will not be allowed to add, edit or delete any resources inside the project. iii. You can re-open a Project from Closed Status using the same Status Toggle Buttonunder the Edit Project Slider.
- On Hold: Projects are marked as On Hold when the project work is temporarily paused due to reasons such as dependency issues, environment problems, client delays, or resource unavailability.On Hold projects are not active but may be resumed later. These projects cannot be archived or deleted unless the status is changed to Closed.
- Descope: Projects are marked as Descope when the project or specific scope of work has been removed from the project plan or is no longer required. This status indicates that the project will not continue further.
- Archived: Archiving a project keeps it for future reference without deleting it, but moves it to the bottom of the list. i. Only Closed Projects can be archived. ii. Archived projects are disabled, cannot be modified, cannot be viewed and do not allow linking any information or project details. They can be deleted if needed. iii. You can unarchive a project if needed; it will then be set to Closed status by default.
- Modified by: Displays the name of the user who last modified the project. The name is hyperlinked, allowing quick access to user details.
- Modified On: Records the date and time when the project was last modified.
Project Actions
When a User hovers over a project, a set of action icons—such as Edit and More Options—will become visible.
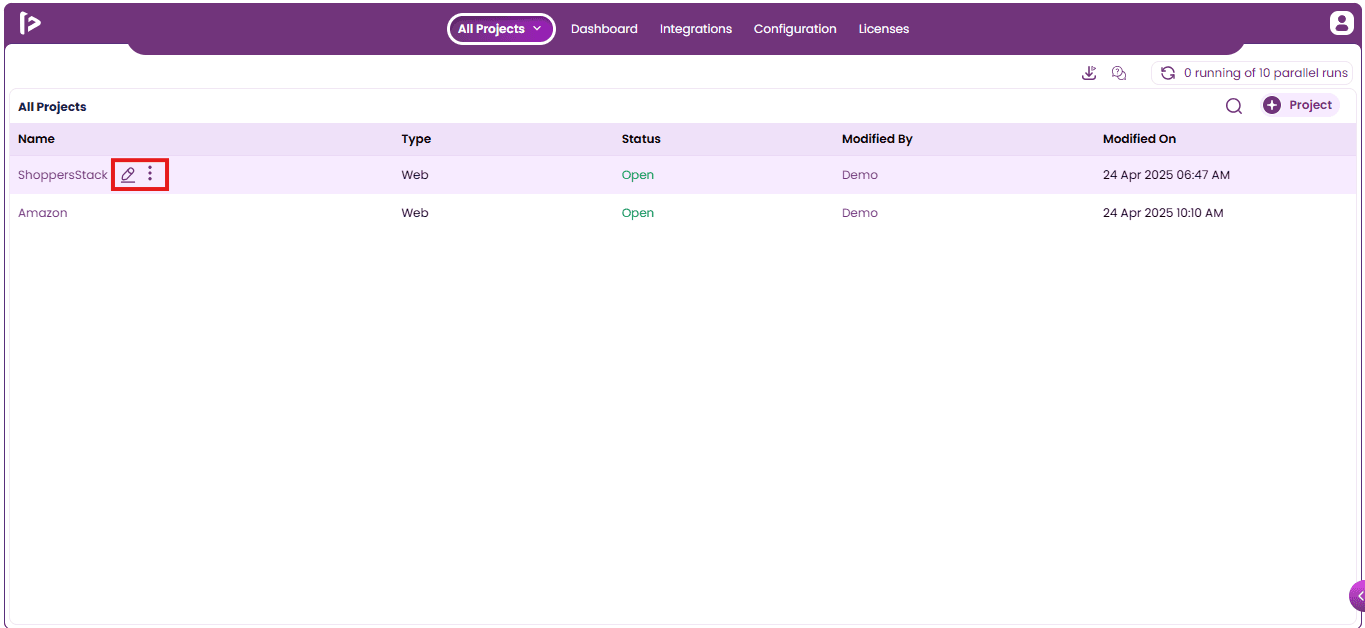
Edit : To edit the created project, follow the below steps;
- Click on the Edit icon.
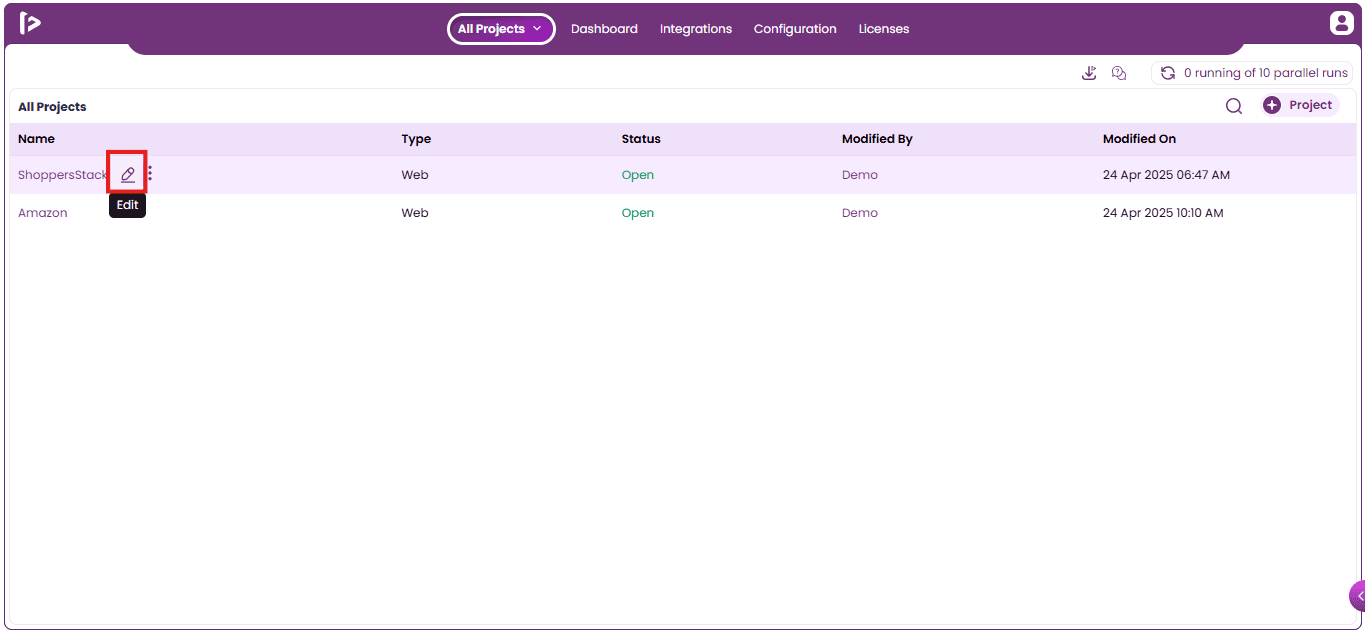
- Upon clicking the edit icon, the Edit Project slider will be displayed. In this slider, all fields are editable except for the Type.
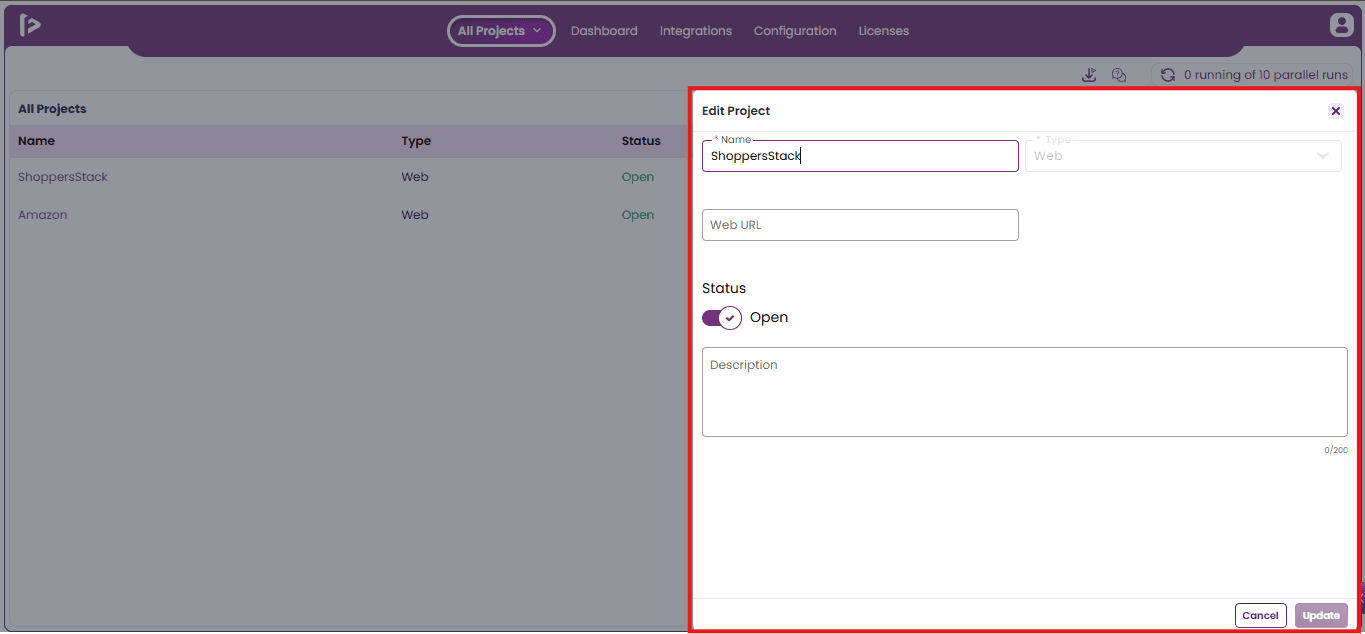
- Users can update project details as needed, and once the changes are made, clicking the Update button will save and apply the modifications.
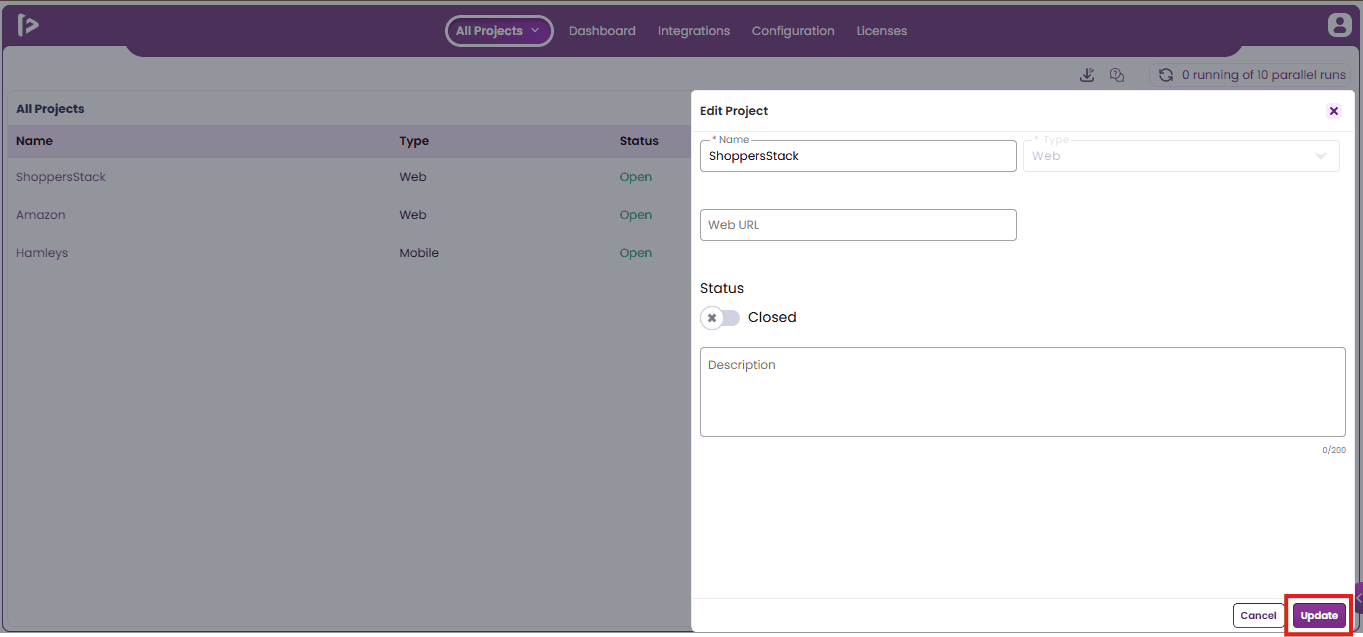
- Upon modification, a success message will be displayed.
More Options: This menu offers two options for Open projects and three options for Closed and Archived projects:
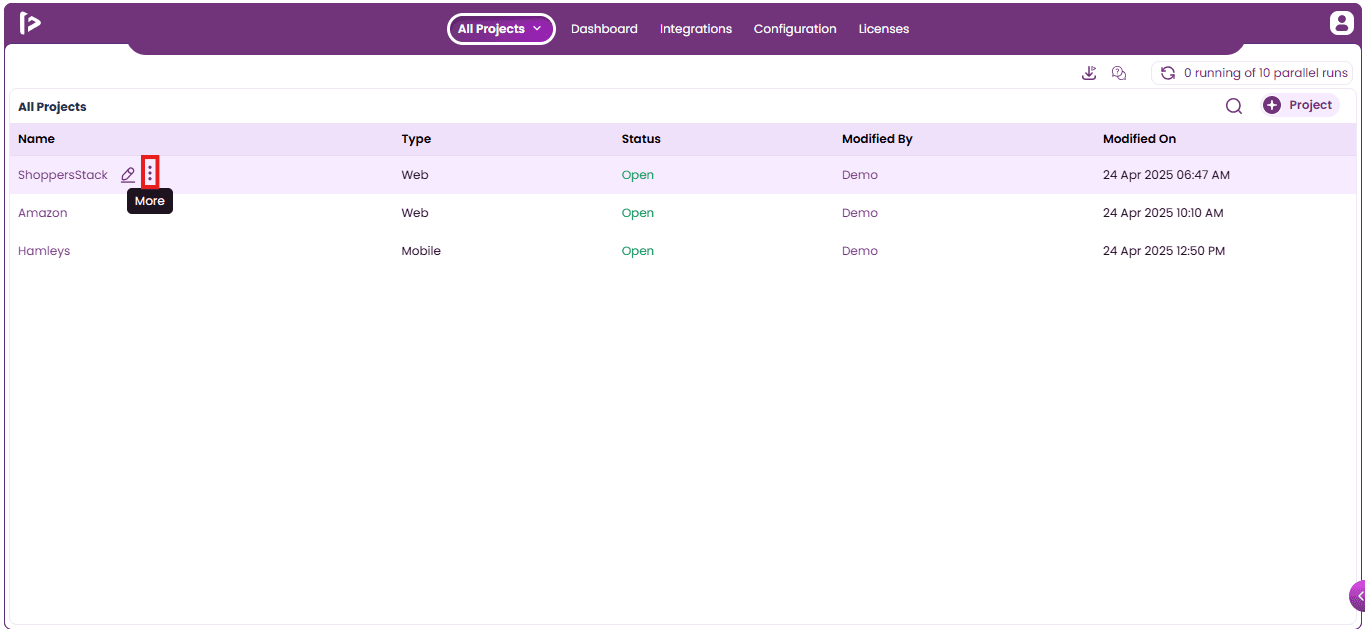
1. Details: To view details of the created project, follow the below steps;
- Click on More option and select Details from the dropdown.
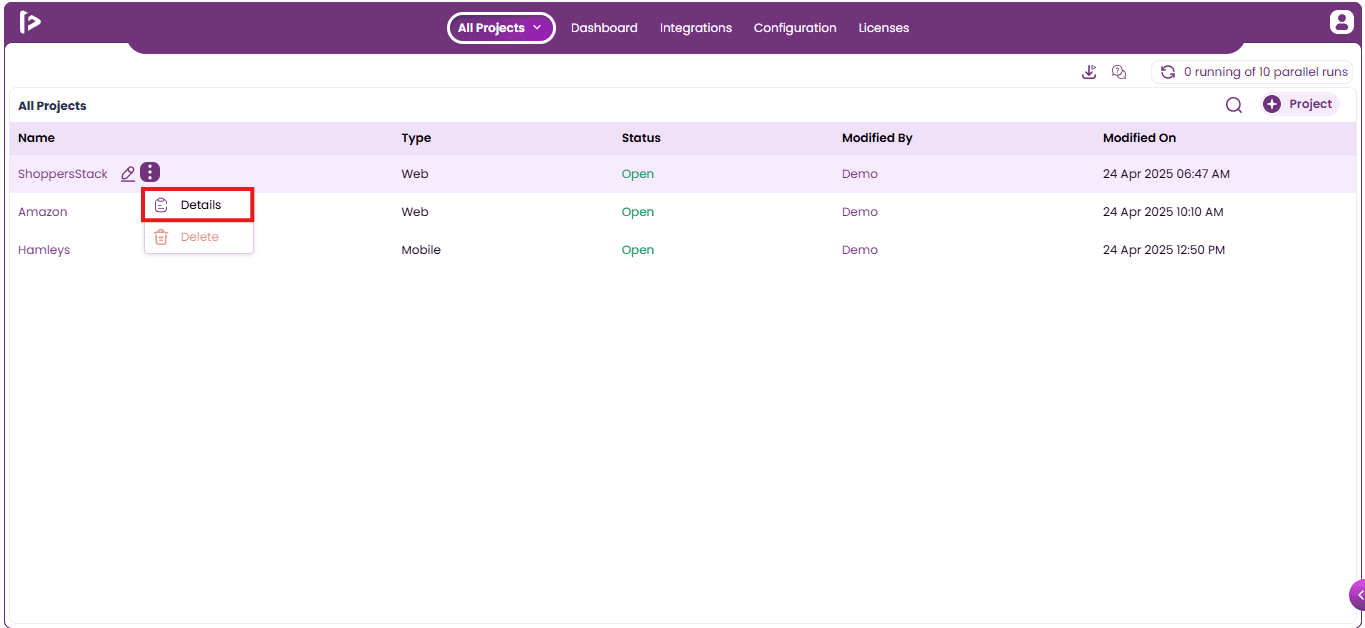
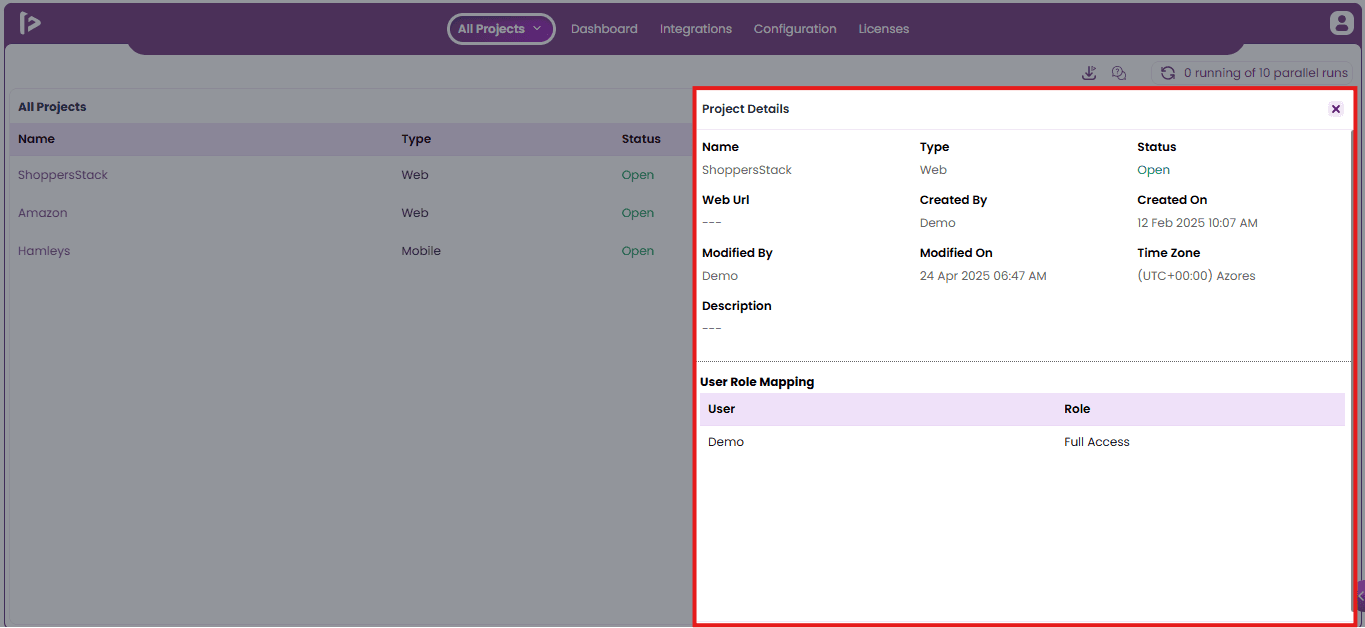
- Selecting this option displays a Project Details slider window, including:
- Name: The name of the project.
- Type: The selected type of the project.
- Status: The current project status.
- Web URL: The Application URL entered by the user.
- Created By: The user who last created the project.
- Created On: The date and time of the last creation.
- Modified By: The user who last modified the project.
- Modified On: The date and time of the last modification.
- Time Zone: The selected time zone for the project.
- Description: A brief description provided during project creation.
- User Role Mapping: A table displaying all users assigned to the project, along with their roles.
2. Add to Archive: Available only for projects with a Closed status.
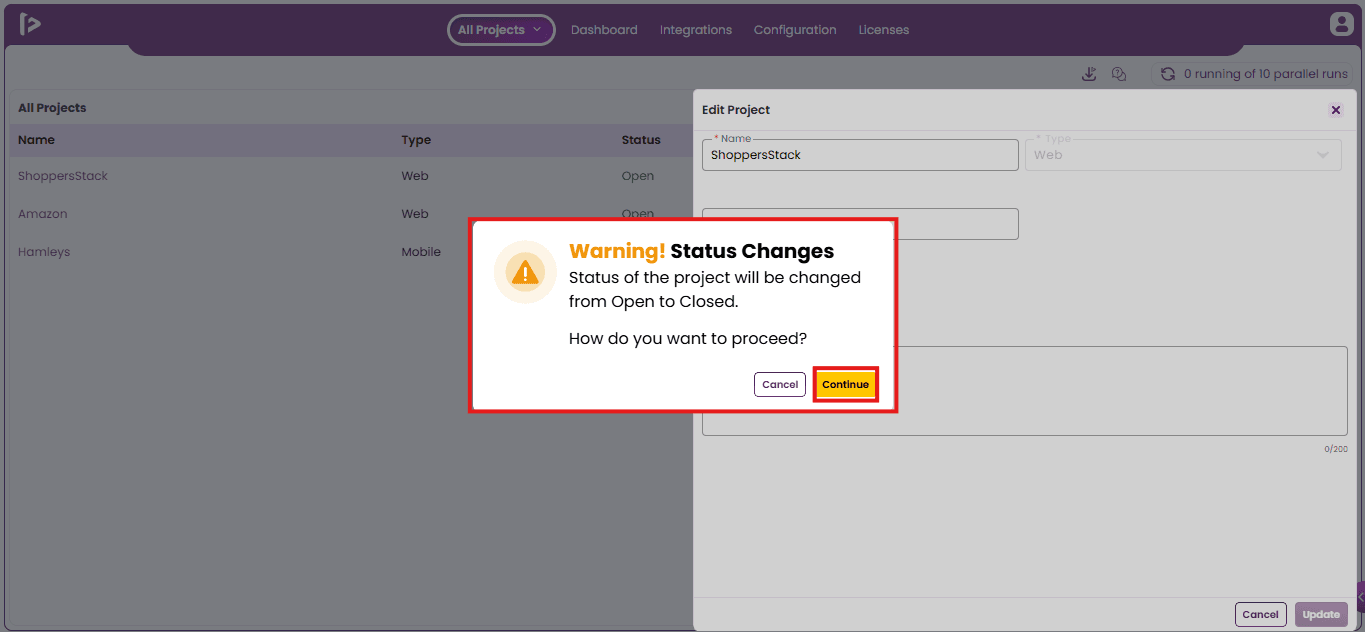
To change the project status to Closed, follow the below steps;
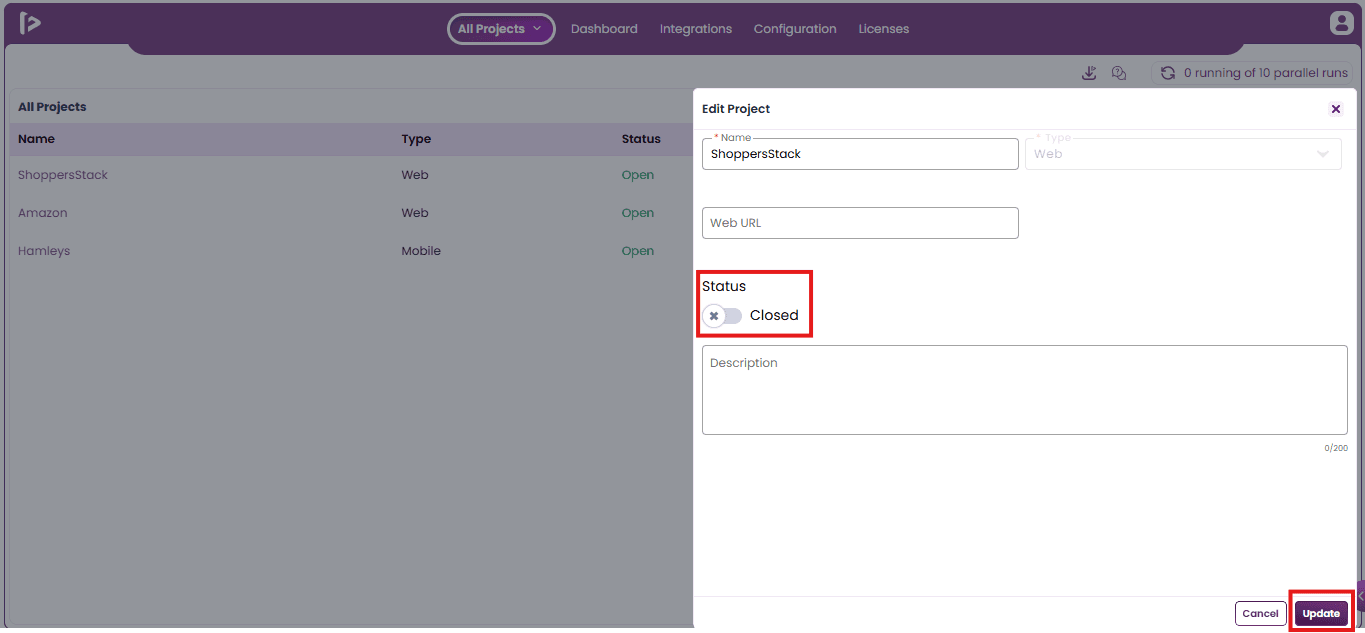
- Click on the Edit icon for the desired project. In the Edit Project slider, disable the Open Status toggle button. A warning pop-up will be displayed. Click on Continue button.
- Click the Update button to save the changes.
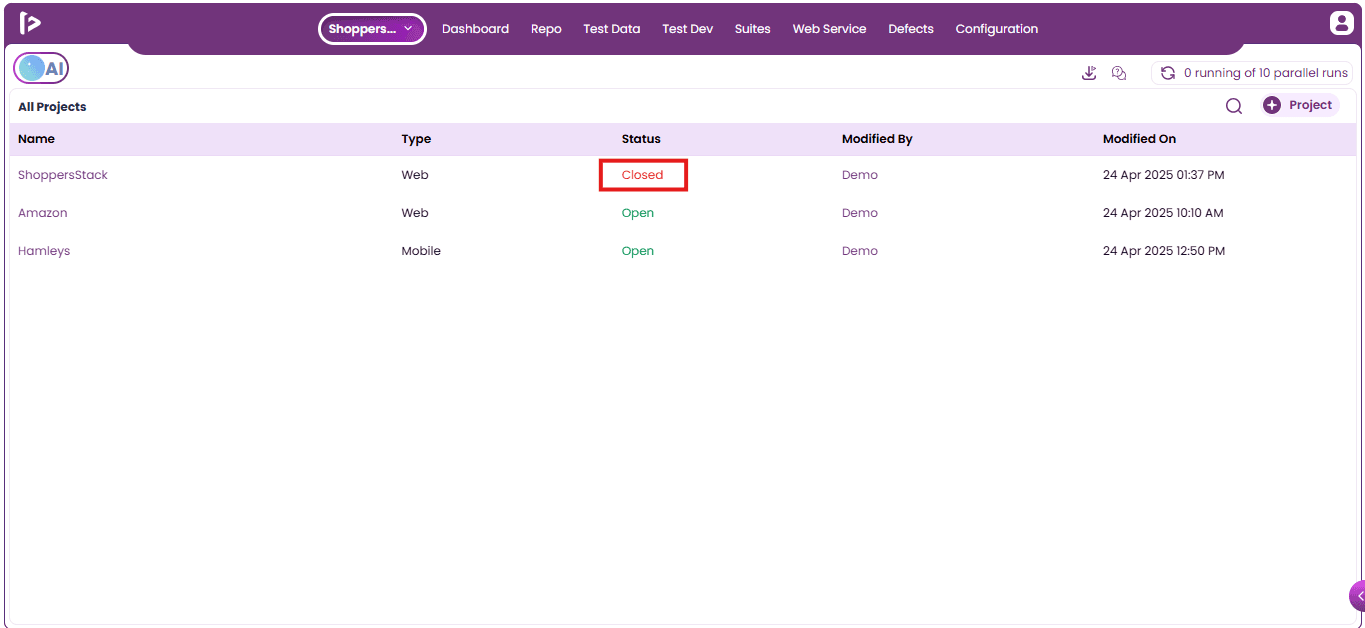
- The project status will now be updated to Closed.
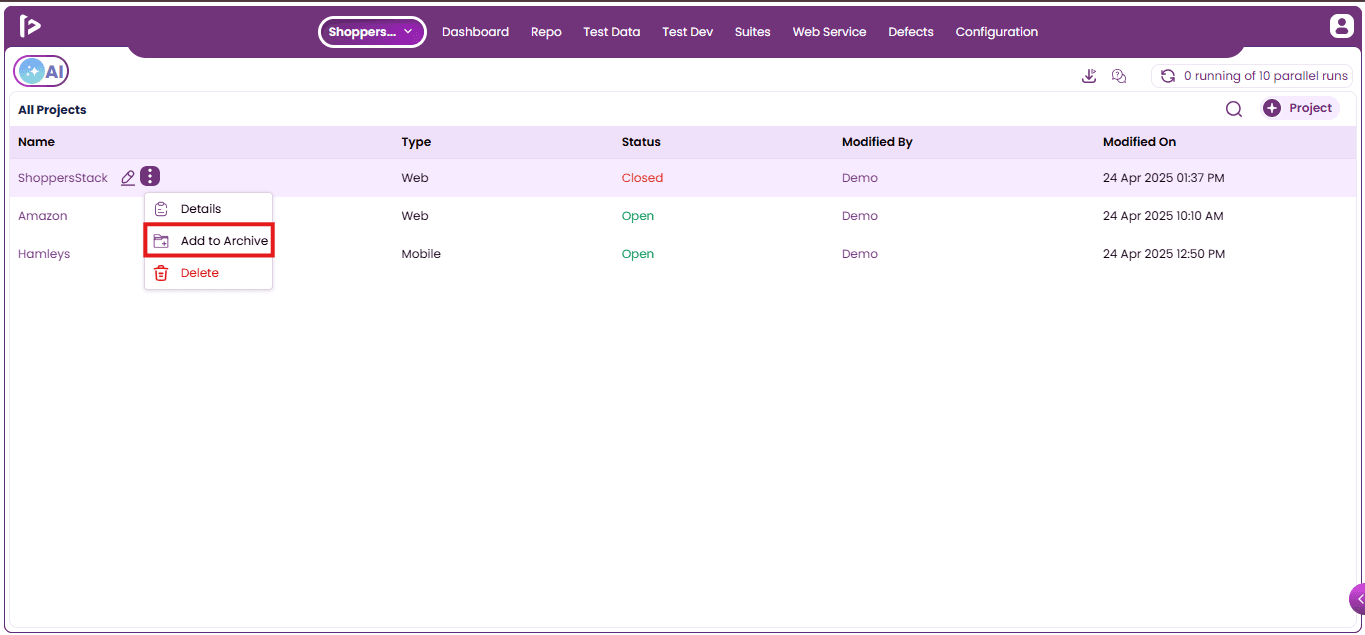
To Archive a closed project, follow the below steps;
- Click on the More Options icon (three dots) next to the project. Select Add to Archive from the dropdown menu.
- The project status will then be updated to Archived.
- Note: Archived projects are moved to the bottom of the list.
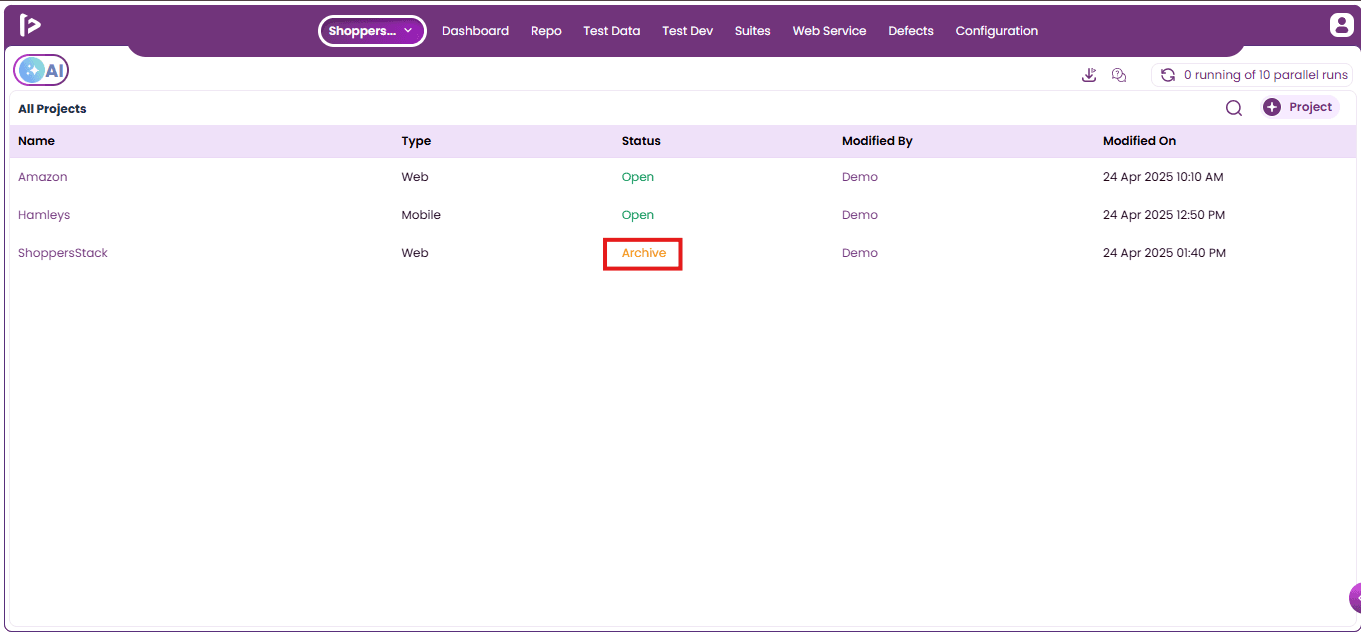
3. Add to UnArchive:
- Click on the More Options icon (three dots) next to the project. Select Add to UnArchive from the dropdown menu.
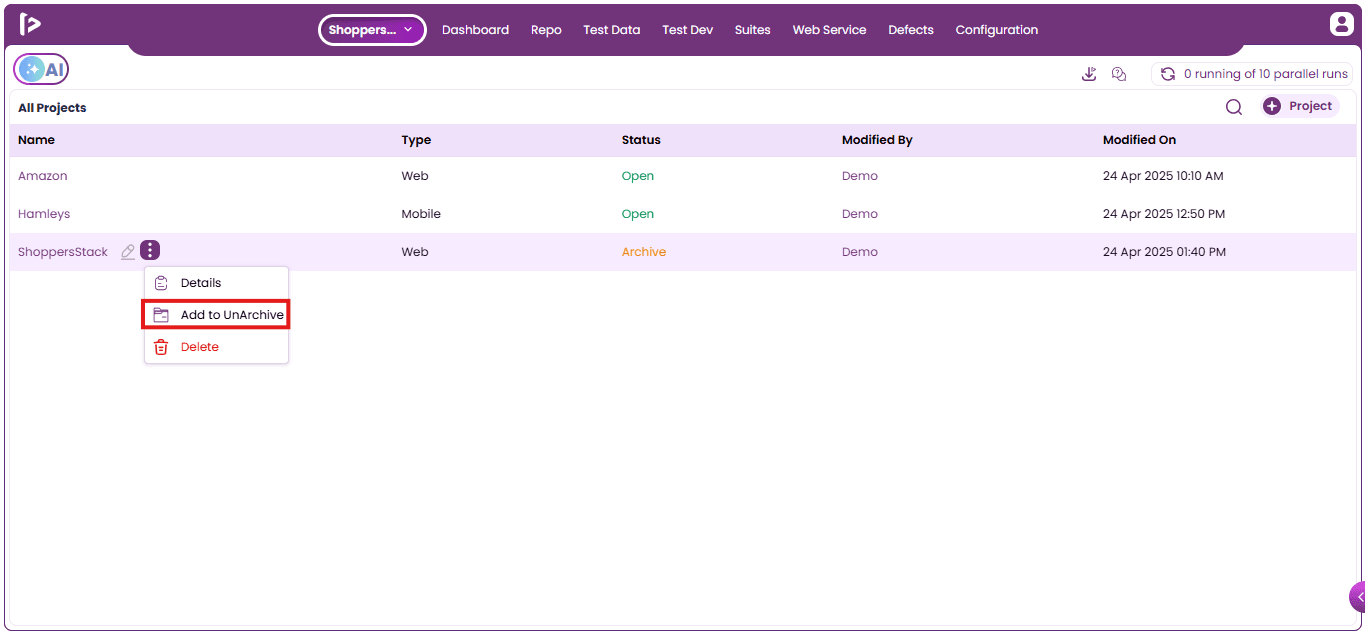
- This will unarchive the project and change the status back to Closed.
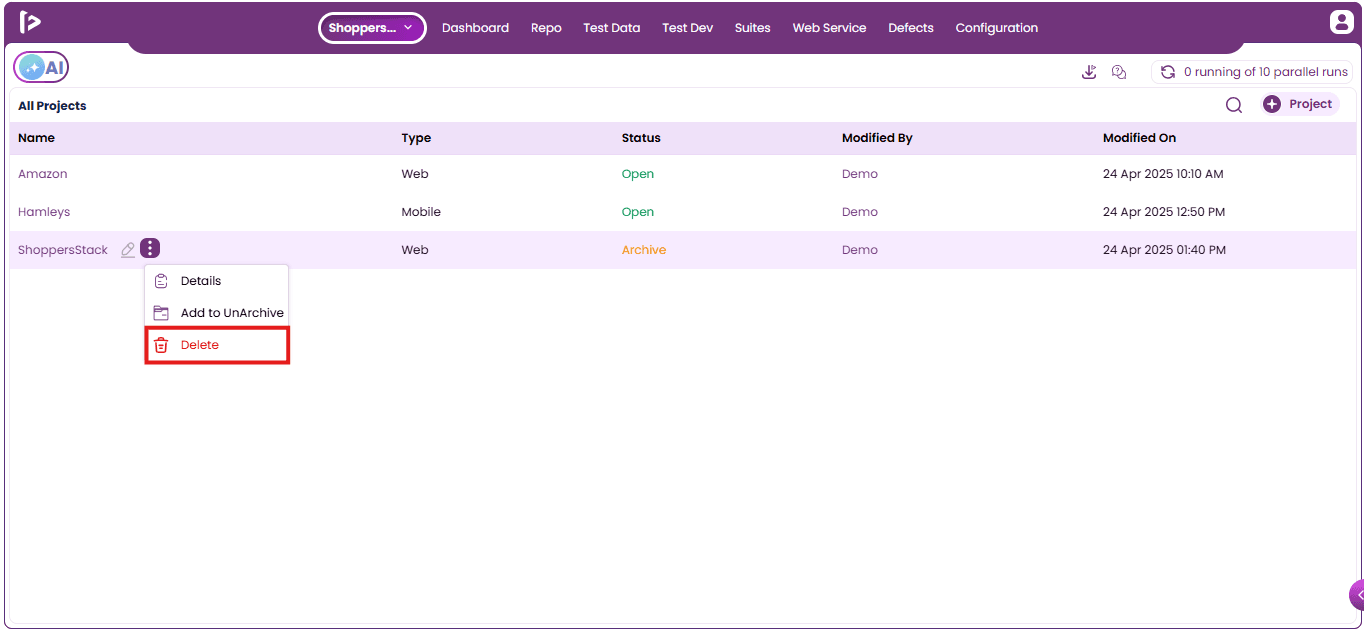
4. Delete: This option permanently removes the project from the license. It is only applicable to projects that are either Closed or Archived.
- Click on the More Options icon (three dots) next to the project. Select Delete option from the dropdown menu.
- Confirmation pop-up is displayed. Click on the Delete button.
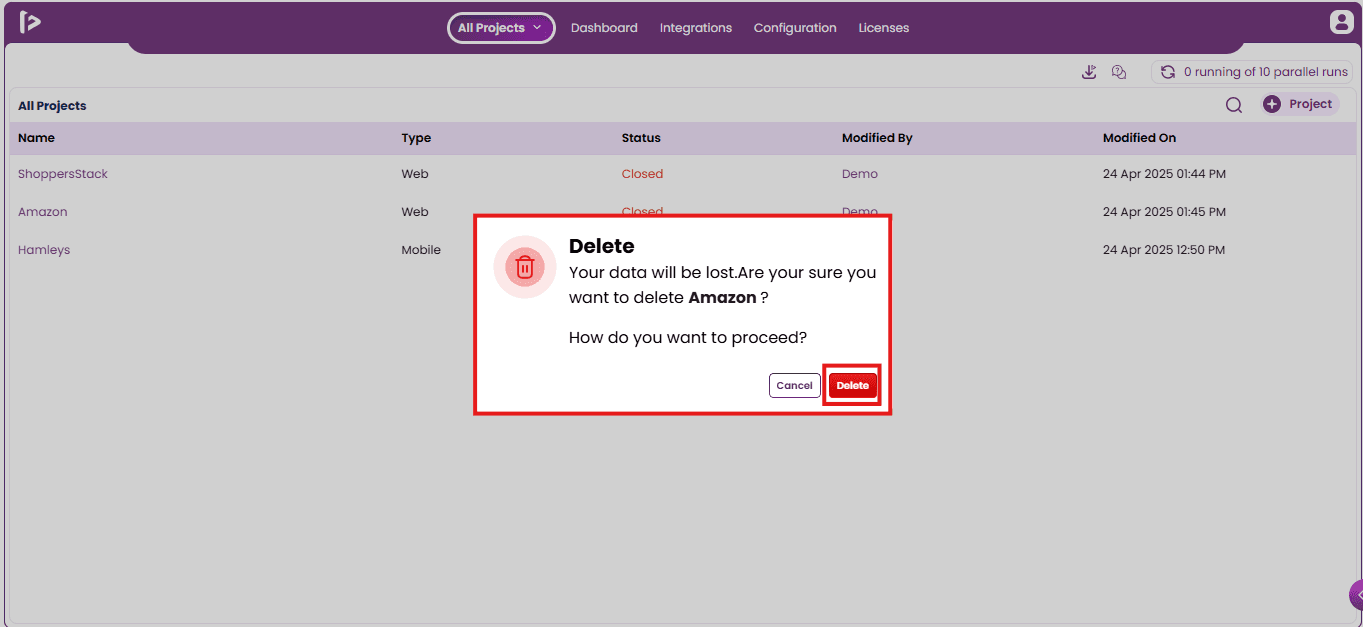
- This will delete the project from the license permanently.
Search Functionality
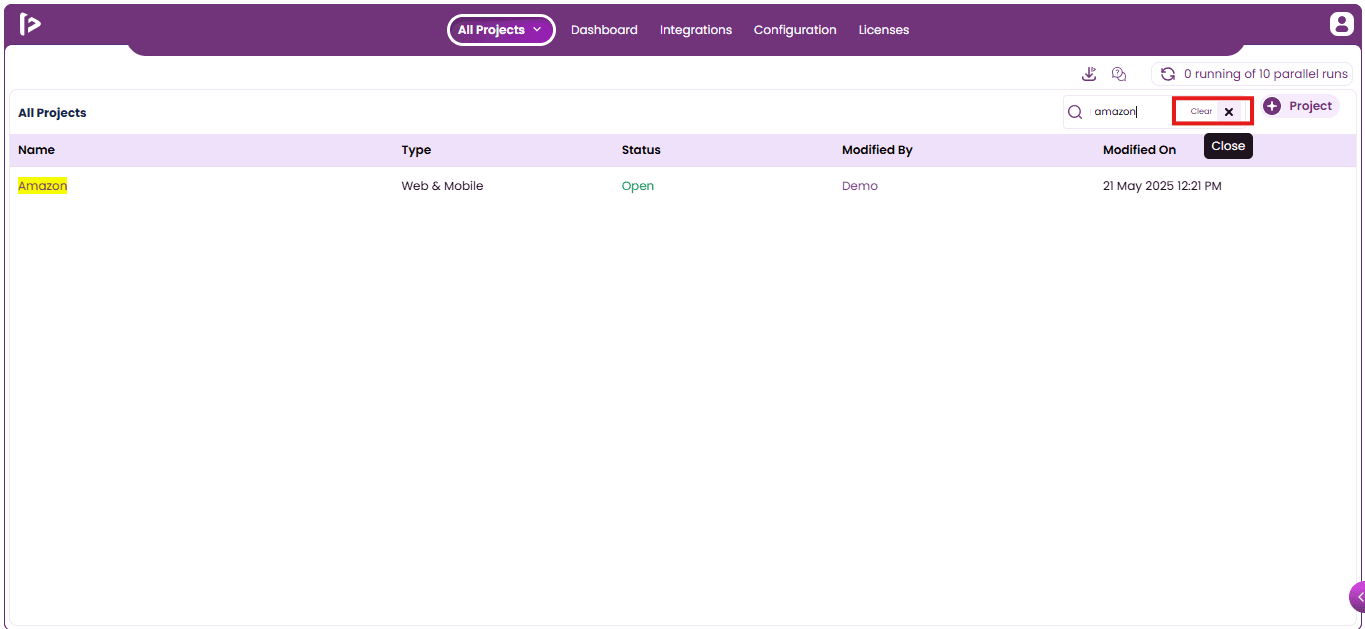
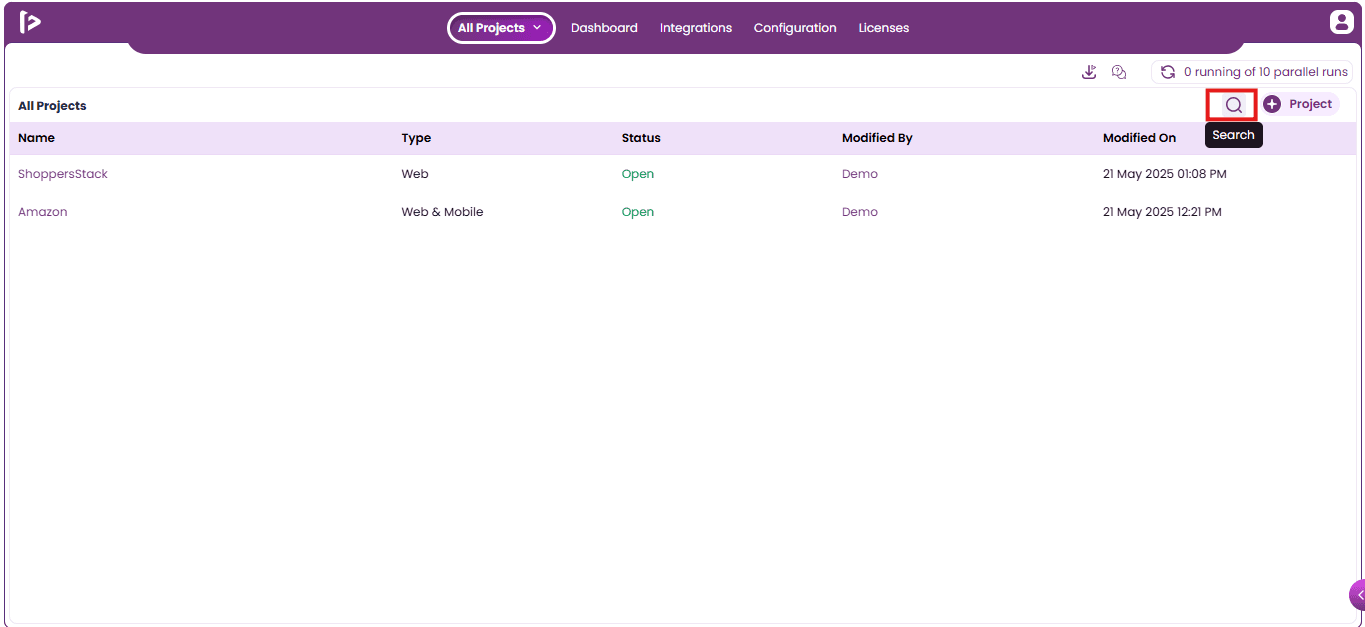
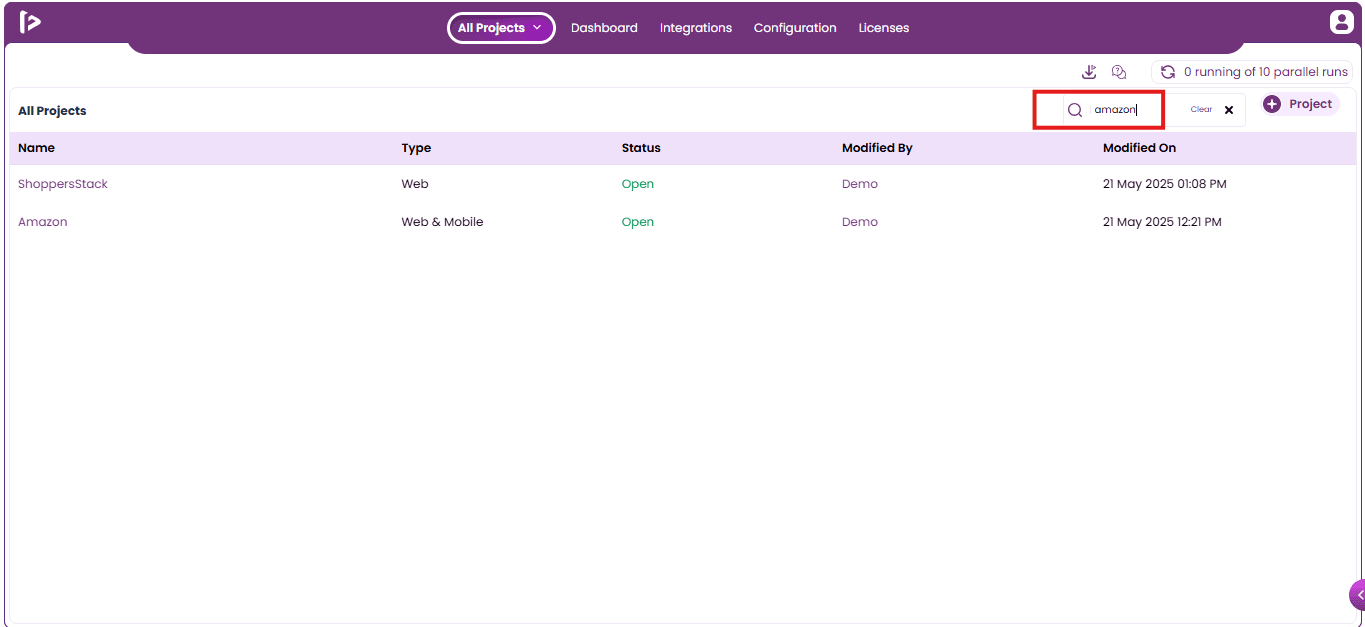
Search functionality allows users to quickly locate a specific project from the list of projects that are created under the Current License by entering name of the Project into the search bar. This feature helps users quickly navigate to a specific project when multiple projects exist under the license, eliminating the need for manual searching. Below steps illustrate the process of filtering the data using search features.
- Click on the Search icon as shown below.
- Enter the data the user wants to search in the search bar and press Enter key.
- It filters the data and displays as shown below.
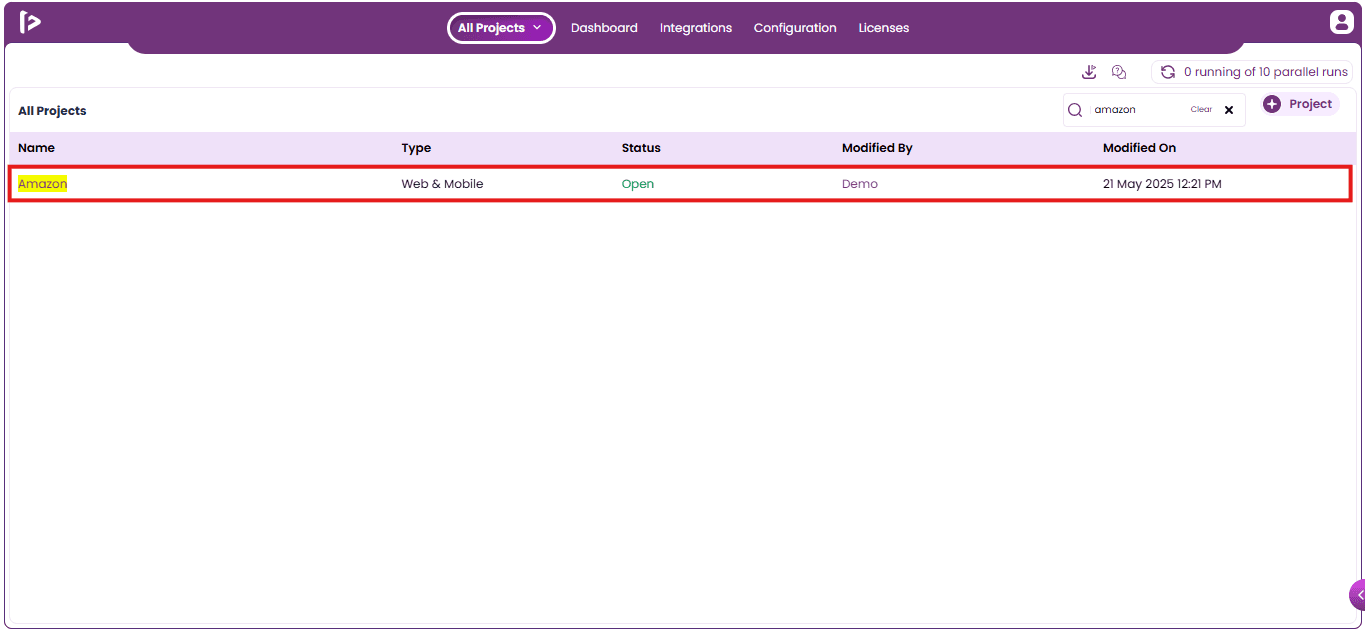
- To clear the search, click on Clear or Close buttons.