FireFlink Device Farm
-
FireFlink Device Farm is a cloud-based testing solution that offers access to a broad range of real mobile and desktops for both manual and automation testing. It enables teams to validate applications across multiple operating systems, browsers, and device configurations, ensuring consistent behavior and compatibility.
-
With FireFlink Device Farm, users can execute tests on Android, iOS, Windows, macOS, and Linux environments hosted entirely in the cloud. The platform supports parallel execution, real-time session monitoring, and video recordings to accelerate issue identification and resolution.
-
By removing the need for maintaining a physical device lab, FireFlink Device Farm helps organizations scale testing efficiently, lower infrastructure overhead, and deliver high-quality software more quickly across mobile and desktop platforms.
Integrating FireFlink Device Farm with FireFlink Platform
- Upon signing into the platform, All Projects page will be displayed by default.
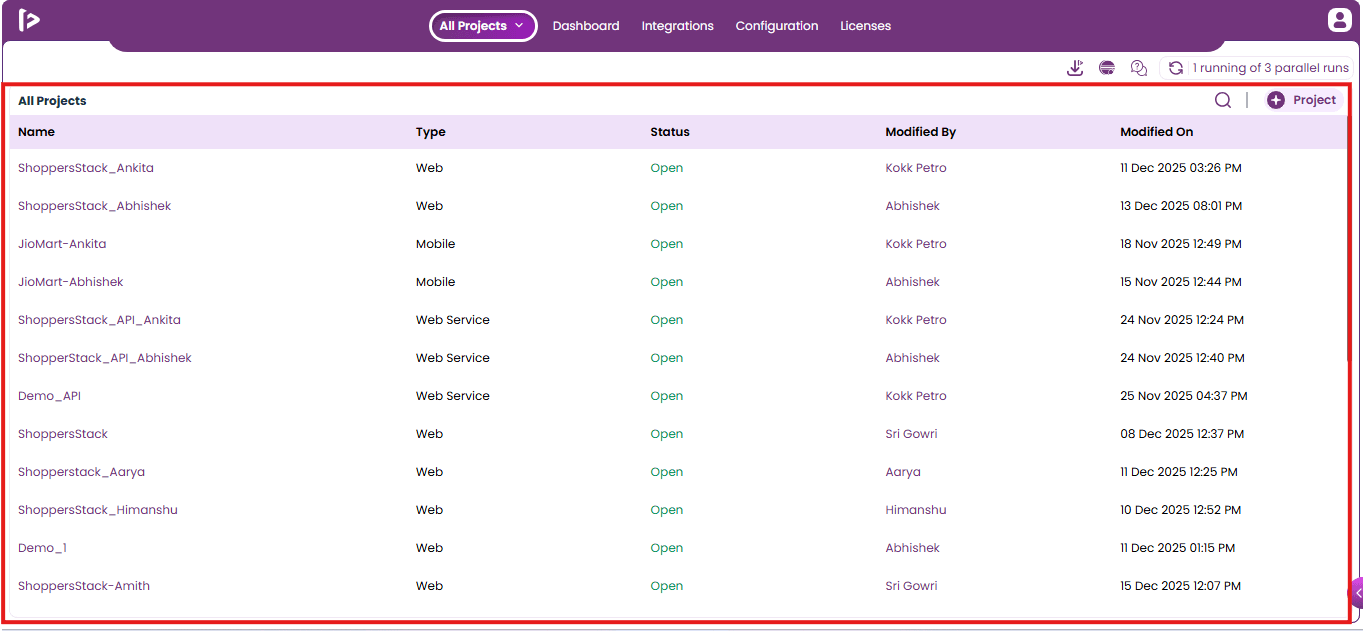
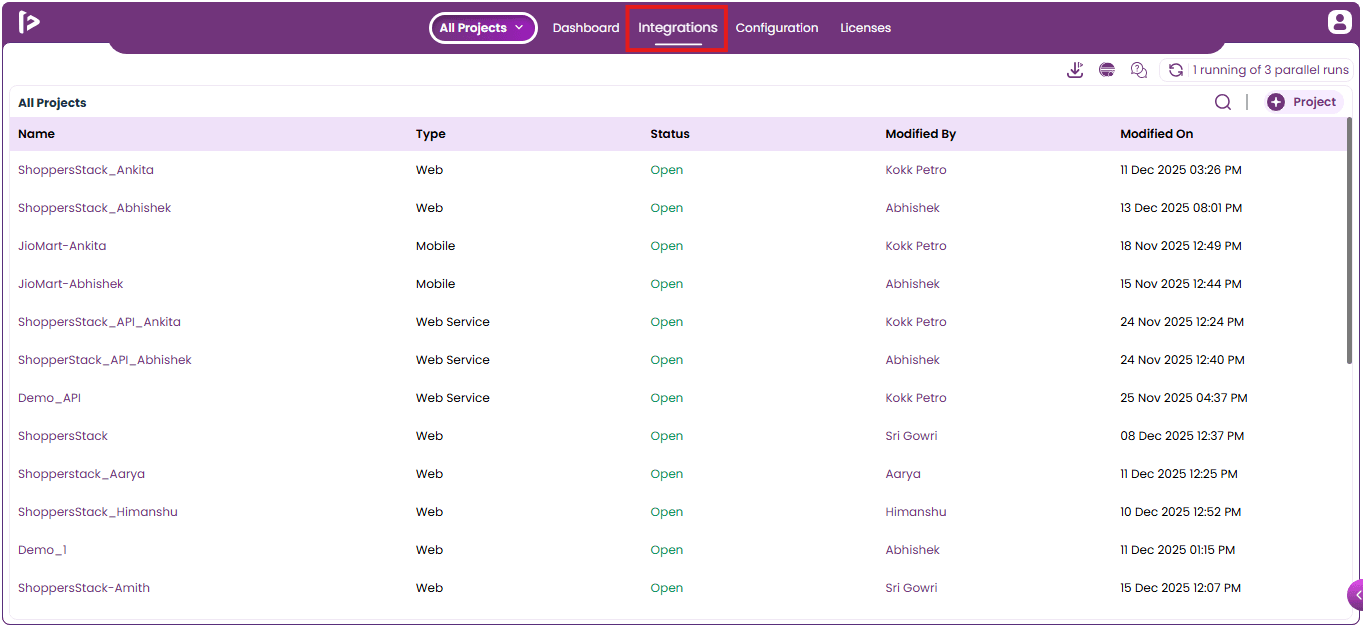
- Click on Integrations in the top navigation bar.
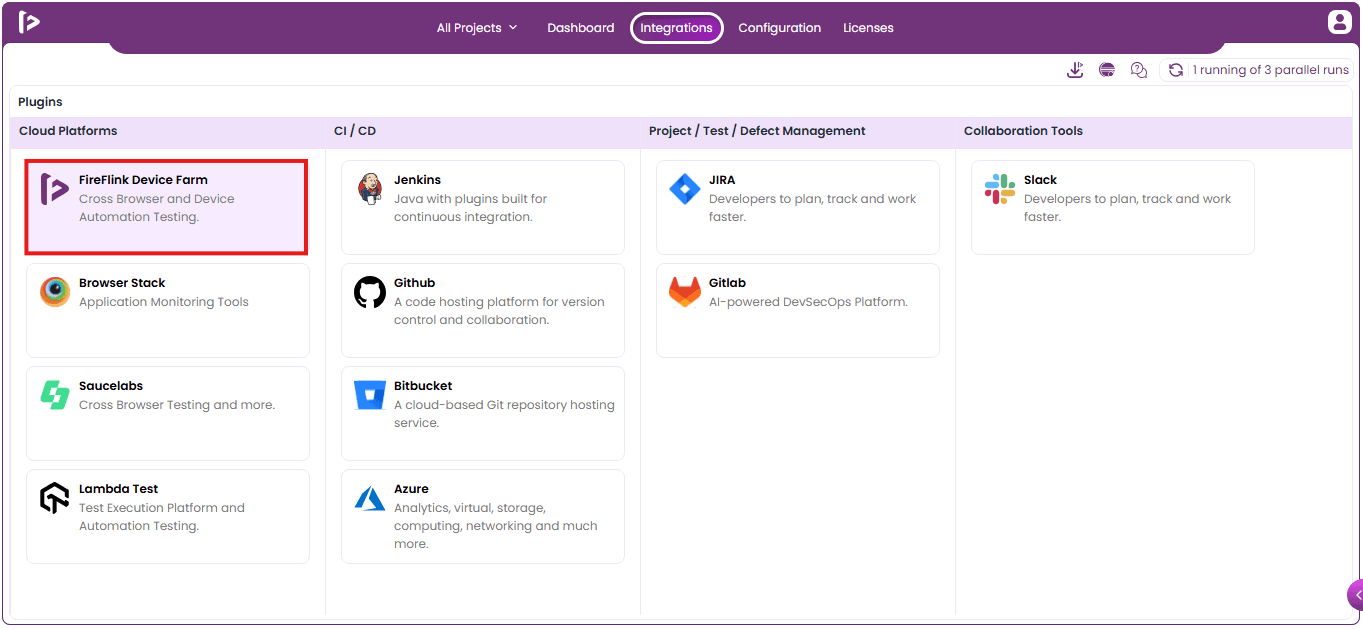
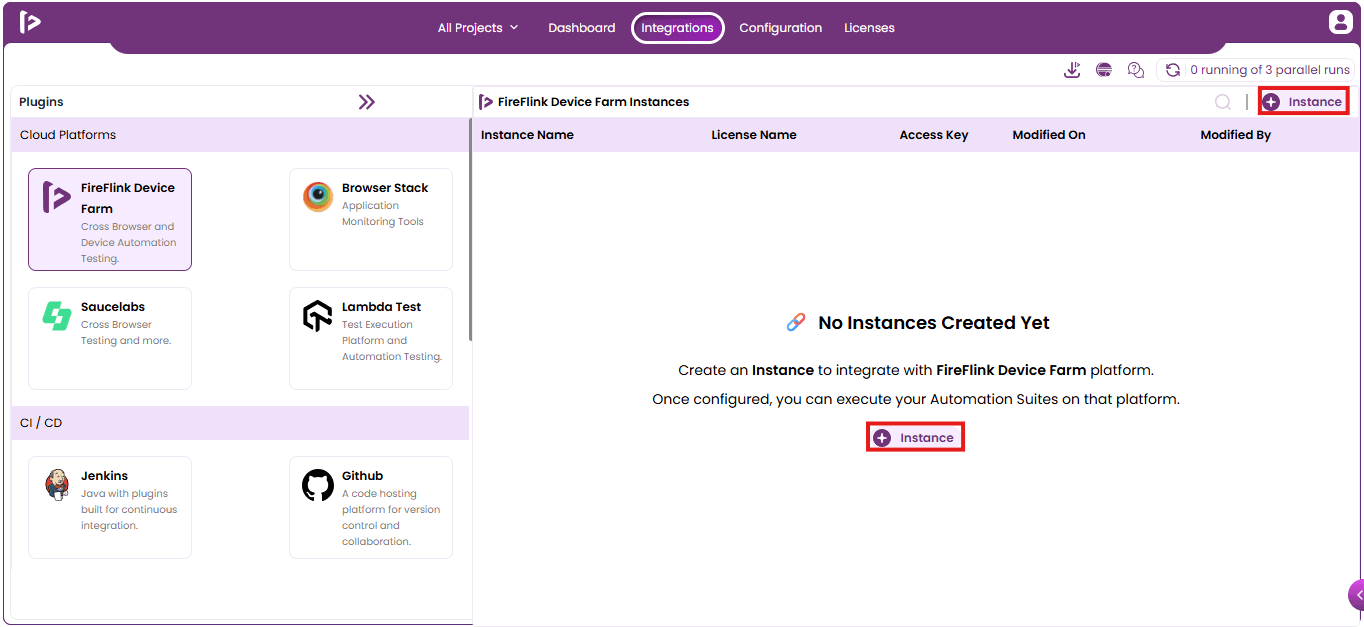
- Select FireFlink Device Farm from the Cloud Platforms column.
- FireFlink Device Farm Instances slider will be displayed as shown below.
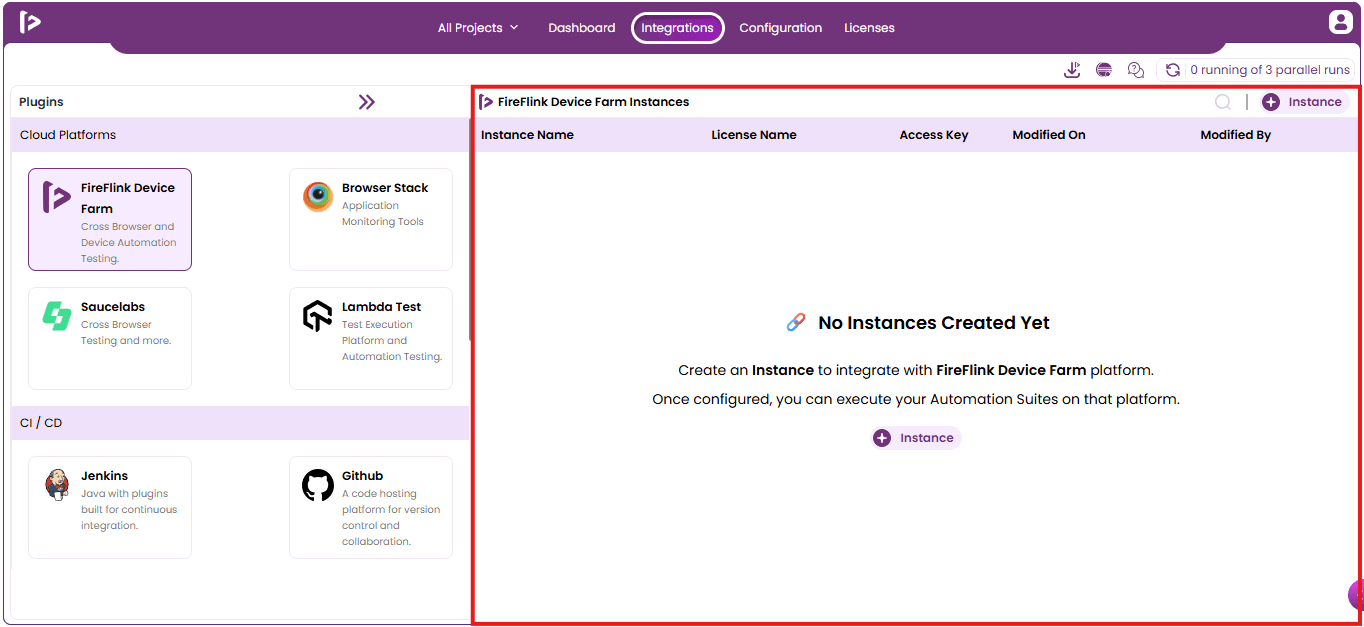
- Click on +Instance button to create an instance as shown below.
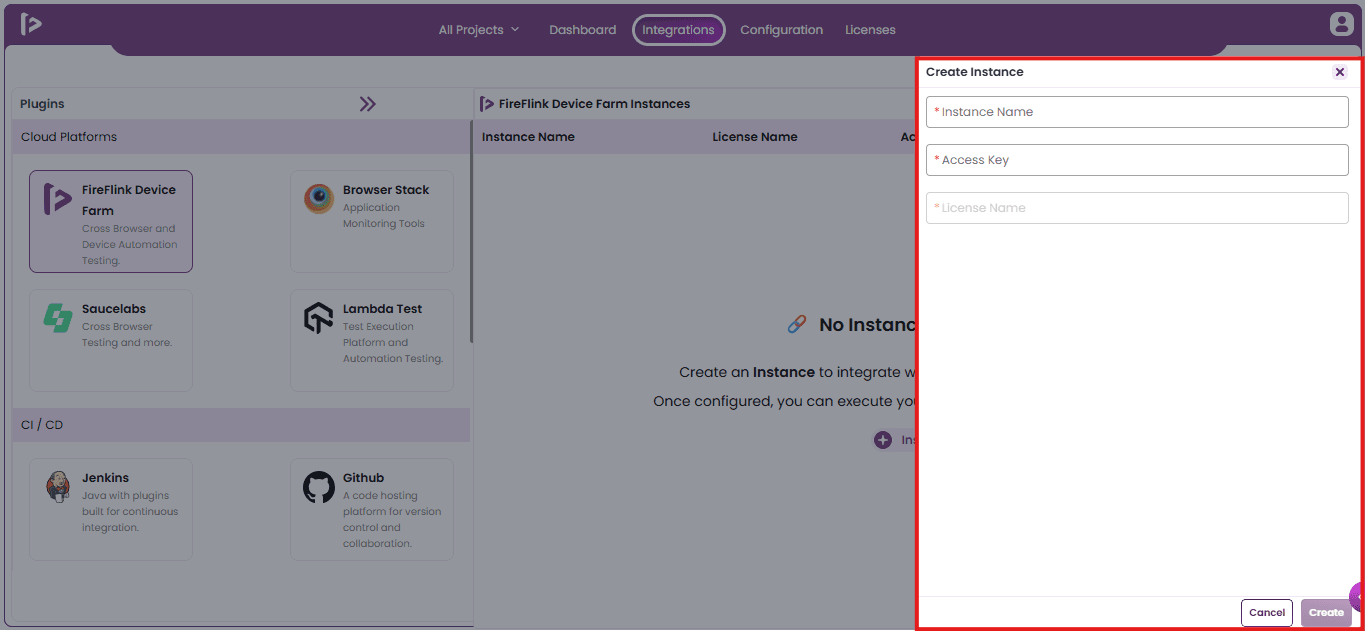
- The Create Instance slider will be displayed.
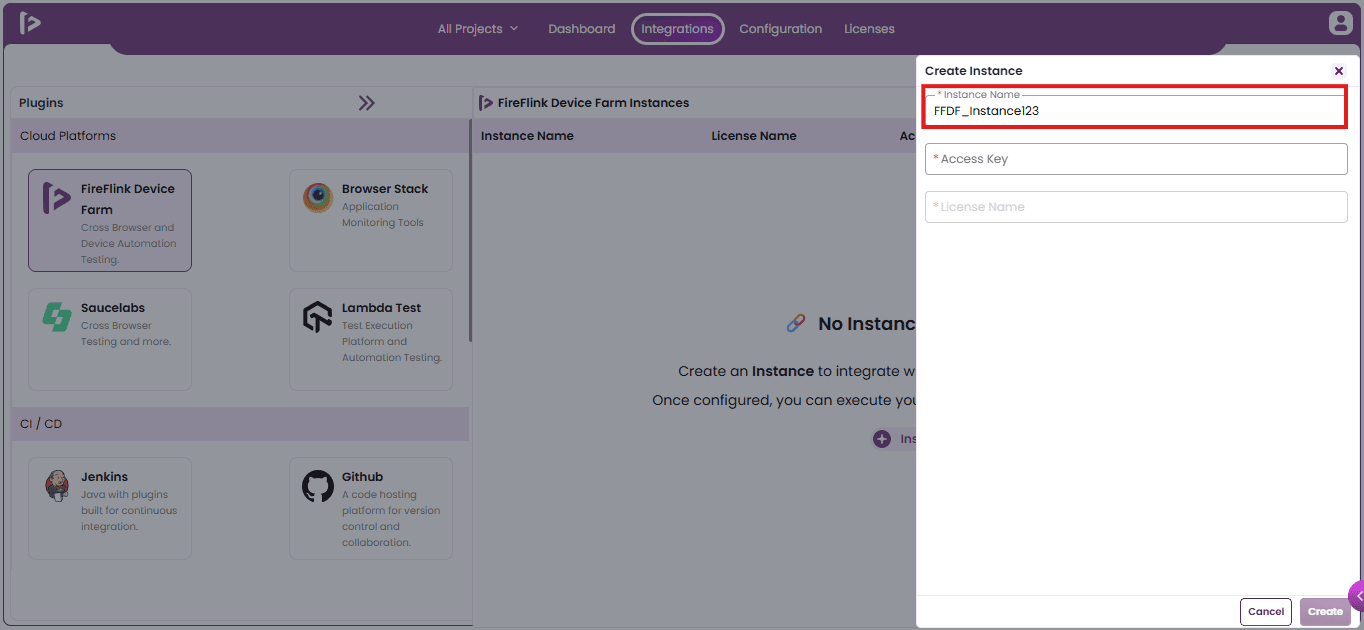
- Provide a name into the Instance Name textfield.
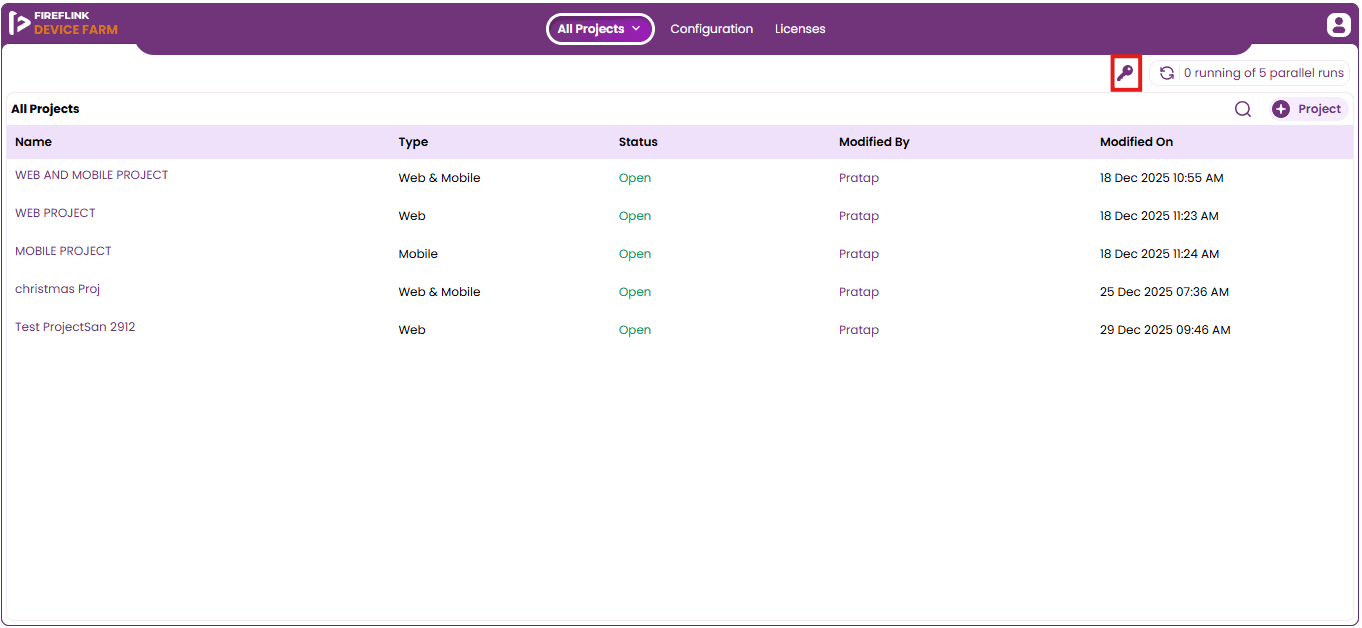
- The Access Key should be fetched from FireFlink Device Farm. Navigate to the All Project Level in the FireFlink Device Farm.
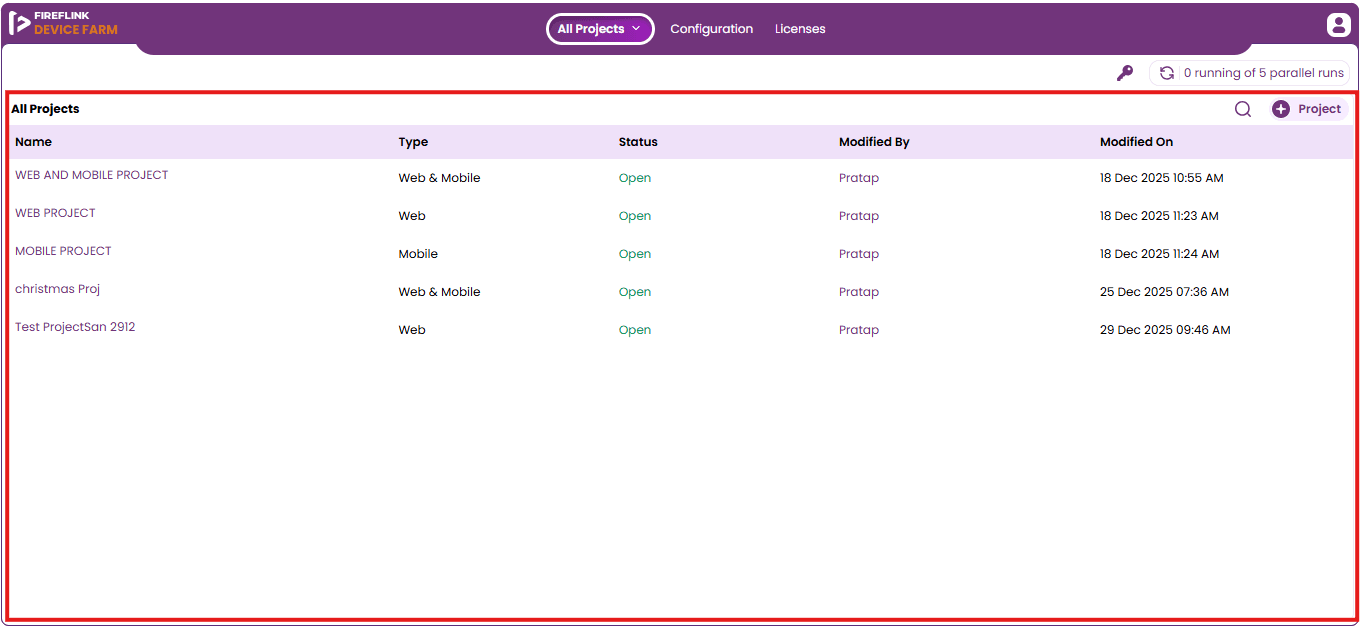
- Click on the Access Key icon.
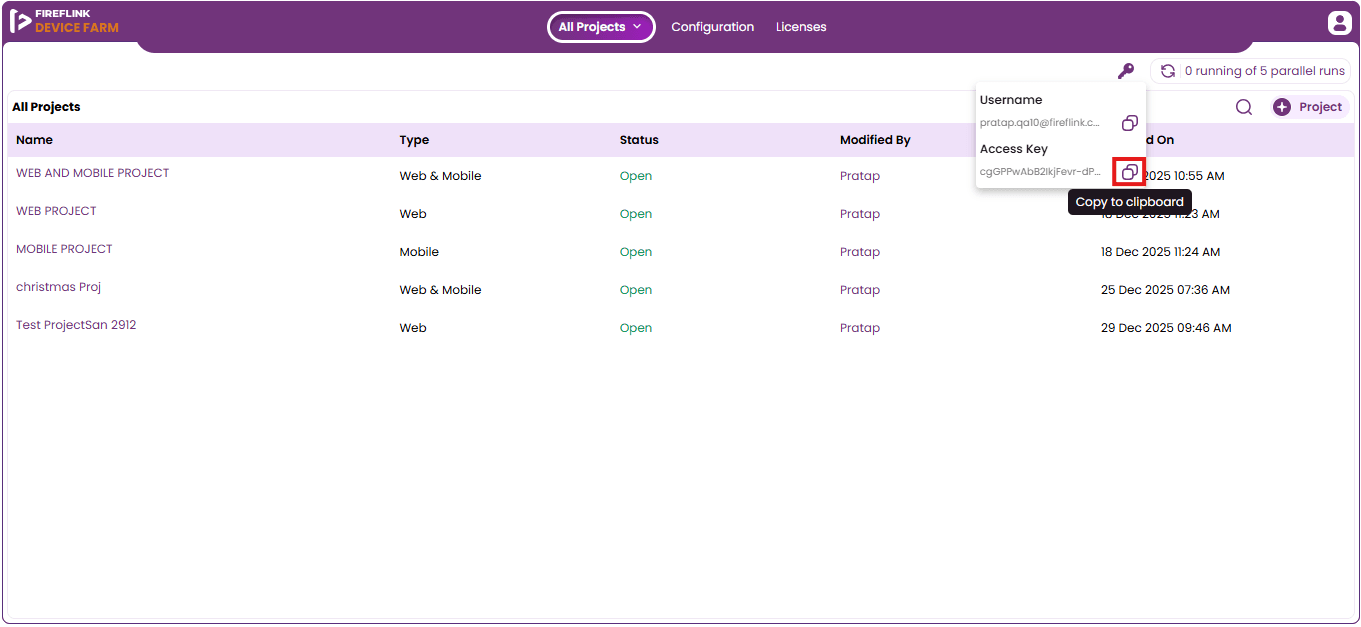
- Click on the Copy to clipboard to copy the Access Key.
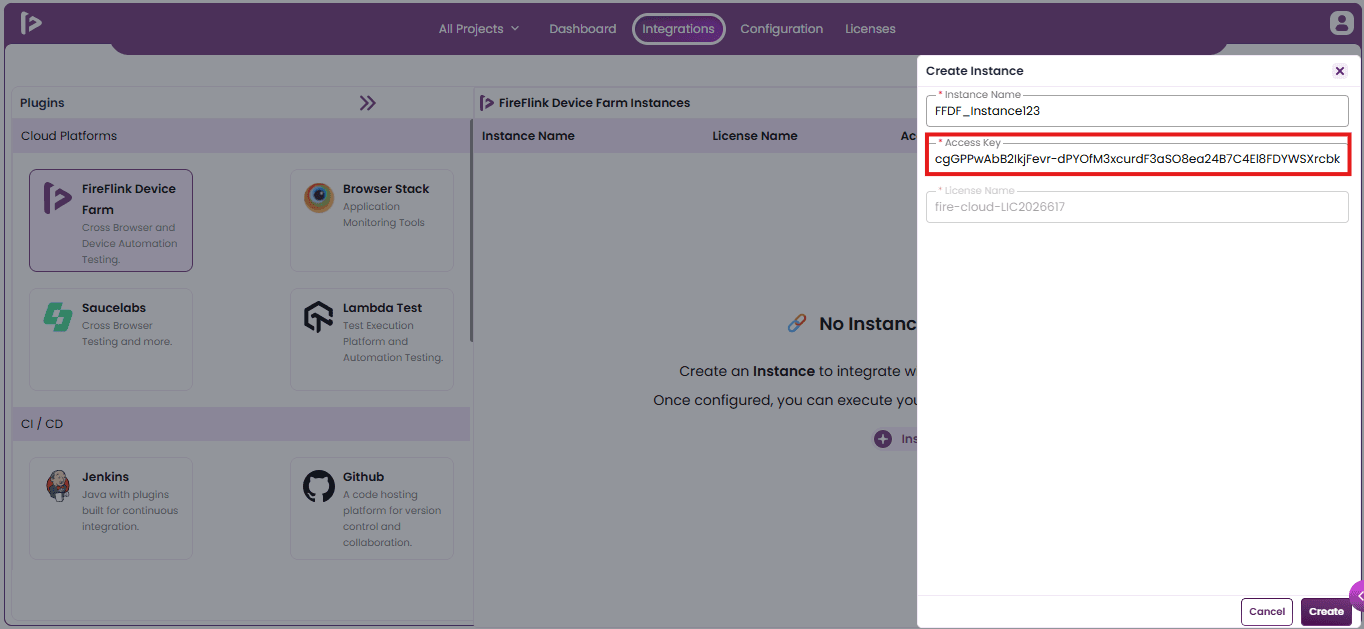
- Paste the copied Access key in the textfield as shown below.
- The license associated with the provided details will be displayed as shown below.
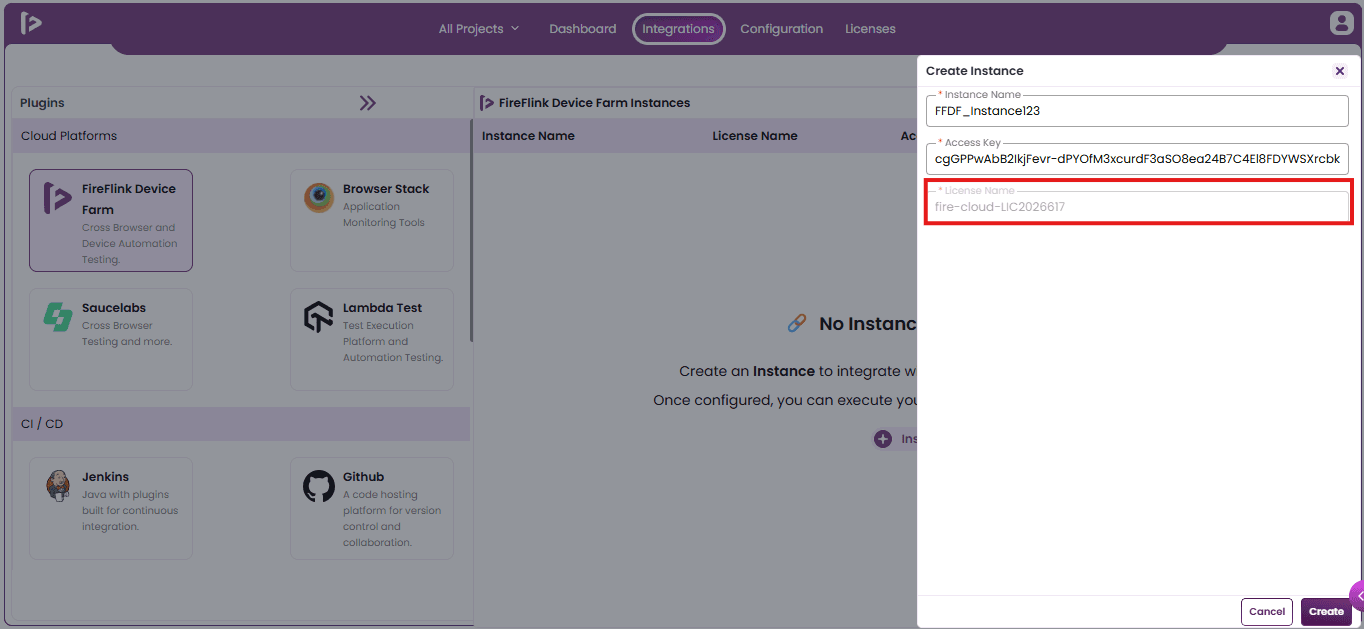
- Click on the Create button.
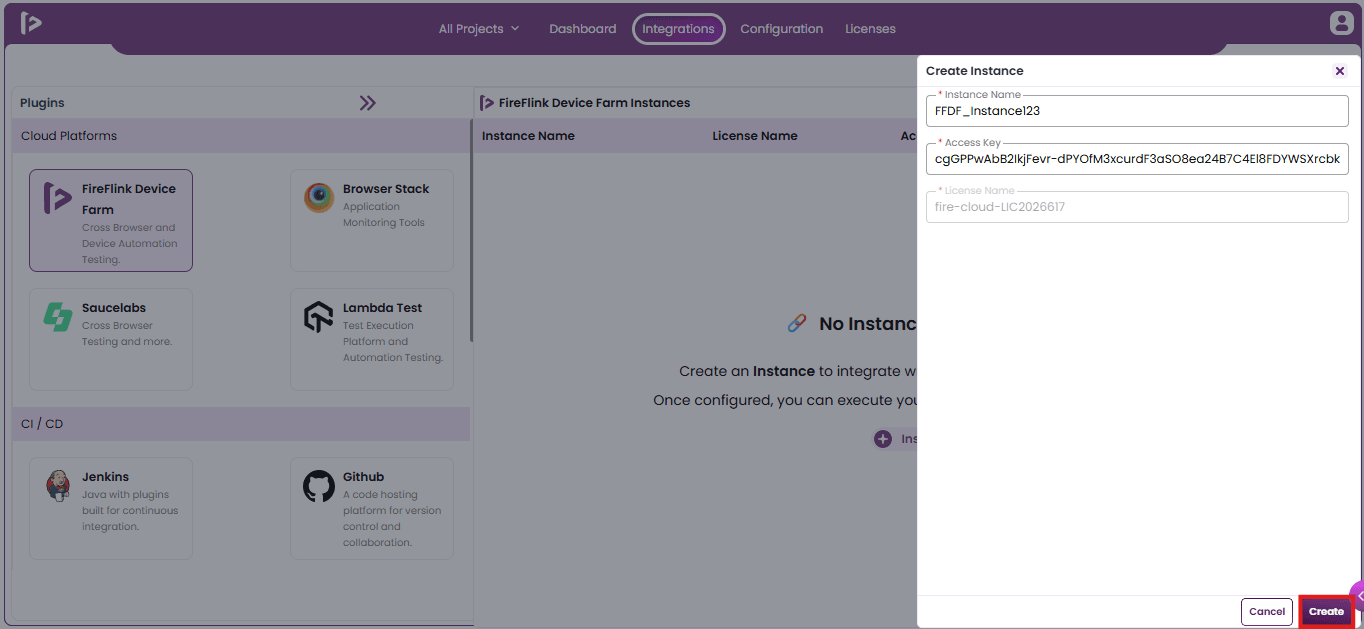
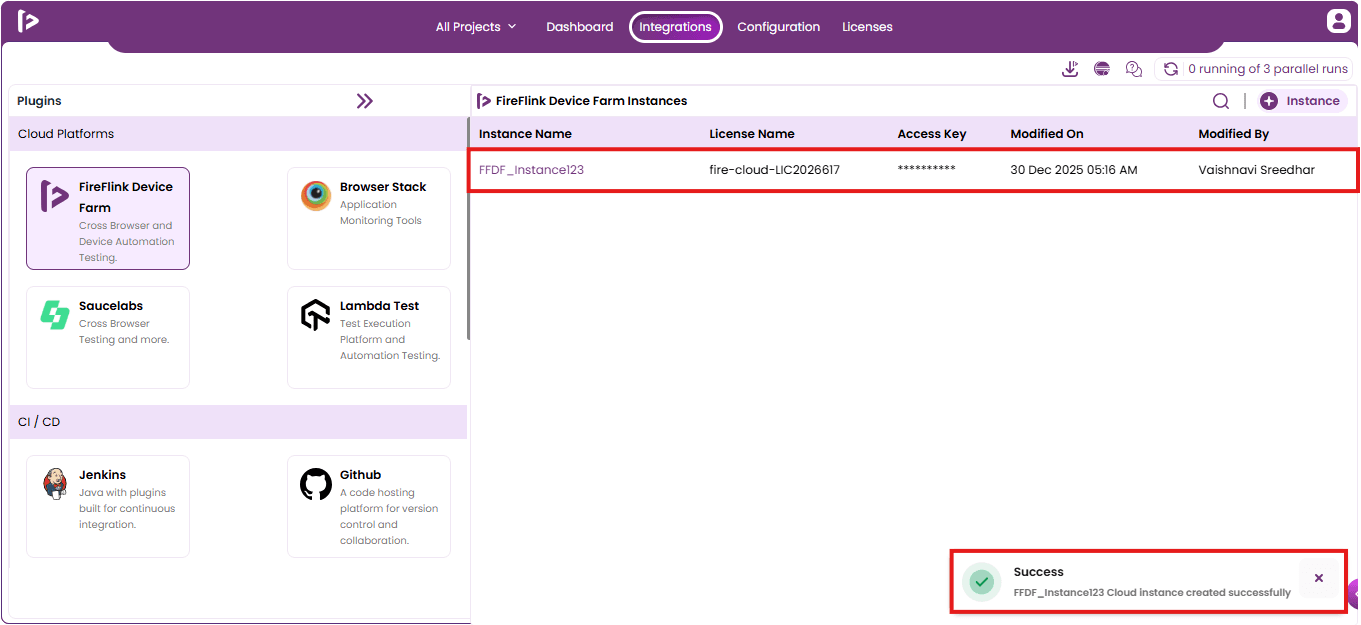
- An instance will be created for the FireFlink Device Farm and a success message will be displayed.
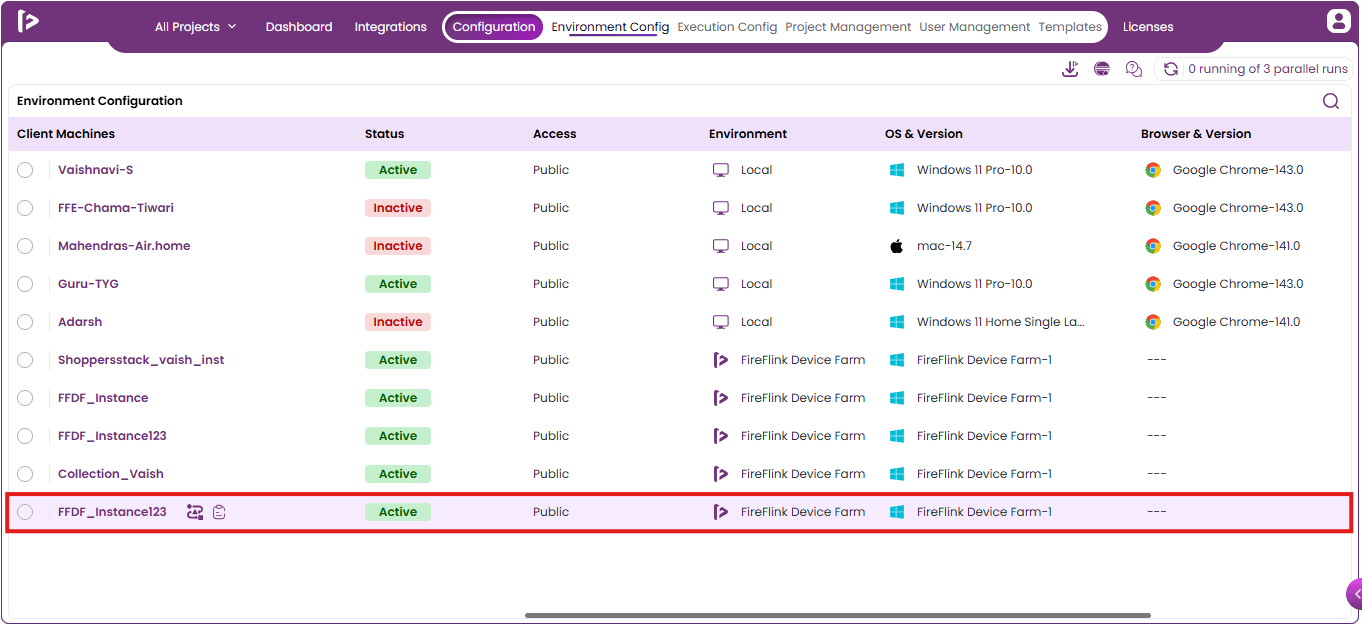
- The created instance will be stored as a FireFlink Device Farm machine in the Environment Configuration.
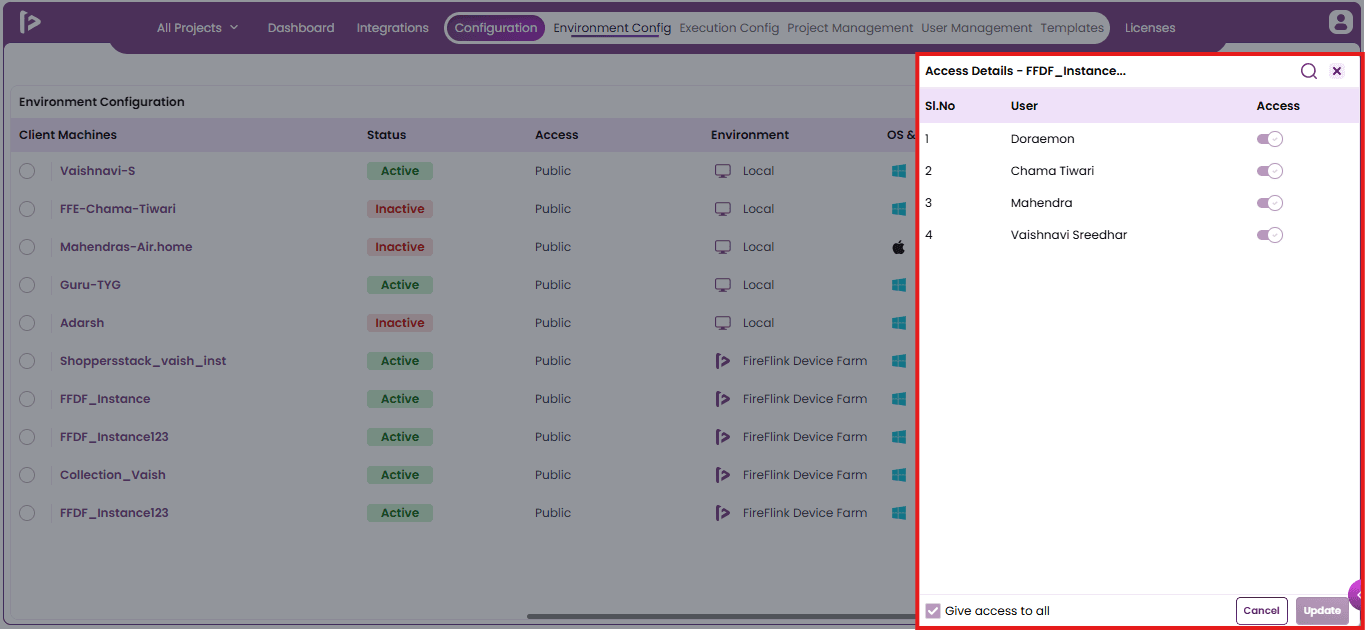
- The machine’s access details will be displayed, and access will be granted to users for execution.
Web Automation in FireFlink Device Farm
- Click on the project name.
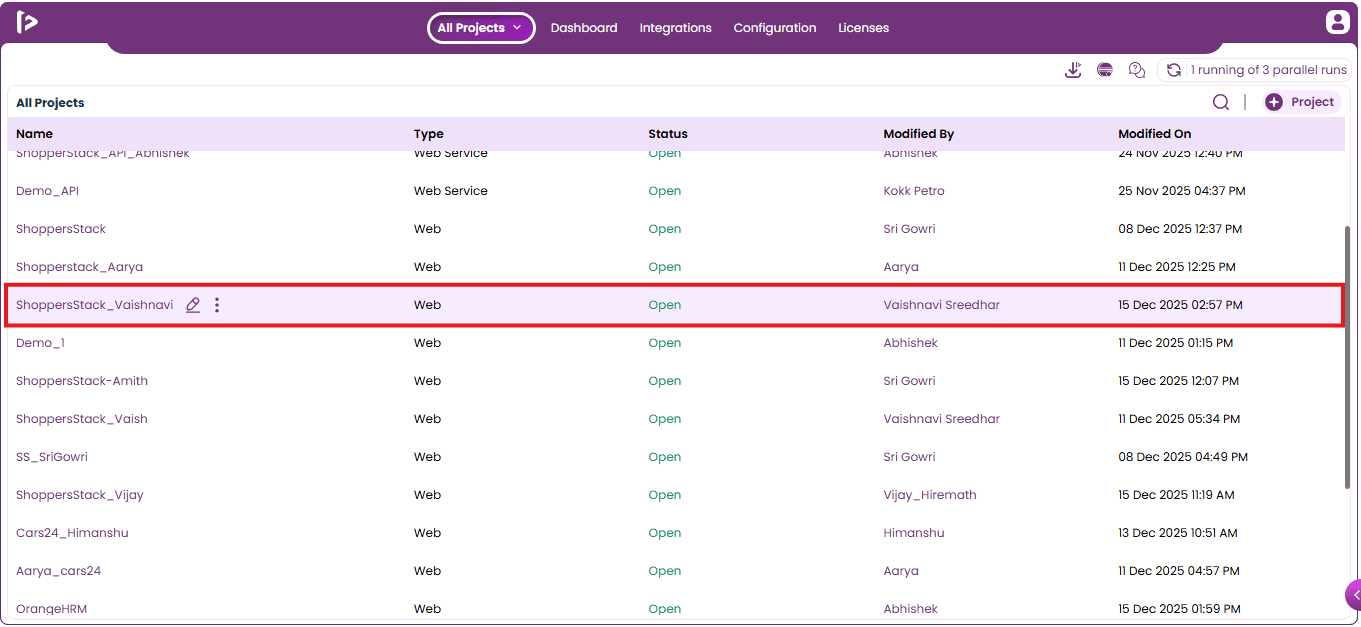
- Upon clicking, the user will be redirected to the Test Dev section by default. Navigate to the web script the user wants to execute as shown below.
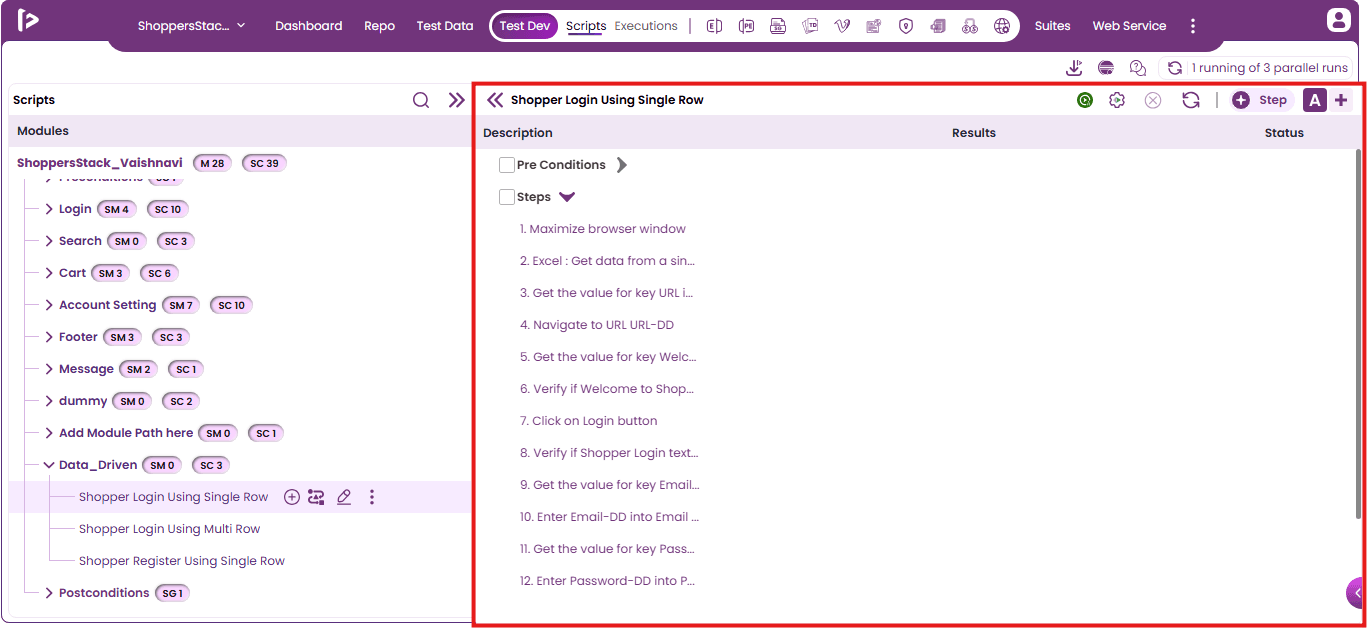
- Click on the Automation Run Settings button.
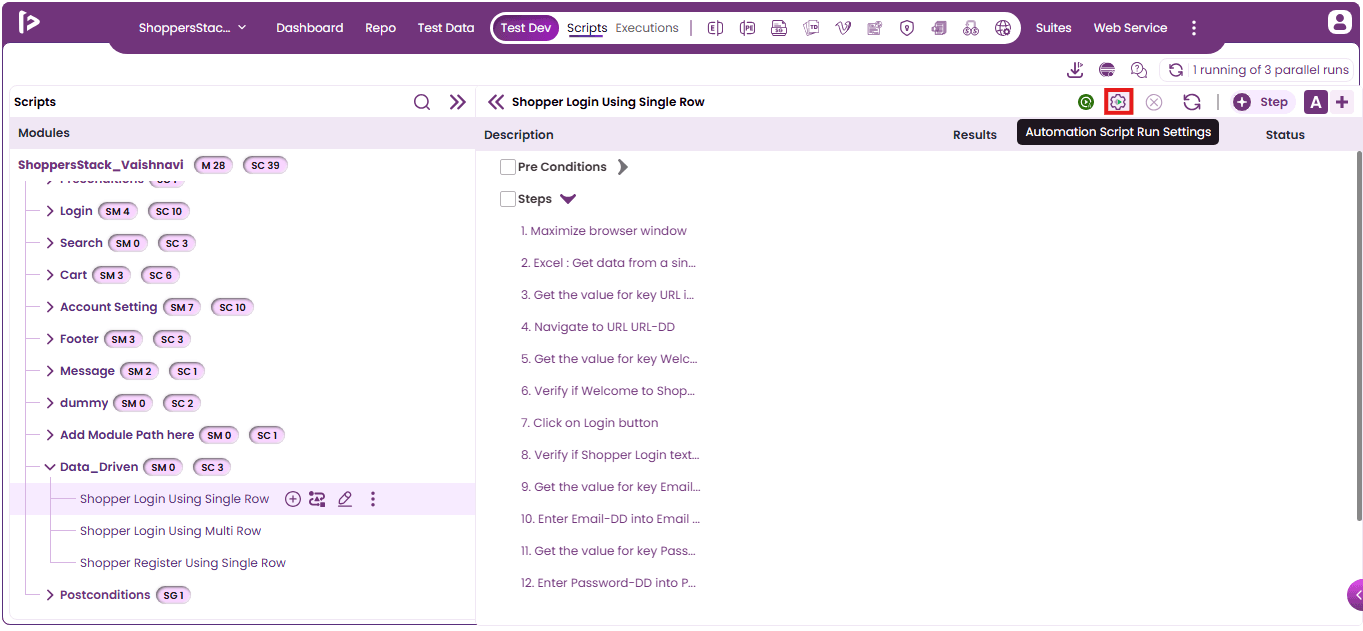
- The user needs to select the machine from the dropdown as shown in the below image.
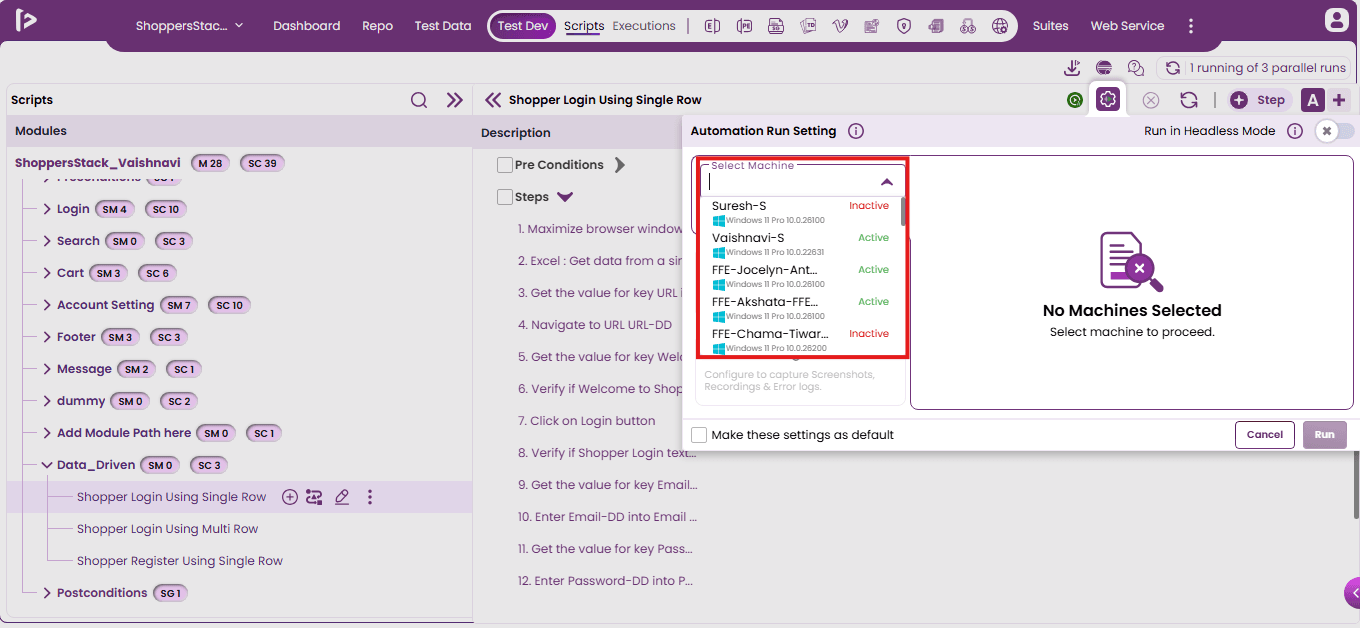
- Here, select the instance created for FireFlink Device Farm.
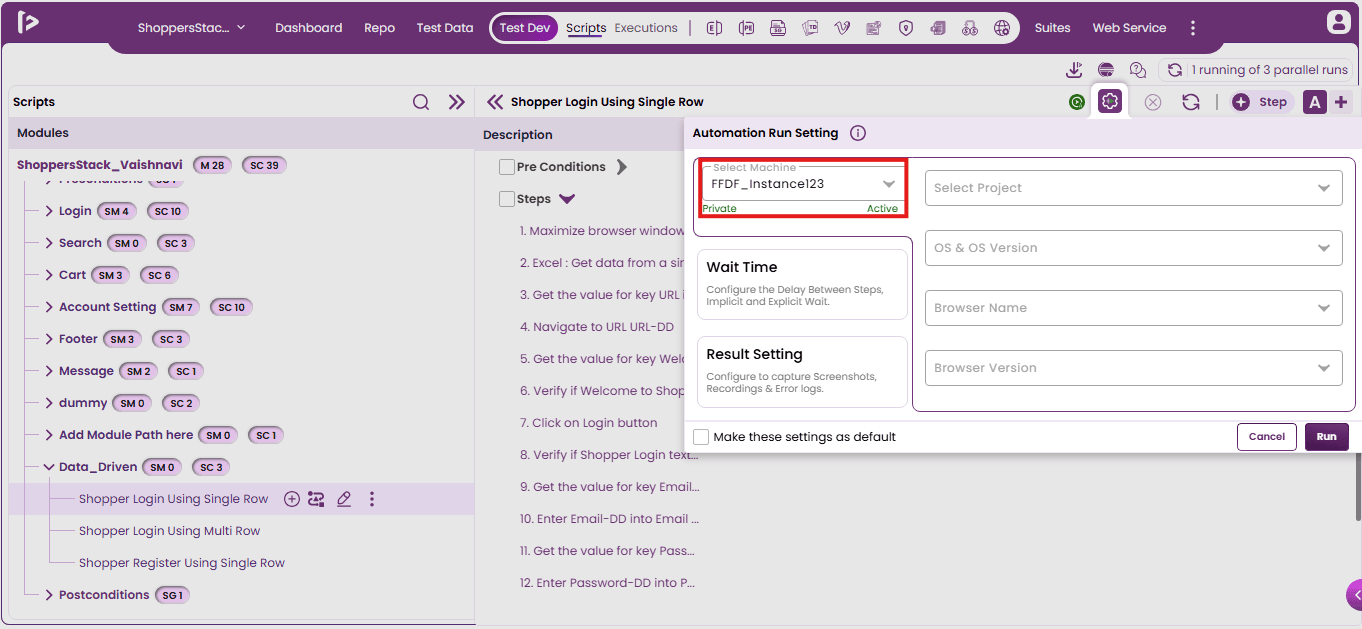
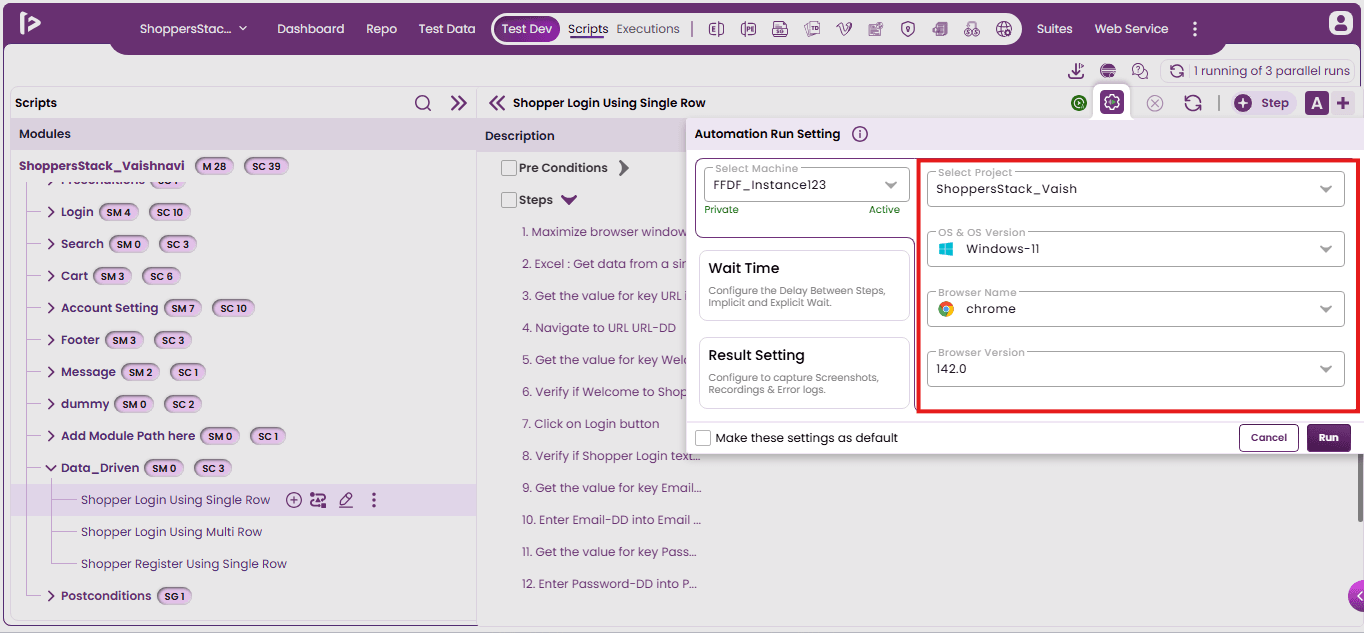
- After selecting, provide all the required fields like Project created in FireFlink Device Farm, OS & OS Version, Browser, Browser version as shown below.
- Click on the Run button as shown below.
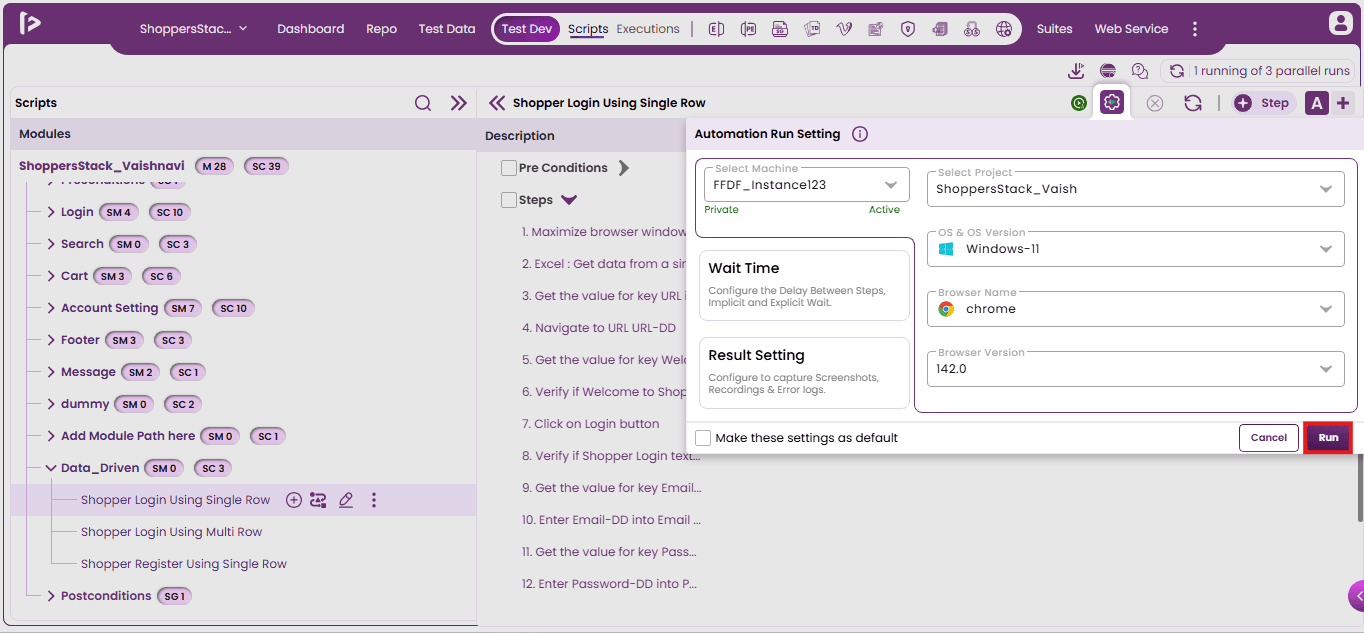
- Upon clicking, the execution will be triggered in the FireFlink Device Farm. To view the executions, signing into FireFlink Device Farm, All Projects level will be displayed by default.
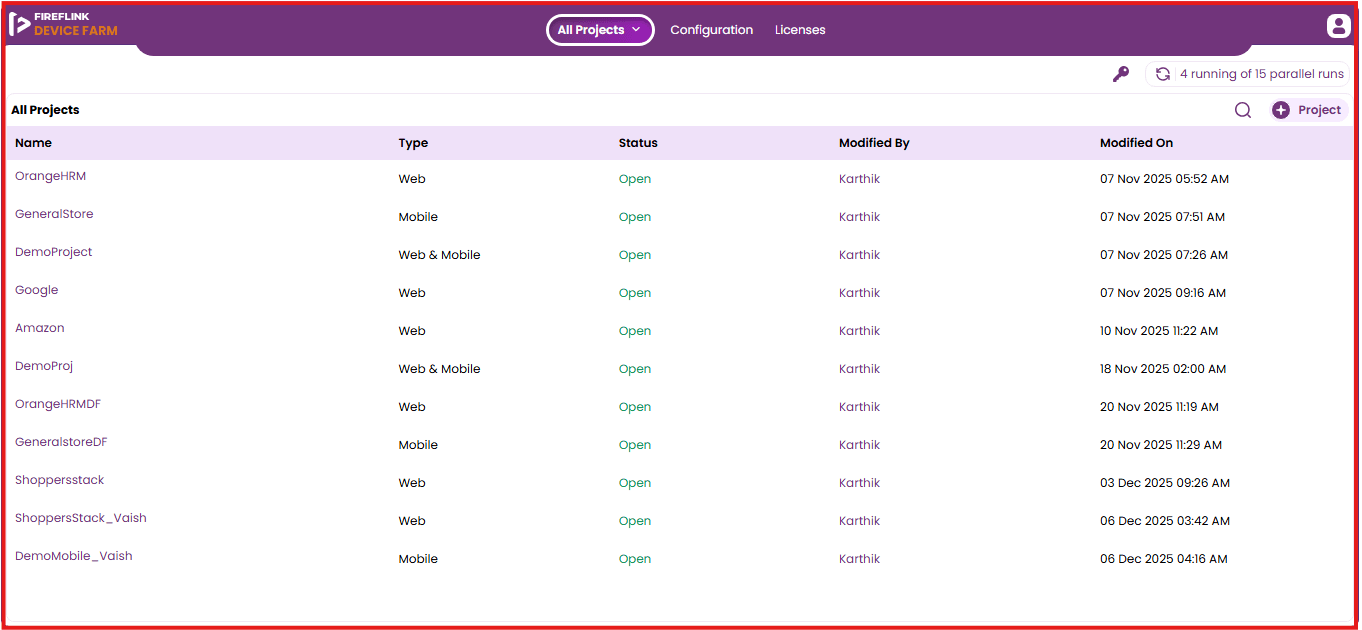
- Click the selected Web Project in the Automation Run Settings popup on the FireFlink platform.
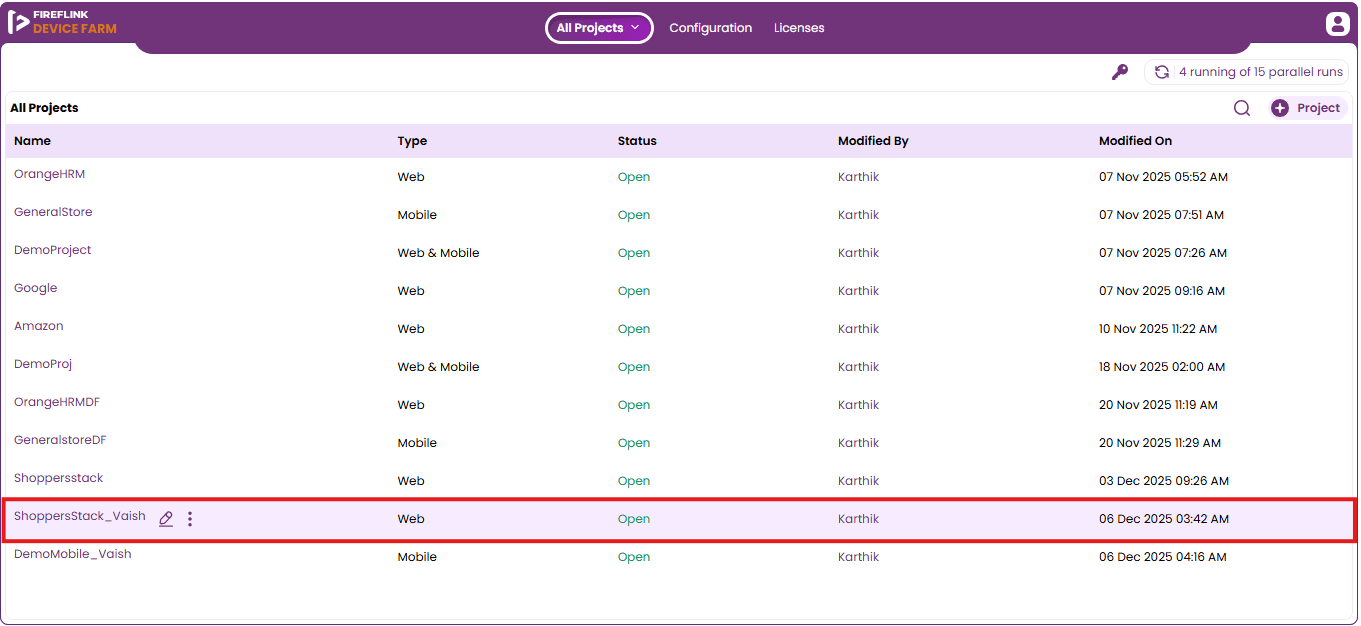
- Upon clicking, the user will be landed on the Manual Testing page. Click on the Automation Testing as shown below.
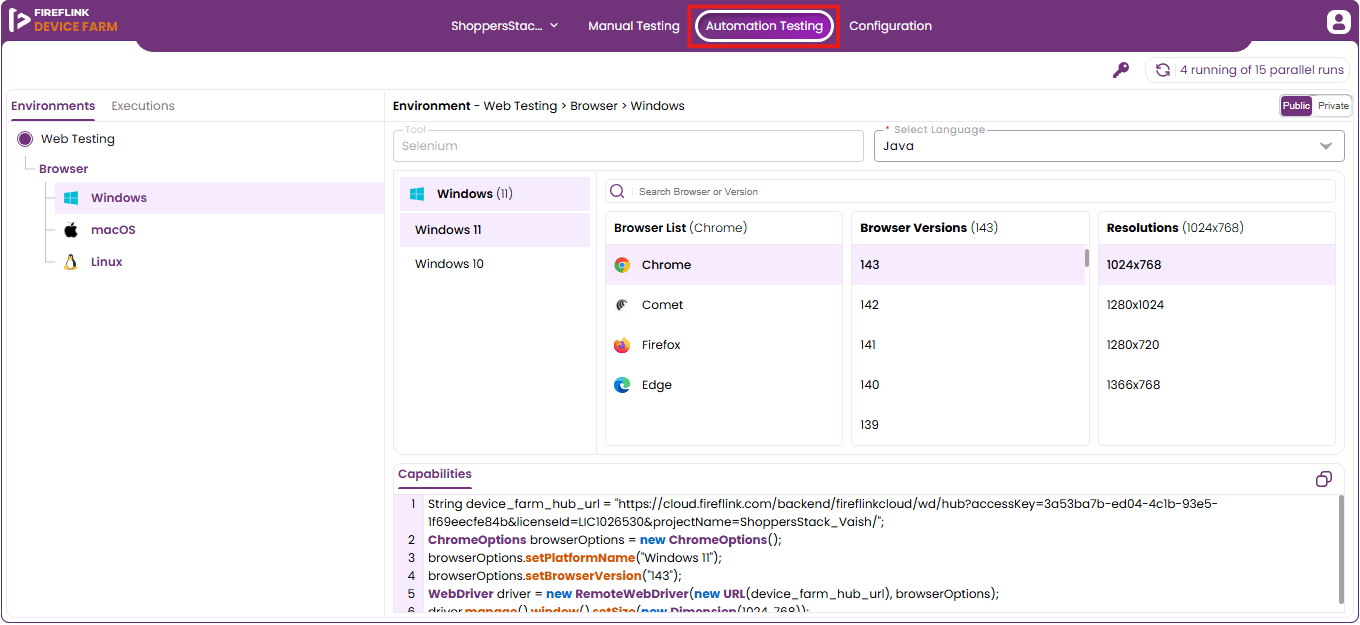
- By default the Environments section tab will be displayed. The user must select the Executions.
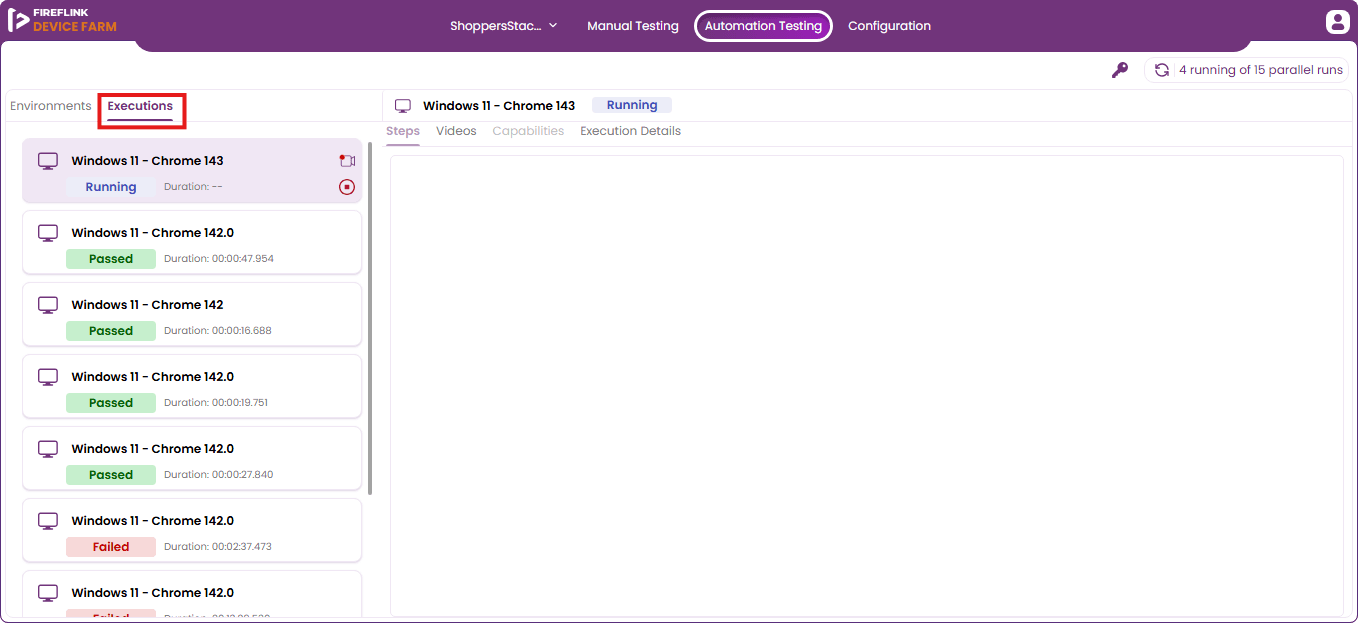
- Click on the Running execution triggered from the FireFlink platform.
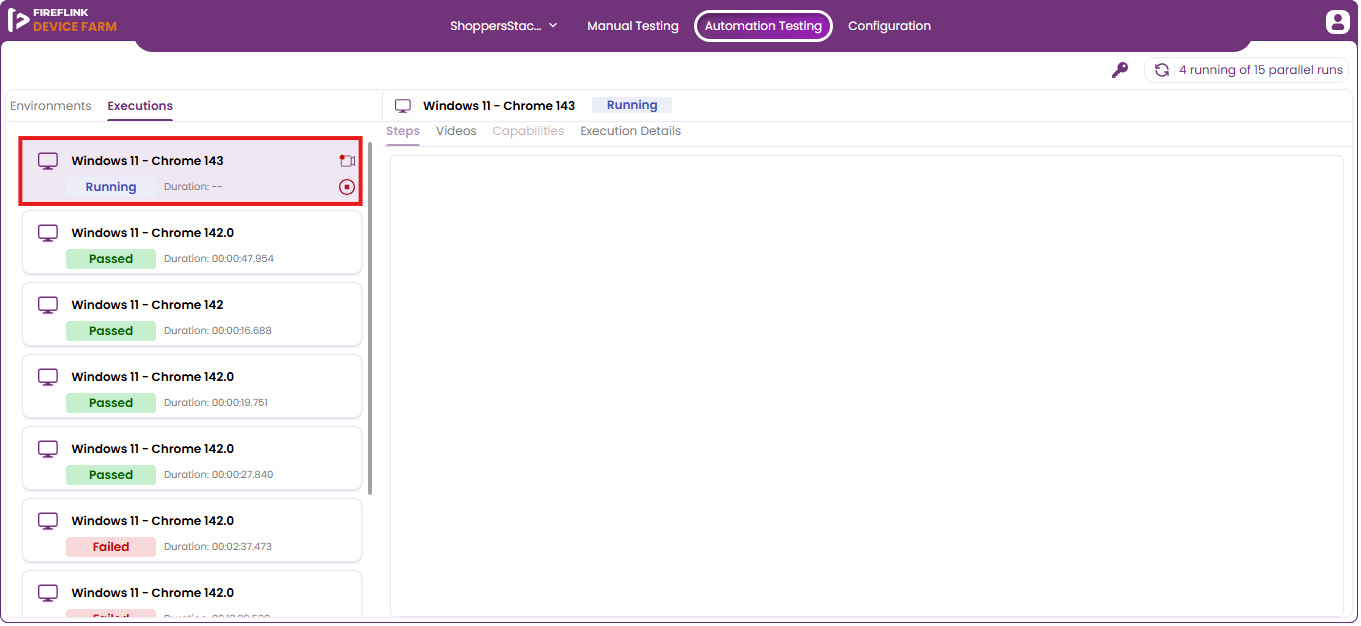
- While the execution is in progress, the user can view the live execution video by clicking on the video icon button as shown below.
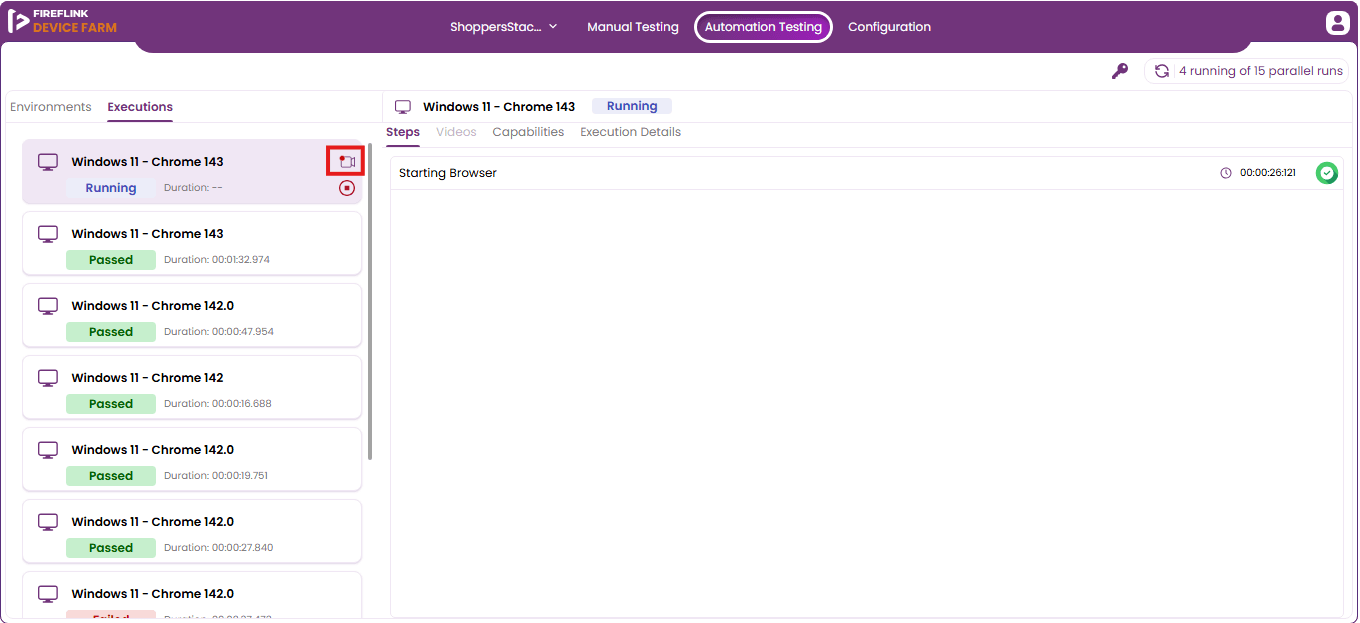
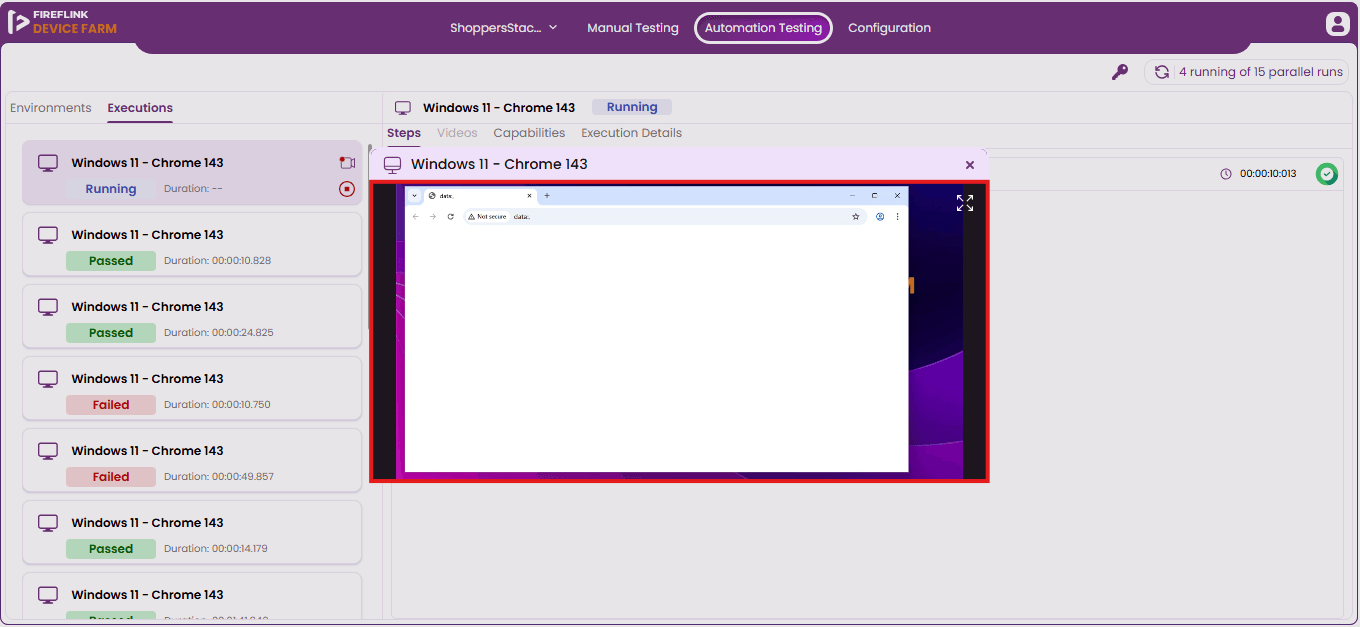
- Upon clicking, the live execution video will be displayed as shown below.
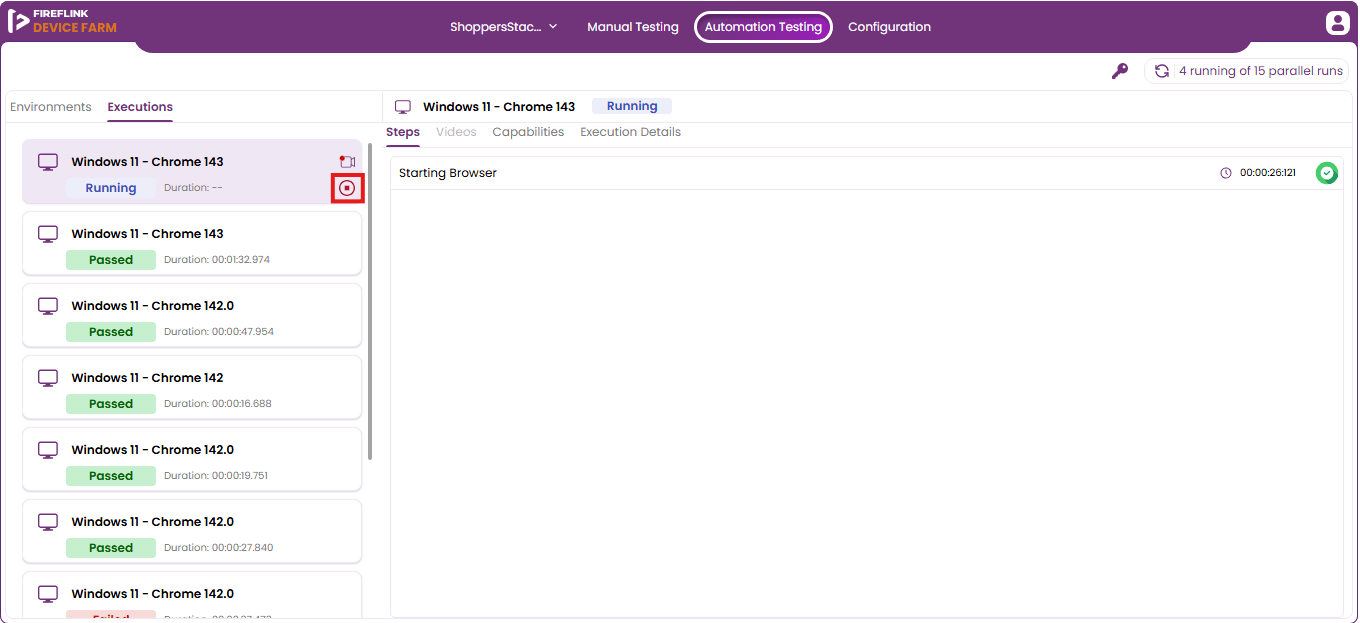
- The user can forcefully stop the executions using the Terminate icon.
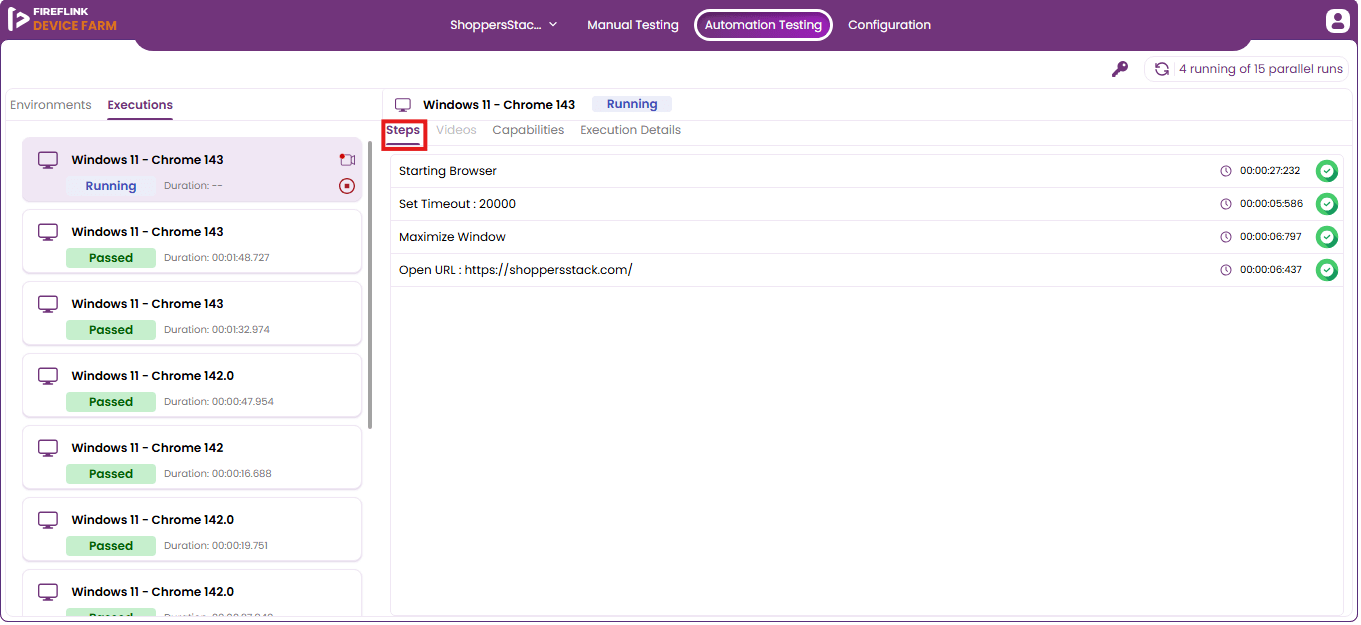
- The user can view the step-by-step live status of the execution as shown below.
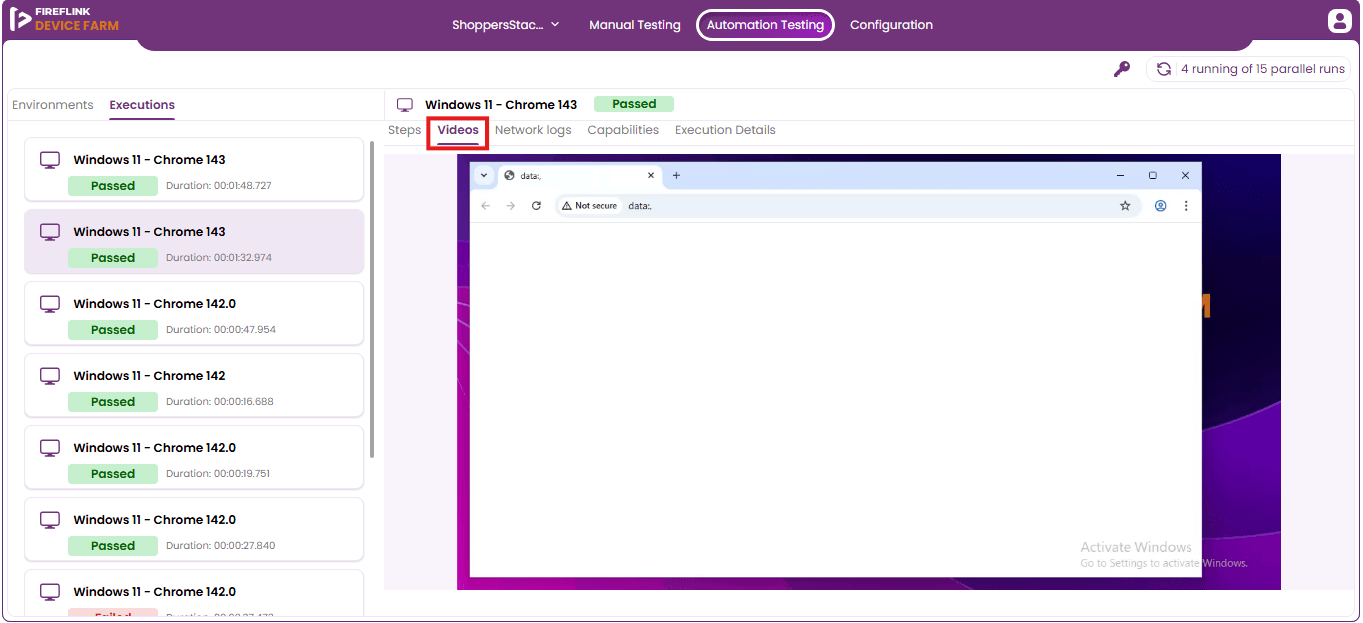
- After the execution is configured and completed, the user can view the execution video as shown below.
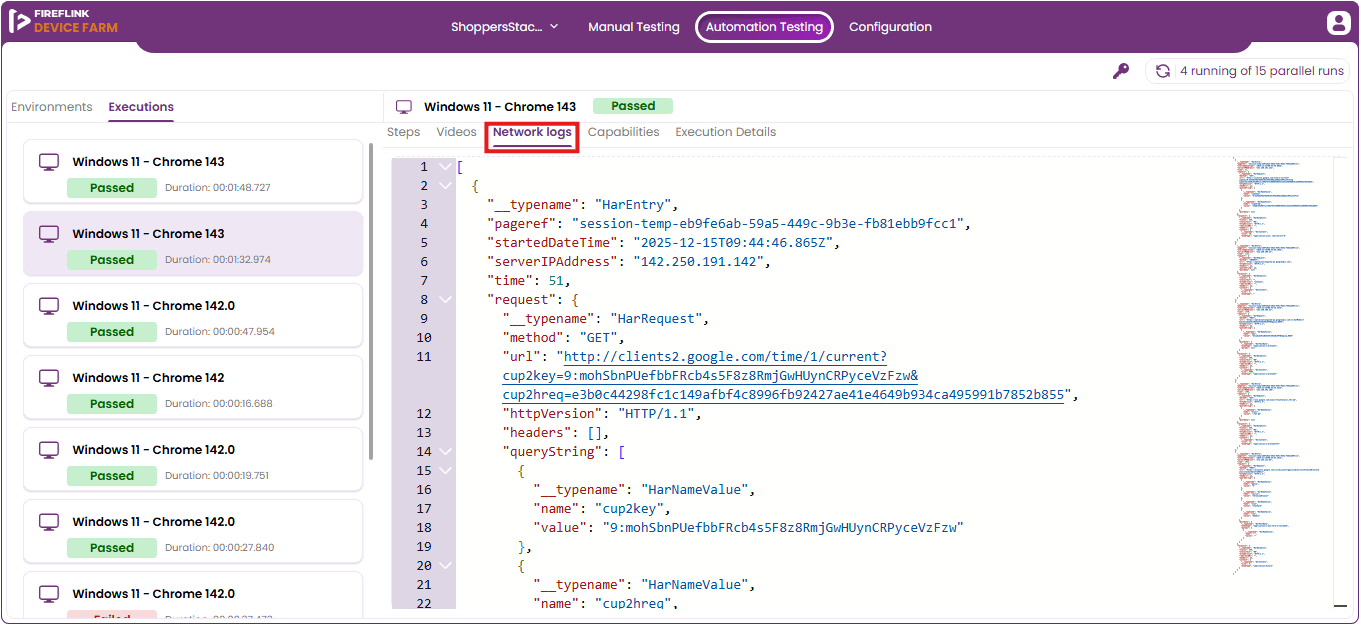
- The user can even view the Network logs generated during the execution as displayed below.
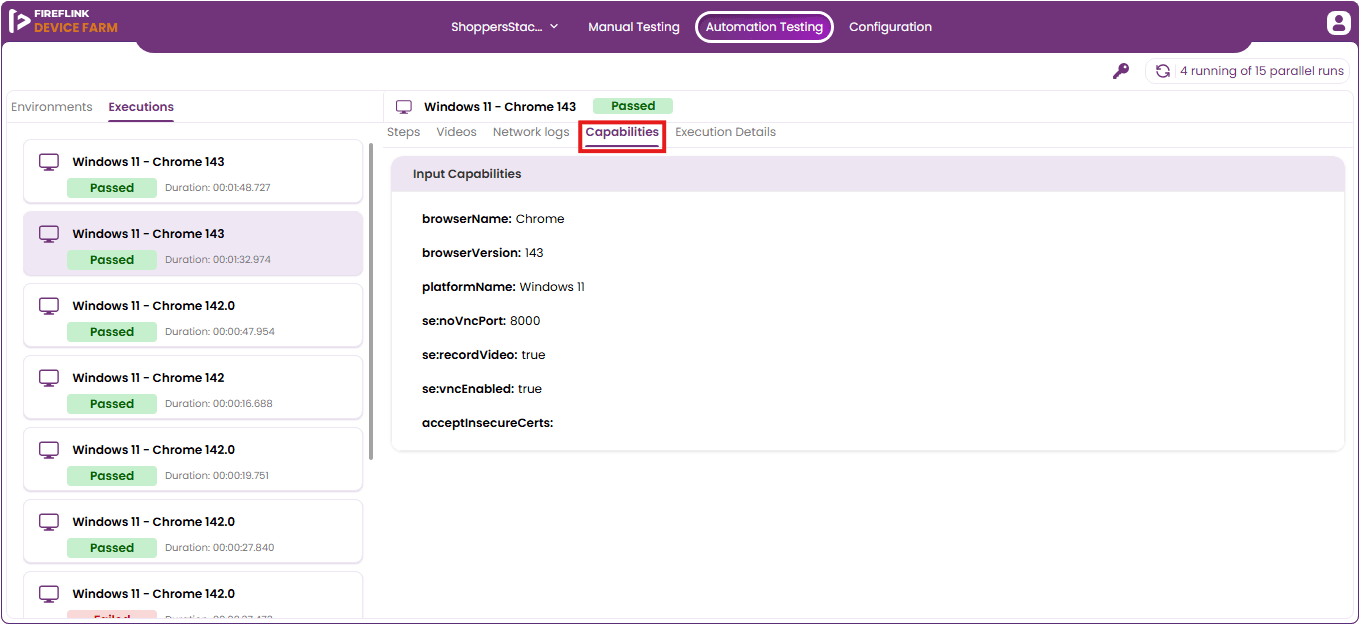
- The Capabilities utilized during script execution are listed as shown below.
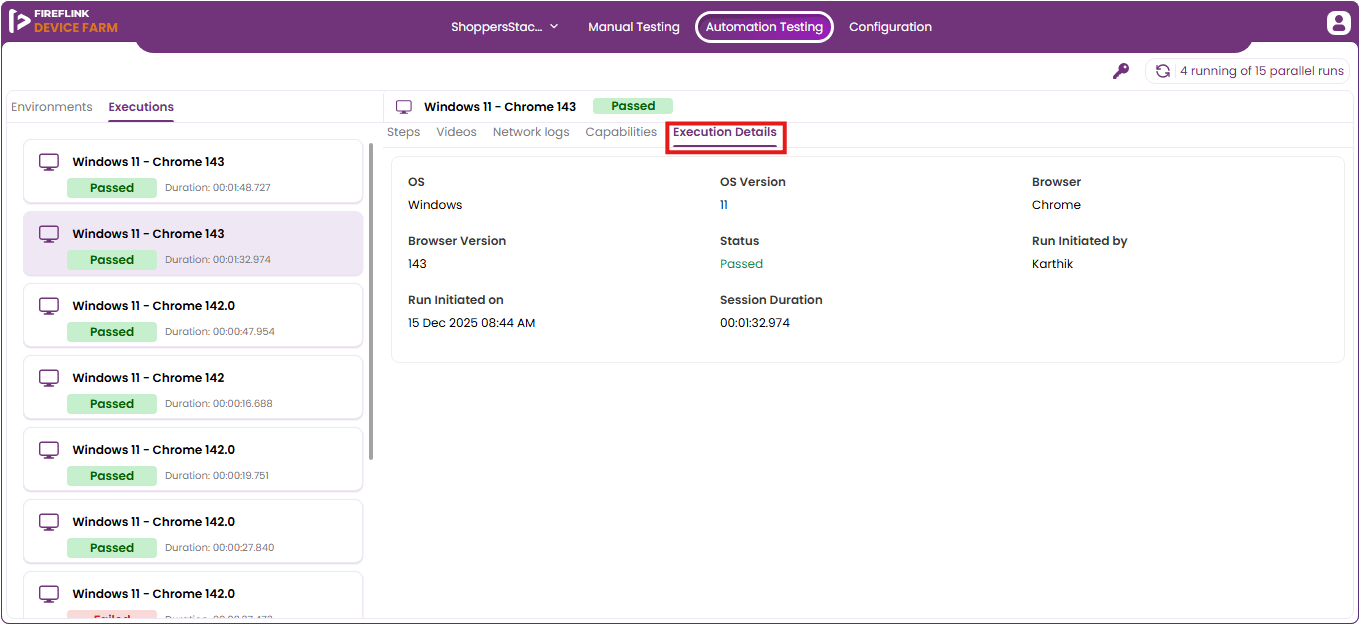
- The execution details such as the selected OS, OS version, browser, browser version, and resolution can be viewed in the Execution Details.
App Automation in FireFlink Device Farm
- Click on the project name.
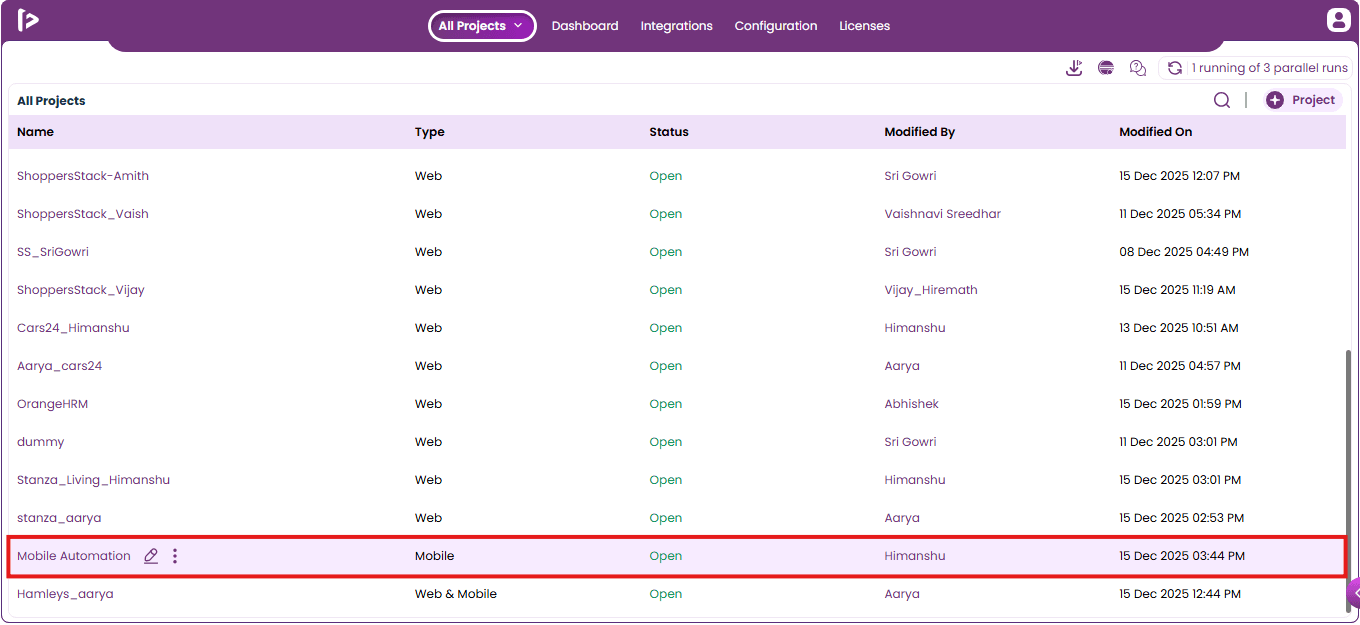
- Upon clicking, the user will be redirected to the Test Dev section by default. Navigate to the mobile script the user wants to execute as shown below.
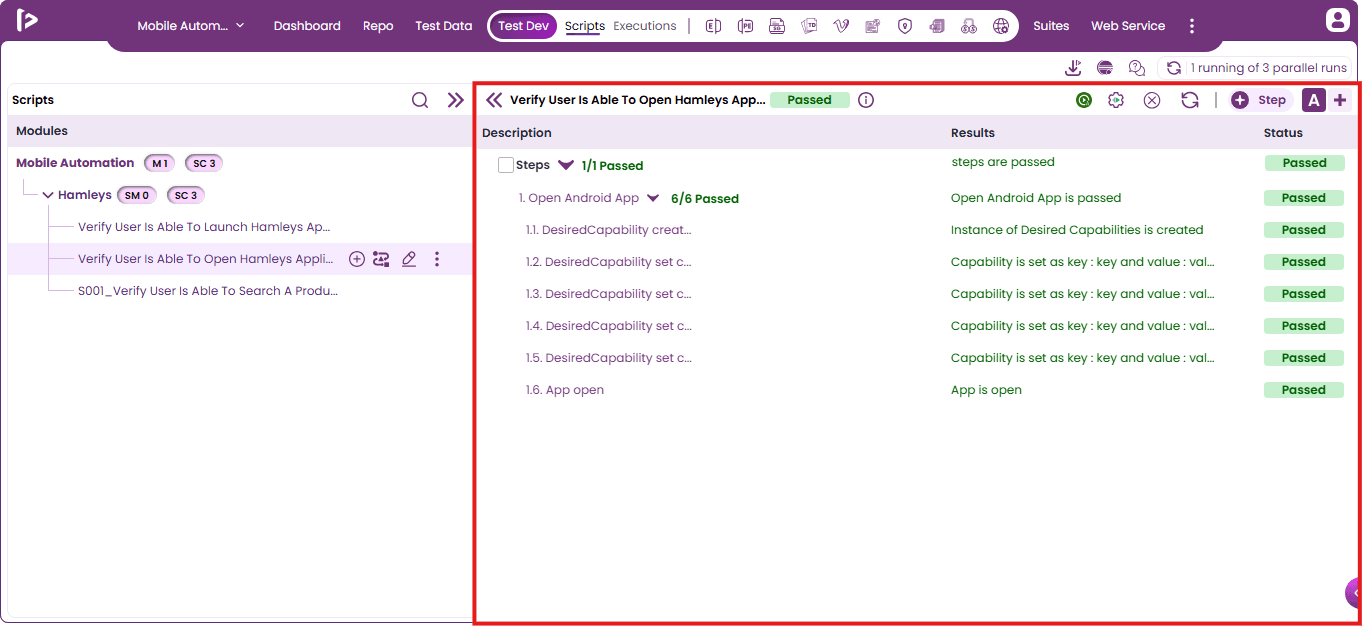
- Click on the Automation Run Settings button.
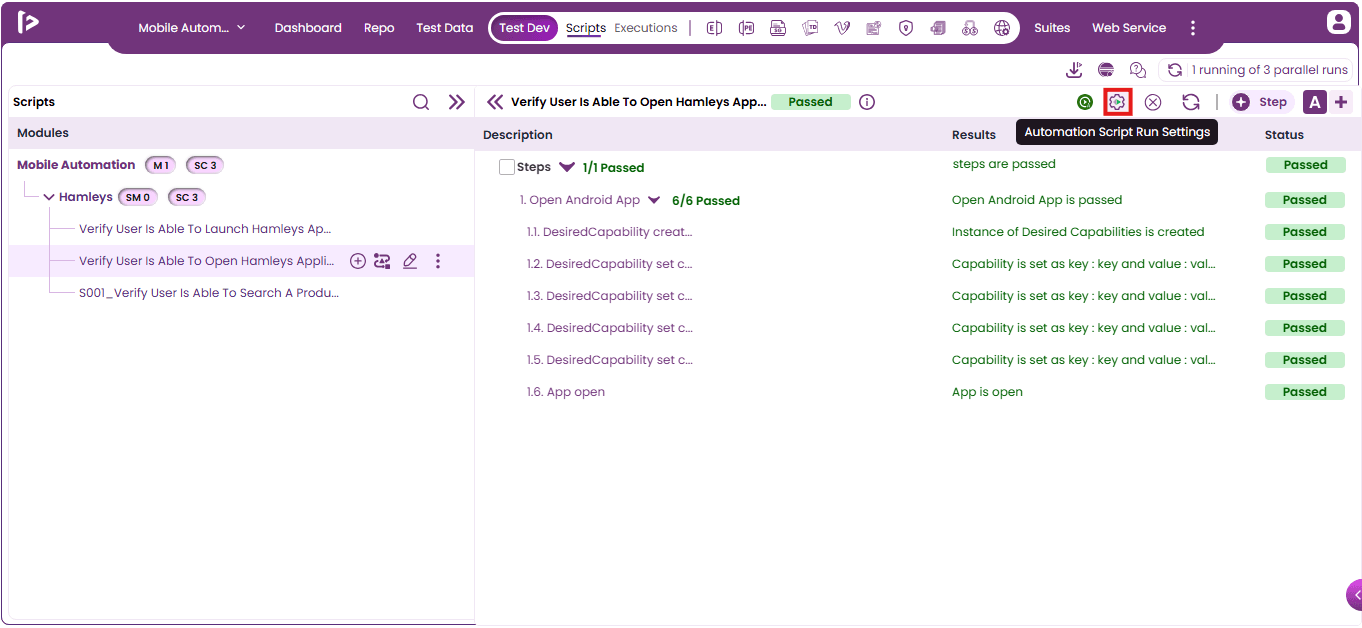
- Click on the dropdown to select the machine name.
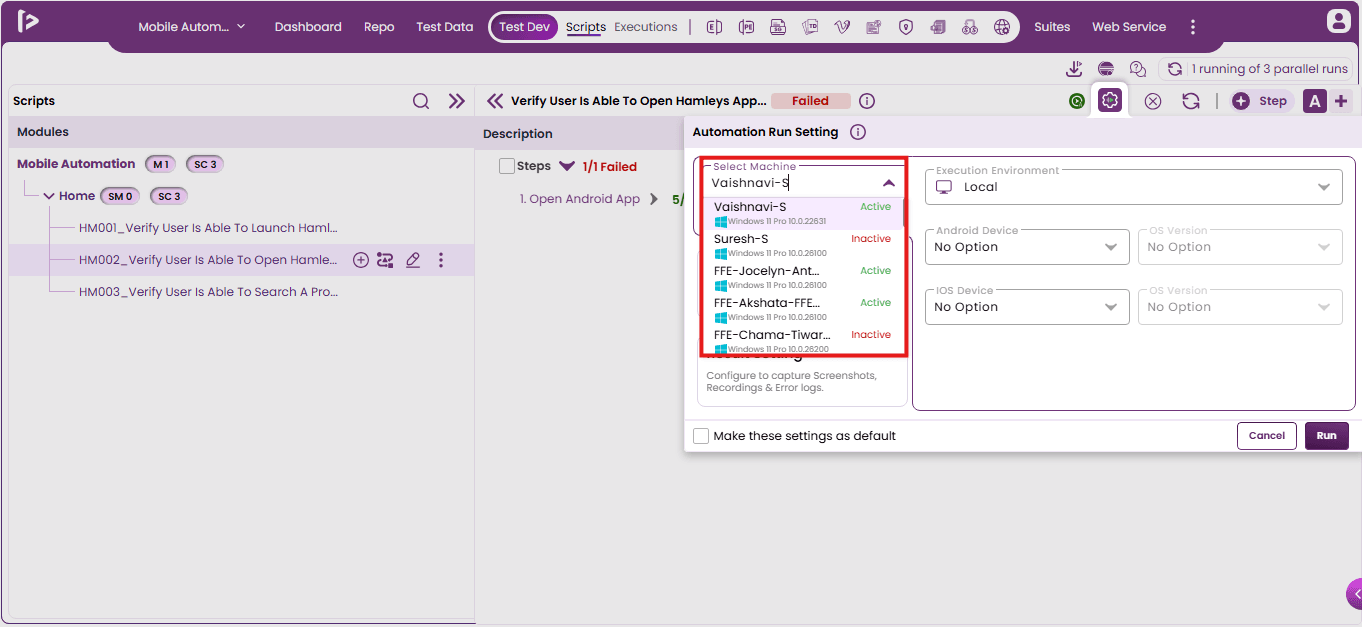
- Select the instance created for FireFlink Device Farm as shown below.
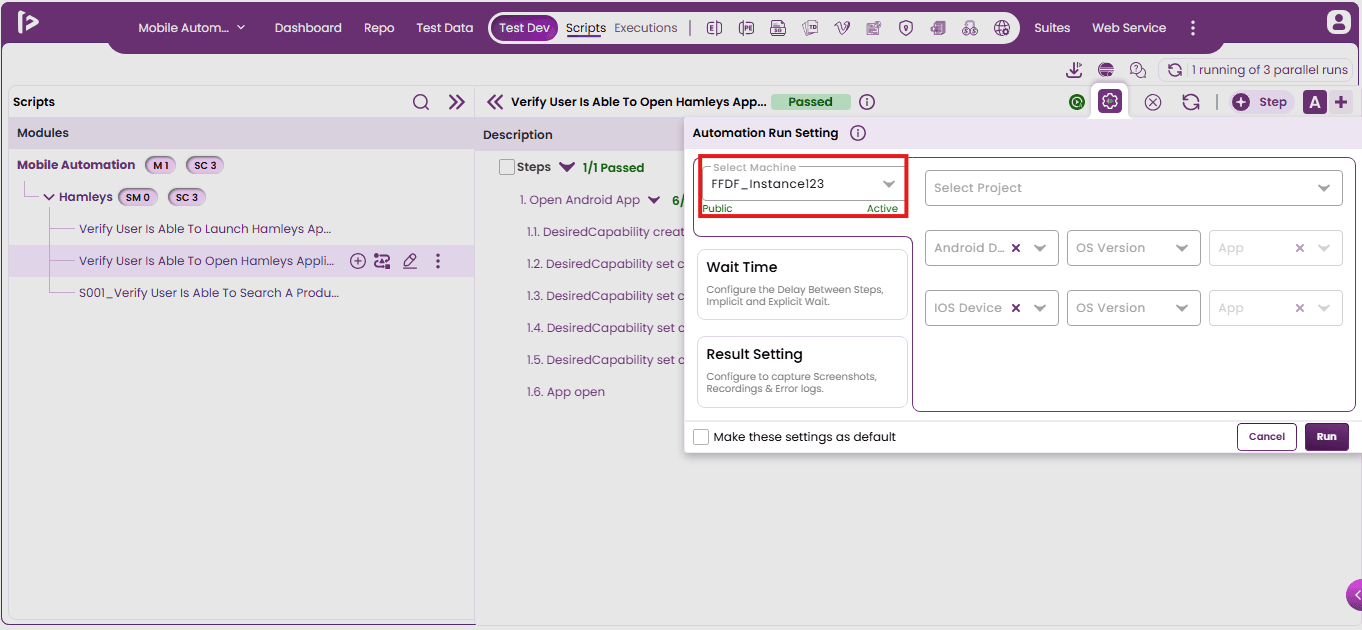
- After selecting the machine, select all the corresponding execution environments.
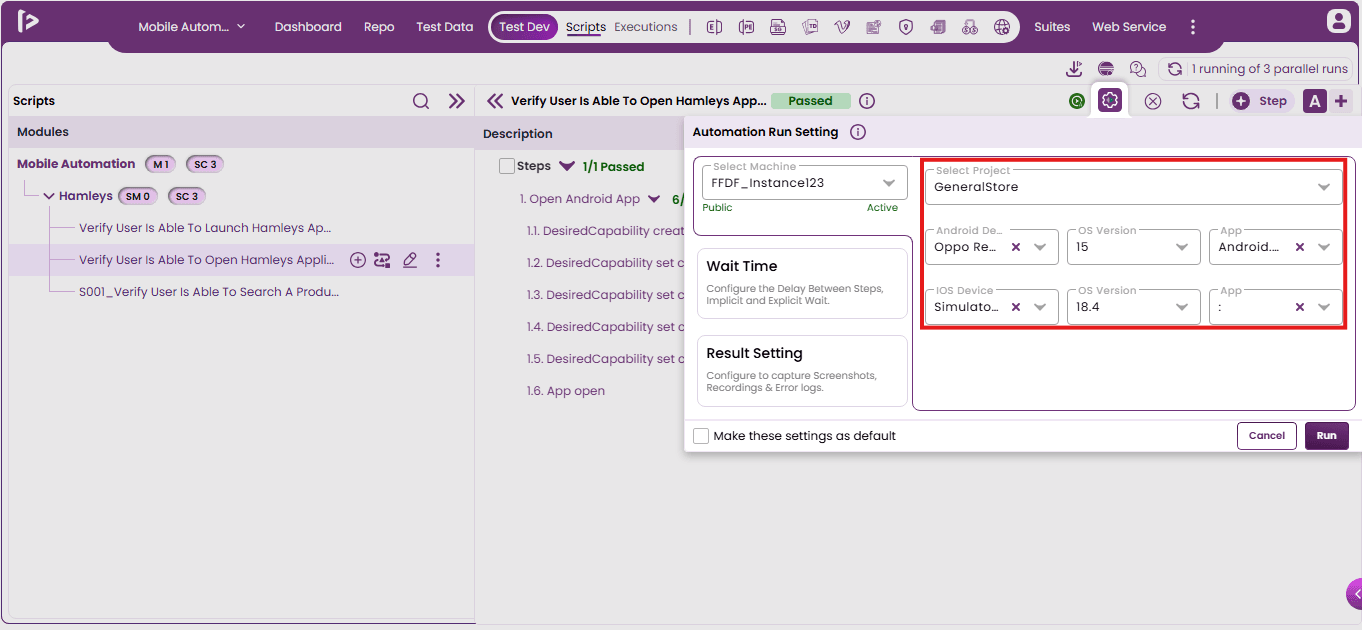
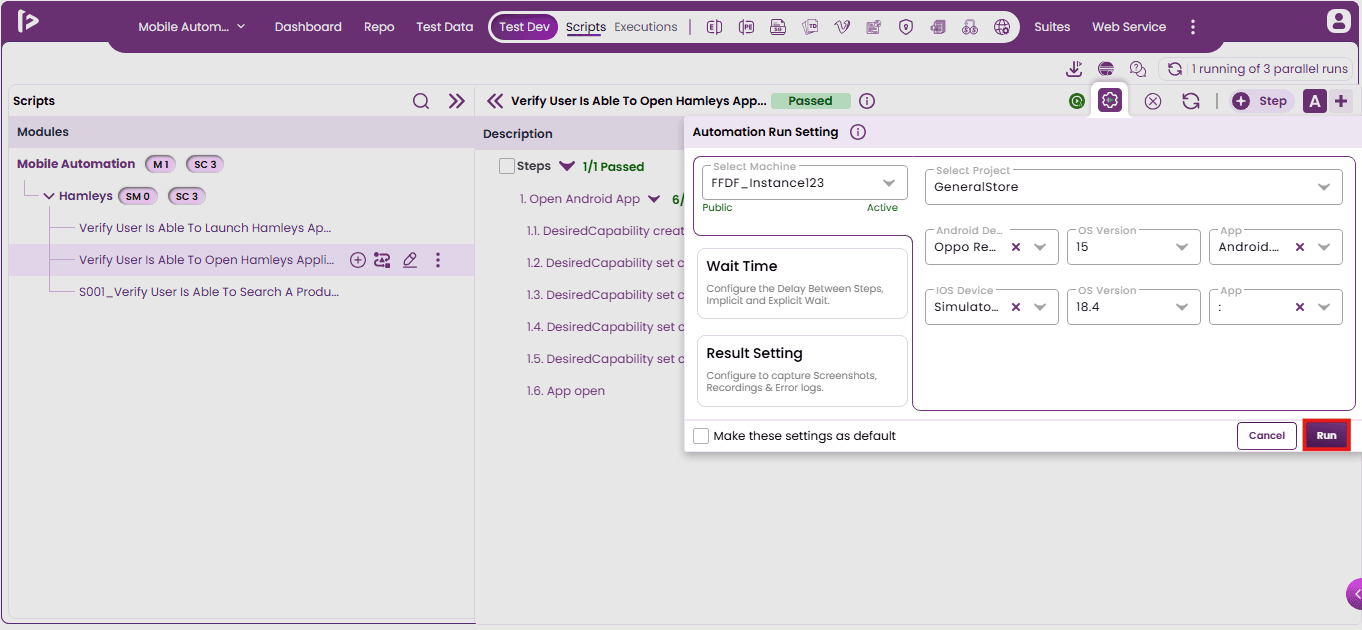
- Click on the Run button as shown below.
- Upon clicking, the execution will be triggered in the FireFlink Device Farm. To view the executions, signing into FireFlink Device Farm, All Projects level will be displayed by default.
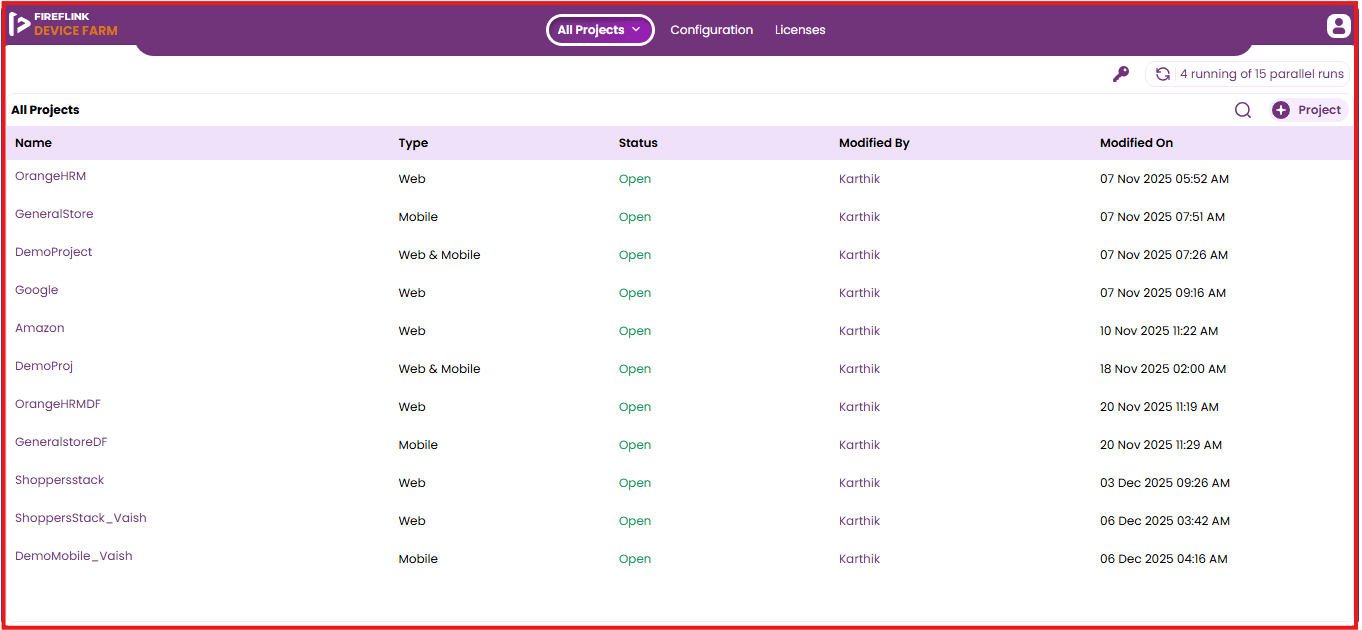
- Click the selected Mobile Project in the Automation Run Settings popup on the FireFlink platform.
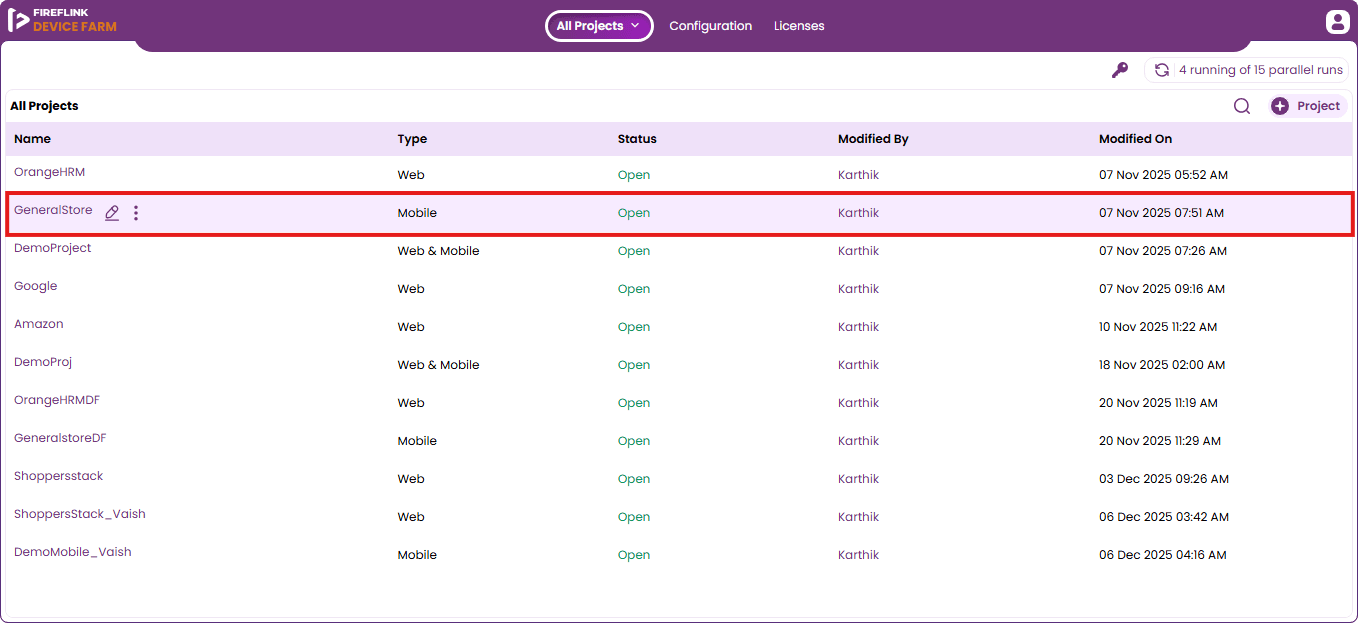
- Upon clicking, the user will be landed on the Manual Testing page. Click on the Automation Testing as shown below.
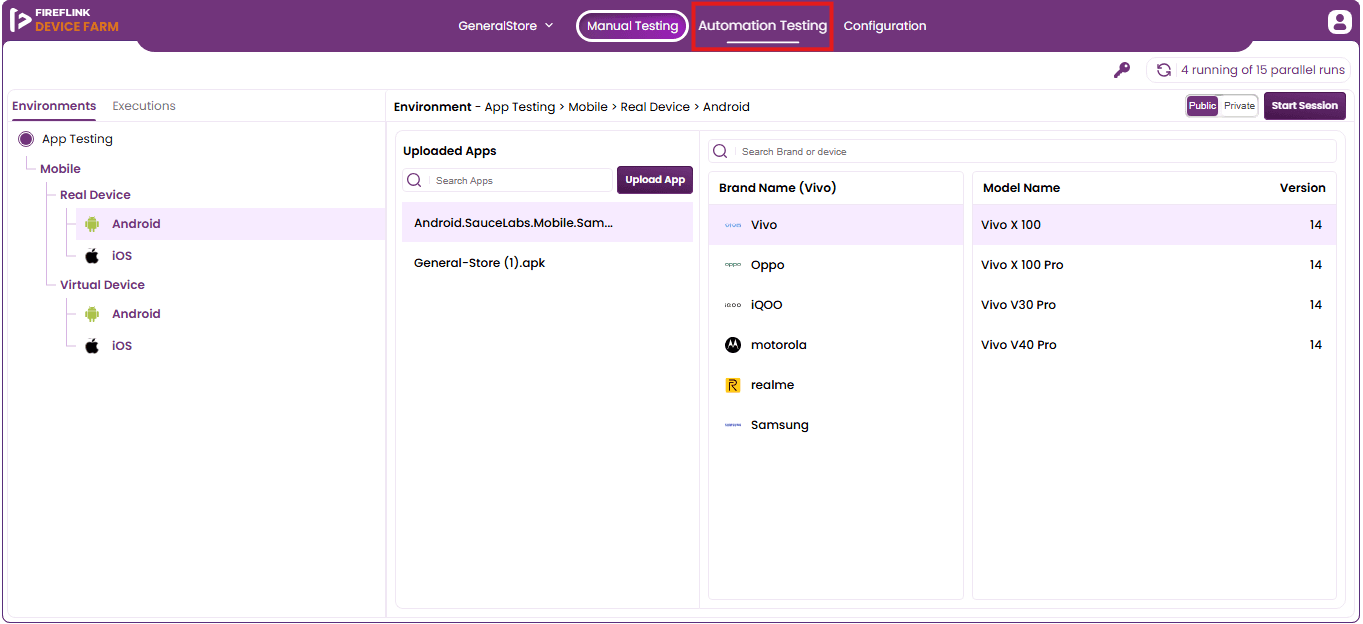
- By default the Environments section tab will be displayed. The user must select the Executions.
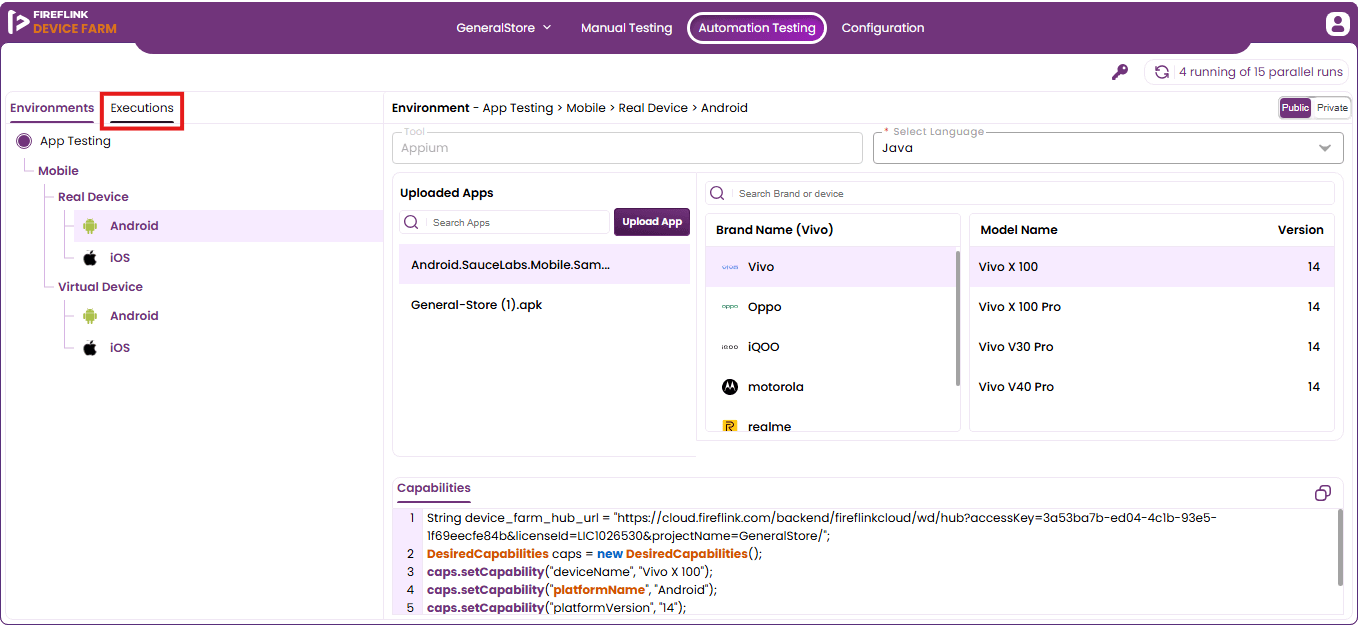
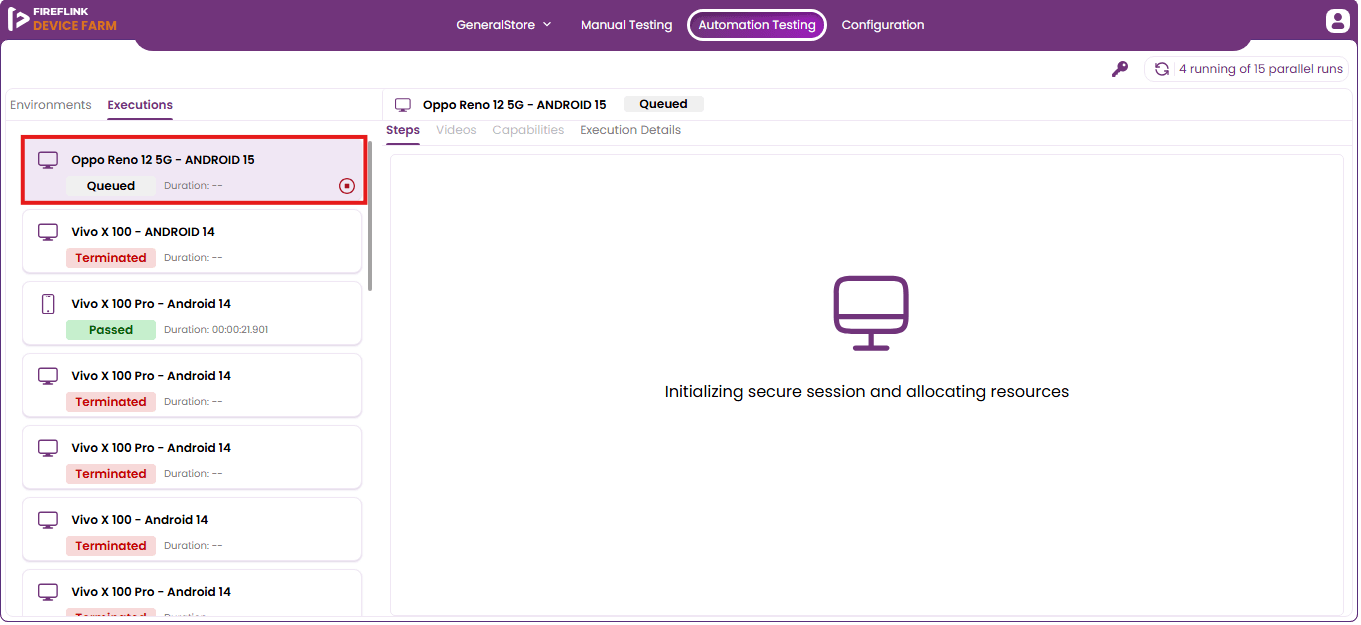
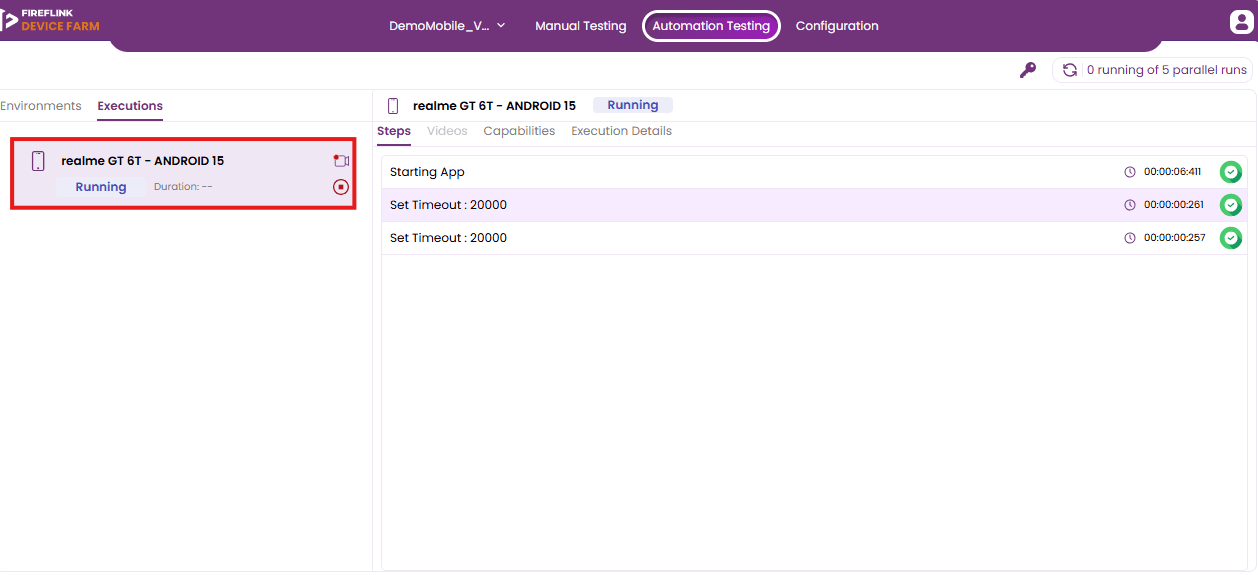
- Click on the Running execution triggered from the FireFlink platform.
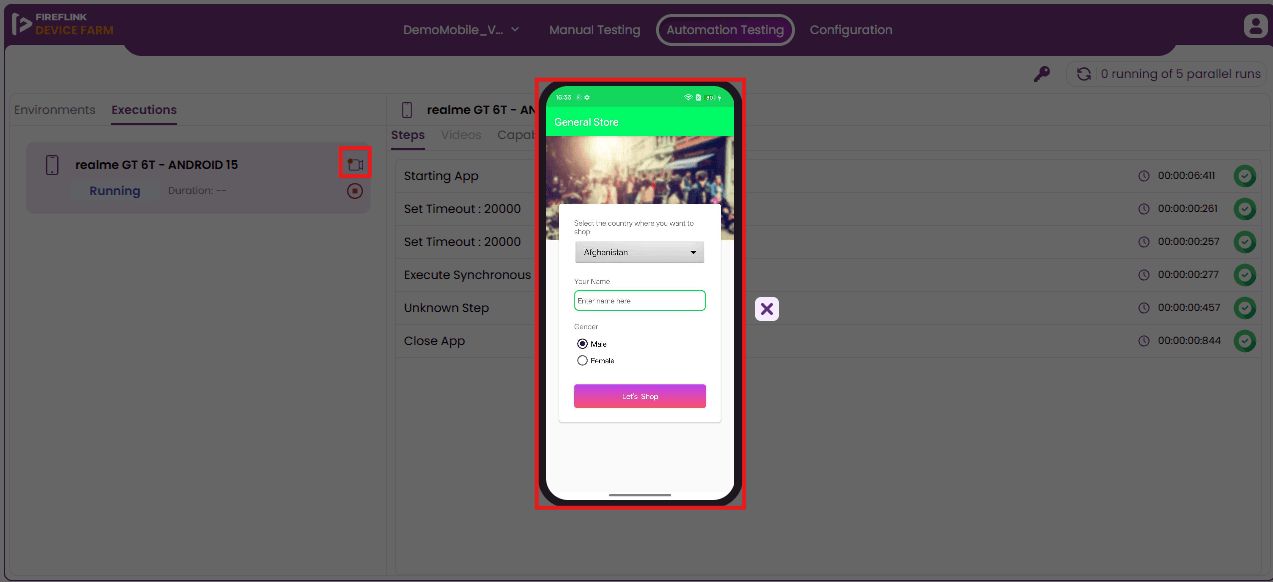
- Similarly like web script execution, the user can view the live mobile script execution upon clicking the video icon button as shown below.
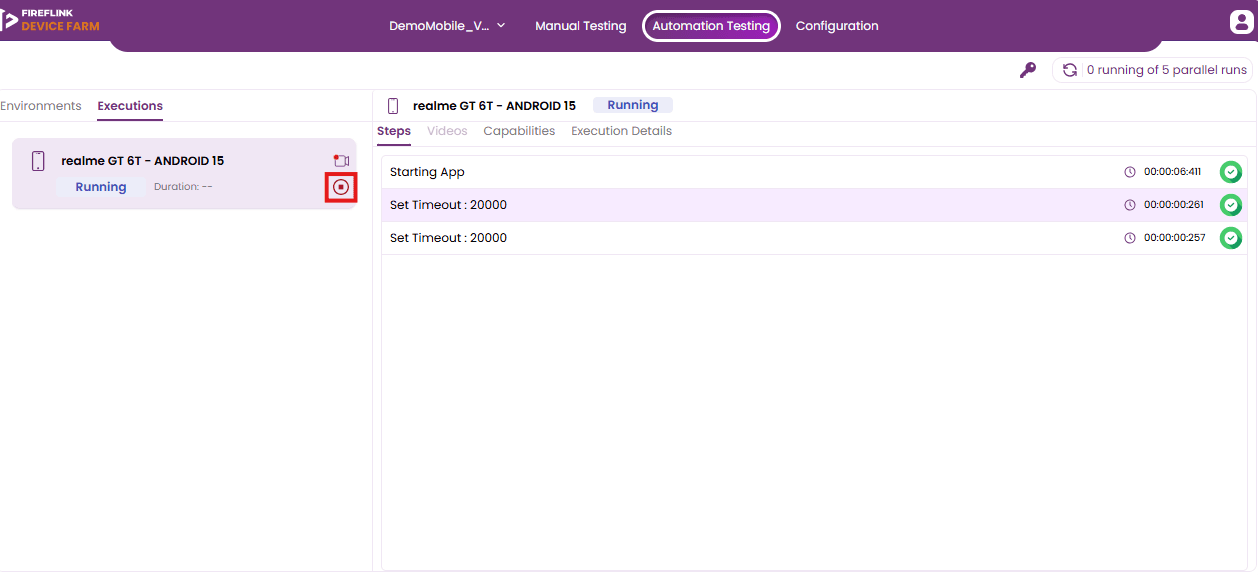
- The user can forcefully stop the executions using the Terminate icon.
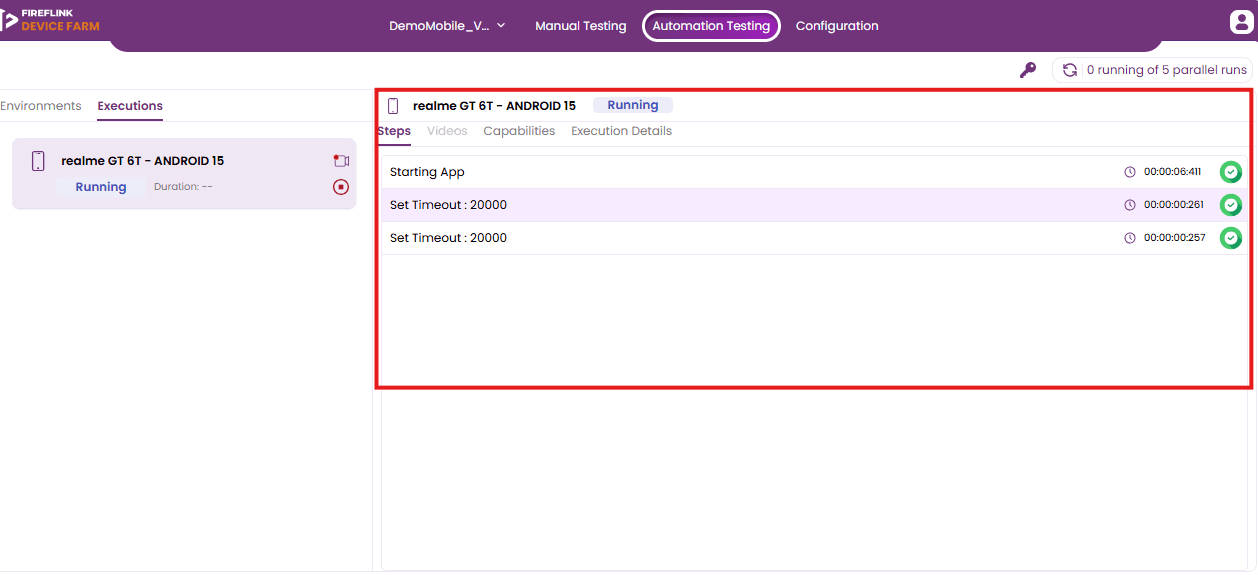
- The user can view the step-by-step live status of the execution as shown below.
- After the execution is configured and completed, the user can view the execution video as shown below.
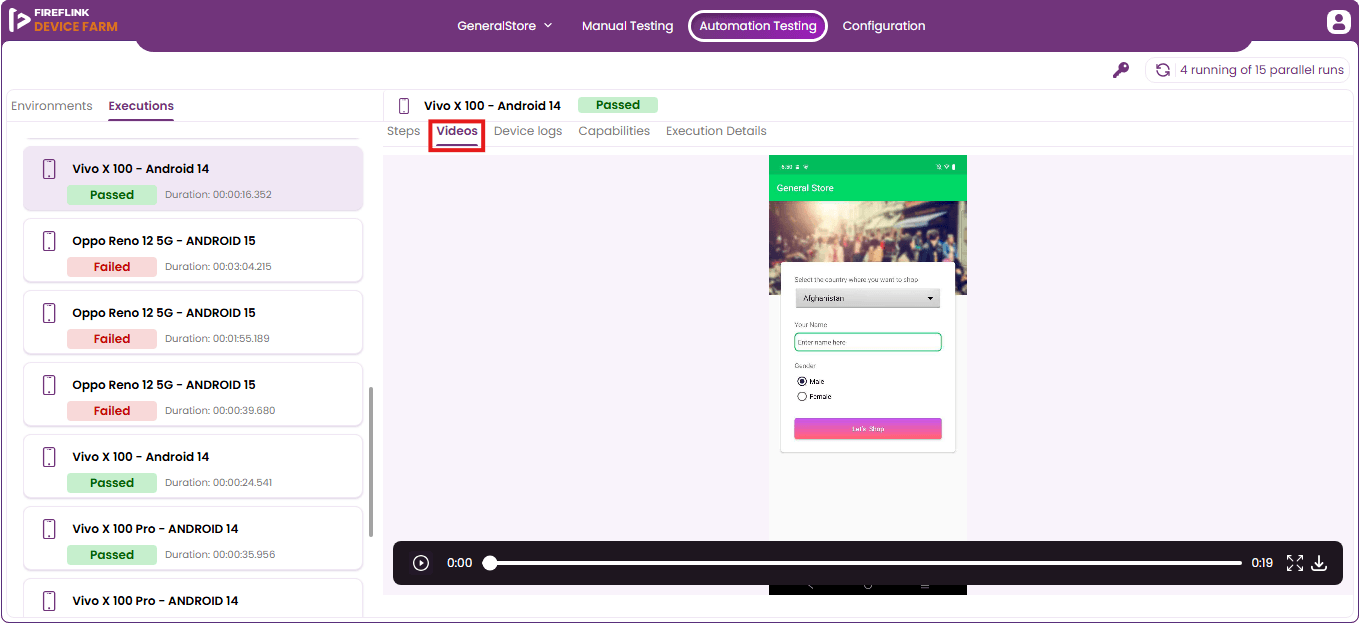
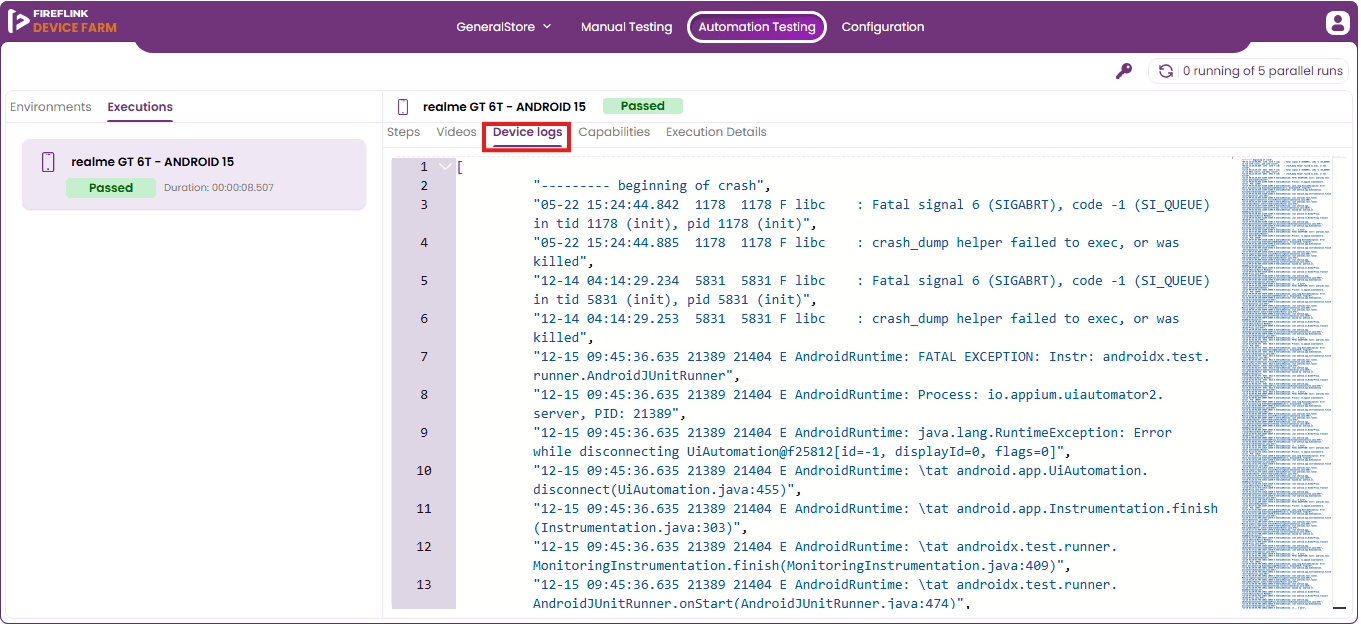
- Device Logs helps to display the network logs generated during the application’s execution as shown below
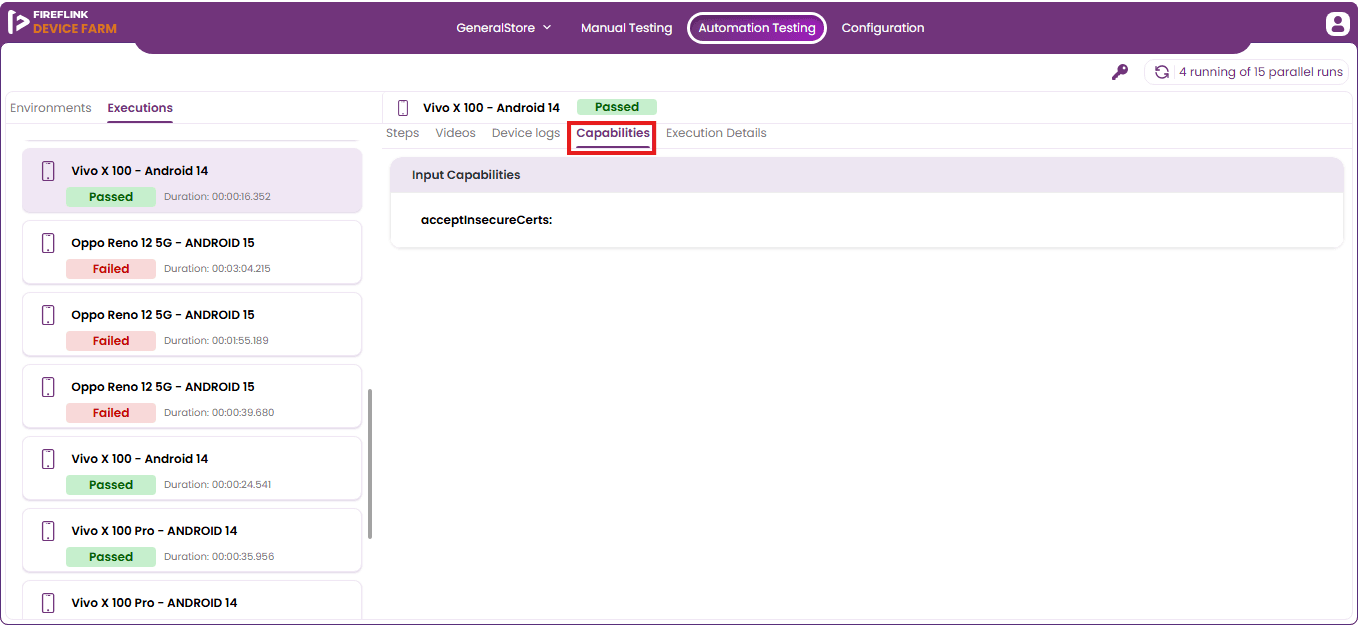
- Capabilities displays the input capabilities utilized during script execution.
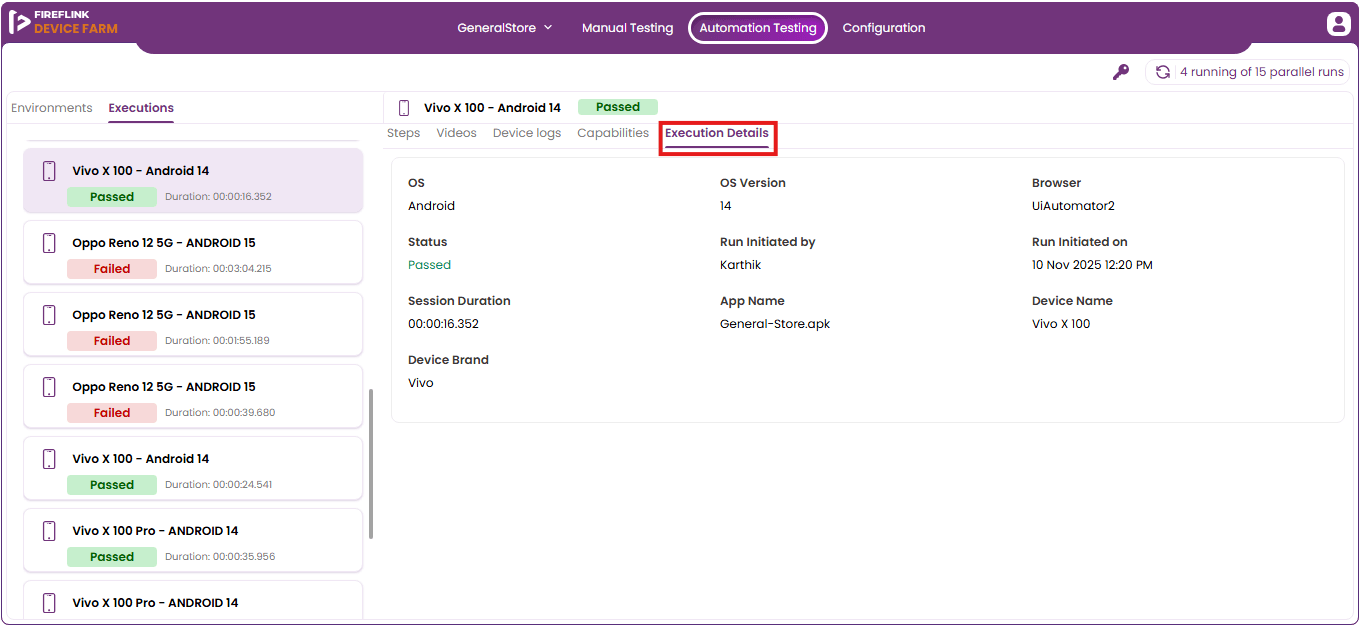
- Execution Details displays the execution details such as the selected OS, OS version, browser, browser version, and resolution.
Web Automation Suite Execution in FireFlink Device Farm.
- Web Automation Suite Execution in the FireFlink Device Farm allows users to run automated web test scripts in suites on real desktop environments hosted in the cloud.
- This helps ensure that web applications function correctly across different browsers, operating systems, and configurations without maintaining physical machines.
Steps to execute Automation Suite in FireFlink Device Farm are as follows;
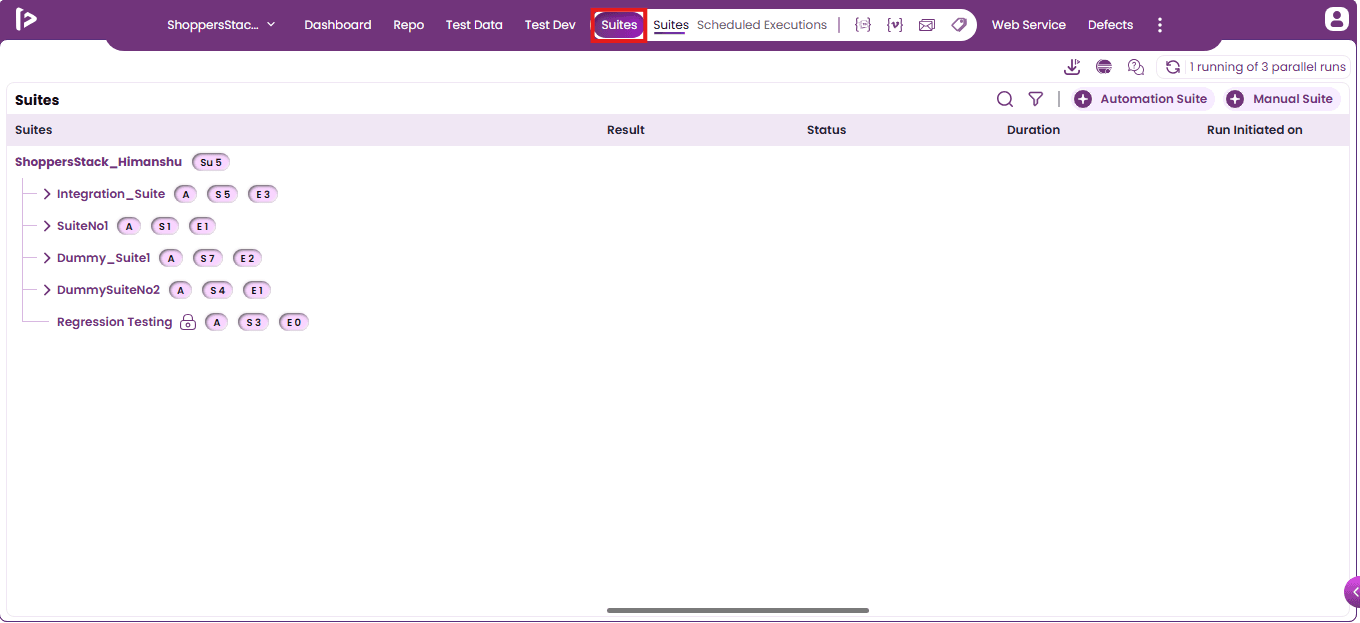
- Navigate to project level in the FireFlink Platform and click on the Suites as shown below
- Click on the Run icon corresponding to the Automation Suite
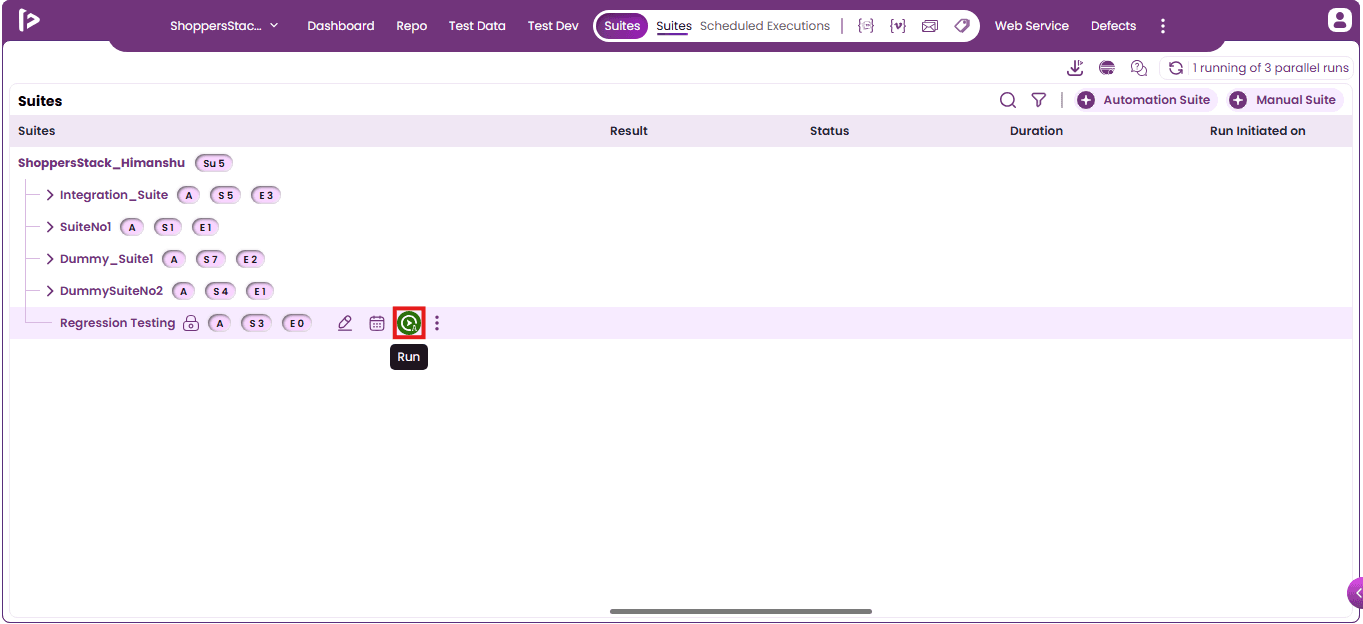
- Execution Run Settings slider will be displayed.
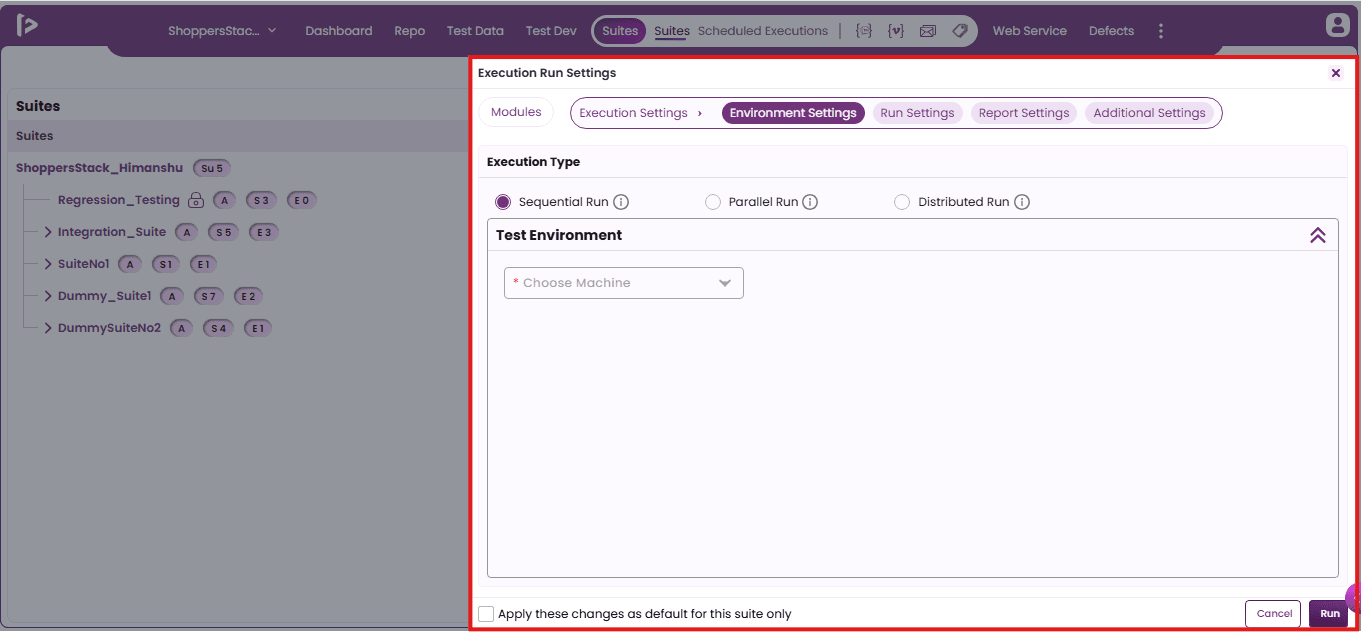
- Select FireFlink Device Farm instance as machine from the dropdown.
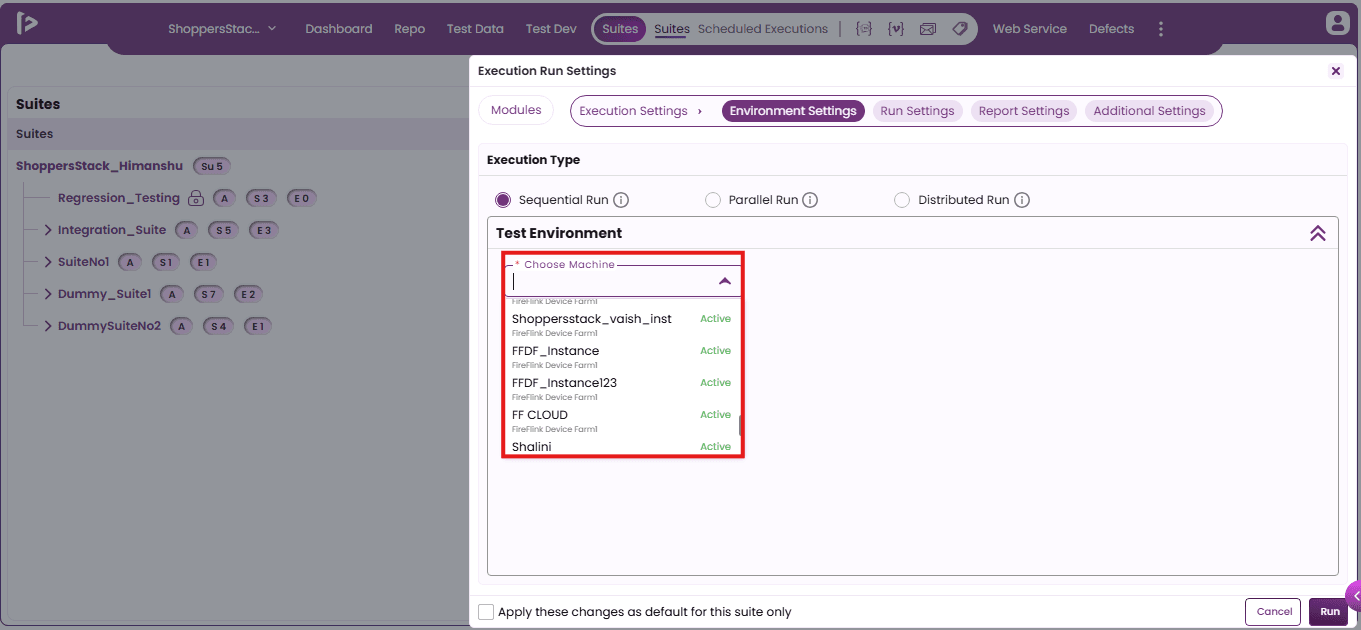
- Add all the required fields and click the Run button.
- Navigate to the project level (the selected project in Execution Run Settings slider) in FireFlink Device Farm
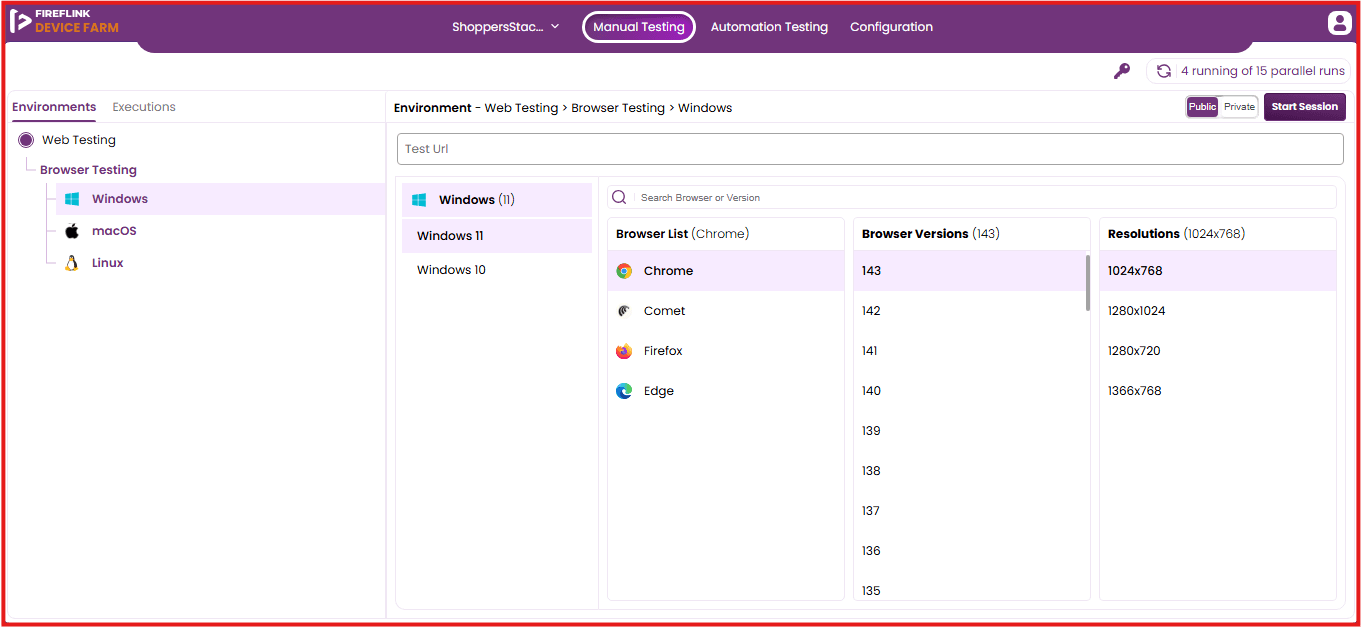
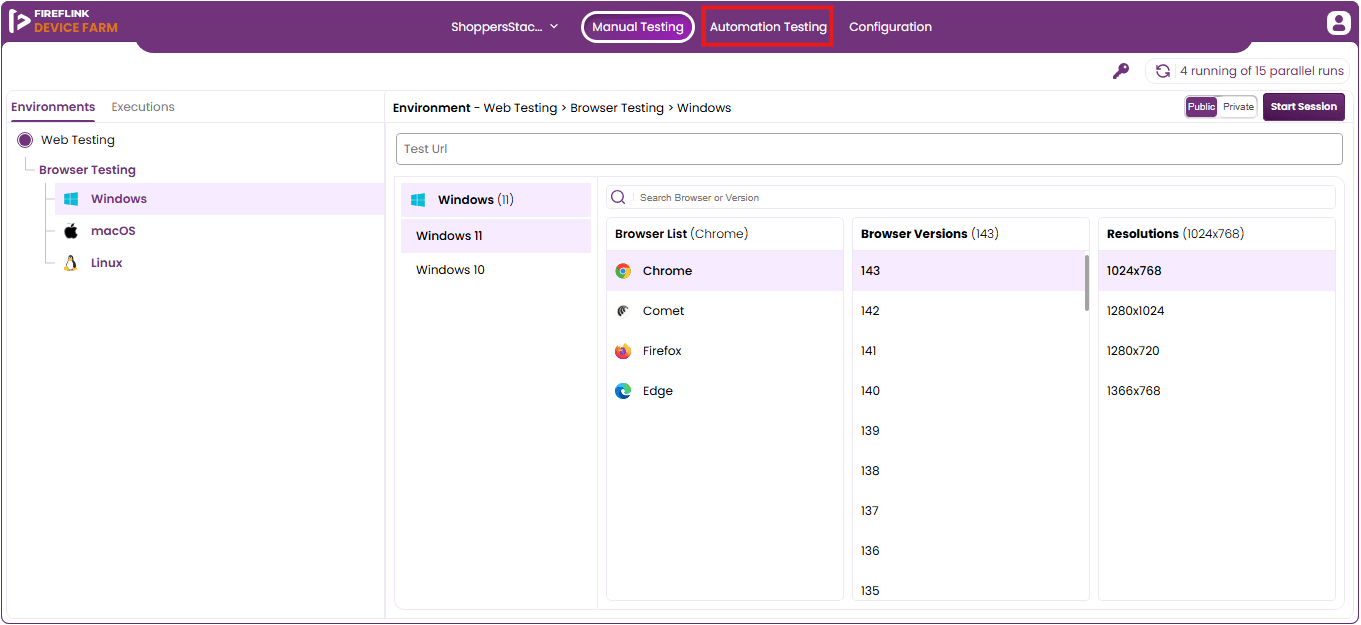
- Upon clicking, the user will be landed on the Manual Testing page. Click on the Automation Testing as shown below.
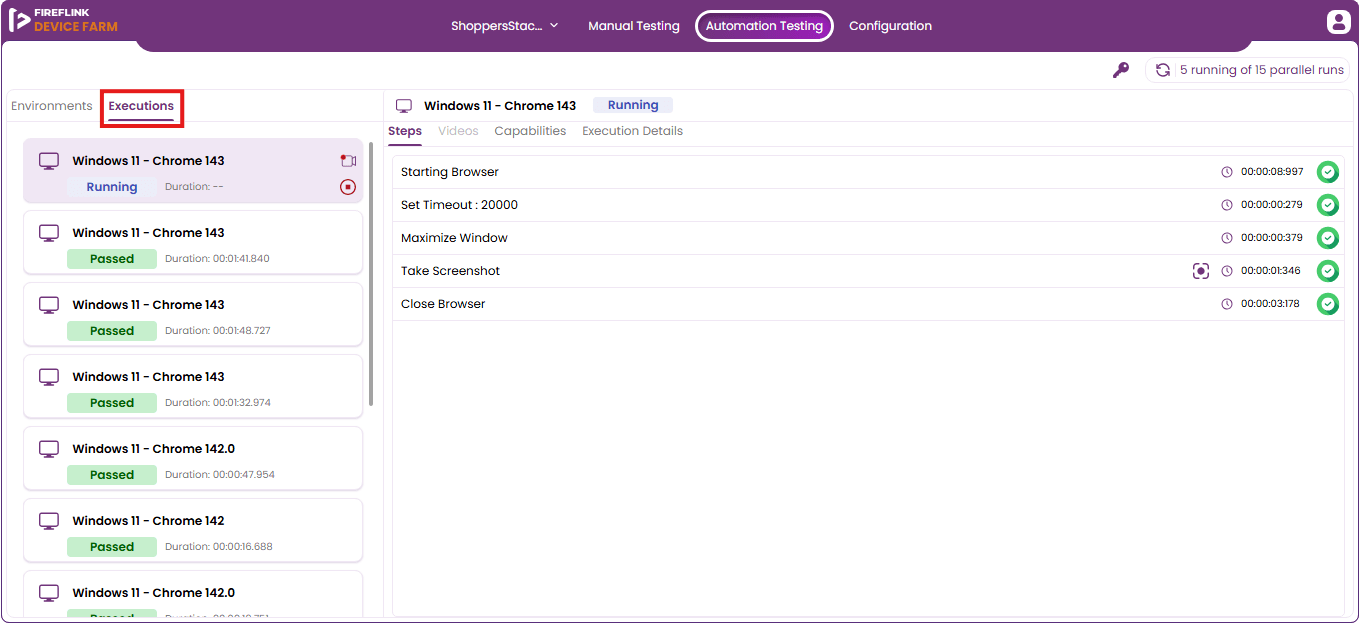
- By default the Environments section tab will be displayed. The user must select the Executions.
- Click on the Running execution triggered from the FireFlink platform
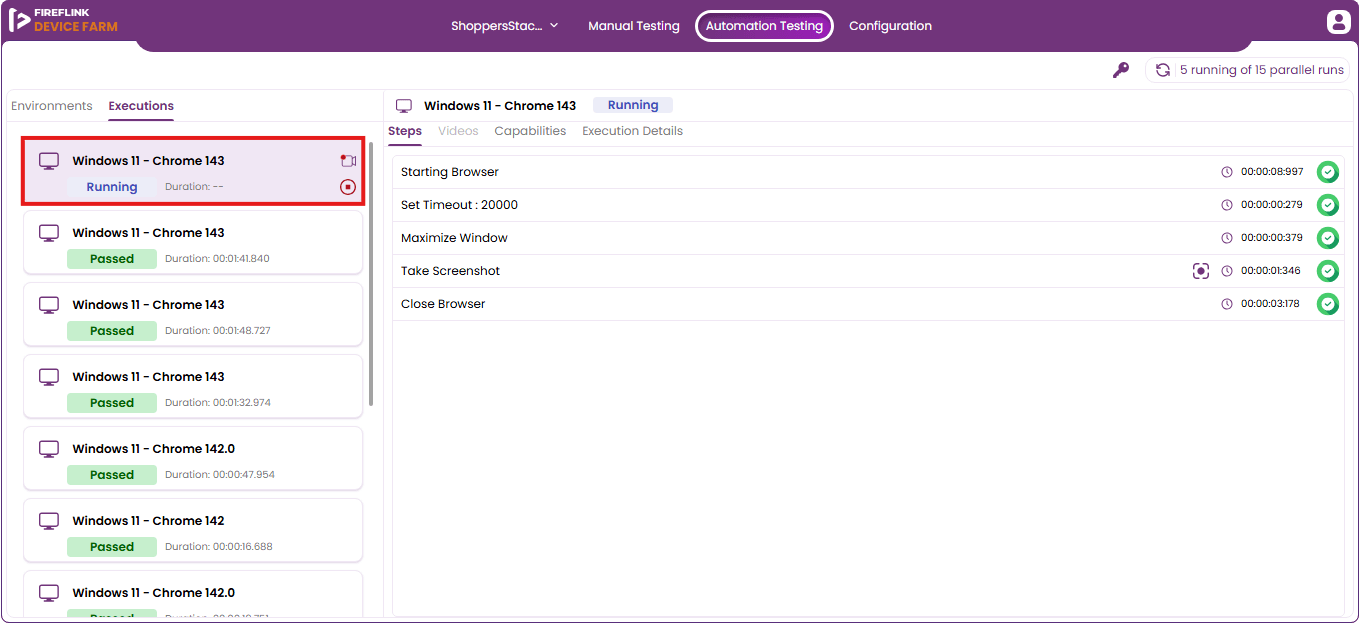
- Live Execution for the suites is as shown below
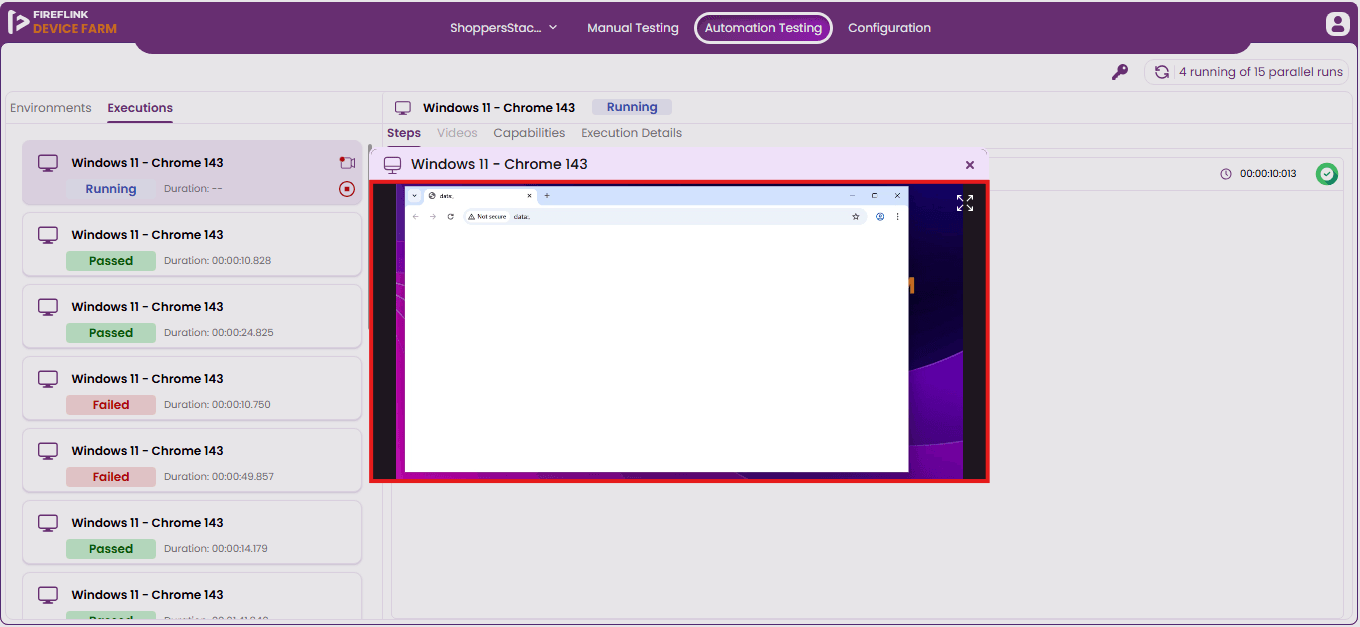
Note : The Executions triggered for both Parallel and Distributed Run can be viewed similarly in FireFlink Device Farm.
App Automation Suite Execution with FireFlink Device Farm
- App Automation Suite Execution in the FireFlink Device Farm enables users to run automated test scripts in the suite on real mobile devices hosted in the cloud.
- This functionality helps ensure that mobile applications perform reliably across different devices, operating systems, and configurations without the need to maintain physical devices.
Steps to execute Mobile Automation Suite are as follows:
- Click on the Suites in the Top navigation bar in the FireFlink Platform.
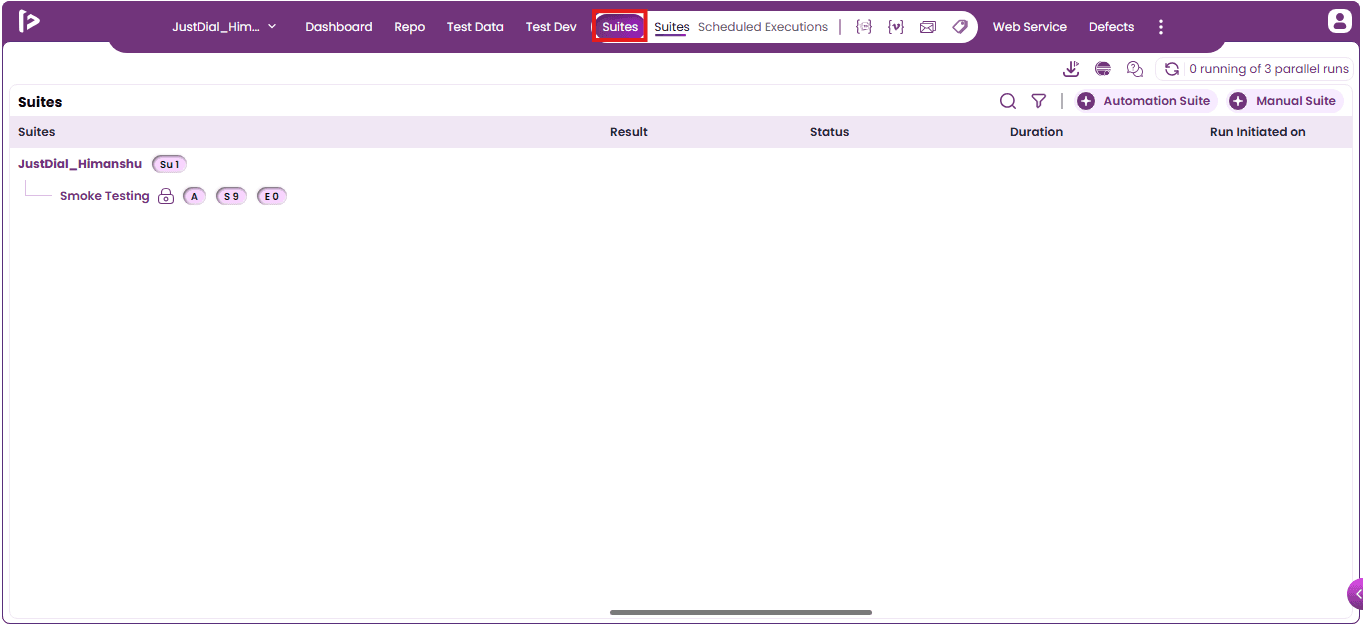
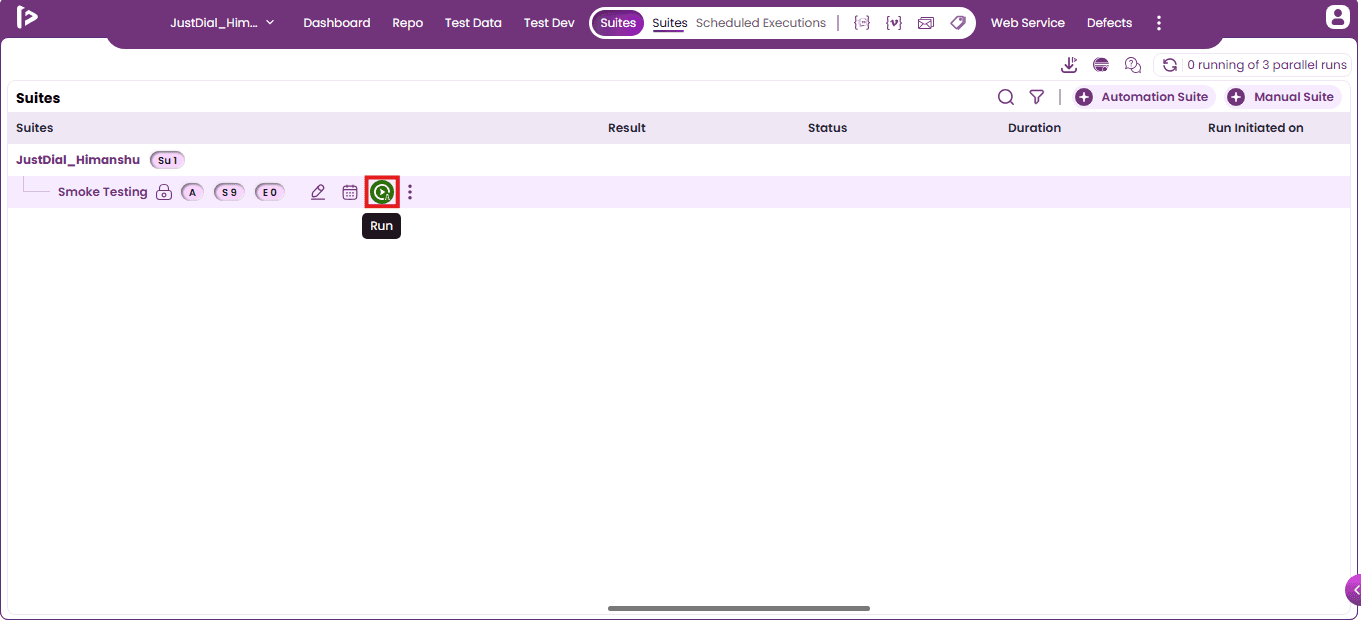
- Click the Run icon corresponding to the created Automation Suite.
- Execution Run Settingsslider will be displayed. Select the FireFlink Device Farm instance as a machine.
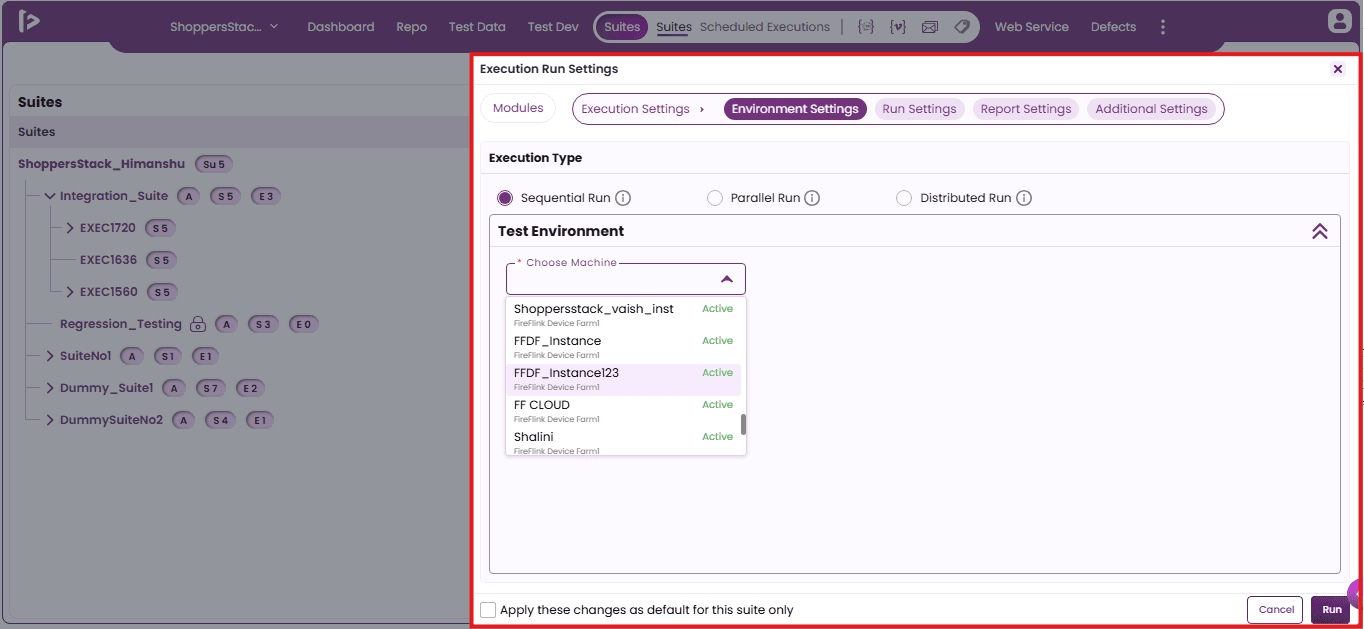
- Add all the required fields and click the Run button.
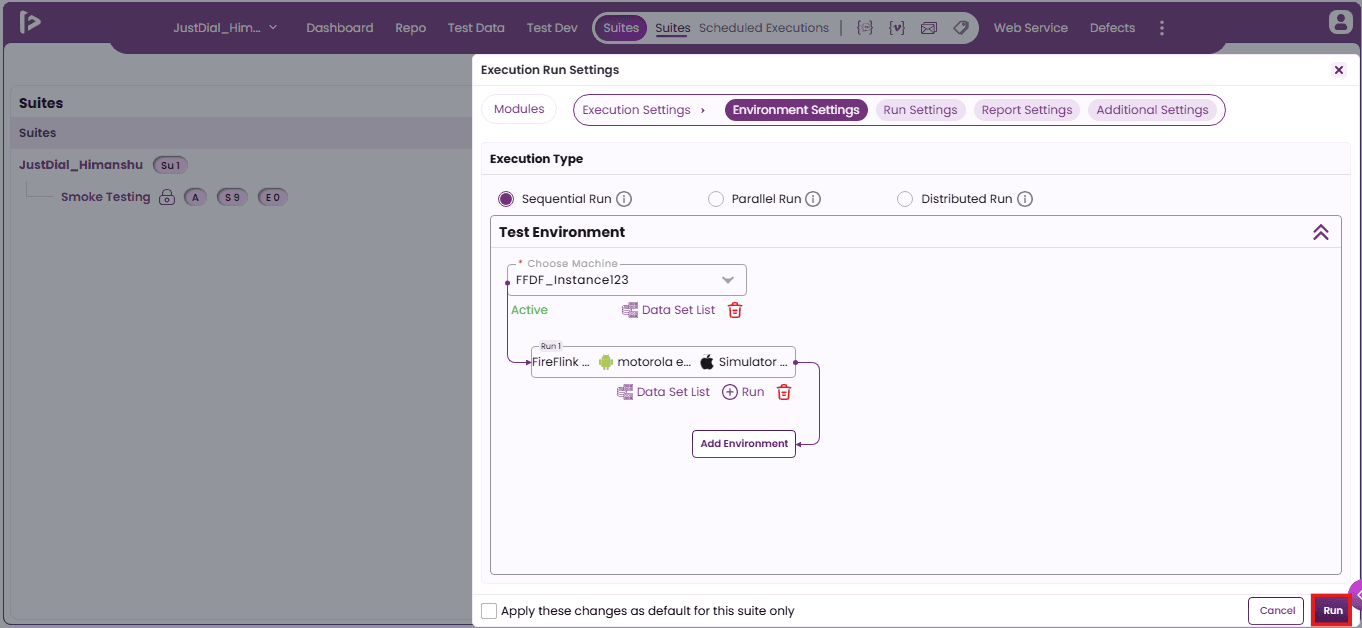
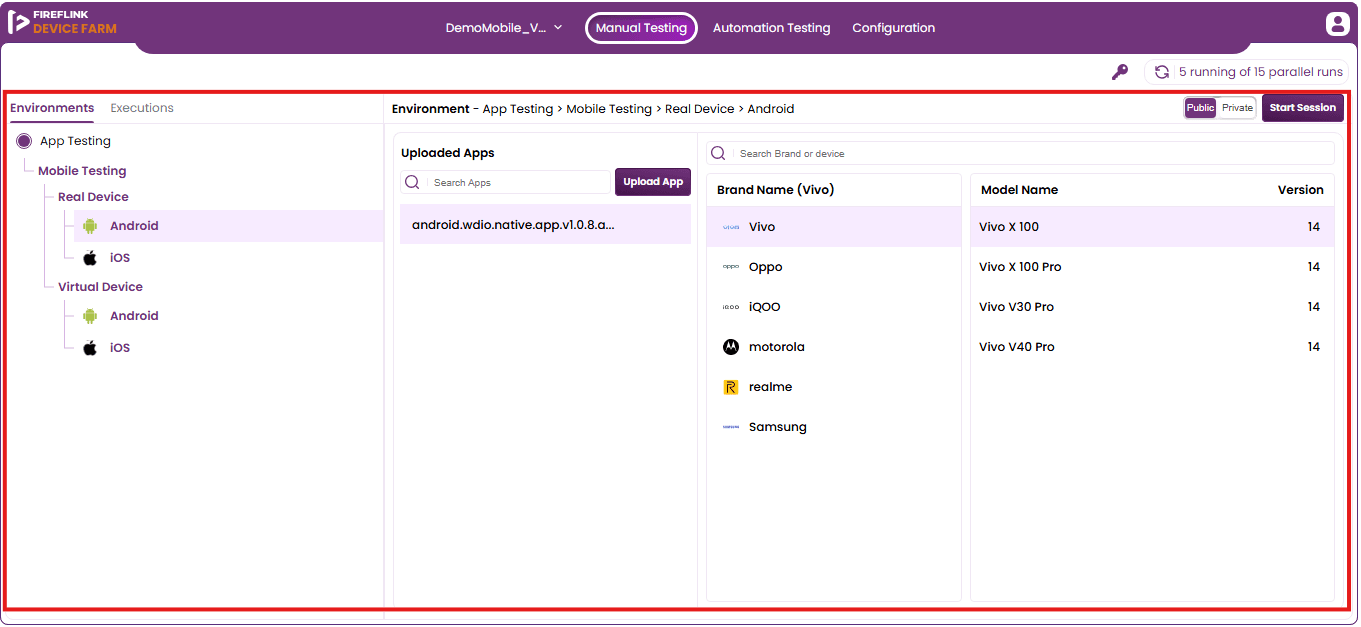
- Navigate to the Mobile project in the FireFlink Device Farm.
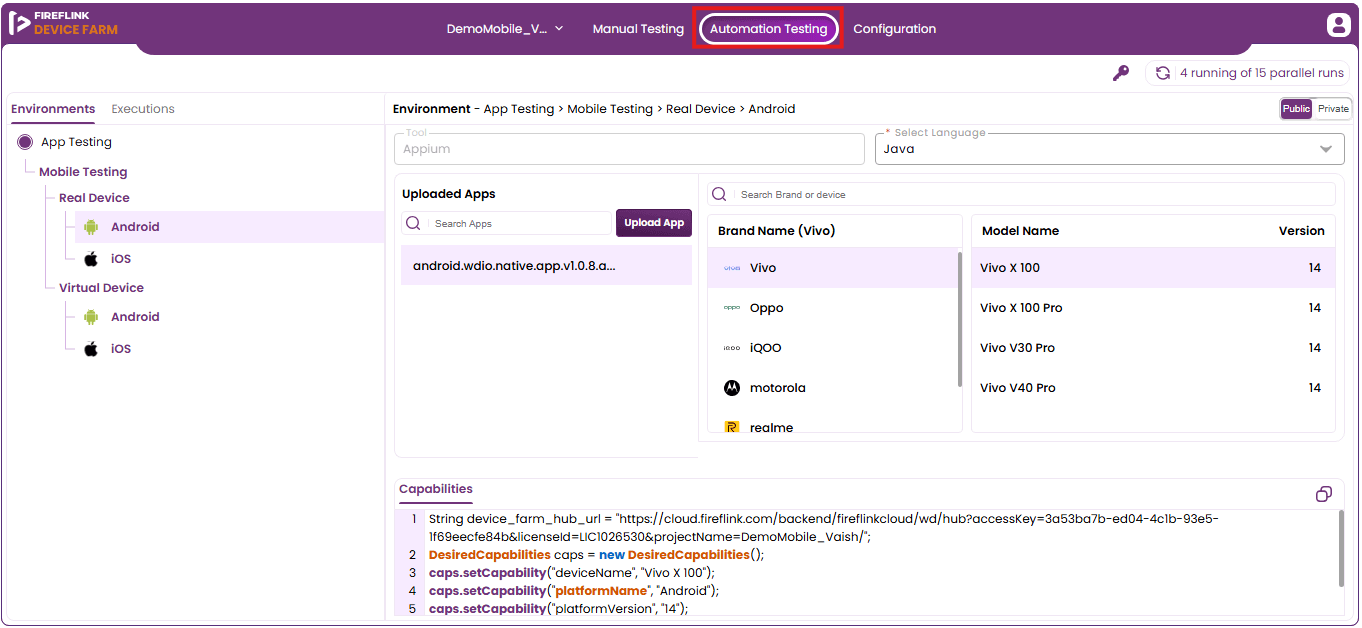
- Click on the Automation Testing
- By default the Environments section tab will be displayed. The user must select the Executions section tab.
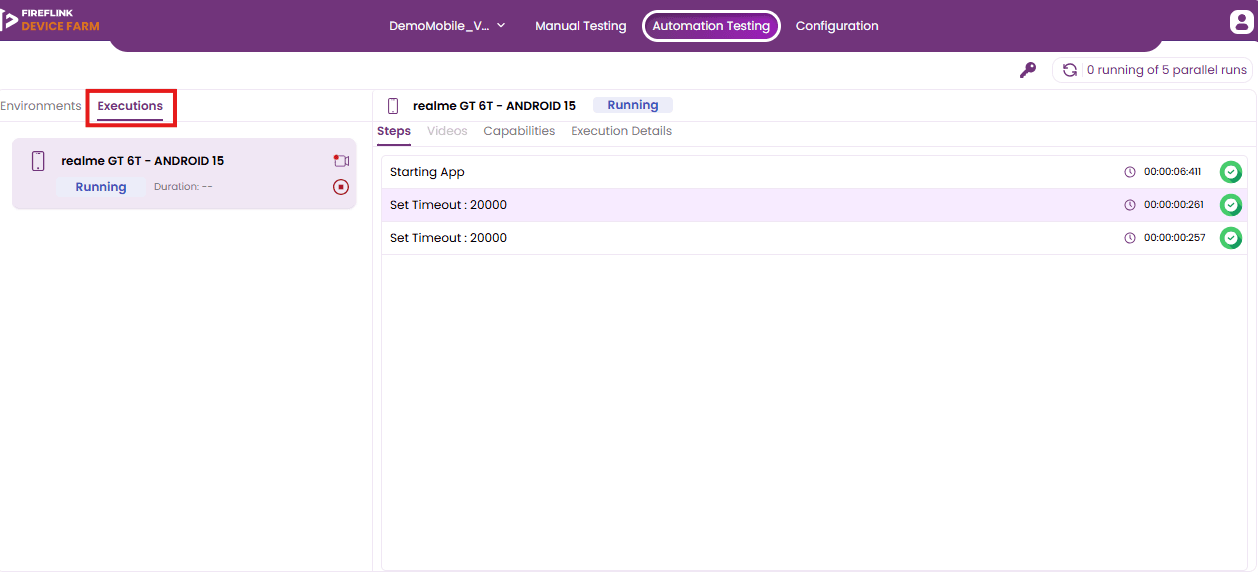
- Click on the Running execution triggered from the FireFlink platform
Note:Initially, the execution will be in a Queued state. Once the machine is ready, the status will change to Running, and the live execution will be displayed in the same manner as the Web Suite execution.
Note : The Execution is same for both Parallel and Distributed Run in FireFlink Device Farm.